
Service & Parts Manual (2019, 2020, 2021, 2022)
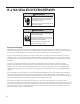

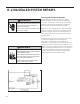
Table Of Contents
- INTRODUCTION
- SPECIFICATIONS
- OPERATION
- ROUTINE MAINTENANCE
- REMOVE AND INSTALL THE CHASSIS
- R-410A SEALED SYSTEM REPAIR
- COMPONENT TESTING
- Hermetic Components Check
- Reversing Valve Description And Operation
- Testing The Reversing Valve Solenoid Coil
- Checking The Reversing Valve
- Replace The Reversing Valve
- Touch Test Chart : To Service Reversing Valves
- Compressor Checks
- Compressor Replacement
- Fan Motor
- Capacitors
- Heating Element
- Drain Pan Valve
- Testing the User Interface and Electronic Control Board
- Thermistors Description
- Electronic Control Board Identification
- Replace the Electronic Control Board
- Replace the User Interface
- TROUBLESHOOTING
- WIRING DIAGRAMS
- PARTS CATALOG
- Available Accessories

47 PB
R-410A SEALED SYSTEM REPAIRS
Sealed System Method of Charging/ Repairs
BURN HAZARD
Proper safety procedures must be followed,
and proper protective clothing must be worn
when working with a torch.
Failure to follow these procedures could
result in moderate or serious injury.
WARNING
FREEZE HAZARD
Proper safety procedures must be followed,
and proper protective clothing must be worn
when working with liquid refrigerant.
Failure to follow these procedures could
result in minor to moderate injury.
CAUTION
The acceptable method for charging the sealed system is the Weighed in Charge Method. The weighed in charge
method is applicable to all units. It is the preferred method to use, as it is the most accurate.
The weighed in method should always be used whenever a charge is removed from a unit such as for a leak
repair, compressor replacement, or when there is no refrigerant charge left in the unit. To charge by this method,
requires the following steps:
1. Install a piercing valve to remove refrigerant from the sealed system. (Piercing valve must be removed from
the system before recharging.)
2. Recover Refrigerant in accordance with EPA regulations.
3. Install a process tube to sealed system.
4. Make necessary repairs to system.
5. Evacuate system to 200 microns or less.
6. Weigh in refrigerant with the property quantity of R-410A refrigerant.
7. Start unit, and verify performance.
8. Crimp the process tube and solder the end shut.