Electric R ange Range Drop-in / Slide-in Models Welcome .................................. 2 Important Safety Instructions .. 3-5 Features at a Glance ............. 6 Setting Surface Controls.. 7-12 Surface Cooking .................. 13 Before Setting Oven Controls ................. 13-14 Setting Oven Controls ......... 14 Setting Warmer Drawer Controls ...... 15 Cooking Informations ..... 16-17 Care & Cleaning .............. 18-25 Adjusting Your Oven Temperature ................
Important Safety Instructions Read all instructions before using this appliance. Save these instructions for future reference. This guide contains important safety symbols and instructions. Please pay special attention to these symbols and follow all instructions given. Here is a brief explanation of these symbols. This symbol will help alert you to situations that may cause serious bodily harm, death or property damage.
Important Safety Instructions • • DO NOT TOUCH SURFACE UNITS, AREAS NEAR THESE UNITS, OVEN HEATING ELEMENTS OR INTERIOR SURFACES OF THE OVEN OR WARMER DRAWER (if equipped). Both surface units and oven heating elements may be hot even though they are dark in color. Areas near surface units may become hot enough to cause burns. During and after use, do not touch, or let clothing or other flammable materials touch these areas until they have had sufficient time to cool.
Important Safety Instructions • Cleaners/aerosols—Always follow the manufacturer's recommended directions for use. Be aware that excess residue from cleaners and aerosols may ignite causing damage and/or injury. • Avoid scratching the cooktop glass with sharp objects. IMPORTANT INSTRUCTIONS FOR USING YOUR OVEN SELF-CLEANING O0 Tw(eV-0.00r-04Tw(grea7 Tc- T • Use Care When Opening Door or Warmer Drawer (if equipped)—Stand to the side of the appliance when opening the door of a hot oven.
Features At A Glance 6
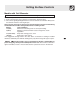
Setting Surface Controls Models with Coil Elements NOTE: All knobs shown in this owner's Guide are typical only. 1. Place the pan on the surface element. 2. Push in and turn the surface element control knob to desired setting. 3. The surface signal light will glow when one or more elements are turned on. Always turn the element off before removing the pan. Note: The size and type of utensil used, and the amount and type of food being cooked will influence the setting needed for best cooking results.
Setting Surface Controls Models with Ceramic Glass Cooktop About the Ceramic Glass Cooktop Model A The ceramic cooktop has radiant surface elements located below the surface of the glass. The design of the ceramic cooktop outlines the area of the surface element underneath. Make sure the diameter of the pan matches the diameter of the element outline on the cooktop (See Figure 1). Heat is transferred up through the surface of the cooktop to the cookware. Only flat-bottom cookware should be used.
Setting Surface Controls Models with Ceramic Glass Cooktop (continued) Radiant surface elements may appear to have cooled after they have been turned off. A hot surface indicator light will come on and will continue to glow until the glass cooktop has cooled down to a moderate level. The glass surface may still be hot and burns may occur if the glass surface is touched before the indicator light has turned off.
Setting Surface Controls Models with Ceramic Glass Cooktop (continued) The Electronic Surface Element Control (ESEC) (some models) Hot Surface Indicator Lights After using any of the radiant element positions the cooktop will become very hot. After turning any of these elements OFF, the cooktop will remain HOT for some time. The “Hot Surface” indicator light will glow whenever any of the element positions becomes HOT.
Small Large OFF Petit Grand hi hi 6 6 4 4 lo 11 lo .. ... . 2 .....
Before Setting Oven Controls 4 Setting Oven Controls Refer to the Electronic Oven Control Guide for oven settings.
Cooking Informations Oven Baking For best cooking results, heat the oven before baking cookies, breads, cakes, pies or pastries, etc... There is no need to preheat the oven for roasting meat or baking casseroles. The cooking times and temperatures needed to bake a product may vary slightly from your previously owned appliance. Baking Problems and Solutions Chart Baking Problems Causes Corrections Cookies and biscuits burn on the bottom.
Care & Cleaning (Cleaning Chart) Cleaning Various Parts of Your Range Before cleaning any part of the range, be sure all controls are turned OFF and the range is COOL. REMOVE SPILLOVERS AND HEAVY SOILING AS SOON AS POSSIBLE. REGULAR CLEANING WILL REDUCE THE NUMBER OF MAJOR CLEANING LATER. Surfaces How to Clean Aluminum & Vinyl Use hot, soapy water and a cloth. Dry with a clean cloth.
Care & Cleaning (Cleaning Chart) Oven Racks Oven racks should be removed, or else their finish will dull and their color turn slightly blue. If they do go through the self-clean cycle, wait until the oven has cooled, then remove the oven racks and rub their sides with wax paper or a cloth containing a small amount of baby or salad oil; this will make the oven racks glide easier back in and out of their positions. Oven door To clean oven door, wash with hot, soapy water and a clean cloth.
Care & Cleaning Cooktop Cleaning- Coil Surface Element Models Only (Continued) a a a a a aaa a a aa a a A rod swings up to support the top for cleaning underneath. To Raise the Top for Cleaning (some models) 1. Grasp the sides and lift from the front. A lift-up rod will support the top in its raised position. Only lift the top high enough to allow the support rod to rest in place under the front of the cooktop. 2. Clean underneath using a clean cloth and hot, soapy water. 3.
Care & Cleaning Models with Ceramic Glass Cooktop Ceramic Glass Cooktop Cleaning & Maintenance Consistent and proper cleaning is essential to maintaining your Ceramic glass cooktop Prior to using your cooktop for the first time, apply the recommended CERAMA BRYTE® Cleaning Creme to the ceramic surface. Clean and buff with a non abrasive cloth or pad. This will make cleaning easier when soiled from cooking.
Care & Cleaning Models with Ceramic Glass Cooktop (Continued) Do not use the following on the ceramic glass cooktop: • Do not use abrasive cleaners and scouring pads, such as metal and some nylon pads. They may scratch the cooktop, making it more difficult to clean. • Do not use harsh cleaners, such as chlorine bleach, ammonia or oven cleaners, as they may etch or discolor the cooktop.
Care & Cleaning Hinge support Hinge lever hook Lock engaged for door removal - Figure 1 HINGE SLOT - Door removed from the oven - Figure 2 Hinge lever Lock in normal position - Figure 3 Removing and Replacing the Oven Door The door is heavy. For safe, temporary storage, lay the door flat with the inside of the door facing down. To Remove Oven Door: 1. Open the door to the fully opened position. 2. Pull up the lock located on both hinge supports and engage it in the hinge lever hooks (Figure 1).
Care & Cleaning To Remove and Replace Warmer Drawer (some models) Latch Pull up latch with finger Left Glide To Replace Warmer Drawer: 1. Align the glide latches on both sides of the drawer with the slots on the drawer. 2. Push the drawer back into the range. Latch Pull down latch with finger Figure 1 To remove Warmer Drawer: 1. Turn power off before removing the warmer drawer. 2. Open the drawer to the fully opened position. 3. Locate the latches on both sides of the warmer drawer. 4.
Before you call Solutions to Common Problems Before you call for service, review this list. It may save you time and expense. The list includes common occurrences that are not the result of defective workmanship or materials in this appliance. You will be charged for a service call while the appliance is in warranty if the problem is not caused by defective product workmanship or materials. Your new appliance is a carefully engineered product.
Before you call Solutions to Common Problems OCCURRENCE POSSIBLE CAUSE/SOLUTION Metalmarks. (1) Sliding or scraping of metal utensils on cooktop surface. Do not slide metal utensils on cooktop surface. Use a ceramic-glass cooktop cleaning cream to remove the marks. “Cooktop Cleaning - Ceramic Glass Cooktop Models” section under General Cleaning. Brown streaks or specks. (1) Boilovers are cooked onto surface. Use razor blade scraper to remove soil.
Warranty Information RANGE WARRANTY Your range is protected by this warranty 28