
Owner's Guide

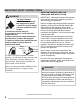
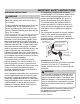
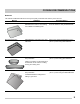
Table Of Contents
- Table of contents
- Questions?
- Product Record and Registration
- Important Safety Instructions
- Bakeware
- Cooking Conditions
- Cooking Results
- Cooking Tips
- Cooking Recommendations
- Assembly of the burner caps
- 1. Remove all packing material from the cooktop area.
- 2. Make sure burner caps are properly placed on the surface burners.
- 3. Unpack the burner grates and position them on the cooktop.
- 4. Discard all packing material.
- Figure 1: Burner caps and burner heads
- Figure 2: Proper burner cap placement
- Figure 3: Gently move cap for proper placement
- Install burner grates
- Using Proper Cookware
- Cookware Material Types
- Gas surface burner types
- Assembly of the burner caps
- Before Setting Surface Controls
- Setting surface controls
- 1. Place cooking utensil on center of surface burner grate. Be sure the cooking utensil rests stable on the burner grate.
- 2. Push the burner’s surface control knob in and turn counterclockwise out of the OFF position (Figure 7).
- 3. Release the surface control knob and rotate to the LITE position (). Visually check that the burner has a steady gas flame.
- 4. Once the surface burner has a flame, push the surface control knob in and turn counterclockwise to the desired flame size setting. Adjust the flame as needed using the knob markings.
- Figure 7: Surface control knob
- Set proper burner flame size
- Cooking with a griddle (some models)
- Using the griddle:
- Home Canning
- Setting surface controls
- Setting Surface Controls
- Before Setting Oven Controls
- 1. Bake - Use to select for all baking.
- 2. Broil - Use to select the broil feature. When broil is active the indicator light above the broil key will glow.
- 3. Timer On-Off - Use to set or cancel the minute timer. The minute timer does not start or stop cooking.
- 4. Set Clock - Use with up or down arrows to set the time of day.
- 5. OFF - Use to stop or to clear any feature previously entered except time of day and minute timer. Press OFF to stop cooking.
- 6. Up and Down arrow keys - Use with the feature or function pads to set oven temperature or to adjust the clock or minute timer.
- LO
- HI
- Setting the Clock
- Temperature display (Fahrenheit/Celsius)
- Operating oven light
- Setting the minute timer
- 1. Press Timer on-off.
- 2. Press to increase time in one-minute increments. Press and hold to increase time in 10-minute increments. The timer can be set for any amount of time from 1 minute to 11 hours and 59 minutes.
- 3. When the diesired timer setting is reached, release the arrow key. The timer will start counting down within a few seconds.
- 4. When the set time ends, the timer will beep three times and will continue to beep three times every minute until Timer on-off is pressed.
- 1. Press Timer on-off once.
- Setting Bake
- 1. Press Bake. — — — appears in the display.
- 2. Within 5 seconds, press or. The display will show 350°F (177°C). The temperature can then be adjusted in 5°F (1°C) increments.
- 3. When a key is released, the oven will begin heating to the selected temperature. When the oven reaches the set temperature, the preheat indicator light will turn off and the control will beep three times.
- 4. To cancel the baking function, press OFF.
- 1. Press Bake.
- 2. Press or to increase or decrease to a new temperature. The oven indicator light on the electronic display will turn on and off when using the bake feature and during preheat. This is normal and indicates that the oven is cycling to maintain the se...
- Figure 13: Rack positions
- Figure 14: Pan spacing recommendations
- Setting Broil
- 1. Arrange the oven rack while oven is still cool.
- 2. Press broil. The display will show — —.
- 3. Press for HI broil or for LO broil. Most foods may be broiled at the HI broil setting.
- 4. For optimum results, preheat pan using Broil HI for 5 minutes before placing food on pan.
- 5. Boil with the oven door closed.
- 6. Broil on one side until food is browned. Turn and broil food on the other side.
- Figure 15: Rack positions (L) Broil pan and insert (R)
- Table 1: Suggested broil settings for electric ovens
- 5th
- Hi
- 6
- 4
- 140°F (60°C)
- Rare**
- 5th
- Hi
- 8
- 7
- 170°F (77°C)
- Well
- 5th
- Hi
- 13
- 11
- 170°F (77°C)
- Well
- 4th
- Hi
- 30
- 30
- 170°F (77°C)
- Well
- 3rd
- Hi
- 13
- 11
- 170°F (77°C)
- Well
- 3th
- Hi
- as directed
- as directed
- 170°F (77°C)
- Well
- 3th
- Hi
- 170°F (77°C)
- Well
- 5th
- Hi
- 8
- 8
- 140°F (60°C)
- Rare**
- 5th
- Hi
- 10
- 10
- 170°F (77°C)
- Well
- Adjusting the oven temperature
- 1. Press and hold the Bake key and release when the display shows the factory temperature setting of 00. If the oven temperature has been previously adjusted from the factory setting, the last adjusted value will appear in the display instead.
- 2. The temperature can now be adjusted up +35°F (+19°C), in 5°F increments with each press of the key.
- 3. When lowering the oven temperature using the key, minus sign (-) will appear before the number to indicate that the oven will be cooler by the displayed amount of degrees.
- 4. To accept the change, wait for the oven control to provide an acceptance beep.
- Adjusting the oven temperature
- Setting Oven Controls
- Figure 17: Use cleaners with caution
- Cleaning the sealed burners
- 1. Remove the burner cap from the burner head (see Figure 18). Clean the cap with hot soapy water and dry thoroughly.
- Figure 18: Burner Cap
- Figure 19: Sealed burner components
- 3. Use a toothbrush to clean all over the burner head (see Figure 19).
- 4. Use the toothbrush to clean the slots and holes in the burner (see Figure 19).
- 5. Use a needle or fine wire to clean out the ignition port (see Figure 19).
- 6. Wipe the burner head clean with a soft, clean cloth, sponge, or scratch-free cleaning pad.
- 7. Before using the cooktop again, make sure the burner caps are properly placed and seated on the burner heads. When placed correctly, the burner cap is centered on the burner head and will click into place on the burner head. You can wiggle the cap...
- Remove and replace storage drawer
- Replacing the Oven Light
- Removing and Replacing the Oven Door
- 1. Open oven door completely, horizontal with floor (See Figure 21).
- 2. Pull the door hinge locks on both left and right door hinges down from the oven frame completely towards the oven door (See Figure 22). A tool such as a small flat-blade screwdriver may be required.
- 3. Firmly grasp both sides of oven door along the door sides. Do not use the oven door handle (See Figure 23).
- 4. Close the door to approximately 10 degrees from the door frame (See Figure 23).
- 5. Lift the oven door hinge arms over the roller pins located on each side of the oven frame (See Figure 24).
- 1. Firmly grasp both sides of oven door along the door sides. Do not use the oven door handle (See Figure 23).
- 2. Holding the oven door at the same angle as the removal position, seat the hook of the hinge arm over the roller pins located on each side of the oven door frame (See Figure 23 and Figure 24). The hook of the hinge arms must be fully seated onto th...
- 3. Fully open the oven door, horizontal with floor (See Figure 21).
- 4. Push the door hinge locks up towards and into the oven frame on both left and right oven door hinges to the locked position (See Figure 22).
- 5. Close the oven door.
- Figure 21: Door hinge location
- Figure 22: Door hinge locks
- Figure 23: Holding door for removal
- Figure 24: Replacement and location of hinge arm and roller pin
- Care and Cleaning
- Before You Call

5
IMPORTANT SAFETY INSTRUCTIONS
Save these instructions for future reference
GROUNDING INSTRUCTIONS
Proper Installation—Be sure your appliance is
properly installed and grounded by a qualified
technician. In the United States, install in accor-
dance with the National Fuel Gas Code ANSI
Z223.1/NPFA No. 54, latest edition and National
Electrical Code NFPA No. 70 latest edition, and
local electrical code requirements. In Canada,
install in accordance with CAN/CGA B149.1 and
CAN/CGA B149.2 and CSA Standard C22.1,
Canadian Electrical code, Part 1-latest editions
and local electrical code requirements. Install only
per installation instructions provided in the litera-
ture package for this appliance.
For personal safety, this appliance must be
properly grounded. For maximum safety, the
power cord must be securely connected to an
electrical outlet or junction box that is the correct
voltage, is correctly polarized and properly
grounded, and protected by a circuit breaker in
accordance with local codes.
It is the personal responsibility of the consumer to
have the appropriate outlet or junction box with
the correct, properly grounded wall receptacle
installed by a qualified electrician. It is the respon-
sibility and obligation of the consumer to contact a
qualified installer to assure that the electrical
installation is adequate and is in conformance
with all local codes and ordinances.
This appliance is equipped with a 3-prong
grounding plug for your protection against shock
hazard and should be plugged directly into a
properly grounded receptacle. Do not cut or
remove the grounding prong from this plug.
For personal safety, the appliance must be
properly grounded. For maximum safety, the
power cord must be plugged into an electrical
outlet that is correctly polarized and properly
grounded.
If a 2-prong wall receptacle is the only available
outlet, it is the personal responsibility of the
consumer to have it replaced with a properly
grounded 3-prong wall receptacle, installed by a
qualified technician.
Conversion to (L.P.) Gas
This appliance allows for conversion to Liquefied
Petroleum (L.P.) Gas. If L.P. conversion is
needed, contact your local L.P. Gas provider for
assistance.
See the installation instructions packaged with
this appliance for complete installation and
grounding instructions.
Avoid fire hazard or electrical shock. Failure to
follow this warning may cause serious injury,
fire, or death.
Avoid fire hazard or electrical shock. Do not use
an adapter plug, use an extension cord, or
remove grounding prong from the power cord.
Failure to follow this warning may cause serious
injury, fire, or death.
WARNING
Personal injury or death from electrical shock
may occur if the conversion to L.P. gas is not
made by a qualified installer or electrician. Any
additions, changes, or conversions required in
order for this appliance to satisfactorily meet the
application need must be made by a qualified
technician.
Do not cut, remove, or
bypass the grounding
plug under any
circumstances.
Grounding type
wall receptacle
Power supply cord
with 3-prong
grounding plug
WARNING