
Installation guide
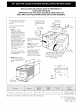

5. Range Installation
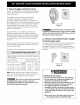
When unpacking the range, do not
discard the 4 shipping bolts. These are to be replaced on
the unit for use as leveling legs and height adjustments.
.
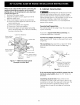
Installation Without Side Panel(s)
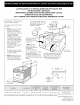
A. The range cooktop overlaps the countertop at
the sides and the range rests on the floor. The
cooktop is 30" (76.2 cm) wide.
B. Install base cabinets 29" (73.7 cm) apart. Make
sure they are plumb and level before attaching
cooktop. Shave raised countertop edge to clear
30" (76.2 cm) wide range top rim.
C. Install cabinet doors 31 " (78.7 cm) min. apart so
as not to interfere with range door opening.
D. Cutout countertop exactly as shown on page 1.
E. A backguard kit can be ordered through your
dealer.
F. Adjust leveling legs so that the underside of the
cooktop is sitting on the countertop.
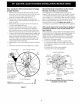
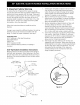
G. Level the range. The floor where the range
is to be installed must be level (see Figure 9).
.
Installation With Side Panel(s)
A. Install base cabinets 30 1/8" (76.5 cm) min.
apart. Make sure they are plumb and level.
B. Install cabinet doors 31 " (78.7 cm) min. apart so
as not to interfere with range door opening.
c. A backguard kit can be ordered through your
dealer.
D An end panel kit can be ordered through your
dealer.
E. Level the range and adjust cooktop height.
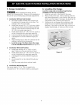
3. Installation With Backguard
The cutout depth of 21 5/8" (55 cm) needs to be
increased to 24" (61 cm) when installing a backguard.
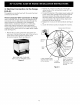
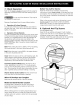
6. Leveling the Range
Level the range and set cooktop height before
installation in the cut-out opening.
1. Install an oven rack in the center of the oven.
2. Place a level on the rack. Take 2 readings with the
level placed diagonally in one direction and then the
other. Level the range, if necessary, by adjusting the
4 leg levelers with a wrench (see Figure12).
3. Taking care to not damage the countertop, slide
range into cut-out opening and double check for
levelness. If the range is not level, pull unit out and
readjust leveling legs, or make sure floor is level.
Figure 9
7