TABLE OF CONTENTS Before Setting Oven Controls . . . . . . . . . . . . . . . . Oven Controls . . . . . . . . . . . . . . . . . . . . . . . . . . . . Care and Cleaning . . . . . . . . . . . . . . . . . . . . . . . . Before You Call . . . . . . . . . . . . . . . . . . . . . . . . . . . Warranty . . . . . . . . . . . . . . . . . . . . . . . . . . . . . . . . 16 17 22 29 32 808527513 Rev B (May 2018) Product Record and Registration . . . . . . . . . . . . . . 2 Important Safety Instructions . . . . . . . . .
PRODUCT RECORD AND REGISTRATION Product Registration . . . . . . . . . . . . . . . . . . . . . . . . . .2 Product Record and Registration . . . . . . . . . . . . . . . . . 2 Need Help? . . . . . . . . . . . . . . . . . . . . . . . . . . . . . . . . .2 Important Safety Instructions . . . . . . . . . . . . . . . . . . . . 3 Cooking Recommendations . . . . . . . . . . . . . . . . . . . . . 9 Before Setting Surface Controls . . . . . . . . . . . . . . . . 12 Setting Surface Controls . . . . . . . . . . . . . .
IMPORTANT SAFETY INSTRUCTIONS Read all instructions before using this appliance. This manual contains important safety symbols and instructions. Please pay attention to these symbols and follow all instructions given. Do not attempt to install or operate your appliance until you have read the safety precautions in this manual. Safety items throughout this manual are labeled with a WARNING or CAUTION statement based on the risk type.
IMPORTANT SAFETY INSTRUCTIONS IMPORTANT INSTRUCTIONS FOR UNPACKING AND INSTALLATION Remove all tape and packaging before using the appliance. Destroy the carton and plastic bags after unpacking the appliance. Never allow children to play with packaging material. Do not remove the wiring label and other literature attached to the appliance. Do not remove model/ serial number plate. Proper Installation—Be sure your appliance is properly installed and grounded by a qualified technician.
IMPORTANT SAFETY INSTRUCTIONS IMPORTANT INSTRUCTIONS FOR USING THE APPLIANCE WARNING Storage In or On Appliance—Flammable materials should not be stored in an oven or microwave, near surface burners or elements, or in the storage or warmer drawer (if equipped). This includes paper, plastic, and cloth items, such as cookbooks, plastic ware, and towels, as well as flammable liquids. Do not store explosives, such as aerosol cans, on or near the appliance.
IMPORTANT SAFETY INSTRUCTIONS CAUTION Do not attempt to operate the appliance during a power failure. If the power fails, always turn off the appliance. If the appliance is not turned off and the power resumes, electric surface elements may resume operation when power is restored. Once the power resumes, reset the clock and the oven function. IMPORTANT INSTRUCTIONS FOR USING YOUR RADIANT COOKTOP Know which knob or key controls each surface heating area.
IMPORTANT SAFETY INSTRUCTIONS IMPORTANT INSTRUCTIONS FOR USING YOUR OVEN Protective liners—Do not use aluminum foil, aftermarket oven liners, or any other materials or devices to line oven bottom, oven racks, or any other part of the appliance. Only use aluminum as recommended for baking, such as lining cookware or as a cover placed on food. Any other use of protective liners or aluminum foil may result in a risk of electric shock or fire or a short circuit.
IMPORTANT SAFETY INSTRUCTIONS Do not touch a hot oven light bulb with a damp cloth. Doing so could cause the bulb to break. Handle halogen lights (if equipped) with paper towels or soft gloves. Disconnect the appliance or shut off the power to the appliance before removing and replacing the bulb.
COOKING RECOMMENDATIONS Bakeware The material of bakeware affects how evenly and quickly it transfers heat from the pan to the food. Material Attributes Recommendation Shiny metal bakeware Shiny, aluminum, and non-coated bakeware is the best for even heating. It is suitable for all baked goods. Recommended cooking temperatures and times are based on shiny metal bakeware. Dark metal bakeware Dark bakeware cooks hotter than shiny bakeware.
COOKING RECOMMENDATIONS Cooking Conditions Conditions in your kitchen can affect the performance of your appliance when cooking food. Condition Aging cookware High altitude Attributes Recommendation As pans age and become discolored, cooking times may need to be reduced slightly. If food is too dark or overcooked, use the minimum cook time in the recipe or packaging. Air is drier and air pressure is lower. Adjust cooking temperature, cooking time, or recipes as needed.
COOKING RECOMMENDATIONS Cooking Tips Broiling / Roasting Broiling pan For best results when broiling, use a broil pan with a broil pan insert designed to drain the fat from the food, help avoid spatter, and reduce smoking. The broiler pan will catch grease spills, and the insert helps prevent grease splatters. If a broiler pan and insert are not supplied with this appliance, they may be purchased from Frigidaire.com.
BEFORE SETTING SURFACE CONTROLS Using Proper Cookware Cookware Material Types The size and type of cookware used will influence the heat setting needed for best cooking results. Be sure to follow the recommendations for using proper cookware as illustrated in Figure 1 and Figure 2. The cookware material determines how evenly and quickly heat is transferred from the surface element to the pan bottom.
BEFORE SETTING SURFACE CONTROLS About the Radiant Surface Elements Element On and Hot Surface Indicator Lights The element temperature rises gradually and evenly. As the temperature rises, the element will glow red. To maintain the selected setting the element will cycle on and off. The heating element retains enough heat to provide a uniform and consistent heat during the off cycle. The ELEMENT ON indicator light will turn on when one or more elements are turned on.
SETTING SURFACE CONTROLS Radiant surface elements To operate the radiant element: 1. Place correctly sized cookware on the radiant surface element. 2. Push in and turn the surface control knob in either direction (Figure 5) to the desired setting (refer to the “Suggested radiant surface element settings” table, Table 1). 3. When cooking is complete, turn the radiant surface element OFF before removing the cookware.
SETTING SURFACE CONTROLS Home Canning Be sure to read and observe all the following points when home canning with your appliance. Check with the USDA (United States Department of Agriculture) Web site and be sure to read all the information they have available as well as follow their recommendations for home canning procedures. • Use only a completely flat bottom canner with no ridges that radiate from the bottom center when home canning. Heat is spread more evenly when the bottom surface is flat.
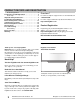
BEFORE SETTING OVEN CONTROLS Oven Vent Location Types of oven racks The oven is vented as shown below. When the oven is on, warm air is released through the vent. This venting is necessary for proper air circulation in the oven and good baking results. Do not block oven vent. Never close off the openings with aluminium foil or any other material. Steam or moisture may appear near the oven vent. This is normal.
OVEN CONTROLS 1 Bake 6 2 Broil 4 3 Timer Set Clock 5 OFF Oven Control Features Setting the Clock 1. Bake - Use to select for all baking. When the appliance is first plugged in or when the power supply to the appliance has been interrupted, the display will flash 12:00. It is recommended to always set the clock for the correct time of day before using the appliance. 2. Broil - Use to select the broil feature. When broil is active the indicator light above the broil key will glow. 3.
OVEN CONTROLS Temperature display (Fahrenheit/Celsius) Setting the minute timer The electronic oven control is set to operate in Fahrenheit (°F) at the factory. The oven may be programmed for any temperature from 170°F to 550°F (77°C to 288°C). 1. Press Timer on-off. To change the temperature to Celsius (°C) or from °C to °F: 2. Press to increase time in one-minute increments. Press and hold to increase time in 10-minute increments.
OVEN CONTROLS Setting Bake To set Bake: Bake cooks with heat that rises from the oven bottom. The heat and air circulate naturally in the oven. Follow baking recommendations for best results. 1. Press Bake. — — — appears in the display. The oven can be programmed to bake at any temperature from 170°F to 550°F (77°C to 288°C). The factory preset automatic bake temperature is 350°F (177°C). Baking Tips • Fully preheat the oven before baking items like cookies, cakes, biscuits, and breads. 2.
OVEN CONTROLS Setting Broil To set Broil Broiling is direct heat cooking and will produce some smoke. If smoke is excessive, place food further away from the element. Watch food to prevent burning. Always remember to arrange the oven racks while oven is still cool. Position the rack as suggested in Table 2. 1. Arrange the oven rack while oven is still cool. WARNING Should an oven fire occur, close the oven door and turn the oven off. If the fire continues, use a fire extinguisher.
OVEN CONTROLS Adjusting the oven temperature Your appliance has been factory calibrated and tested to ensure an accurate baking temperature. For the first few uses, follow your recipe times and temperature recommendations carefully. If you think the oven is cooking too hot or too cool for your recipe times, you can adjust the control so the oven cooks hotter or cooler than the temperature displayed.
CARE AND CLEANING Remove spills and any heavy soiling as soon as possible. Regular cleaning will reduce the difficulty of major cleaning later. CAUTION • Before cleaning any part of the appliance, be sure all controls are turned off and the appliance is cool. • If ammonia or appliance cleaners are used, they must be removed and the appliance must be thoroughly rinsed before operating. Follow manufacturer's instructions and provide adequate ventilation.
CARE AND CLEANING Porcelain-enameled broiler pan and insert Porcelain door liner Porcelain body parts Rinse with clean water and a damp cloth. Scrub gently with a soapy, non-abrasive scouring pad to remove most spots. Rinse with a 50/50 solution of clean water and ammonia. If necessary, cover difficult spots with an ammonia-soaked paper towel for 30 to 40 minutes. Rinse and wipe dry with a clean cloth. Remove all cleaners or future heating could damage the porcelain.
CARE AND CLEANING Surface elements and drip bowls Your cooking product includes a new generation of electric coil element. This electric coil element design follows/ supports a change made to the UL Standard for Household Electric Ranges related to cooktop surface temperature detection. If ordering replacement electric coil elements, you must refer to the parts catalog to obtain the correct part number for the electric coil element that was designed to function with the specific model that was purchased.
CARE AND CLEANING Cleaning drip bowls Wash in hot, soapy water. Rinse and dry while still warm. Hard to remove, burned-on soil can be removed by soaking the drip bowls for about 20 minutes in a lightly diluted liquid cleanser or a solution of ammonia and water (1/2 cup ammonia to 1 gallon of water). A nylon scrubber may be used after soaking. Do not use abrasive cleaners or steel wool, they will scratch the surface. Always rinse with clean water and polish dry with a soft cloth.
CARE AND CLEANING Cleaning under bake element (some models) The bake element is located in the lower oven cavity. For some models, if the lower bake element is visible it may be tilted up for easier access to the oven bottom for cleaning. Remove the oven racks before raising the element. Be careful not to raise the element more than 4 or 5 inches from the resting position. Cleaning under cooktop (some models) CAUTION When lowering the lift-up range cooktop, grasp the sides with fingertips only.
CARE AND CLEANING Removing and Replacing the Oven Door: Oven door hinge locations CAUTION The door is heavy. For safe, temporary storage, lay the door flat with the inside of the door facing down. To remove the oven door 1. Open oven door completely, horizontal with floor (See Figure 16). 2. Pull the door hinge locks on both left and right door hinges down from the oven frame completely towards the oven door (See Figure 17). A tool such as a small flat-blade screwdriver may be required.
CARE AND CLEANING Replacing the Oven Light CAUTION Be sure the oven is unplugged and all parts are cool before replacing the oven light. To remove and replace storage drawer (some models) Use the storage drawer for storing cooking utensils. The drawer can be removed to facilitate cleaning under the range. Use care when handling the drawer. Replacing the oven interior light bulb: The interior oven light is located at the rear of the oven cavity (Figure 20). 1.
BEFORE YOU CALL Oven Baking For best cooking results, preheat the oven before baking cookies, breads, cakes, pies, pastries, etc. There is no need to preheat the oven for roasting meat or baking casseroles. The cooking times and temperatures needed to bake a product may vary slightly from your previously owned appliance. Baking Problems and Solutions Baking Problems Causes Cookies and biscuits burn • on the bottom. Cookies and biscuits put into • oven before oven is preheated. • Oven rack is overcrowded.
BEFORE YOU CALL Solutions to Common Problems: Before you call for service, review the following list. It may save you time and expense. Possible solutions are provided with the problem listed. Problem Cause / Solution Entire appliance does not operate. Appliance not connected. Make sure power cord is plugged properly into outlet. Check your fuse box or breaker box to make sure the circuit is active. Electrical power outage. Check house lights to be sure.
BEFORE YOU CALL Problem Cause / Solution Cooktop Problems Surface element is too hot or not hot enough. Incorrect surface control setting. Adjust power level setting. Surface element does not heat or does not heat evenly. Be sure the correct surface control knob is turned on for the element needed. Drip bowls are pitting or rusting. Foods with acids, such as tomatoes, will cause corrosion if allowed to stand in/on bowls. When cool, remove and wash drip bowls as soon as possible after a spill.
WARRANTY Your appliance is covered by a one year limited warranty. For one year from your original date of purchase, Electrolux will pay all costs for repairing or replacing any parts of this appliance that prove to be defective in materials or workmanship when such appliance is installed, used and maintained in accordance with the provided instructions. Exclusions This warranty does not cover the following: 1. 2. 3. 4. 5. 6. 7. 8. 9. 10. 11. 12. 13.