
Use and Care
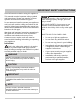

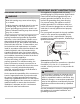


Table Of Contents
- Table of contents
- Questions?
- Product Record and Registration
- Important Safety Instructions
- Bakeware
- Cooking Conditions
- Cooking Results
- Cooking Tips
- Cooking Recommendations
- Assembly of the burner caps
- 1. Remove all packing material from the cooktop area.
- 2. Make sure burner caps are properly placed on the surface burners.
- 3. Unpack the burner grates and position them on the cooktop.
- 4. Discard all packing material.
- Figure 1: Burner caps and burner heads
- Figure 2: Proper burner cap placement
- Figure 3: Gently move cap for proper placement
- Install burner grates
- Using Proper Cookware
- Cookware Material Types
- Gas surface burner types
- Assembly of the burner caps
- Before Setting Surface Controls
- Setting surface controls
- 1. Place cooking utensil on center of surface burner grate. Be sure the cooking utensil rests stable on the burner grate.
- 2. Push the burner’s surface control knob in and turn counterclockwise out of the OFF position (Figure 7).
- 3. Release the surface control knob and rotate to the LITE position (). Visually check that the burner has a steady gas flame.
- 4. Once the surface burner has a flame, push the surface control knob in and turn counterclockwise to the desired flame size setting. Adjust the flame as needed using the knob markings.
- Figure 7: Surface control knob
- Set proper burner flame size
- Cooking with a griddle (some models)
- Using the griddle:
- Home Canning
- Setting surface controls
- Setting Surface Controls
- Before Setting Oven Controls
- 1. Bake - Use to select for all baking.
- 2. Broil - Use to select the broil feature. When broil is active the indicator light above the broil key will glow.
- 3. Timer On-Off - Use to set or cancel the minute timer. The minute timer does not start or stop cooking.
- 4. Set Clock - Use with up or down arrows to set the time of day.
- 5. OFF - Use to stop or to clear any feature previously entered except time of day and minute timer. Press OFF to stop cooking.
- 6. Up and Down arrow keys - Use with the feature or function pads to set oven temperature or to adjust the clock or minute timer.
- Setting the Clock
- Temperature display (Fahrenheit/Celsius)
- Changing between continuous bake setting or 12- hour energy saving feature
- 1. Press and hold Timer on-off for 6 seconds until a tone sounds. — — hr will appear in the display for continuous cooking. The current time of day will return to the display.
- 2. To cancel the continuous bake setting, press Timer on- off and hold for 6 seconds until a tone sounds. 12 hr will appear in display indicating that the control has returned to the 12-hour energy saving feature.
- Operating oven light
- Setting the minute timer
- Setting Bake
- Figure 13: Pan spacing recommendations
- 1. Press Bake. — — — appears in the display.
- 2. Within 5 seconds, press or. The display will show 350°F (177°C). The temperature can then be adjusted in 5°F (1°C) increments.
- 3. When a key is released, the oven will begin heating to the selected temperature. When the oven reaches the set temperature, the preheat indicator light will turn off and the control will beep three times.
- 4. To cancel the baking function, press OFF.
- 1. Press Bake.
- 2. Press or to increase or decrease to a new temperature. The oven indicator light on the electronic display will turn on and off when using the bake feature and during preheat. This is normal and indicates that the oven is cycling to maintain the se...
- Figure 14: Rack positions
- Figure 13: Pan spacing recommendations
- Setting Broil
- Figure 15: Broil rack (L) Broil pan and insert (R)
- Figure 16: Setting broil rack
- 1. Slide broiler drawer out until drawer stops. Arrange the oven rack while oven is still cool.
- 2. Press Broil. — — will appear in display.
- 3. Press for HI broil or for LO broil.
- 4. If using a broiler pan and insert, place the insert on the broil pan then place the food on the broil pan insert. The broiler pan and the insert allow grease to drain and be kept away from the high heat of the broiler.
- 5. Place the broiler pan and insert on the broil rack.
- 6. Broil on one side until food is browned. Turn and broil food on second side.
- 7. When broiling is finished press OFF.
- Adjusting the oven temperature
- 1. Press and hold the Bake key and release when the display shows the factory temperature setting of 00. If the oven temperature has been previously adjusted from the factory setting, the last adjusted value will appear in the display instead.
- 2. The temperature can now be adjusted up +35°F (+19°C), in 5°F increments with each press of the key.
- 3. When lowering the oven temperature using the key, minus sign (-) will appear before the number to indicate that the oven will be cooler by the displayed amount of degrees.
- 4. To accept the change, wait for the oven control to provide an acceptance beep.
- Setting Oven Controls
- Figure 17: Use cleaners with caution
- Cleaning the sealed burners
- 1. Remove the burner cap from the burner head (see Figure 18). Clean the cap with hot soapy water and dry thoroughly.
- Figure 18: Burner Cap
- Figure 19: Sealed burner components
- 3. Use a toothbrush to clean all over the burner head (see Figure 19).
- 4. Use the toothbrush to clean the slots and holes in the burner (see Figure 19).
- 5. Use a needle or fine wire to clean out the ignition port (see Figure 19).
- 6. Wipe the burner head clean with a soft, clean cloth, sponge, or scratch-free cleaning pad.
- 7. Before using the cooktop again, make sure the burner caps are properly placed and seated on the burner heads. When placed correctly, the burner cap is centered on the burner head and will click into place on the burner head. You can wiggle the cap...
- Replacing the Oven Light
- Removing and Replacing the Oven Door
- 1. Open oven door completely, horizontal with floor (See Figure 21).
- 2. Pull the door hinge locks on both left and right door hinges down from the oven frame completely towards the oven door (See Figure 22). A tool such as a small flat-blade screwdriver may be required.
- 3. Firmly grasp both sides of oven door along the door sides. Do not use the oven door handle (See Figure 23).
- 4. Close the door to approximately 10 degrees from the door frame (See Figure 23).
- 5. Lift the oven door hinge arms over the roller pins located on each side of the oven frame (See Figure 24).
- 1. Firmly grasp both sides of oven door along the door sides. Do not use the oven door handle (See Figure 23).
- 2. Holding the oven door at the same angle as the removal position, seat the hook of the hinge arm over the roller pins located on each side of the oven door frame (See Figure 23 and Figure 24). The hook of the hinge arms must be fully seated onto th...
- 3. Fully open the oven door, horizontal with floor (See Figure 21).
- 4. Push the door hinge locks up towards and into the oven frame on both left and right oven door hinges to the locked position (See Figure 22).
- 5. Close the oven door.
- Figure 21: Door hinge location
- Figure 22: Door hinge locks
- Figure 23: Holding door for removal
- Figure 24: Replacement and location of hinge arm and roller pin
- Care and Cleaning
- Before You Call
- Blank Page
- Blank Page
- Blank Page

6
IMPORTANT SAFETY INSTRUCTIONS
IMPORTANT INSTRUCTIONS FOR USING THE
APPLIANCE
Storage In or On Appliance—Flammable
materials should not be stored in an oven or
microwave, near surface burners or elements,
or in the storage or warmer drawer (if
equipped). This includes paper, plastic, and
cloth items, such as cookbooks, plastic ware,
and towels, as well as flammable liquids. Do not
store explosives, such as aerosol cans, on or
near the appliance.
Do not leave children alone - Children should
not be left alone or unattended in the area
where appliance is in use. They should never
be allowed to sit or stand on any part of the
appliance, including the storage drawer, lower
broiler drawer, warmer drawer, or lower double
oven.
Do not store items of interest to children in the
cabinets above the appliance or on the back-
guards of ranges. Children climbing on or near
the appliance to reach items could be seriously
injured.
Do not allow children to climb or play around the
appliance. The weight of a child on an open
over door may cause the appliance to tip,
resulting in serious burns or other injury. An
open drawer when hot may cause burns.
Stepping, leaning, or sitting on the door or
drawers of this appliance can result in serious
injuries and also cause damage to the appli-
ance.
Never cover any slots, holes, or passages in the
oven bottom or cover an entire oven rack with
any materials, such as aluminum foil or after-
market oven liners. Aluminum foil and other
liners may trap heat, causing a fire hazard.
Do not use oven or warmer drawer (if equipped)
for storage.
WARNING
Never use your appliance as a space heater to
heat or warm the room. Doing so may result in
carbon monoxide poisoning and overheating of
the appliance.
When heating fat or grease, watch it closely.
Grease may catch fire if it becomes too hot.
Do not use water or flour on grease fires.
Smother fire or flame or use dry chemical or
foam-type extinguisher. Cover the fire with a
pan lid or use baking soda.
Use dry potholders. Moist or damp potholders
on hot surfaces may result in burns from steam.
Do not let potholders touch hot cooking areas.
Do not use towels or other bulky cloths.
Do not heat unopened food containers - Build-
up of pressure may cause container to burst
and result in injury.
Wear proper apparel - Loose-fitting or hanging
garments should never be worn while using the
appliance. Do not let clothing or other
flammable materials contact hot surfaces.
Do not touch surface burners or elements,
areas near these burners or elements, interior
surfaces of the oven, or the warmer drawer (if
equipped). Surface burners and elements may
be hot even though they appear cool. Areas
near surface burners and elements may
become hot enough to cause burns. During and
after use, do not touch, or let clothing or other
flammable materials touch these areas until
they are cool. These areas may include the
cooktop, surfaces facing the cooktop, oven vent
areas, oven door, and oven window.
WARNING
CAUTION