All about the Use & Care of your Gas Range TABLE OF CONTENTS www.frigidaire.com USA 1-800-944-9044 Care and Cleaning . . . . . . . . . . . . . . . . . . . . . . . . 29 Before You Call . . . . . . . . . . . . . . . . . . . . . . . . . . . 33 Warranty . . . . . . . . . . . . . . . . . . . . . . . . . . . . . . . . 36 www.frigidaire.ca Canada 1-800-265-8352 A02992501 Rev A (May 2015) Product Record and Registration . . . . . . . . . . . . . . 2 Important Safety Instructions . . . . . . . . . . . . . .
PRODUCT RECORD AND REGISTRATION Need Help? Product Record and Registration . . . . . . . . . . . . . . . . . 2 Important Safety Instructions . . . . . . . . . . . . . . . . . . . . 3 Before Setting Surface Controls . . . . . . . . . . . . . . . . . . 8 Setting Surface Burners . . . . . . . . . . . . . . . . . . . . . . . . 9 Before Setting Oven Controls . . . . . . . . . . . . . . . . . . . 12 Oven Controls. . . . . . . . . . . . . . . . . . . . . . . . . . . . . . . . 14 Care and Cleaning . . . . . . . . .
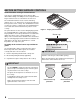
IMPORTANT SAFETY INSTRUCTIONS CAUTIONS AND WARNINGS Read all instructions before using this appliance. This manual contains important safety symbols and instructions. Please pay attention to these symbols and follow all instructions given. Do not attempt to install or operate your appliance until you have read the safety precautions in this manual. Safety items throughout this manual are labeled with a WARNING or CAUTION statement based on the risk type. DEFINITIONS This is the safety alert symbol.
IMPORTANT SAFETY INSTRUCTIONS IMPORTANT Read and follow the below instructions and precautions for unpacking, installing, and servicing your appliance: • Remove all tape and packaging before using the oven. Destroy the carton and plastic bags after unpacking the oven. Never allow children to play with packaging material. • Proper installation is essential. Be sure your appliance is properly installed and grounded by a qualified technician in accordance with the National Electrical Code ANSI/NFPA No.
IMPORTANT SAFETY INSTRUCTIONS WARNING • Do Not Leave Children Alone - Children should not be left alone or unattended in the area where appliance is in use. They should never be allowed to sit or stand on any part of the appliance, including the storage drawer, lower broiler drawer, warmer drawer, or lower double oven. CAUTION • When heating fat or grease, watch it closely. Grease may catch fire if it becomes too hot. • Do not use water or flour on grease fires.
IMPORTANT SAFETY INSTRUCTIONS IMPORTANT INSTRUCTIONS FOR USING YOUR COOKTOP WARNING Use Proper Flame Size — Adjust flame size so it does not extend beyond the edge of the utensil. The use of undersized utensils will expose a portion of the burner flame to direct contact and may result in ignition of clothing. Proper relationship of utensil to flame will also improve efficiency. • Know which knob controls each surface burner.
IMPORTANT SAFETY INSTRUCTIONS IMPORTANT INSTRUCTIONS FOR CLEANING YOUR OVEN CAUTION Before manually cleaning any part of the oven, be sure all controls are turned off and the oven is cool. • Clean the oven regularly to keep all parts free of grease that could catch fire. • Always follow the manufacturer’s recommended directions for use of kitchen cleaners and aerosols. Be aware that excess residue from cleaners and aerosols may ignite causing damage and injury. • Clean ventilating hoods frequently.
BEFORE SETTING SURFACE CONTROLS Control locations of the gas surface burners Your range is equipped with gas surface burners with different BTU ratings. The ability to heat food quicker and in larger volumes increases as the burner size increases. The small simmer burner is best used for simmering delicate sauces, etc. This burner is located at the right rear burner position on the cooktop. The standard burner can be used for most surface cooking needs.
SETTING SURFACE BURNERS Operating the gas surface controls IMPORTANT • • Do not cook with the surface control knob left in the LITE position. The electronic ignitor will continue to spark if the control knob setting remains in the LITE position. When setting any surface control knob to the LITE position, all electronic surface ignitors will spark at the same time. However, only the surface burner you are setting will ignite.
SETTING SURFACE BURNERS Setting proper surface burner flame size Gas Cooktop Burners For most cooking: Start on the highest control setting and then turn to a lower one to complete the process. Use the recommendations below as a guide for determining proper flame size for various types of cooking. The size and type of utensil used and the amount of food being cooked will influence the setting needed. The front control gas cooktop comes with a variety of burners to accommodate different sizes of cookware.
SETTING SURFACE BURNERS Setting the Simmer Oval Burner Home Canning The simmer oval burner is specifically designed for use with a griddle, and can be used for simmering sauces or foods in most pots or pans. There are two knobs which control the separate functions of the simmer oval. Be sure to read and observe all the following points when home canning with your appliance.
BEFORE SETTING OVEN CONTROLS Oven vent location Type of oven racks The oven vent is located under the backguard in the rear of the cooktop. When the oven is on, warm air passes through this vent. This venting is necessary for proper air circulation in the oven and good baking results. While the oven is in operation, it is normal for steam or moisture to appear near the vent. Do not block oven vent.
BEFORE SETTING OVEN CONTROLS IMPORTANT Do not line the oven walls, racks, bottom or any other parts of the range with aluminum foil or any other materials or oven liners. Doing so will alter heat distribution and may cause permanent damage to the oven interior. During clean the oven temperatures will be hot enough to melt foil. Using both hands, grasp the upper and lower portions of the glide rack. Lift up the front of the rack slightly and continue to pull the rack away from the oven (Figure 10).
OVEN CONTROLS 2 1 3 OVEN MODE SETTINGS POWERPLUS™ PREHEAT - Use powerplus preheat for single rack items only and place food in center of oven. BAKE - Use to select bake function before setting temperature. CLEAN - Use to select clean feature cycle before setting clean with oven temperature selector. CONVECT BAKE - Use to select convection baking before setting oven temperature. CONVECT ROAST - Use to select convection roast for beef, lamb, pork, and poultry before setting oven temperature.
OVEN CONTROLS Setting the Clock Setting the Timer The clock icon is used to access the time of day setting. When the oven is first plugged in or if there has been an interruption in power to the range, 12:00 will flash in the display. The minute timers in the oven display serve as extra timers to help keep track of cooking functions. The timer cannot be used during a clean cycle or if the meat probe function associated with the timer display is in use.
OVEN CONTROLS Setting Continuous Bake or 6 Hour Energy Saving Setting Control for Silent Operation The oven is preset to cook up to 6 hours and to shut off automatically. For longer periods of cooking, this feature can be changed to continuous cooking by setting the user preference and turning the energy saving feature off. The oven is set to operate with certain chimes and tones (default settings) that alert the user to certain oven functions.
OVEN CONTROLS Setting PowerPlus™ Preheat The PowerPlus™ Preheat feature uses the convection fan to quickly bring the oven up to the set temperature. Use powerplus preheat for single rack items only and place food in center of oven. Important: When baking delicate items like cakes and cookies use the regular bake or convection bake mode. To set powerplus preheat: 1. Turn the oven mode selector to POWERPLUS PREHEAT. The oven mode light will turn on. 2.
OVEN CONTROLS Convection Cooking Setting Convection Bake This mode of cooking enables you to obtain the best results when baking with multiple pans and racks. The oven can be programmed for convection baking at any temperature between 170°F to 550°F with a default temperature of 350°F. The convection fan will turn on after 6 minutes and remain on during the convection baking process. This mode of cooking enables you to obtain the best results when baking with multiple pans and racks.
OVEN CONTROLS Setting Convection Convert Setting Convection Roast This feature must be set before selecting the oven mode and oven temperature by using the user preference setting in the oven display. Convection roast is best for cooking tender cuts of beef, lamb, pork, and poultry. Use this mode when cooking speed is desired. Convection roasting gently browns the exterior and seals in the juices.
OVEN CONTROLS Table 1: Meat Beef Poultry Pork Convection roasting temperature and time recommendations Weight Oven Temp Standing rib roast* 4 to 6 lb. 350°F (177ºC) Rib eye roast* 4 to 6 lb. 350°F (177ºC) Tenderloin roast 2 to 3 lb. 400°F (204ºC) Turkey whole** 12 to 16 lb. 325°F (163ºC) Turkey whole** 16 to 20 lb 325°F (163ºC) Turkey whole** 20 to 24 lb. 325°F (163ºC) Chicken 3 to 4 lb. 350°F-375°F (177ºC191ºC)* Ham roast, fresh 4 to 6 lb. 325°F (163ºC) Shoulder roast 4 to 6 lb.
OVEN CONTROLS Using the Broil Feature Use the broil feature to cook meats requiring direct exposure to radiant heat for optimum browning results. To set broil: 1. Arrange oven racks while oven is cool. 2. Turn the mode selector knob to broil. The corresponding indicator light will flash. WARNING Should an oven fire occur, do not open oven door, turn off the oven. If the fire continues, throw baking soda on the fire or use a fire extinguisher. Do not put water or flour on the fire.
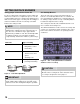
OVEN CONTROLS Meat Probe Proper placement of probe in food. Use the probe feature for best results when cooking foods such as roasts, hams or poultry, using a probe to check internal temperature is the safest method to ensure properly cooked food. Before using the meat probe read the important information listed here: • Insert the probe so that the probe tip rests inside the center of the thickest part of meat or food (Figure 23).
OVEN CONTROLS Meat Probe (cont’d) 3. When the probe is inserted, an acceptance tone will sound, the probe icon appears in the display (See Figure 24). Close the oven door. Figure 24: Probe inserted and ready to set temperature 4. Press the + key to set the desired probe temperature between 140°F and 210°F. If no selection is made within10 seconds, the control will automatically set the default temperature of 170°F and the display will sound an acceptance chime.
OVEN CONTROLS Setting the Sabbath Feature This appliance provides special settings for use when observing the Jewish Sabbath/Holidays. Sabbath mode disables all audible tones or visual display changes on the oven control. For further assistance, guidelines for proper usage, and a complete list of models with the Sabbath feature, please visit the web at www.star-k.org. The Sabbath feature may only be used with the bake function.
OVEN CONTROLS Adjusting the Oven Temperature The temperature in the oven is pre-set at the factory. When first using the oven, be sure to follow recipe times and temperatures. 3. Using the + or - key in the bottom of the display, press until the desired temperature change (offset) is reached. The display will change ± 5° with each key press to a maximum of + 35° or a minimum of – 35°F.
OVEN CONTROLS Self Cleaning A self cleaning oven cleans itself with temperatures well above normal cooking temperatures which eliminate soils completely or reduces them to a fine powdered ash you can wipe away with a damp cloth. While the oven is in operation, the oven heats to temperature much higher than those used in normal cooking. Sounds of metal expansion and contraction are normal. Odor is also normal because the food soil is being removed. Smoke may appear through the oven vent.
OVEN CONTROLS Setting Clean If you are planning to use the oven directly after a clean cycle, remember to allow time for the oven to cool down and the oven door to unlock. This normally takes about one hour. A 3 hour clean cycle will actually take about 4 hours to complete. It is recommended to use a 2 hour clean cycle for light soils, a 3 hour cycle for average soils, and a 4 hour cycle for heavy soils. To set the controls for a 3 hour clean cycle and shut off automatically: 1.
OVEN CONTROLS 3. Once the door is closed the time of day will be visible along with the selected clean time and the door lock icon will be visible in the display. CAUTION To avoid possible burns, use care when opening the oven door after the clean cycle. Stand to the side of the oven when opening the door to allow hot air or steam to escape. Figure 35: Clean cycle in progress Do not force the oven door open while clean is active. This can damage the automatic door locking system.
CARE AND CLEANING Cleaning Various Parts of Your Oven Before cleaning any part of the oven, be sure all controls are turned off and the oven is cool. Remove spills and any heavy soiling as soon as possible. Regular cleaning will reduce the number of major cleaning later. Surface Type Recommendation Aluminum and Vinyl • Use hot, soapy water and a cloth. Dry with a clean cloth. Painted body parts • Using a soft cloth, clean with mild dish detergent and water or a 50/50 solution of vinegar and water.
CARE AND CLEANING Cleaning the cooktop and surface burners To avoid possible burns turn off all of the surface burners and allow them to cool. Any additions, changes or conversions required in order for this appliance to satisfactorily meet the application needs must be made by an authorized qualified agency. ignition port slots Routinely clean the cooktop. Wipe with a clean, damp cloth and wipe dry to avoid scratches.
CARE AND CLEANING Removing and Replacing the Oven Door WARNING Do not remove oven door until it is completely cooled. CAUTION The door is heavy. For safe, temporary storage, lay the door flat with the inside of the door facing down. To remove oven door: Oven door hinge locations 1. Open oven door completely horizontal with floor (See Figure 40). 2. Pull the door hinge locks on both left and right door hinges up from the oven frame completely towards the oven door (See Figure 41).
CARE AND CLEANING Caring for your glide racks Handle oven racks only when they are cool. After cooking or after the clean cycle, racks will be very hot and can cause burns. 4. Extend and return the glide rack several times along the tracks to distribute the lubrication. 5. Turn glide rack over. Shake graphite lubrication very well before applying. Place four drops of graphite lubrication along the tracks. Repeat on both sides of the glide rack. 6.
BEFORE YOU CALL Solutions to Common Baking Problems For best cooking results, heat the oven before baking cookies, breads, cakes, pies or pastries, etc. There is no need to preheat the oven for roasting meat or baking casseroles. The cooking times and temperatures needed to bake a product may vary slightly from your previously owned appliance. Baking Problems and Solutions Chart Baking Problems Causes Corrections Cookies and biscuits burn on the bottom.
BEFORE YOU CALL Solutions to Common Problems Before you call for service, review the following list. It may save you time and expense. Possible solutions are provided with the problem listed: Problem Solution Poor baking results Many factors effect baking results. Use proper oven rack position. Center food in the oven and space pans to allow air to circulate. Preheat oven to the set temperature before placing food in the oven. Try adjusting the recipe's recommended temperature or baking time.
BEFORE YOU CALL Oven control panel sounds an audible alarm and displays an Error code. Oven control has detected a fault or error condition. Turn either oven mode or temperature selector to the OFF position to clear the error code. Try Bake or Broil function. If the Error code error repeats, turn OFF power to appliance, wait 5 minutes and then repower appliance. Set clock with correct time of day. Try Bake or Broil function again.
WARRANTY Your appliance is covered by a one year limited warranty. For one year from your original date of purchase, Electrolux will pay all costs for repairing or replacing any parts of this appliance that prove to be defective in materials or workmanship when such appliance is installed, used and maintained in accordance with the provided instructions. Exclusions This warranty does not cover the following: 1. 2. 3. 4. 5. 6. 7. 8. 9. 10. 11. 12. 13.