All about the Use & Care of your Refrigerator TA B L E O F C O N T E N T S Product Registration...........................................2 Energy-Saving Tips.............................................6 Important Safety Instructions...............................2 Care and Cleaning..............................................6 First Steps.........................................................4 Before You Call..................................................7 Setting the Temperature Control.........
PRODUCT REGISTRATION Read and Save These Instructions This Owner’s Guide provides specific operating instructions for your model. Use your appliance only as instructed in this guide. These instructions are not meant to cover every possible condition and situation that may occur. Common sense and caution must be practiced when installing, operating, and maintaining any appliance. Record Your Model and Serial Numbers Record the model and serial numbers in the space provided below.
IMPORTANT SAFETY INSTRUCTIONS WARNING Child Safety • Destroy carton, plastic bags, and any exterior wrapping material immediately after the unit is unpacked. Children should never use these items for play. Cartons covered with rugs, bedspreads, plastic sheets or stretch wrap may become airtight chambers and can quickly cause suffocation. • An empty, discarded appliance is a very dangerous attraction to children. • Remove the door(s) of any appliance that is not in use, even if it is being discarded.
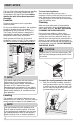
FIRST STEPS This Use & Care Guide provides general operating instructions for your model. Use the unit only as instructed in this Use & Care Guide. Before starting the unit, follow these important first steps. To Level Your Appliance: Choose a place that is near a grounded electrical outlet. Cleaning Location For the most efficient operation, the appliance should be located where surrounding temperatures will not exceed 110°F (43°C).
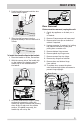
FIRST STEPS 2. Push the shelf grommet onto the wire until it snaps in place. Door Removal If door must be removed, unplug the unit. 1. Gently lay appliance on its back, on a rug or blanket. 3. Slide the shelf grommet into the grommet already in the unit wall until it is flush. 2. Remove 2 base screws and base panel. 3. Remove wire from clips on bottom of cabinet if required. 4. Unplug connector, if required, by holding the cabinet connector in place, and pulling door connector out. 5.
SETTING THE TEMPERATURE CONTROL ENERGY-SAVING TIPS Cool Down Period • The appliance should be located in the coolest area of the room, away from heat-producing appliances or heating ducts, and out of direct sunlight. For safe food storage, allow 4 hours for the unit to cool down completely. The appliance will run continuously for the first several hours. Temperature Control The temperature control is located inside the unit.
CARE AND CLEANING Cleaning the Outside Wash the cabinet with warm water and mild liquid detergent. Rinse well and wipe dry with a clean soft cloth. WARNING If leaving door open while on vacation, make certain that children cannot get into the appliance and become entrapped. Vacation and Moving Tips Vacations: If the unit will not be used for several months, remove all food and unplug the power cord. Clean and dry the interior thoroughly.
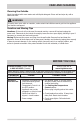
BEFORE YOU CALL PROBLEM CAUSE Appliance • Room or outside weather runs too much is hot. or too long. • Appliance has recently been disconnected for a period of time. CORRECTION • It’s normal for the appliance to work longer under these conditions. • It takes 4 hours for the appliance to cool down completely. • Large amounts of warm or hot food have been stored recently. • Warm food will cause appliance to run more until the desired temperature is reached. • Door is opened too frequently or too long.
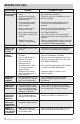
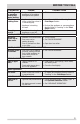
BEFORE YOU CALL PROBLEM CAUSE Bubbling • Refrigerant (used to cool or gurgling appliance) is circulating sound, like throughout the system. water boiling. Vibrating or • Appliance is not level. It rattling noise. rocks on the floor when it is moved slightly. • Appliance is touching the wall. Snapping sound. CORRECTION • This is normal. • Level the unit. Refer to ”Leveling” in the First Steps Section. • Re-level the appliance or move appliance slightly. Refer to “Leveling” in the First Steps Section.
MAJOR APPLIANCE WARRANTY MAJOR APPLIANCE WARRANTY Your appliance is covered by a one year limited warranty. For one year from your original date of purchase, Electrolux will pay all costs for repairing or replacing any parts of this appliance that prove to be defective in materials or workmanship when such appliance is installed, used and maintained in accordance with the provided instructions. Exclusions This warranty does not cover the following: 1.