
Use and Care Guide

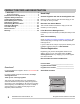


Table Of Contents
- Product Record and Registration
- Important Safety Instructions
- Cooking Recommendations
- Before Setting Oven Controls
- Setting Oven Controls
- About Your Microwave Oven
- Radio or TV Interference
- About Microwave Cooking
- About Foods
- About Utensils and Coverings
- Accessories
- About Children and the Microwave
- About Food Safety
- Preparing Food for Microwave Cooking
- Before Using Microwave Oven
- Microwave Features
- Display
- Before Operating the Microwave
- Control Panel
- Figure 3: Microwave Control Pad
- 1. Lock: Use to lock the controls to prevent accidental use.
- 2. Settings / User Preferences
- 3. Presets
- 4. Melt/Soften
- 5. Auto Cook
- 6. Sensor Cook
- 7. Power level (10 power levels available)
- 8. Timer On-Off
- 9. Number Keys
- 10. START/+30Sec.
- 11. STOP/Cancel: Clears all previous settings if pressed before cooking starts. During cooking, press once to pause (and START to resume); press twice to stop and clear all entries.
- Figure 3: Microwave Control Pad
- Quick Start
- Timed Heating
- Timer
- Setting Power Level
- 1. Use the number pad to enter the time in minutes and seconds. For example, to heat for 5 minutes and 30 seconds, enter 5 3 0.
- 2. Press the Power Level pad until the desired level displays. For example, press once for high power (PL- HI). Press Power Level four times to change to 70% power (PL-70). The selected power level appears in the display.
- 3. Press START.
- Multi-Stage Cooking
- Add Cook Time (+30 Sec)
- Defrost
- Popcorn
- Potato
- Veggies
- Beverage
- Melt / Soften
- Auto Cook
- Sensor Cook
- Reheat
- Keypad Lock
- Set Clock
- Audible Signal Elimination
- 1. Press the Settings pad twice.
- 2. “VOLUME” shows in the display. “LOW”, “MED”, and “HIGH” will show in a cycle.
- 3. Press START when the desired volume is shown in the display.
- 1. Press the Settings pad 3 times. “Lb / KG” shows in the display.
- 2. Press START to change the setting. “KG” or “LB” will briefly display to show the new setting.
- Setting the Microwave
- Care and Cleaning
- Before You Call
- Warranty

10
IMPORTANT SAFETY INSTRUCTIONS
Save these instructions for future reference
IMPORTANT INSTRUCTIONS FOR SELF
CLEANING OVENS
Do not clean the oven door gasket. The door
gasket is essential for a good seal. Care should
be taken not to rub, damage, or move the gasket.
Do not use oven cleaners. No commercial oven
cleaner or oven liner protective coating of any
kind should be used in or around any part of the
appliance.
Use the self clean cycle to clean only the parts
listed in this manual.
Before using self clean, remove the broiler pan,
any food, utensils, and cookware from the oven,
storage drawer or warming drawer (if equipped).
Remove oven racks unless otherwise instructed.
Some birds are extremely sensitive to the fumes
given off during the self clean cycle of any oven.
Move birds to another well-ventilated room.
IMPORTANT INSTRUCTIONS FOR SERVICE
AND MAINTENANCE
Do not repair or replace any part of the appliance
unless specifically recommended in the manuals.
All other servicing should be done only by a
qualified technician. This reduces the risk of
personal injury and damage to the appliance.
Always contact your dealer, distributor, service
agent, or manufacturer about problems or condi-
tions you do not understand.
Ask your dealer to recommend a qualified techni-
cian and an authorized repair service. Know how
to disconnect the power to the appliance at the
circuit breaker or fuse box in case of emergency.
Remove the oven door from any unused oven if it
is to be stored or discarded.
Do not touch a hot oven light bulb with a damp
cloth. Doing so could cause the bulb to break.
Handle halogen lights (if equipped) with paper
towels or soft gloves. Disconnect the appliance or
shut off the power to the appliance before
removing and replacing the bulb.