
Complete Owner's Guide


11
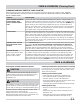
CARE & CLEANING (Cleaning Chart)
CLEANING VARIOUS PARTS OF YOUR COOKTOP
Before cleaning any part of the cooktop, be sure all controls are turned OFF and the cooktop is COOL. REMOVE
SPILLOVERS AND HEAVY SOILING AS SOON AS POSSIBLE. REGULAR CLEANING WILL REDUCE THE NUMBER OF
MAJOR CLEANING LATER.
Surfaces How to Clean
Glass, Painted and Plastic
Control Knobs, Body
Pieces, and Decorative
Trim
Using a soft cloth, clean with mild dish detergent and water or a 50/50 solution of
vinegar and water. Follow by rinsing the area with clean water; dry and polish with a
soft cloth. Glass cleaners may be used if sprayed on a soft cloth fi rst. DO NOT spray
liquids directly on the control pad and display area. Do not use large amounts of
water on the control panel - excess water on the control area may cause damage to
the appliance. Do not use other liquid cleaners, abrasive cleaners, scouring pads, or
some paper towels - they will damage the fi nish.
Control Panel Wipe the control panel clean after each use. Before cleaning the control panel, turn
all controls to OFF and remove the control knobs. To remove, pull each knob straight
off the shaft. Clean using hot, soapy water and a cloth. Be sure to squeeze excess
water from the cloth before wiping the panel; especially when wiping around the
controls. Excess water in or around the controls may cause damage to the appliance.
To replace knobs after cleaning, line up the fl at sides of both the knob and the shaft;
then push the knob into place.
Stainless Steel, Chrome
Decorative Trim (some
models)
Clean stainless steel with hot, soapy water and a dishcloth. Rinse with clean water
and a cloth. Do not use cleaners with high concentrations of chlorides or
chlorine. Do not use harsh scrubbing cleaners. Only use kitchen cleaners that are
especially made for cleaning stainless steel. Always be sure to rinse the cleaners
from the surface as bluish stains may occur during heating that cannot be removed.
Porcelain Enamel
Burner Grates, Burner Rings
(some models), Cooktop
Surface (some models)
Gentle scouring with a soapy scouring pad will remove most spots. Rinse with a
1:1 solution of clear water and ammonia. If necessary, cover diffi cult spots with
an ammonia-soaked paper towel for 30 to 40 minutes. Rinse with clean water and
a damp cloth, and then scrub with a soap-fi lled scouring pad. Rinse and wipe dry
with a clean cloth or paper towel. Remove all cleaners or the porcelain may become
damaged during future heating. DO NOT use spray oven cleaners on the cooktop.
CAUTION
To avoid possible burns DO NOT attempt any of the
cooktop cleaning instructions provided before turning
OFF all of the surface burners and allow them to
completely cool.
CAUTION
Any additions, changes or conversions required in order
for this appliance to satisfactorily meet the application
needs must be made by an authorized qualifi ed agency.
Routinely clean the cooktop. Wipe with a clean, damp
cloth and wipe dry to avoid scratches.
Keeping the surface burner head ports and slots clean
will prevent improper ignition and an uneven fl ame. See
the following sections for more instructions.
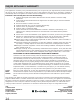
CARE & CLEANING
Cleaning recessed and contoured areas of cooktop
If a spill occurs on or in the recessed or contoured areas,
blot up spill with an absorbent cloth. Rinse with a clean,
damp cloth and wipe dry.
Cleaning surface burner grates
• Clean only after the grates are completely cool.
• Use nonabrasive plastic scrubbing pad and mild
abrasive cleanser or clean in the dishwasher.
• Food soils containing acids may affect the fi nish. Clean
immediately after the grates are cool.
• Thoroughly dry grates immediately following cleaning.
Cleaning burner caps
• Remove caps from burner heads after they have
cooled.
• Clean heavy soils with a plastic scrubbing pad and
absorbent cloth.
• Thoroughly dry burner caps immediately following
cleaning including the bottom and inside of cap.
Cleaning the Cooktop and Surface Burners