
Gas Installation


3
30" GAS RANGE INSTALLATION INSTRUCTIONS
DO NOT MAKE ANY ATTEMPT
TO OPERATE THE ELECTRIC IGNITION OVEN
DURING AN ELECTRICAL POWER FAILURE.
RESET ALL OVEN CONTROLS TO OFF IN THE
EVENT OF A POWER FAILURE. The electric ignitor
will automatically re-ignite the oven burner when
power resumes if the oven thermostat control was
left in the ON position.
When an electrical power failure occurs during use,
the surface burners will continue to operate.
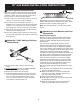
During a power outage, the surface burners
can be lit with a match. Hold a lighted match
to the burner, then slowly turn the knob to the
Lite position. Use extreme caution when lighting
burners this way.
• Adjust surface burner ame size so it does not extend
beyond the edge of the cooking utensil. Excessive ame
is hazardous.
• Do not use the oven as a storage space. This creates a
potentially hazardous situation.
• Never use your range for warming or heating the room.
Prolonged use of the range without adequate ventilation
can be dangerous.
• Do not store or use gasoline or other ammable vapors
and liquids near this or any other appliance. Explosions
or res could result.
• In the event of an electrical power outage, the surface
burners can be lit manually. To light a surface burner,
hold a lit match to the burner head and slowly turn the
Surface Control knob to LITE. Use caution when lighting
surface burners manually.
• Reset all controls to the "off" position after using a
programmable timing operation.
• Remove broiler pan, food and other utensils before self-
cleaning the oven. Wipe up excess spillage. Follow the
precleaning instructions in the Use and Care Guide.
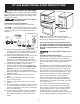
• Unlike the standard gas range, THIS COOKTOP IS NOT
REMOVABLE. Do not attempt to remove the cooktop.
Special instructions for appliances installed in
the state of Massachusetts:
This Appliance can
only be installed in the state of Massachusetts by a
Massachusetts licensed plumber or gas tter. When
using a exible connector, it must not exceed three (3)
feet (36 in.) long. A "T" handle type manual gas valve
must be installed in the gas supply line to this appliance.
Before Starting
Tools you will need
For leveling legs and anti-tip brackets:
● Adjustable wrench or channel lock pliers
●
5/16" Nutdriver or Flat Head Screw Driver
● Electric Drill & 1/8 Diameter
Drill Bit (5/32" Masonry Drill
Bit if installing in concrete)
● Level & Measuring Tape
For gas supply connection:
● Pipe Wrench
● Brush
Propane gas
● A new exible metal appliance conduit
(½" NPT x ¾" or ½" I.D.) must be design
certied by CSA International. Because
solid pipe restricts moving the range we
recommend using a new exible conduit (4
feet length) for each new installation and
additional reinstallations.
For burner ame adjustment:
● Phillips head and blade-type
screwdrivers
For gas conversion (LP/Propane or Natural):
● Open end wrench - 1/2"
Additional materials you will need:
● Gas line shut-off valve
● Pipe joint sealant that resists action of LP/
● Always use the (2) new are union
adapters ½" NPT x ¾" or ½" I.D.) supplied with the
new exible appliance conduit for connection of the
range.