All about the Use & Care of your Gas Range TABLE OF CONTENTS Product Record and Registration . . . . . . . . . . . . . . 2 Important Safety Instructions . . . . . . . . . . . . . . . . . 3 Before Setting Surface Controls . . . . . . . . . . . . . . . 8 Before Setting Oven Controls . . . . . . . . . . . . . . . . 10 www.frigidaire.ca Canada 1-800-265-8352 139901501 (February 2013) www.frigidaire.com USA 1-800-944-9044 Oven Controls . . . . . . . . . . . . . . . . . . . . . . . . . . . .
PRODUCT RECORD AND REGISTRATION Need Help? . . . . . . . . . . . . . . . . . . . . . . . . . . . . . . . . .2 Product Registration . . . . . . . . . . . . . . . . . . . . . . . . . .2 Product Record and Registration . . . . . . . . . . . . . . . . . 2 Important Safety Instructions . . . . . . . . . . . . . . . . . . . . 3 Before Setting Surface Controls . . . . . . . . . . . . . . . . . . 8 Before Setting Oven Controls . . . . . . . . . . . . . . . . . . . 10 Oven Controls. . . . . . . . . . . . . . . . . .
IMPORTANT SAFETY INSTRUCTIONS CAUTIONS & WARNINGS This manual contains important safety symbols and instructions. Please pay attention to these symbols and follow al instructions given. Do not attempt to install or operate your appliance until you have read the safety precautions in this manual. Safety items throughout this manual are labeled with a WARNING or CAUTION statement based on the risk type. DEFINITIONS This is the safety alert symbol. It is used to alert you to potential personal injury hazards.
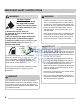
IMPORTANT SAFETY INSTRUCTIONS WARNING WARNING Tip Over Hazard • A child or adult can tip the range and be killed. • Verify the anti-tip device has been installed to floor or wall. • Ensure the anti-tip device is re-engaged to floor or wall when the range is moved. • Do not operate the range without the anti-tip device in place and engaged. • Failure to follow these instructions can result in death or serious burns to children and adults.
IMPORTANT SAFETY INSTRUCTIONS CAUTION IMPORTANT Read and follow these instructions and precautions for unpacking, installing, and servicing your appliance: • • • Remove all tape and packaging before using the range. Destroy the carton and plastic bags after unpacking the range. Never allow children to play with packaging material. Proper Installation—Be sure your appliance is properly installed and grounded by a qualified technician in accordance with the National Fuel Gas Code ANSI Z223.
IMPORTANT SAFETY INSTRUCTIONS CONVERSION TO L.P. GAS This appliance allows for conversion to Liquefied Petroleum (L.P.) Gas. If L.P. conversion is needed, contact your local L.P. Gas provider for assistance. The L.P. conversion kit is provided with this appliance and is located on the lower REAR (back side) panel of the range. Before installing the kit be sure to read the L.P. Installation Instructions and follow them carefully when making the installation.
IMPORTANT SAFETY INSTRUCTIONS IMPORTANT INSTRUCTIONS FOR CLEANING YOUR RANGE CAUTION Before manually cleaning any part of the range, be sure all controls are turned off and the range is cool. Cleaning a hot range can cause burns. • Clean the range regularly to keep all parts free of grease that could catch fire. Pay particular attention to the area around each burner element. Do not allow grease to accumulate.
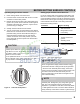
BEFORE SETTING SURFACE CONTROLS Control locations of the gas surface burners Your built-in range is equipped with gas surface burners with different BTU ratings. The ability to heat food quicker and in larger volumes increases as the burner size increases. The small simmer burner is best used for simmering delicate sauces, etc. This burner is located at the right rear burner position on the cooktop (see Figure 1). The standard burner can be used for most surface cooking needs.
BEFORE SETTING SURFACE CONTROLS Operating the gas surface controls Setting proper surface burner flame size 1. Place cooking utensil on surface burner. For most cooking: Start on the highest control setting and then turn to a lower one to complete the process. Use the recommendations below as a guide for determining proper flame size for various types of cooking. The size and type of utensil used and the amount of food being cooked will influence the setting needed. 2.
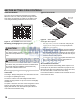
BEFORE SETTING OVEN CONTROLS Oven vent location Types of oven racks The oven vent is located near the back of the cooktop. When the oven is on, warm air passes through this vent. This venting is necessary for proper air circulation in the oven and good baking results. Do not block oven vent.
BEFORE SETTING OVEN CONTROLS Oven racks and rack positions IMPORTANT Remove all oven racks before starting a self-clean cycle. If oven racks are left inside the oven during a cleaning cycle, the slide ability of the oven racks may be damaged and all of the oven racks will lose their shiny finish. Clean oven racks according to the instructions provided in the Care & Cleaning section.
OVEN CONTROLS 4 1 19 5 2 14 12 15 11 6 3 8 10 7 17 9 18 4 1 21 19 5 2 14 13 12 15 16 6 3 20 8 9 11 10 17 18 7 Figure 7: Gallery Model (top) Professional Model (bottom) Oven Controls Features 1. Delay Start — Use to program a delayed time bake or delayed self-cleaning cycle start time. 2. Set Clock — Use along with the numeric keypad to set the time of day. 3. Oven Light — Use to turn the oven light on and off. 4. Self Clean — Use to select self-clean function. 5.
OVEN CONTROLS Table 1: Minimum and maximum control settings Feature Mode Minimum Temp. /Time Maximum Temp. /Time Quick Preheat/Power Plus Preheat 170°F (77°C) 550°F (288°C) Bake 170°F (77°C) 550°F (288°C) Broil 400°F (205°C) 550°F (288°C) Convection Bake 170°F (77°C) 550°F (288°C) Convection Roast 170°F (77°C) 550°F (288°C) Slow Cook Lo 225°F (108°C) Hi 275°F (135°C) Meat Probe Lo 140°F (60°C) Hi 210°F (99°C) Timer 12 Hr. Mode 24 Hr. Mode 0:01 Min. 0:01 Min 11:59 Hr./Min.
OVEN CONTROLS Setting Continuous Bake or 6 Hour Energy Saving The timer on-off and self clean keys control the continuous bake or 6 hour energy saving features. The oven control has a factory preset 6 Hour Energy Saving feature that shuts off the oven if the oven control is left on for more than 6 hours. The oven can be programmed to override this feature for Continuous Baking. To set the control for continuous bake or 6 hour energy saving: 1. Press and hold timer on-off for 6 seconds.
OVEN CONTROLS Setting Oven Lockout Feature Setting Preheat The key controls the oven lockout. When active, this feature automatically locks the oven door, preventing the oven from being turned on. It does not affect the clock, timer, or the interior oven lights. The powerplus preheat/quick preheat feature is used when a recipe calls for preheating the oven. When the preheat stage ends, a tone will sound indicating when to place the food in the oven.
OVEN CONTROLS Setting Bake Baking Tips For best bake results: • Fully preheat the oven before baking items like cookies, cakes, biscuits, and breads. • When using any single rack, position the rack so that the food is in the center of the oven. • For best results when baking cakes using two oven racks, place racks in positions 2 and 4 (See Figure 8). • When baking using two oven racks, position cookware as shown in Figure 9.
OVEN CONTROLS Setting Broil To set a broil of 500°F: Broiling tips: 1. Place the broiler pan insert on the broiler pan and place the food on the broiler pan insert. Do not use the broiler pan without the insert.The exposed grease could ignite. • Broil foods with oven door closed. • For optimum browning, preheat the broil element for 2 minutes. Broil one side until the food is browned; turn and cook on the second side. Season and serve.
OVEN CONTROLS Convection Cooking Convection baking tips: Multiple rack baking may slightly increase cook time for some foods, but the overall result is time saved. Some food may cook faster and more evenly with convection bake. Convection baking uses the three elements and a fan to circulate the heat evenly and continuously within the oven (See Figure 12). • Fully preheat the oven before baking items like cookies, cakes, biscuits, and breads.
OVEN CONTROLS Setting Convection Convert Setting Convection Roast Convection convert automatically converts a standard baking recipe for convection baking. When set properly, this feature is designed to display the actual converted (reduced) temperature in the display. Convection convert may only be used with a convection bake cooking mode. It can be used with a delay start and bake time. For delay start instructions, see page 20. For bake time instructions, see page 20.
OVEN CONTROLS Setting Bake Time Use bake time when setting the oven to cook for a specific length of time and shut off automatically when the time is complete. When cooking time ends, the oven will shut off and will beep. This feature can be used with bake, convection bake, convection roast, and slow cook modes. To program the oven to begin baking immediately and to shut off automatically (example: Bake at 350°F for 30 minutes): 1. Be sure the clock is set for the correct time of day. 2.
OVEN CONTROLS Setting Warm (Keep Warm) Setting My Favorite Recipe (some models) Warm is best for keeping oven baked foods warm for serving after cooking has finished. The warm key turns on the warm feature, will maintain an oven temperature of 170°F (77°C), and will keep oven baked foods warm for serving up to 3 hours after cooking. The my favorite key allows the user to save a recipe to be recalled at any time. The recipe may be for any baking temperature between 170°F (77°C) and 550°F (288°C).
OVEN CONTROLS Setting Slow Cook (some models) The slow cook feature is best for cooking at lower temperatures for longer periods of time and works best for beef (ribs and brisket), pork roasts, and poultry dishes. Slow cook has two settings: Lo 225°F (108°C) and Hi 275°F (135°C). Both settings can be used with the following options: • Bake time • Bake time with delay start Slow cook tips: • Slow cooking meats may result in the outside of the meat turning dark; this is normal.
OVEN CONTROLS Cooking with Meat Probe IMPORTANT CAUTION Do not use kitchen utensils to pull on the probe cable or handles. Always insert and remove the probe using the provided handles, as shown in Figure 15, and always use a pot holder to protect hands from possible burns. Use the probe feature for best results when cooking foods such as roasts, hams, or poultry. For meats like poultry and roasts, using a probe to check internal temperature is the safest method to ensure properly cooked food.
OVEN CONTROLS To set probe: 1. Insert the probe into the food. Place prepared food on the desired oven rack position and slide into the oven. 2. Plug the connector end of the probe all the way into the probe receptacle while the oven is still cool. The receptacle is located on the upper left front oven cavity wall (See Figure 15). 3. When the probe is set, an acceptance tone will sound, the probe icon will illuminate, and the actual probe temperature appears in the display (See Figure 18).
OVEN CONTROLS Table 3: USDA recommended minimum internal cooking temperatures Restoring Factory Default Setting Beef, Pork, Veal, Lamb 160°F (71°C) Your appliance is programmed with default control settings. Over time, users may make changes to these settings. The oven temperature adjustments made with this feature will not change the self clean cycle temperature or the broil temperature.
OVEN CONTROLS Setting the Sabbath Feature (For use on the Jewish Sabbath and Holidays) The bake time and delay start keys are used to set the Sabbath feature. For further assistance, guidelines for proper usage, and a complete list of models with the Sabbath feature, please visit the web at http:\\www.stark.org. The Sabbath feature may only be used with the bake function. Once the oven is properly set using bake with the Sabbath feature active, the oven will remain on until cancelled.
OVEN CONTROLS Self-Cleaning Operation CAUTION • Do not line the oven walls, racks, bottom, or any other part of the oven with aluminum foil. Doing so will block heat distribution, produce poor baking results, and cause permanent damage to the oven interior (aluminum foil will melt to the interior surface of the oven). • The health of some birds is extremely sensitive to the fumes given off during the self-cleaning cycle of any oven. Move birds to another well-ventilated room.
OVEN CONTROLS Setting Self-Clean Cycle Duration The self clean key controls the self-cleaning feature. If you are planning to use the oven directly after a self-clean cycle remember to allow time for the oven to cool down and the oven door to unlock. This normally takes about one hour. A 3 hour self-clean cycle will actually take about 4 hours to complete. It is recommended to use a 2 hour self-clean cycle for light soils, a 3 hour cycle for average soils, and a 4 hour cycle for heavy soils.
CARE AND CLEANING Cleaning Various Parts of Your Wall Oven Before cleaning any part of the oven, be sure all controls are turned off and the oven is cool. Remove spills and any heavy soiling as soon as possible. Regular cleaning will reduce the number of major cleaning later. Surface Type Recommendation Aluminum and Vinyl Use hot, soapy water and a cloth. Dry with a clean cloth.
CARE AND CLEANING Removing and Replacing the Oven Door Oven door hinge locations CAUTION The door is heavy. For safe, temporary storage, lay the door flat with the inside of the door facing down. To remove oven door: 1. Open oven door completely horizontal with floor (See Figure 22). 2. Pull the door hinge locks on both left and right door hinges down from the oven frame completely towards the oven door (See Figure 23). A tool such as a small flat-blade screwdriver may be required. 3.
CARE AND CLEANING Replacing the oven light CAUTION Be sure the oven is unplugged and all parts are cool before replacing oven light. The interior oven lights are located at the rear of the oven cavity and are covered with a glass shield. The glass shield must be in place whenever the oven is in use (See Figure 26). Replacing the oven interior light bulb: 1. Turn electrical power off at the main source or unplug the appliance. 2. Remove interior oven light shield by turning a quarter turn. 3.
BEFORE YOU CALL Solutions to Common Baking Problems For best cooking results, heat the oven before baking cookies, breads, cakes, pies or pastries, etc. There is no need to preheat the oven for roasting meat or baking casseroles. The cooking times and temperatures needed to bake a product may vary slightly from your previously owned appliance. Baking Problems and Solutions Chart Baking Problems Causes Corrections Cookies and biscuits burn on the bottom.
BEFORE YOU CALL Solutions to Common Problems Before you call for service, review the following list. It may save you time and expense. Possible solutions are provided with the problem listed: Problem Solution Poor baking results Many factors effect baking results. Use proper oven rack position. Center food in the oven and space pans to allow air to circulate. Preheat oven to the set temperature before placing food in the oven. Try adjusting the recipe's recommended temperature or baking time.
BEFORE YOU CALL Oven smokes excessively when broiling. Incorrect setting. Follow broiling instructions in Setting Oven Controls section. Meat too close to the broil element. Reposition broil rack to provide proper clearance between the meat and broil element. Remove excess fat from meat. Cut remaining fatty edges to prevent curling, but do not cut into lean. Grease build up on oven surfaces. Regular cleaning is necessary when broiling frequently. Grease or food splatters will cause excessive smoking.
WARRANTY Your appliance is covered by a one year limited warranty. For one year from your original date of purchase, Electrolux will pay all costs for repairing or replacing any parts of this appliance that prove to be defective in materials or workmanship when such appliance is installed, used and maintained in accordance with the provided instructions. Exclusions This warranty does not cover the following: 1. 2. 3. 4. 5. 6. 7. 8. 9. 10. 11. 12. 13.