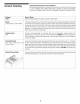
Warm & Serve Drawer mFRIGIDAIRE Owner's Guide CONTENTS Page Product Registration ........................... 2 Important Safety Instructions ......... 3-4 BeforeSetting Warmer Drawer Control .................................... 4 Setting Warmer Drawer Control .......... 5 General Cleaning .............................. 6-7 Avoid Service Checklist ....................... 8 Installation Instructions ................ 9-11 Warranty ............................................ 12 Espa_ol .......................
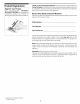
Product Registration Register Your Product The self-addressed PRODUCT REGISTRATION CARD should be filled in completely, signed and returned to Electrolux Home Products North America. Thank you for choosing this appliance. The information contained within this Owner's Guide will instruct you on how to properly install, operate and care for your appliance. Pleaseread through the information contained in your literature pack to learn more about your new appliance.
IMPORTANT SAFETY INSTRUCTIONS Read all instructions before using this appliance. Save these instructions for future reference. This guide contains important safety symbols and instructions. Please pay special attention to these symbols and follow all instructions given.
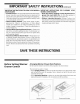
IMPORTANT SAFETY INSTRUCTIONS(continued) IMPORTANTINSTRUCTIONSFORUSINGYOURWARM& SERVEDRAWER IMPORTANT INSTRUCTIONS WARM & SERVE DRAWER FOR CLEANING YOUR • Protective Liners Donotusealuminumfoiltolinewarmer drawer. An) o[ne/use of projective liners or alumlndm fo may resul[ in poor 3erforma nce or damage to tne appliance Only use aluminum foil as recommended for baking if used as a cover placed on the food • Clean the drawer regularly to keep all parts free of grease that could catch fire.
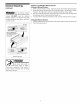
Setting Warmer Drawer Control To Operate the Warmer Drawer The purpose of the warmer drawer is to keep hot cooked foods at serving temperature. Always start with hot food. It is not recommended to heat cold food in the warmer draweR Usethe warmer drawer to keePhot fo0ds I hot such as: vegetables, gravies, meats, I All food placed in the warmer drawer should be covered with a lid or aluminum foil casseroles,biscuits and r0!ls, pastries and to maintain moisture and softness. Do not cover crisp foods.
General Cleaning Cleaning Various Parts of Your Appliance Before cleaning any part of the drawer, be sure control isturned OFFand the drawer is COOL. REMOVE SPILLOVERSAND HEAVY SOILING AS SOON AS POSSIBLE. REGULARCLEANINGSWILL REDUCETHE NUMBER OFMAJOR CLEANINGS LATER. Surfaces How to Clean Vinyl Use hot, soapy water and a cloth. Dry with a clean cloth. Control Knobs, Control Panel To remove control knob, turn to the OFFposition; grasp firmly and pull straight offthe shaft.
To Remove and Replace Warmer Drawer To Remove Warmer Drawer: General Cleaning (continued) 1, 2, _Turn the warmer drawer control knob to OFFbefore removing the drawer. DO NOT touch the warmer drawer element. The element may still be hot enough to cause burns, even if it is dark in color. 3, 4, Make sure the drawer is COOL, Open the drawer to the fully opened position.
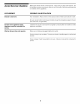
Avoid Service Checklist Beforeyou ca//forservice, review this list. It may save you time and expense. The list includes common occurrences that are not the result of defective workmanship or materials in this appliance. OCCURRENCE POSSIBLE Drawer is not level. Poor installation. Place a level on the cutout bottom. Make sure bottom is level. CAUSE/SOLUTION Be sure cutout bottom is strong and stable enough to adequately support drawer (and wall oven, if applicable), Cannot move appliance easily.
INSTALLATION AND SERVICE MUST BE PERFORMED BY A QUALIFIED INSTALLER. IMPORTANT: SAVE FOR LOCAL ELECTRICAL INSPECTOR'S USE. READ AND SAVE THESE INSTRUCTIONS FOR FUTURE REFERENCE. _'l"=V-q:t_lh_[=lFOR YOUR SAFETY: Do not store or use gasoline or other flammable vapors and liquids in the vicinity of this or any other appliance.
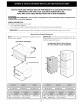
Important Warm 1, 1, 2, 3, 4, Notes to the Installer Read all instructions contained in these installation instructions before installing appliance, Remove all packing material from appliance before connecting the electrical supply. Observe all governing codes and ordinances. Be sure to leave these instructions with the consumer, Important Note Installation Go to step 2 if warmer drawer is installed under a 30" (76 cm) electric wall oven.
NOTE: For stand-alone installation, the base must be capable of supporting 100 Ibs. (45 kg). For a combination Warm & Serve Drawer and built-in oven installation, the base must be capable of supporting 250 Ibs. (114 kg), , 4, 5, Remove the 2 locking plates and 6 screws included in literature package. Mount the locking plates on each s_de of cabinet c pening a_ong ns_ae of cutout as ShOWn ,, _ gure 2 Center ROle mus[ De 7-5/8 (19.
WARMER DRAWER WARRANTY Your warmer drawer is protected by this warranty WARRANTY PERIOD THROUGH OUR AUTHORIZED SERVICERS, WE WILL: FULL ONE-YEAR WARRANTY One year from original purchase,date UMITED WARRANTY Time periods above Pdy all costs for Eepaidng or replacing any parts of this appliance which prove to be de_ctive in materials or workmanship¸ All of the provisions of the full warranties above and the exclusions lis[e.
Caj6n Calentador mFRIGIDAIRE Manual del Usuario Paginas English ...................................... 1-12 InscripciOndelproducto ................ 14 Instruccionesimportantes sobrelasegufmJad ..................... 15-16 Antesde ajustar elcontrol decajon_ ........................ 16 Reglajedelcontrol delcdj0ncaler tador ....................... 17 LimpP_zageneral........................ 18-19 Listapara evitarlasllamadas deservicb ..................................... 20 In_'uccionesde in_alacbn ............
Inscripcibn del producto Inscriba su producto Hay que iler}ar comDleEamer}[e Gracias por haber seleccionado este aparato electrodomestico.
INSTRUCCIONES IMPORTANTES SOBRE LA SEGURIDAD Lea todas las instrucciones antes de usar este aparato. Guarde estas instrucciones para consulta futura.
INSTRUCCIONES IMPORTANTES SOBRE LA SEGURIDAD INSTRUCCIONES IMPORTANTES SU CAJON CALENTADOR PARA EL use (continLta) INSTRUCCIONES IMPORTANTES PARA LIMPIEZA DE SU CAJON CALENTADOR LA • Revestimientos de proteccibn--No use hojas de aluminio • Limpie el cajbn calentador regularmente para mantener para proteger el aparato. Solamente use nojas ae a_um_n_o todas sus partes libres de grasa y evitar que se enciendan, come se recomtenaa eara cocer, para cubrir el alimento.
Reglaje del control del cajOn calentador Para operar el cajOn calentador El proposito del cajon calentador es mantener las comidas cocinadas calientes a una temperatura para servir.
Limpieza general Limpieza de diversas partes del aparato Antes de limpiar cualquier parte de su ca]on calentador, asegurese de que todos el control se encuentren en la posicion OFF (apagado) y el cajon caLentador este FRIO, QUITE LOS DERRAMESY TODA SUCIEDADTAN PRONTOCOMO SEA POSIBLE,LA LIMPIEZA FRECUENTE REDUCIRA LA NECESIDAD DE HACER NUMEROSAS LIMPIEZASA FONDO EN EL FUTURO, Superficies Cbmo limpiarlas Vinilo Use agua caliente jabonosa y un pano.
Limpieza general (contint_a) _Gire la perilla de control del cajon calentador hacia OFF antes de sacar el cajon, NO toque el elemento del ca]0n calentador, Es posible que el elemento este bastante caliente para causar quemaduras, a(m si no Io aparezca, Para quitar y reponer el cajOn calentador Para quitar el cajbn calentador: I, Aseg(_resede que el caj0n este FRIO, Abra el caj0n a la posici0n de abertura completa, 2, Localice los pestillos en cada lado del caj0n calentador, El pestillo izquierdo es vi
Lista para evitar las Ilamadas de servicio Antes de Ilamar al servicio, examine esta lista, Puede ahorrarle tiempo y dinero. En la lista se induyen incidentes comunes que no son el resultado de fabricaci0n o materiales defectuosos en el aparato electrodomestico, PROBLEMA POSIBLE CAUSA/SOLUCION El cajbn calentador no esta nivelada.
LA INSTALACION Y EL SERVICIO DEBEN SER EJECUTADOS POR UN INSTALADOR CALIFICADO, IMPORTANTE: GUARDE ESTAS INSTRUCCIONES PARA EL USO DEL INSPECTOR LOCAL DE ELECTRICIDAD, LEA Y GUARDE ESTAS INSTRUCCIONES PARA FUTURAS REFERENCIAS, PARA SU SEGURIDAD: No almacene cerca a este o a cualquier otro electrodom_stico, o use gasolina u otros vapores y liquidos combustibles INFORMACION GENERAL El cajOncalentador puede ser usado: • Como unidad independiente • En una combinaciOn entre el cajOncalentador y el homo de 3
Notas importantes para el instalador 1, Lea todas las instrueeiones de instalacion antes de instalar el electrodomestieo, 2, Retire todos los materialesde empaque del eleetrodomestico antes de conectar la fuente de energia, 3, Observe todos los c6digos y leyes del gobierno 4, Asegurese de dejarle estas instrucciones al consumidor, Nora importante Guarde Instalacibn ContinEze con el paso 2 si el cajon va a ser usar en combinacion con un homo de 30" (76 cm) integrado y montado por encima.
NOTA:Para la instalaci0n como unidad independiente, la base debe ser capaz de soportar 100 libras (45 kilos), Para la combinacion del Caj0n Calentador y el horno integrado, la base debe ser capaz de soportar 250 libras (114 Kg), 4, Deslice el cajon hacia dentro de la abertura de la abertura basra que el marco frontal del cajon este a ras contra el gabinete, Tenga cuidado de no pinchar el cable electrico, 5, Abra el cajon y asegure el encapsulado alas platinas de seguridad usando los dos tornillos niquelad
GARANTIA DEL CAJUN CALENTADOR Su cajdn calentador esta protegido por esta garantfa PEPJODO DE GARANTfA LA EMPRESA, A TRAVES DE SUS CENTROS DE SERVICIO TECNICO AUTOPJ ZADO: EL CONSUMIDOR ES RESPONSIBLEDE: GARANTiA COMPLETE POR UN AI_O Un aho a partir de la fucha original de cornpra Pagara todos los costos de reparation o reemplazo de piezas d,J este aparato que tengan defectos en Io_ materiales o en la mano de obra Usted debera cancelar los costos de las visitas de servicio t_nico que su d_crib,Jn en
Tiroir-r6chaud mFRIGIDAIRE Guide de l'utilisateur CONTENU Page English ...........................................1-12 Espa_ol ....................................... 13-24 Enregistrement de l'appareil .............. 26 Mesures de securite importantes ................................. 27-28 Avant le reglage de la commande du tiroir-rechaud ............. 28 Reglagede la commande du tiroir-rechaud ............................... 29 Nettoyage general ....................... 30-31 Liste de contr01eanti-panne .
Enregistrement I'appareil Enregistrez de Nous vous remercions d'avoir choisi cet appareiL Les informationscontenues dans ce guide de I'utilisateur vous indiqueront comment utiliser correctement votre appareil et comment en prendre soin, Veuillez life tous les renseignements contenus dans votre documentation pour mieux connaitre votre nouvel appareil, votre appareil LaCARTE D'ENREGISTREMENT _olt etre rempue avec soln, puls stgnee e[ retoumee a la compagnie Produits Electrolux Nord-Am@ucalns, Enregistrez
MESURES DE SI CURITI IMPORTANTES Lisez toutes les directives avant d'utiliser Conservez ces directives pour rd rence Ce guide contient des instructions et suivre les instructions donnees, II[l_Ce qui risquent d'entrainer dommages materiels, I'appareil. future.
MESURES DE SECURITE IMPORTANTEScsuite INSTRUCTIONS IMPORTANTES POUR L'UTILISATION DU TIROIR-RI_CHAUD • Rev_tements protecteurs: n'utilisez pas de papier d'aluminium pour recouvrir I'interieur du tiroir, Tout autre usage de recouvrement protecteur ou de papier d'aluminium peut causer une baisse de performance ou endommager l'appareil, Utilisez uniquement le papier d'aluminium tel que recommande pour la cuisson; il sert 8 recouvrir les aliments, • Ustensiles de cuisson en poterie: seuls certains types d'usten
R glage de la commande du tiroir-r chaud Pour faire fonctionner le tiroir-r_chaud Le tiroiFrechaud a pour fonction de conserver les aliments chauds a la temperature de service.
Nettoyage g n ral Nettoyage des composantes de rappareil Avant de nettoyer toute composante du tiroir-rechaud, assurez-vousque le bouton de commande est 8 la position OFF (ARRET)et que le tiroir est FROID,NETTOYER LA NOURRITURERENVERSEE ET LA SALETEEXCEDENTAIRELE PLUSRAPIDEMENT POSSIBLE,UN ENTRETIENREGULIER R_DUIT LA N_CESSITE D'EFFECTUERDES NETTOYAGESMAJEURS PLUS TARD, Surfaces Vinyle M_thodes de nettoyage Utilisez de I'eau chaude savonneuse et un chiffon, Sechez a l'aide d'un chiffon propre, Plastiqu
Nettoyage g( n( ral (suite) de commande (ARRET) avant Tournez le bouton du tiroir-rechaud 8 OFF de retirer le tiroir, Ne touchez pas a I'element du tiroirrechaud, L'element peut etre encore chaud et causer des br01ures meme s'il est de couleur foncee, Pour retirer et replacer le tiroir-r_chaud Pour enlever le tiroir-r_chaud: 1, Assurez-vous que le tiroir est froid, Ouvrez completement le tiroir, 2, Localisez les Ioquets des deux cotes du tiroir-rechaud, Le Ioquet du cote gauche est visible, Cependant
Liste de contr( le anti. Avent panne d'appeler le servicedlentretien, revisez cette liste, vous sauverez probablement du temps et de I'argent. La liste contient les incidents courants qui ne resultent pas de defectuosites darts le materiel ou de vice de fabrication de cet appareil, INCIDENT CAUSE POSSIBLE ET SOLUTION -"- --. Le tiroir-rechaud -- - - - -- - n'est pas a niveau.
L'INSTALLATION ET L'ENTRETIEN DOIVENT F'TRE EFFECTUI_S PAR UN INSTALLATEUR COMPI_TENT. IMPORTANT : CONSERVEZ CES INSTRUCTIONS POUR L'INSPECTEUR D'I_LECTRICITI_ LOCAL. LISEZ ET CONSERVEZ CES INSTRUCTIONS POUR RE_FItRENCES ULTI_RIEURES.
Notes importantes b I'installateur 1, Lisez toutes les instructions d'installation 8 I'installation de cet appareil, 2, Retirez tout le materiel d'emballage de brancher l'alimentation electrique, 3, Observez tousles reglements et codes 4, Assurez-vous de laisser ces instructions avant de proceder l'appareil avant de Installation d'un tiroir-r_chaud 1, Retirez les 2 attaches de fixation fixees avec 2 vis au haut du tiroir (voir Figure 1), Jetez ces 2 vis, Ces attaches ne sont requises que si le tiroir doi
NOTA:Pour Line installation autonome du tiroir-rechaud, la base du decoupage dolt pouvoir supporter un poids de 100 Ibs (45 kg), Pour un combine tiroir-rechaud et four encastre, la base dolt pouvoir supporter un poids de 250 Ibs (114 kg), 3, Retirez les 2 plaques de retenue et les 6 vis incluses dans l'enveloppe litterature, Montez les plaques de chaque cote de I'ouverture de I'armoire, a I'interieur du decoupage, tel qu'illustre a la Figure 2, Le trou central doit ¢tre a 7-5/ 8" (19,4 cm) de la partie inf
GARANTIE DU TIROIR-R CHAUD Votre tiroir-r chaud est prot g par cette garantie P_PJODE DE GARANTIE PAR L'ENTREMISE DE NOS PROPOSESA L'ENTRETIEN AUTORISES : RESPONSABIUT_ DU CLIENT : GARANTIE COMPLETE DE UN AN Un an a partir de la date d'achat Tousles flais de reparation ou de remplace_r_nt de route p_ece de cet apparel1 pr_entant des dafectuc_ites de mat_iaux ou de _i_tion Le coat des visites d'un repa_a_ur pour les iterr_ classes sous la liste RESPONSABIUT_S NORMALES DU CLIENT.