OWNER’S GUIDE PLHV36W7KC READ AND SAVE THESE INSTRUCTIONS Contents Product Registration .................................................................................... 2 Important Safety Instructions ..................................................................... 3 Installation ................................................................................................4-7 Use and Care ................................................................................................
Product Registration Register your Product The self-addressed P R O D U C T REGISTRATION CARD should be filled in completely, signed and returned to the Frigidaire Canada. Thank you for choosing this appliance. The information contained within this Owner’s Guide will instruct you on how to properly operate and care for your range hood. Please read through the information contained in your literature pack to learn more about your new appliance.
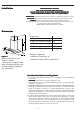
Important Safety Instructions READ AND SA VE THESE INSTRUCTIONS SAVE Take care when using cleaning agents or detergents. Suitable for use in household cooking area CAUTION - To reduce risk of fire and to properly exhaust air, be sure to duct air outside – Do not vent exhaust air into spaces within walls or ceilings or into attics, crawl spaces, or garages. CAUTION - For General Ventilating Use Only. Do Not Use To Exhaust Hazardous Or Explosive Materials And Vapors.
Installation FOR RESIDENTIAL USE ONLY NOT TO BE INSTALLED OVER GAS GRILLS PLEASE READ ENTIRE INSTRUCTIONS BEFORE PROCEEDING. INSTALLATION MUST COMPLY WITH ALL LOCAL CODES. IMPORTANT: Save these Instructions for the Local Electrical Inspector’s use. INSTALLER: Please leave these Instructions with this unit for the owner. OWNER: Please retain these instructions for future reference. Safety Warning: Turn off power circuit at the service entrance and lock out panel, before wiring this appliance.
Installation Preparation of mounting surface (Drywall) Tools required for installation Screw driver (flat head, pozidrive n°2 and torx 10) 1. Select a mounting height comfortable for the user and mark on wall behind cooktop. Allen spanner 4mm 2. Mark center line of cooktop and draw vertical line from bottom of hood to the ceiling. Electric drill with twist bit Ø 10 mm 3. Tape template, matching center-line and hood bottom as shown in Figure 2. 4.
Installation Appliance Installation: 11. Install transition on top of hood if removed for shipping. Figure 4. 1" 12. Hang hood on 2 mounting hooks through the rectangular cutouts on back of hood. Figure 5 13. Level the appliance, using a carpenters level across bottom of hood with leveling screws in mounting hooks or rectangular cutouts. Starting Collar Figure 4 14. Secure hood with 2 screws on top and 2 screws on bottom. See Figure 5. 15. Connect ducting (Figure 4).
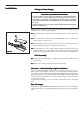
Installation Wiring to Power Supply WARNING! ELECTRICAL GROUNDING INSTRUCTIONS THIS APPLIANCE IS FITTED WITH AN ELECTRICAL JUNCTION BOX WITH 3 WIRES, ONE OF WHICH (GREEN/YELLOW) SERVES TO GROUND THE APPLIANCE. TO PROTECT YOU AGAINST ELECTRIC SHOCK, THE GREEN AND YELLOW WIRE MUST BE CONNECTED TO THE GROUNDING WIRE IN YOUR HOME ELECTRICAL SYSTEM, AND IT MUST UNDER NO CIRCUMSTANCES BE CUT OR REMOVED. Warning: Turn off power circuit at the service panel before wiring this unit.
READ THE INSTRUCTIONS CAREFULLY BEFORE USING THE HOOD. For satisfactory use of your hood, become familiar with the various functions of the hood as described below Use and Care Suction power 3 LED, this led is ON when suction power 3 is selected. Suction power 2 LED, this led is ON when suction power 2 is selected. Light OFF button Motor OFF button Light ON button ON button and motor suction power selection button 1, 2, 3, 1,.... Suction power 1 LED, this led is ON when suction power 1 is selected.
Hood Cleaning Be sure lights are cool before cleaning the hood. To Clean Filters • The metal grease filters will last forever. They are made of anodized aluminum • It is recommended that the filters be washed at least once a month; they can be washed by hand or in the dishwasher. • Drain water through edge holes and let each filter dry thoroughly before replacing it. To Remove The Metal Grease Filters • Turn blower and lights off. • Push each handle towards the center and pull downwards Figure 8.
RANGE HOOD WARRANTY Your range hood is protected by this warranty In the U.S.A., your appliance is warranted by Electrolux Home Products North America, a division of White Consolidated Industries, Inc. We authorize no person to change or add to any of our obligations under this warranty. Our obligations for service and parts under this warranty must be performed by us or an authorized Electrolux Home Products North America servicer. In Canada, your appliance is warranted by WCI Canada, Inc.