
user manual


18
USER PREFERENCES
SETTING CONTINUOUS BAKE OR 12
HOUR ENERGY SAVING
The TIMER pad controls the Continuous Bake or 12 Hour
Energy Saving features. The oven control has a factory
preset built-in 12 Hour Energy Saving feature that will
shut off the oven if the oven control is left on for more
than 12 hours. The oven can be programmed to override
this feature for Continuous Baking.
To set the control for Continuous Bake or 12 Hour
Energy Saving features
1. Press and hold TIMER for 6 seconds.
After 6 seconds "12hr" or "--h" will appear in the
display and the control will beep once.
2. Press or pad to switch between the 6 Hour
Energy Saving and continuous bake features.
Note: "12hr" in the display indicates the control is set for
the 12 Hour Energy Saving mode and "- -h" indicates
the control is set for the Continuous Bake feature.
3. Wait 4 seconds to accept the change (display will
return to time of day) or press CANCEL pad to reject
the change.
SETTING TEMPERATURE DISPLAY —
FAHRENHEIT OR CELSIUS:
The BROIL pad controls the Fahrenheit or Celsius
temperature display modes. The oven control can be
programmed to display temperatures in Fahrenheit or
Celsius. The oven has been preset at the factory to
display in Fahrenheit.
To change display from Fahrenheit to Celsius or
Celsius to Fahrenheit
1. Press BROIL pad and hold for 6 seconds. A beep
will sound, "---" will appear and "BROIL" will fl ash
in the display. After 6 seconds a beep will be heard
and "F" or "C" will appear in the display. If "F"
appears, the display is set to show temperatures in
Fahrenheit. If "C" appears, the display is set to show
temperatures in Celsius.
2. Press or pad to switch between Fahrenheit or
Celsius display modes. The display will show either
"F" or "C".
3. Wait 4 seconds to accept the change or press
CANCEL pad to reject the change.
SETTING THE CLOCK
The SET CLOCK pad is used to set the clock. The clock
may be set for 12 or 24 hour time of day operation.
The clock has been preset at the factory for the 12 hour
operation. When the range is fi rst plugged in, or when
the power supply to the range has been interrupted, the
timer in the display will fl ash.
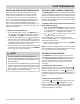
To set the clock (example below for 1:30)
1. Press SET CLOCK. "CLO" will appear in the display.
2. Press or pad to set the correct time of day.
Wait 5 seconds to accept the change or press the
CANCEL pad to reject the change. The new time of
day will appear in the display.
CHANGING BETWEEN 12 OR 24 HOUR
TIME OF DAY DISPLAY
1. Press and hold SET CLOCK for 6 seconds. "CLO" will
appear in the display.
2. CONTINUE holding the pad until "12h" or "24h"
appears in the display and the control beeps once.
3. Press or pad to switch between the 12 and 24
hour time of day display. The display will show either
"12h" or "24h".
4. Wait 5 seconds to accept the change or press
CANCEL pad to reject the change.
5. Reset the correct time as described in To set the
Clock above. Please note that if the 24 hour time
of day mode was chosen, the clock will now display
time from 0:00 through 23:59 hours.