Warm & Serve Drawer Welcome .................................. 2 Important Safety Instructions ... 3-4 Before Setting Control ..................................... 4 Setting Control ........................ 5 Care & Cleaning ...................... 6 Before You Call Solutions to Common Problems .................................................. 7 Warranty .................................. 8 318201004 (0406) Rev.
Important Safety Instructions Read all instructions before using this appliance. Save these instructions for future reference. This manual contains important safety symbols and instructions. Please pay attention to these symbols and follow all instructions given. This symbol will help alert you to situations that may cause serious bodily harm, death or property damage. This symbol will help alert you to situations that may cause bodily injury or property damage.
Important Safety Instructions moved while hot, use extreme caution. Use potholders and grasp the rack with both hands to reposition. Do not let potholders contact the hot element or interior of the warmer drawer. Remove all utensils from the rack before removing rack. Never use your appliance for warming or heating the room. IMPORTANT INSTRUCTIONS FOR USING YOUR WARM & SERVE DRAWER • Protective Liners—Do not use aluminum foil to line warmer drawer.
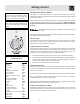
Setting Control Use the warmer drawer to keep hot foods hot such as: vegetables, gravies, meats, casseroles, biscuits and rolls, pastries and heated dinner plates. The warmer drawer is equipped with a catch which may require a small amount of force when opening and closing the drawer. To Operate the Warmer Drawer The purpose of the warmer drawer is to keep hot cooked foods at serving temperature. Always start with hot food. It is not recommended to heat cold food in the warmer drawer.
Care & Cleaning Surfaces Vinyl How to Clean Use hot, soapy water and a cloth. Dry with a clean cloth. Plastic Control Knobs, Control Panel To remove control knob, turn to the OFF position; grasp firmly and pull straight off the shaft. Clean with a cloth soaked in soapy water. Rinse with a clean water and a dishcloth. Be sure to squeeze excess water from the cloth before wiping the panel; especially when wiping around the controls. Excess water in or around the controls may cause damage to the appliance.
Before you call Solutions to Common Problems OCCURRENCE POSSIBLE CAUSE/SOLUTION Drawer is not level. Poor installation. Place a level on the cutout bottom. Make sure bottom is level. Be sure cutout bottom is strong and stable enough to adequately support drawer (and wall oven, if applicable). Cannot move appliance easily. Appliance must be accessible for service. Cabinets not square or are built in too tightly. Contact builder or installer to make appliance accessible. Warmer drawer does not operate.
2
Instrucciones Importantes de seguridad Lea todas las instrucciones antes de usar este aparato. Guarde estas instrucciones para consulta futura. Este manual contiene símbolos e instrucciones importantes sobre la seguridad. Enseguida, se da una breve explicación sobre el uso de estos símbolos. Por favor preste atención especial a estos símbolos y siga todas las instrucciones. Esta es una explicación breve del uso de estos símbolos.
Instrucciones Importantes de seguridad éste. Saque todos los utensilios de la parrilla antes de retirarla. Nunca use su aparato para mantener un cuarto caliente ni para calentarlo. INSTRUCCIONES IMPORTANTES PARA EL USO SU CAJÓN CALENTADOR INSTRUCCIONES IMPORTANTES PARA LA LIMPIEZA DE SU CAJÓN CALENTADOR • Revestimientos de protección—No use hojas de aluminio para proteger el aparato. Solamente use hojas de aluminio como se recomienda para cocer, para cubrir el alimento.
Reglaje del control Use el cajón calentador para mantener calientes las comidas tales como: los vegetales, las salsas, las carnes, guisados, bisquets y panecillos, bollos y platos de comida. El cajón calentador está equipado con un picaporte que puede requerer un esfuerzo extra al abrir y cerrar el cajón. Para operar el cajón calentador El propósito del cajón calentador es mantener las comidas cocinadas calientes a una temperatura para servir. Siempre comience con comida caliente.
Limpieza general Superficies Cómo limpiarlas Vinilo Use agua caliente jabonosa y un paño. Seque con un paño limpio. Plástico Perilla de control, panel de control Para quitar las perillas de control, ponga todos el control en OFF ; quítelas tirando de cada una directamente hacia afuera de la espiga. Limpie usando agua caliente jabonosa y un paño. Enjuague con agua limpia y un paño.
Antes de llamar Soluciones de Problemas Comunes PROBLEMA CAUSA POSIBLE/SOLUCION El cajón calentador no está nivelada. Mala instalación. Ponga un nivel en la base de la abertura. Asegúrese de que la base está nivelada. Asegúrese de que la base de la abertura es bastante fuerte y estable para soportar el cajón calentador (y un horno entegrado, si hay uno). No se puede mover el aparato fácilmente. Debe tenerse acceso al cajón calentador para darle servicio.
GARANTIA LIMITADA Su cajón calentador está protegido por esta garantía PERIODO DE GARANTÍA LA EMPREZA, A TRAVÉS DE SUS CENTROS DE SERVICIO TÉCNICO AUTORIZADO EL CONSUMIDOR ES RESPONSIBLE DE: GARANTÍA COMPLETA POR UN AÑO Un año a partir de la fecha original de compra. Pagará todos los costos de reparación o reemplaco de piezas Usted deberá cancelar los costos de las visitas de servicio de este aparato que tengan defectos en los materiales o en técnico que se describen en la sección la mano de obra.
Tiroir-réchaud Bienvenue ............................... 2 Mesures de sécurité importantes .......................... 3-4 Avant le réglage de la commande ..................... 4 Réglage de la commande ...... 5 Entretien et nettoyage ............ 6 Avant de faire appel au service après-vente Solutions aux problèmes communs .................................................. 7 Garantie ................................... 8 318201004 (0406) Rev.
Bienvenue & Félicitations Questions? 1-800-944-9044 (Etas-Unis) 1-866-294-9911 (Canada) S'il vous plaît veuillez apposer içi le reçu de vente pour reférence future Félicitation pour l’achat de votre nouvel appareil! Chez Electrolux Home Products, Nous sommes très fières de nos produits et complètement dévoué a vous offrir le meilleur service possible. Votre satisfaction est notre première priorité. Nous savon que vous allez apprécier votre nouvel appareil et Merci D’avoir choisi l’un de nos produits.
Mesures de sécurité importantes Lisez toutes les directives avant d’utiliser l’appareil. Conservez ces directives pour référence future. Ce guide contient des instructions et symboles de sécurité importants. Veuillez faire particulièrement attention à ces symboles et suivre les instructions données. Voici une brève explication de ces symboles. Ce symbole vous prévient des situations qui risquent d'entraîner de graves blessures, la mort ou des dommages matériels.
Mesures de sécurité importantes l'intérieur du tiroir-réchaud. Enlevez tous les ustensiles déposés sur la grille avant de la déplacer. INSTRUCTIONS DE NETTOYAGE IMPORTANTES • Nettoyez régulièrement le tiroir pour que toutes ses pièces soient libres de graisse risquant de s'enflammer. Maintenez propres les filtres à graisse et les hottes d'évacuation propres. Ne laissez pas la graisse s'y accumuler. Les dépôts de graisse dans le ventilateur pourraient s'enflammer.
Réglage de la commande du tiroir-réchaud Utilisez le tiroir-réchaud pour garder les aliments chauds comme : les légumes, sauces, viandes, casseroles, biscuits et petits pains, pâtisseries et assiettes à dîner chaudes. Le tiroir-réchaud est equipé d'un loquet qui peut exiger assez d'effort pour ouvrir et fermer le tiroir. Pour faire fonctionner le tiroir-réchaud Le tiroir-réchaud a pour fonction de conserver les aliments chauds à la température de service. Commencez toujours avec des mets chauds.
Nettoyage général Surfaces Vinyle Méthodes de nettoyage Utilisez de l’eau chaude savonneuse et un chiffon. Séchez à l’aide d’un chiffon propre. Plastique Bouton de commande, panneau de commande Tournez le bouton de commande à OFF (ARRÊT) avant de le retirer. Serrez-le fermement et tirez-le tout droit hors de l'axe. Nettoyez en suivant les directives qui figurent ci-dessus. Rincez à l’eau claire à l’aide d’un chiffon.
Avant de faire appel au service après-vente Solutions aux problèmes communs INCIDENT CAUSE POSSIBLE ET SOLUTION Le tiroir-réchaud n’est pas à niveau. Mauvaise installation. Déposez un niveau à bulle sur le plancher du découpage du tiroir-réchaud. Vérifiez si le fond du découpage est de niveau. Assurez-vous que le plancher du découpage est solide et capable de supporter adéquatement le tiroir-réchaud (en plus du four encastré si applicable). On ne peut pas déplacer l’appareil facilement.
GARANTIE LIMITEE Votre tiroir-réchaud est protégé par cette garantie PÉRIODE DE GARANTIE PAR L'ENTREMISE DE NOS PRÉPOSÉS À L'ENTRENTIEN AUTORISÉS: RESPOSABILITÉ DU CLIENT GARANTIE COMPLÈTE DE UN ANS Un an à partir de la date d'achat. tout les frais de réparation ou de remplacement de toute pièce Le coût des visites d'un réparateur pour des items de cet appareil présentant des défectuosités de matériaux ou classés sous la liste RESPONSABILITÉS NORMALES de fabrication. DU CLIENT.