Owner’s Manual BL00004964-203 EN
Introduction Thank you for your purchase of this product. Be sure that you have read this manual and understood its contents before using the camera. Keep the manual where it will be read by all who use the product. For the Latest Information The latest versions of the manuals are available from: http://fujifilm-dsc.com/en/manual/ The site can be accessed not only from your computer but also from smartphones and tablets. It also contains information on the software license.
P Chapter Index Menu List 1 Before You Begin iv 1 2 First Steps 25 3 Basic Photography and Playback 43 4 Movie Recording and Playback 49 5 Taking Photographs 55 6 The Shooting Menus 87 7 Playback and the Playback Menu 129 8 The Setup Menus 155 9 Shortcuts 191 10 Peripherals and Optional Accessories 203 11 Connections 217 12 Technical Notes 231 iii
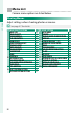
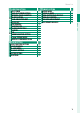
Menu List Camera menu options are listed below. Menu List Shooting Menus Adjust settings when shooting photos or movies. N See page 87 for details.
Menu List P B MOVIE SETTING 111 112 112 114 114 115 116 117 118 118 119 121 123 123 MOVIE MODE MOVIE AF MODE HDMI OUTPUT INFO DISPLAY HDMI REC CONTROL MIC LEVEL ADJUSTMENT MIC/REMOTE RELEASE P 127 127 127 128 128 128 P 124 124 125 125 126 126 v Menu List A SHOOTING SETTING SELF-TIMER SAVE SELF-TIMER SETTING INTERVAL TIMER SHOOTING BKT SETTING 1⁄2 AE FILM SIMULATION BKT FOCUS BKT PHOTOMETRY SHUTTER TYPE FLICKER REDUCTION IS MODE 2⁄2 ISO MOUNT ADAPTER SETTING 35mm FORMAT MODE WIRELESS COMMUNICATION
The Playback Menu Adjust playback settings. N See page 135 for details.
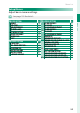
Menu List Setup Menus Adjust basic camera settings. N See page 155 for details. P D SCREEN SETTING P 156 EVF BRIGHTNESS 162 157 EVF COLOR 162 157 EVF COLOR ADJUSTMENT 162 163 158 1⁄3 LCD BRIGHTNESS LCD COLOR 163 158 LCD COLOR ADJUSTMENT 163 159 IMAGE DISP. 164 159 AUTOROTATE DISPLAYS 164 159 PREVIEW EXP./WB IN MANUAL MODE 165 P NATURAL LIVE VIEW 165 160 FRAMING GUIDELINE 166 160 PB 167 160 2⁄3 AUTOROTATE FOCUS SCALE UNITS 167 161 DISP.
Menu List Menu List D BUTTON/DIAL SETTING FOCUS LEVER SETTING EDIT/SAVE QUICK MENU FUNCTION (Fn) SETTING DIAL SETTING 1⁄2 COMMAND SHUTTER AF SHUTTER AE SHOOT WITHOUT LENS SHOOT WITHOUT CARD FOCUS RING MODE 2⁄2 AE/AF-LOCK TOUCH SCREEN SETTING LOCK D POWER MANAGEMENT AUTO POWER OFF SHOOTING STAND BY MODE AUTO POWER SAVE viii P D SAVE DATA SETTING 172 173 174 176 177 177 177 178 178 178 179 179 P 180 180 181 P FRAME NO.
P Table of Contents Introduction ....................................................................................................ii For the Latest Information ................................................................................... ii Menu List .........................................................................................................iv Shooting Menus ........................................................................................................iv The Playback Menu ....
Touch Screen Mode ................................................................................... 21 Shooting Touch Controls ................................................................................... 21 Playback Touch Controls .................................................................................... 24 2 First Steps 25 3 Basic Photography and Playback 43 4 Movie Recording and Playback 49 5 Taking Photographs 55 Attaching the Strap ............................................
Table of Contents Autofocus ...................................................................................................... 64 Focus Mode................................................................................................................ 65 Autofocus Options (AF Mode) ........................................................................ 67 Focus-Point Selection .......................................................................................... 69 Manual Focus ..................
HIGHLIGHT TONE .................................................................................................... 96 SHADOW TONE ........................................................................................................ 96 COLOR............................................................................................................................ 96 SHARPNESS.................................................................................................................
Table of Contents 7 Playback and the Playback Menu 129 The Playback Display...............................................................................130 The DISP/BACK Button ..................................................................................... 131 Viewing Pictures .......................................................................................133 Playback Zoom......................................................................................................
The Playback Menu..................................................................................135 SWITCH SLOT .......................................................................................................... 135 RAW CONVERSION .............................................................................................. 136 ERASE ..........................................................................................................................
Table of Contents xv 1 Introduction SHUTTER VOLUME............................................................................................... 161 SHUTTER SOUND ................................................................................................. 161 PLAYBACK VOLUME ............................................................................................ 161 SCREEN SETTING.......................................................................................162 EVF BRIGHTNESS...........
POWER MANAGEMENT ..........................................................................180 AUTO POWER OFF ............................................................................................... 180 SHOOTING STAND BY MODE ........................................................................ 180 AUTO POWER SAVE............................................................................................. 181 SAVE DATA SETTING .......................................................................
Table of Contents 10Peripherals and Optional Accessories 203 11Connections 217 HDMI Output..............................................................................................218 Connecting to HDMI Devices ...................................................................... 218 Shooting.................................................................................................................... 219 Playback ...............................................................................
Table of Contents 12Technical Notes 1 231 Introduction Accessories from Fujifilm .......................................................................232 Software from Fujifilm ............................................................................234 FUJIFILM Camera Remote .............................................................................. 234 MyFinePix Studio.................................................................................................. 234 RAW FILE CONVERTER EX .
Supplied Accessories The following are included with the camera: • NP-T125 rechargeable battery • BC-T125 battery charger • Plug adapter • Body cap • Metal strap clips (× 2) • Clip attaching tool • Protective covers (× 2) • Shoulder strap • Cable protector • Hot shoe cover (comes attached to hot shoe) • Sync terminal cap (comes attached to camera) • Owner’s Manual (this manual) 1 Introduction N • The plug adapter supplied with the camera varies with the country or region of purchase; be sure to use the a
About This Manual This manual contains instructions for your FUJIFILM GFX 50R digital camera. Be sure you have read and understood its contents before proceeding. 1 Introduction Symbols and Conventions The following symbols are used in this manual: O Information that should be read to prevent damage to the product. Additional information that may be helpful when using the N product. P Pages on which related information may be found. Menus and other text in the displays are shown in bold.
Before You Begin 1
Parts of the Camera 1 Before You Begin A ON/OFF switch ................................................. 37 B Shutter button................................................. 46 C Exposure compensation dial ..................6, 79 D Fn1 button......................................................196 E Dial lock release .................................................5 F Shutter speed dial .................................................. 5, 56, 58, 61, 62 G Hot shoe .....................................
Parts of the Camera 1 Before You Begin V Electronic viewfinder (EVF)...............10, 14, 15 W Eye sensor ......................................................... 14 X VIEW MODE button......................................... 14 Y b (delete) button .......................................... 48 Z Focus mode selector ...................................... 65 a Fn3 button...............................................82, 196 b Rear command dial....................... 7, 133, 176 c Fn4 button................
1 Before You Begin w Battery chamber ............................................ 32 y USB connector (Type-C) .............................223 x Battery latch .................................................... 33 z 15 V DC-IN connector.................................... 31 The Cable Protector A The cable protector prevents accidental disconnection of the USB cable or AC adapter. Attach the protector as shown and tighten the lock screw.
Parts of the Camera The Serial Number Plate Do not remove the serial number plate, which provides the FCC ID, KC mark, serial number, and other important information. 1 The Focus Stick (Focus Lever) Tilt or press the focus stick to select the focus area. The focus stick can also be used to navigate the menus. The Shutter Speed Dial Press the dial lock release to release the dial before rotating it to the desired setting. Press the release again to lock the dial in place.
The Drive Button Pressing the drive button displays the following drive mode options.
Parts of the Camera The Command Dials Rotate or press the command dials to: Front command dial Rear command dial 1 through menus the desired combination of shutter speed and aperture (program shift) • Adjust aperture 1, 2 4 • Adjust exposure compensation 1 Adjust sensitivity • • View other pictures during playback • Choose Rotate — Press • Highlight menu items • Choose the desired combina- tion of shutter speed and aperture (program shift) • Choose a shutter speed 1 • Adjust settings in the quick me
The Indicator Lamp Camera status is shown by the indicator lamp. 1 Before You Begin Indicator lamp Glows green Blinks green Blinks green and orange Glows orange Blinks orange Blinks red Camera status Focus locked. Focus or slow shutter speed warning. Pictures can be taken. • Camera on: Recording pictures. Additional pictures can be taken. • Camera off: Uploading pictures to a smartphone or tablet. * Recording pictures. No additional pictures can be taken at this time.
Parts of the Camera The LCD Monitor The LCD monitor can be tilted for easier viewing, but be careful not to touch the wires or trap fingers or other objects behind the monitor. Touching the wires could cause camera malfunction.
Camera Displays This section lists the indicators that may be displayed during shooting. O For illustrative purposes, displays are shown with all indicators lit. The Electronic Viewfinder 1 A B C D EF GHIJKLM N O Before You Begin t s r q p o n P Q R S 01/01/2018 10:00 AM U 5 4 3 2 1 0 -1 -2 -3 -4 -5 V m W l 1.
Camera Displays X Histogram......................................................... 19 Y Battery level ..................................................... 38 Z Sensitivity.......................................................... 76 a Exposure compensation .............................. 79 b Aperture ...............................................57, 61, 62 c Shutter speed......................................57, 58, 62 d TTL lock ........................................ 125, 175, 199 e AE lock ........
The LCD Monitor A B C D E FG H s 1 I J K LM 01/01/2018 10:00 AM N Before You Begin r q p O o P Q n l R S T k U m j V e d i h g f 12 cb a Z Y X W
Camera Displays X Sensitivity.......................................................... 76 Y Exposure compensation .............................. 79 Z Aperture ...............................................57, 61, 62 a Shutter speed......................................57, 58, 62 b TTL lock ........................................ 125, 175, 199 c AE lock ......................................................82, 178 d Metering............................................................ 78 e Shooting mode .
Choosing a Display Mode Press the VIEW MODE button to cycle through the following display modes. 1 Before You Begin Option E EYE SENSOR EVF ONLY LCD ONLY EVF ONLY + E E EYE SENSOR + LCD IMAGE DISP. Description Putting your eye to the viewfinder turns the viewfinder on and the LCD monitor off ; taking your eye away turns the viewfinder off and LCD monitor on. Viewfinder on, LCD monitor off. LCD monitor on, viewfinder off.
Camera Displays Adjusting Display Brightness The brightness and hue of the viewfinder and LCD monitor can be adjusted using the items in the D SCREEN SET-UP menu. Choose EVF BRIGHTNESS or EVF COLOR to adjust viewfinder brightness or hue, LCD BRIGHTNESS or LCD COLOR to do the same for the LCD monitor. To focus the viewfinder: A Lift the diopter adjustment control. B Rotate the control to adjust viewfinder focus. C Return the control to its original position and lock it in place.
The DISP/BACK Button The DISP/BACK button controls the display of indicators in the viewfinder and LCD monitor. N Indicators for the EVF and LCD must be selected separately. To choose the EVF display, place your eye to the viewfinder while using the DISP/BACK button.
Camera Displays LCD Monitor Standard indicators No indicators 1 Before You Begin Dual display (manual focus mode only) Info display The Dual Display The dual display consists of a large full-frame window and a smaller close-up of the focus area.
Customizing the Standard Display To choose the items shown in the standard indicator display: 1 Display standard indicators. Use the DISP/BACK button to display standard indicators. 2 Select DISP. CUSTOM SETTING. Select D SCREEN SET-UP > DISP. CUSTOM SETTING in the setup menu. 3 Choose items. Highlight items and press MENU/OK to select or deselect.
Camera Displays Virtual Horizon Selecting ELECTRONIC LEVEL displays a virtual horizon. The camera is level when the two lines overlap. Note that the virtual horizon may not be displayed if the camera lens is pointed up or down. For a 3D display (shown), press the function button to which ELECTRONIC LEVEL is assigned (P 174, 198). Pitch Roll Histograms Histograms show the distribution of tones in the image. Brightness is shown by the horizontal axis, the number of pixels by the vertical axis.
Using the Menus To display the menus, press MENU/OK. Shooting Playback PLAY BACK MENU IMAGE QUALITY SETTING IMAGE QUALITY SWITCH SLOT RAW CONVERSION IMAGE SIZE RAW RECORDING ERASE 1 FILM SIMULATION SIMULTANEOUS DELETE(RAW SLOT1/JPG SLOT2) GRAIN EFFECT COLOR CHROME EFFECT CROP RESIZE Before You Begin DYNAMIC RANGE WHITE BALANCE PROTECT IMAGE ROTATE EXIT EXIT To navigate the menus: 1 Press MENU/OK to display the menus.
Touch Screen Mode The LCD monitor also functions as a touch screen. TOUCH SCREEN SETTINGS ON TOUCH SCREEN ON/OFF EVF TOUCH SCREENOFF AREA SETTINGS EVF The LCD monitor can be used to select the focus area while pictures are being framed in the electronic viewfinder (EVF). Use D BUTTON/DIAL SETTING > TOUCH SCREEN SETTING > EVF TOUCH SCREEN AREA SETTINGS to choose the area of the monitor employed for touch controls.
LCD Monitor Touch controls can be used to choose the focus area. The operation performed can be selected by tapping the touch screen mode indicator in the display to cycle through the following options. 1 Before You Begin Mode Description • In focus mode S (AF-S), the camera focuses when you tap your AF AF OFF subject in the display. Focus locks at the current distance until you tap the AF OFF icon. • In focus mode C (AF-C), the camera initiates focus when you tap your subject in the display.
Touch Screen Mode Touch Function Functions can be assigned to the following flick gestures in much the same way as function buttons (P 196): • Flick up: T-Fn1 • Flick left: T-Fn2 • Flick right: T-Fn3 • Flick down: T-Fn4 Before You Begin N In some cases, touch-function flick ges- 1 MIC LEVEL ADJUSTMENT tures display a menu; tap to select the desired option.
Touch Screen Mode Playback Touch Controls When ON is selected for D BUTTON/DIAL SETTING > TOUCH SCREEN SETTING > TOUCH SCREEN ON/OFF, touch controls can be used for the following playback operations: • Swipe: Swipe a finger across the display to 1 view other images. Before You Begin • Pinch-out: Place two fingers on the display and spread them apart to zoom in. • Pinch-in: Place two fingers on the display and slide them together to zoom out.
First Steps 25
Attaching the Strap Attach the strap clips to the camera and then attach the strap. 1 Attach a protective cover. Place a protective cover over the eyelet as shown, with the black side of the cover toward the camera. 2 Open a strap clip. Use the clip attaching tool (A) to open a strap clip (B). 2 First Steps Protective cover (A) (B) 3 26 Slide the clip onto the tool. Slide the clip onto the tool so that it hooks over the projection.
Attaching the Strap 4 Place the strap clip on an eyelet. Hook the strap eyelet in the clip opening. Remove the tool, using the other hand to keep the clip in place. N Keep the tool in a safe place, as you will need it to open the strap clips when removing the strap. 2 Pass the clip through the eyelet. Rotate the clip fully through the eyelet until it clicks closed. 6 Fasten the strap. Insert the strap through a protective cover and strap clip and fasten the buckle as shown.
Attaching a Lens The camera can be used with lenses for the FUJIFILM G-mount. 2 Remove the body cap from the camera and the rear cap from the lens. Place the lens on mount, keeping the marks on the lens and camera aligned (A), and then rotate the lens until it clicks into place (B). First Steps O • When attaching lenses, ensure that dust or other foreign matter does not enter the camera. • Be careful not to touch the camera’s internal parts. • Rotate the lens until it clicks securely into place.
Charging the Battery The battery is not charged at shipment. Before use, charge the battery in the supplied battery charger. O • An NP-T125 rechargeable battery is supplied with the camera. • Charging takes about 140 minutes. 1 Connect the plug adapter. O The plug adapter supplied with the camera varies with the coun- try or region of purchase; use the adapter appropriate to your country or region as described in the enclosed notice. Place the battery in the charger.
The Charging Indicator The charging indicator shows battery charge status as follows: On Battery status Battery not inserted. Battery fully charged. Battery charging. Blinks Battery fault. Charging indicator Off 2 Action Insert the battery. Remove the battery. — Unplug the charger and remove the battery. First Steps O • The supplied charger is compatible with power supplies of 100 to 240 volts (a plug adapter may be needed for overseas use). • Do not affix labels or other objects to the battery.
Charging the Battery Charging via AC Adapter The battery inserted in the camera will also charge when the camera is powered by an optional AC-15V AC adapter. Charging takes about 120 minutes. 31 2 First Steps Battery charge status is shown by battery status icons when the camera is on (playback mode) and by the indicator lamp when the camera is off.
Inserting the Battery After charging the battery, insert the battery in the camera as described below. 1 Open the battery-chamber cover. Slide the battery-chamber latch as shown and open the battery-chamber cover. O • Do not open the battery-chamber 2 First Steps cover when the camera is on. Failure to observe this precaution could damage image files or memory cards. • Do not use excessive force when handling the battery-chamber cover. 2 Insert the battery as shown.
Inserting the Battery 3 Close the battery-chamber cover. Close and latch the cover. O If the cover does not close, check that the battery is in the correct orientation. Do not attempt to force the cover shut. Removing the Battery Before removing the battery, turn the camera off and open the battery-chamber cover. First Steps To remove the battery, press the battery latch to the side, and slide the battery out of the camera as shown.
Inserting Memory Cards Pictures are stored on memory cards (sold separately). N The camera can be used with two cards, one in each of its two slots. 1 Open the memory card slot cover. Unlatch and open the cover. 2 First Steps O Do not open the memory card-slot cover when the camera is on. Failure to observe this precaution could damage image files or memory cards. 2 Insert the memory card. Holding the card in the orientation shown, slide it in until it clicks into place at the back of the slot.
Inserting Memory Cards Removing Memory Cards Before removing memory cards, turn the camera off and open the memory card slot cover. Press and release the card to eject it part way (to prevent the card falling from the slot, press the center of the card and release it slowly, without removing your finger from the card). The card can then be removed by hand. 2 Option Description Display The card in the second slot is used only when the card in the first slot is full.
Inserting Memory Cards 2 Compatible Memory Cards • Fujifilm and SanDisk SD, SDHC, and SDXC memory cards have been approved for use in the camera. • UHS-II cards are recommended for use in this camera. • Use a UHS Speed Class 1 or better memory card when recording movies. • A list of supported memory cards is available on the Fujifilm website. For details, visit: http://www.fujifilm.com/support/digital_cameras/compatibility/.
Turning the Camera On and Off Use the ON/OFF switch to turn the camera on and off. Slide the switch to ON to turn the camera on, or to OFF to turn the camera off. O Fingerprints and other marks on the lens or viewfinder can affect picN • Press the a button to start playback. • Press the shutter button halfway to return to shooting mode. • The camera will turn off automatically if no operations are performed for the length of time selected for D POWER MANAGEMENT > AUTO POWER OFF.
Checking the Battery Level After turning the camera on, check the battery level in the display. Battery level is shown as follows: 2 First Steps Indicator e f g h i i (red) j (blinks red) 38 Description Battery partially discharged. Battery about 80% full. Battery about 60% full. Battery about 40% full. Battery about 20% full. Low battery. Charge as soon as possible. Battery exhausted. Turn camera off and recharge battery.
Basic Setup When you turn the camera on for the first time, you can choose a language and set the camera clock. At default settings, you can also pair the camera with a smartphone or tablet so that you can later synchronize the clocks or download pictures. Follow the steps below when turning the camera on for the first time. N If you intend to pair the camera with a smartphone or tablet, install 1 Turn the camera on. A language-selection dialog will be displayed. 2 Choose a language.
4 Check the time. When pairing is complete, you will be prompted to set the camera clock to the time reported by the smartphone or tablet. Check that the time is correct. PAIRING REGISTRATION PAIRING COMPLETE 1/ 1/2018 12:00 PM SET DATE/TIME FROM SMARTPHONE? SET N 2 5 CANCEL To set the clock manually, press DISP/BACK (P 41). First Steps Synchronize the camera settings with the settings configured on your smartphone or tablet. SMARTPHONE SYNC.
Basic Setup Choosing a Different Language To change the language: 1 Display language options. Select D USER SETTING > Qa. 2 Choose a language. Highlight the desired option and press MENU/OK. Changing the Time and Date To set the camera clock: 2 First Steps 1 Display DATE/TIME options. Select D USER SETTING > DATE/TIME. 2 Set the clock. Press the focus stick (focus lever) left or right to highlight the year, month, day, hour, or minute and press up or down to change.
MEMO 42
Basic Photography and Playback 43
Taking Photographs (Mode P) This section describes how to take pictures using program AE (mode P). See pages 56–63 for information on S, A, and M modes. 1 Adjust settings for program AE. 3 Basic Photography and Playback A Aperture B Shutter speed C Focus mode Setting A (auto) A (auto) S (single AF) P 56 56 65 N To use the shutter speed dial, press the dial lock release and rotate the dial to the desired setting. 2 44 Check the shooting mode. Confirm that P appears in the display.
Taking Photographs (Mode P) 3 Ready the camera. • Hold the camera steady with both hands and brace your elbows against your sides. Shaking or unsteady hands can blur your shots. • To prevent pictures that are out of focus or too dark (underexposed), keep your fingers and other objects away from the lens and AF-assist illuminator. Basic Photography and Playback 4 3 Frame the picture. Lenses with Zoom Rings Use the zoom ring to frame the picture in the display.
Taking Photographs (Mode P) 5 Focus. Press the shutter button halfway to focus. Focus indicator Focus frame • If the camera is able to focus, it will beep twice and focus frame and focus indicator will glow green. • If the camera is unable to focus, the focus frame will turn red, s 3 will be displayed, and the focus indicator will blink white. Basic Photography and Playback N • If the subject is poorly lit, the AF-assist illuminator may light to assist the focus operation.
a Viewing Pictures Pictures can be viewed in the viewfinder or LCD monitor. To view pictures full frame, press a. 100-0001 N Pictures taken using other cameras are marked with a m (“gift image”) icon to warn that they may not display correctly and that playback zoom may not be available. Two Memory Cards If two memory cards are inserted, you can press and hold the a button to choose a card for playback. You can also select a card using the C PLAY BACK MENU > SWITCH SLOT option.
b Deleting Pictures Use the b button to delete pictures. O Deleted pictures cannot be recovered. Protect important pictures or copy them to a computer or other storage device before proceeding. 1 With a picture displayed full frame, press the b button and select FRAME. ERASE FRAME SELECTED FRAMES ALL FRAMES 3 Basic Photography and Playback 2 Press the focus stick (focus lever) left or right to scroll through pictures and press MENU/OK to delete (a confirmation dialog is not displayed).
Movie Recording and Playback 49
F Recording Movies This section describes how to film movies in auto mode. 1 2 Press the drive button and select F MOVIE. Adjust settings for program AE. 4 Movie Recording and Playback A Aperture B Shutter speed C Focus mode Setting A (auto) A (auto) S (single AF) P 56 56 65 N To use the shutter speed dial, press the dial lock release and rotate the dial to the desired setting. 3 50 Press the shutter button to start recording.
Recording Movies 4 Press the button again to end recording. Recording ends automatically when the maximum length is reached or the memory card is full. O • Sound is recorded via the built-in microphone or an optional external microphone. Do not cover the microphone during recording. • Note that the microphone may pick up lens noise and other sounds made by the camera during recording. • Vertical or horizontal streaks may appear in movies containing very bright subjects.
Recording Movies Adjusting Movie Settings • Frame size and rate can be selected using B MOVIE SETTING > MOVIE MODE. • To choose the card used to store movies, use D SAVE DATA SET-UP > MOVIE FILE DESTINATION. • Focus mode is selected using the focus mode selector; for continuous focus adjustment, select C, or choose S and enable Intelligent Face Detection. Intelligent Face Detection is not available in focus mode M. Depth of Field Choose low f-numbers to soften background details.
a Viewing Movies View movies on the camera. In full-frame playback, movies are identified by a W icon. Press the focus stick (focus lever) down to start movie playback. 01/01/2018 10:00 AM PLAY +1.0 12800 The following operations can be performed while a movie is displayed: 4 Left/right View other pictures Playback in Playback progress ((x x) paused (y (y) End playback Pause playback Start/resume playback Single frame rewind/ Adjust speed advance Progress is shown in the display during playback.
Viewing Movies Playback Speed Press the focus stick (focus lever) left or right to adjust playback speed during playback. Speed is shown by the number of arrows (M or N).
Taking Photographs 55
P, S, A, and M Modes P, S, A, and M modes give you varying degrees of control over shutter speed and aperture. Mode P: Program AE Let the camera choose shutter speed and aperture for optimal exposure. Other values that produce the same exposure can be selected with program shift. 5 Taking Photographs A Shutter speed B Aperture Setting A (auto) A (auto) Confirm that P appears in the display.
P, S, A, and M Modes Program Shift If desired, you can rotate the rear command dial to select other combinations of shutter speed and aperture without altering exposure (program shift). Aperture Shutter speed O Program shift is not available in any of the following circumstances: • With flash units that support TTL auto • When an auto option is selected for H IMAGE QUALITY SETTING > DYNAMIC RANGE • In movie mode N To cancel program shift, turn the camera off.
Mode S: Shutter-Priority AE Choose a shutter speed and let the camera adjust aperture for optimal exposure. A Shutter speed B Aperture Setting User-selected A (auto) Confirm that S appears in the display. 5 O • If the correct exposure cannot be achieved at the selected shutter Taking Photographs speed, aperture will be displayed in red. • If the subject is outside the metering range of the camera, the aperture display will show “– – –”.
P, S, A, and M Modes Time (T) Rotate the shutter speed dial to T (time) to choose slow shutter speeds for long time-exposures. Use of a tripod is recommended to prevent the camera moving during the exposure. 1 Rotate the shutter speed dial to T. 2 Rotate the rear command dial to choose a shutter speed. 5 Press the shutter button all the way down to take a picture at the selected shutter speed. At speeds of 1 s or slower, a count-down timer will be displayed while the exposure is in progress.
Bulb (B) Select a shutter speed of B (bulb) for long time-exposures in which you open and close the shutter manually. Use of a tripod is recommended to prevent the camera moving during the exposure. 5 1 Rotate the shutter speed dial to B. 2 Press the shutter button all the way down. The shutter will remain open for up to 60 minutes while the shutter button is pressed; the display shows the time elapsed since the exposure started.
P, S, A, and M Modes Mode A: Aperture-Priority AE Choose an aperture and let the camera adjust shutter speed for optimal exposure. A Shutter speed B Aperture Setting A (auto) User-selected Confirm that A appears in the display. 32 O • If the correct exposure cannot be achieved at the selected aperture, speed display will show “– – –”. N • To use the shutter speed dial, press the dial lock release and rotate the dial to the desired setting. • Rotate the lens aperture ring to adjust aperture.
Mode M: Manual Exposure In manual mode, the user controls both shutter speed and aperture. Shots can be deliberately overexposed (brighter) or underexposed (darker), opening the door for a variety of individual creative expression. The amount the picture would be under- or over-exposed at current settings is shown by the exposure indicator; adjust shutter speed and aperture until the desired exposure is reached.
P, S, A, and M Modes Exposure Preview To preview exposure in the LCD monitor, select an option other than OFF for D SCREEN SET-UP > PREVIEW EXP./WB IN MANUAL MODE. N Select OFF when using the flash or on other occasions on which exposure may change when the picture is taken.
Autofocus Take pictures using autofocus. 1 Rotate the focus mode selector to S or C (P 65). 2 3 Choose an AF mode (P 67). 4 Take pictures. Choose the position and size of the focus frame (P 69). 5 Taking Photographs N For information on the autofocus system, visit: http://fujifilm-x.com/af/en/index.
Autofocus Focus Mode Use the focus mode selector to choose how the camera focuses. Choose from the following options: Mode S (AF-S) C (AF-C) M (manual) Description Single AF: Focus locks while the shutter button is pressed halfway. Choose for stationary subjects. Continuous AF: Focus is continually adjusted to reflect changes in the distance to the subject while the shutter button is pressed halfway. Use for subjects that are in motion. Eye-detection AF is not available.
The Focus Indicator Focus status is shown by the focus indicator. Focus indicator Focus status ( ) Camera focusing. Subject in focus; focus locked (focus z (lights green) mode S). Subject in focus (focus mode C). (z) (lights green) Focus is automatically adjusted for Focus indicator changes in distance to subject. A (blinks white) Camera unable to focus. Manual focus (focus mode M).
Autofocus Autofocus Options (AF Mode) Choose how the camera focuses in modes S and C. 1 Press a function button (by default, Fn5) to display AF mode options. 2 Choose an AF mode. N • The Fn5 button can be assigned other roles using D BUTTON/DIAL SETTING > FUNCTION (Fn) SETTING. The role described above can also be assigned to other function buttons (P 198). • AF mode can also be selected using G AF/MF SETTING > AF MODE. How the camera focuses depends on the focus mode.
Option Description Sample image Camera focuses automatically on high-contrast subjects; display WIDE/TRACKING shows areas in focus. z Focus Mode C (AF-C) Option Description Focus tracks subject at selected focus point. Use for subjects moving SINGLE POINT toward or away from camera. r 5 Taking Photographs y ZONE Focus tracks subject in selected focus zone. Use for subjects that are moving fairly predictably. Focus tracks subjects moving z WIDE/TRACKING through wide area of frame.
Autofocus Focus-Point Selection Choose a focus point for autofocus. Viewing the Focus-Point Display 1 2 3 Press MENU/OK and go to the shooting menu. Select G AF/MF SETTING > FOCUS AREA to view the focus-point display. Use the focus stick (focus lever) and rear command dial to choose a focus area. N The focus point can also be selected using touch controls (P 21).
The Focus-Point Display The focus-point display varies with the option selected for AF mode. N Focus frames are shown by small squares (), focus zones by the large squares. r SINGLE POINT 5 Taking Photographs Number of able can be G AF/MF NUMBER POINTS. AF mode y ZONE z WIDE/TRACKING points avail- Choose from zones with Position focus frame over selected using 7 × 7, 5 × 5, or 3 × 3 focus subject you want to track. SETTING > points.
Autofocus Checking Focus To zoom in on the current focus area for precise focus, press the center of the rear command dial. Use the focus stick (focus lever) to choose another focus area. Press the center of the rear command dial again to cancel zoom. Normal display Focus zoom N • In focus mode S, zoom can be adjusted by rotating the rear command dial. • The focus stick can be used to select the focus area while zoom is in 71 5 Taking Photographs effect.
Manual Focus Adjust focus manually. 1 Rotate the focus mode selector to M. j will appear in the display. 5.6 5 Taking Photographs 2 Focus manually using the lens focus ring. Rotate the ring left to reduce the focus distance, right to increase. 3 Take pictures. N • Use D BUTTON/DIAL SETTING > FOCUS RING to reverse the direction of rotation of the focus ring. • Regardless of the option selected, manual focus will be used when the lens is in manual focus mode.
Manual Focus Quick Focus • To use autofocus to focus on the subject in the selected focus area, press the button to which focus lock or AF-ON has been assigned (the size of the focus area can be chosen with the rear command dial). • In manual focus mode, you can use this feature to quickly focus on a chosen subject using either single or continuous AF according to the option chosen for G AF/MF SETTING > INSTANT AF SETTING.
Checking Focus A variety of options are available for checking focus in manual focus mode. 5 The Manual Focus Indicator The manual focus indicator indicates how closely the focus distance matches the distance to the subject in the focus brackets.
Manual Focus Focus Zoom If ON is selected for G AF/MF SETTING > FOCUS CHECK, the camera will automatically zoom in on the selected focus area when the focus ring is rotated. Press the center of the rear command dial to exit zoom. N • Use the focus stick (focus lever) to choose another focus area. • Zoom can be adjusted by rotating the rear command dial. Focus Peaking Select FOCUS PEAK HIGHLIGHT for G AF/MF SETTING > MF ASSIST to highlight high-contrast outlines.
N Sensitivity Adjust the camera’s sensitivity to light. Adjust ISO sensitivity using a function button (by default, Fn1). Option 5 Description Sensitivity is automatically adjusted in response to shooting AUTO1 conditions according to combination of standard and maxAUTO2 imum sensitivity and minimum shutter speed chosen for AUTO3 A SHOOTING SETTING > ISO. Choose from AUTO1, AUTO2, and AUTO3 (P 77). Adjust sensitivity manually. Selected value is shown in display.
Sensitivity AUTO Choose the base sensitivity, maximum sensitivity, and minimum shutter speed for AUTO1, AUTO2, and AUTO3. Item DEFAULT SENSITIVITY MAX. SENSITIVITY MIN.
C Metering Choose how the camera meters exposure. A SHOOTING SETTING > PHOTOMETRY offers a choice of the following metering options: O The selected option will only take effect when G AF/MF SETTING > FACE/EYE DETECTION SETTING is FACE OFF/EYE OFF. Mode o (multi) p (centerweighted) v 5 (spot) Taking Photographs w (average) 78 Description The camera instantly determines exposure based on an analysis of composition, color, and brightness distribution. Recommended in most situations.
d Exposure Compensation Adjust exposure. Rotate the exposure compensation dial. N The amount of compensation available varies with the shooting mode.
Exposure Compensation C (Custom) When the exposure compensation dial is rotated to C, you can adjust exposure compensation after pressing a function button (by default, Fn2). Rotate the front command dial to choose a value. N • The Fn2 button can be assigned other roles using D BUTTON/DIAL SETTING > FUNCTION (Fn) SETTING. The role described above can also be assigned to other function buttons (P 198).
Focus/Exposure Lock Focus and exposure lock when the shutter button is pressed halfway. 1 Position the subject in the focus frame and press the shutter button halfway to lock focus and exposure. Focus and exposure will remain locked while the shutter button is pressed halfway (AF/AE lock). 2 Press the button all the way down. N Focus lock using the shutter button is only available when ON is selected for D BUTTON/DIAL SETTING > SHUTTER AF, SHUTTER AE.
Focus/Exposure Lock The AF-L and AE-L Buttons Focus and exposure can also be locked using function buttons. At default settings, the Fn3 button locks exposure, the Fn4 button focus. • While the assigned control is pressed, pressing the shutter button halfway will not end the lock. • If AE&AF ON/OFF SWITCH is selected for D BUTTON/DIAL SETTING > AE/ AF-LOCK MODE, the lock can only be ended by pressing the control a second time.
BKT Bracketing Automatically vary settings over a series of pictures. Press the drive button and choose from the options below. O AE BKT Use A SHOOTING SETTING > AE BKT SETTING to choose the bracketing amount, bracketing order, and number of shots. Each time the shutter button is pressed, the camera will take the specified number of shots: one using the metered value for exposure and the others over- or under-exposed by multiples of the selected bracketing amount.
Bracketing V WHITE BALANCE BKT Select a bracketing amount (±1, ±2, or ±3) in the drive mode display. Each time the shutter is released, the camera takes one shot and processes it to create three copies: one at the current white balanced setting, one with fine-tuning increased by the selected amount, and another with fine-tuning decreased by the selected amount.
I Continuous Shooting (Burst Mode) Capture motion in a series of pictures. Press the drive button and select I CONTINUOUS. The camera will take pictures while the shutter button is pressed; shooting ends when the shutter button is released or the memory card is full. O • If file numbering reaches 999 before shooting is complete, the remaining pictures will be recorded to a new folder. • Shooting ends when the memory card is full; the camera will record all photos shot to that point.
j Multiple Exposures Create a photograph that combines two exposures. 1 2 3 Press the drive button and select j MULTIPLE EXPOSURE. Take the first shot. Press MENU/OK. The first shot will be shown superimposed on the view through the lens and you will be prompted to take the second shot. N • To return to Step 2 and retake the 5 NEXT RETRY Taking Photographs first shot, press the focus stick (focus lever) left. • To save the first shot and exit without creating a multiple exposure, press DISP/BACK.
The Shooting Menus 87
H IMAGE QUALITY SETTING Adjust image quality settings. To display image quality settings, press MENU/OK in the shooting display and select the H (IMAGE QUALITY SETTING) tab. IMAGE QUALITY SETTING IMAGE SIZE IMAGE QUALITY RAW RECORDING FILM SIMULATION GRAIN EFFECT COLOR CHROME EFFECT DYNAMIC RANGE WHITE BALANCE EXIT N The options available vary with the shooting mode selected. IMAGE SIZE Choose the size and aspect ratio at which still pictures are recorded.
IMAGE QUALITY SETTING IMAGE QUALITY Choose a file format and compression ratio. Option SUPER FINE FINE Description Very low compression ratios are used for maximum image quality. Low compression ratios are used for higher-quality images. Higher compression ratios are used to increase the number of NORMAL images that can be stored. SUPER FINE + RAW Record both RAW and super-fine quality JPEG pictures. Record both RAW and fine-quality JPEG images.
FILM SIMULATION Simulate the effects of different kinds of film, including blackand-white (with or without color filters). Choose a palette according to your subject and creative intent. Option 6 The Shooting Menus Description Standard color reproduction. Suited to a wide range of c PROVIA/STANDARD subjects, from portraits to landscapes. A high-contrast palette of saturated colors, suited to nad Velvia/VIVID ture photos.
IMAGE QUALITY SETTING GRAIN EFFECT Add a film grain effect. Select an amount (STRONG or WEAK) or choose OFF to turn film grain off. STRONG Options WEAK OFF COLOR CHROME EFFECT Deepen colors in shadows. Select an amount (STRONG or WEAK) or choose OFF to turn the effect off. STRONG Options WEAK OFF O COLOR CHROME EFFECT is not available during bracketing or burst photography.
DYNAMIC RANGE Control contrast. Choose lower values to increase contrast when shooting indoors or under overcast skies, higher values to reduce loss of detail in highlights when photographing high-contrast scenes. Higher values are recommended for scenes that include both sunlight and deep shade, for such high-contrast subjects as sunlight on water, brightly-lit autumn leaves, and portraits taken against a blue sky, and for white objects or people wearing white.
IMAGE QUALITY SETTING WHITE BALANCE For natural colors, choose a white balance option that matches the light source. Option AUTO k/l/m k i j k l m n g Description White balance is adjusted automatically. Measure a value for white balance. Choose a color temperature. For subjects in direct sunlight. For subjects in the shade. Use under “daylight” fluorescent lights. Use under “warm white” fluorescent lights. Use under “cool white” fluorescent lights. Use under incandescent lighting.
Custom White Balance Choose k, l, or m to adjust white CUSTOM 1 balance for unusual lighting conditions. White balance measurement options will be displayed; frame a white object so that it fills the display and press the shutter SHUTTER : NEW WB SHIFT NOT CHANGE button all the way down to measure white balance (to select the most recent custom value and exit without measuring white balance, press DISP/BACK, or press MENU/OK to select the most recent value and display the fine-tuning dialog).
IMAGE QUALITY SETTING k: Color Temperature Selecting k in the white balance menu displays a list of color temperatures; highlight a color temperature and press MENU/OK to select the highlighted option and display the fine-tuning dialog. WHITE BALANCE COLOR TEMPERATURE R:0 B:0 SET SHIFT 10000K 9100K 8300K 7700K 7100K Color Temperature Color temperature is an objective measure of the color of a light source, expressed in Kelvin (K).
HIGHLIGHT TONE Adjust the appearance of highlights. +4 +3 +2 Options +1 0 −1 −2 0 −1 −2 SHADOW TONE Adjust the appearance of shadows. +4 +3 +2 Options +1 COLOR Adjust color density. +4 +3 +2 +1 Options 0 −1 −2 −3 −4 Options 0 −1 −2 −3 −4 SHARPNESS Sharpen or soften outlines.
IMAGE QUALITY SETTING NOISE REDUCTION Reduce noise in pictures taken at high sensitivities. +4 +3 +2 +1 Options 0 −1 −2 −3 −4 LONG EXPOSURE NR Select ON to reduce mottling in long time-exposures. Options ON OFF LENS MODULATION OPTIMIZER Select ON to improve definition by adjusting for diffraction and the slight loss of focus at the periphery of the lens. Options ON OFF COLOR SPACE Choose the gamut of colors available for color reproduction.
PIXEL MAPPING Use this option if you notice bright spots in your pictures. 1 Press MENU/OK in the shooting display and select the H IMAGE QUALITY SETTING tab. 2 Highlight PIXEL MAPPING and press MENU/OK to perform pixel mapping. O • Results are not guaranteed. • Be sure the battery is fully charged before beginning pixel mapping. • Pixel mapping is not available when the camera temperature is elevated. • Processing may take a few seconds.
IMAGE QUALITY SETTING EDIT/SAVE CUSTOM SETTING Save up to 7 sets of custom camera settings for commonly-encountered situations. Saved settings can be recalled using H IMAGE QUALITY SETTING > SELECT CUSTOM SETTING. 1 Press MENU/OK in shooting mode to display the shooting menu. Select the H IMAGE QUALITY SETTING tab, then highlight EDIT/SAVE CUSTOM SETTING and press MENU/OK. 2 Highlight a custom settings bank and press MENU/OK to select.
G AF/MF SETTING Adjust focus settings. To display focus settings, press MENU/OK in the shooting display and select the G (AF/MF SETTING) tab. AF/MF SETTING FOCUS AREA AF MODE STORE AF MODE BY ORIENTATION RAPID AF AF POINT DISPLAY NUMBER OF FOCUS POINTS PRE-AF AF ILLUMINATOR EXIT N The options available vary with the shooting mode selected. FOCUS AREA Choose the focus area for autofocus, manual focus, and focus zoom.
AF/MF SETTING AF MODE Choose the AF mode for focus modes S and C. Option Description The camera focuses on the subject in the selected focus point. The number of focus points available can be selected using G AF/MF r SINGLE POINT SETTING > NUMBER OF FOCUS POINTS. Use for pin-point focus on a selected subject. The camera focuses on the subject in the selected focus zone. y Focus zones include multiple focus points, making it easier to ZONE focus on subjects that are in motion.
STORE AF MODE BY ORIENTATION Choose whether the focus mode and focus area used when the camera is in portrait orientation are stored separately from those used when the camera is in landscape orientation. Option Description OFF The same settings are used in both orientations. FOCUS AREA ONLY The focus area for each orientation can be selected separately. ON The focus mode and focus area can be selected separately. RAPID AF Select ON for faster focus times.
AF/MF SETTING NUMBER OF FOCUS POINTS Choose the number of focus points available for focus-point selection in manual focus mode or when SINGLE POINT is selected for AF MODE. Option 117 POINTS (9 × 13) 425 POINTS (17 × 25) Description Choose from 117 focus points arranged in a 9- by 13-point grid. Choose from 425 focus points arranged in a 17- by 25-point grid. PRE-AF If ON is selected, the camera will continue to adjust focus even when the shutter button is not pressed halfway.
FACE/EYE DETECTION SETTING Intelligent Face Detection sets focus and exposure for human faces anywhere in the frame, preventing the camera from focusing on the background in group portraits. Choose for shots that emphasize portrait subjects. You can also choose whether the camera detects and focuses on eyes when Intelligent Face Detection is on. Choose from the following options: Option FACE ON/EYE OFF Description Intelligent Face Detection only.
AF/MF SETTING AF+MF If ON is selected in focus mode S and focus has been locked (whether by pressing the shutter button halfway or by other means), focus lock can be ended and focus adjusted manually by rotating the focus ring. Options ON OFF O • Lenses with a focus distance indicator must be set to manual focus mode (MF) before this option can be used. Selecting MF disables the focus distance indicator.
MF ASSIST Choose how focus is displayed in manual focus mode. Option Description STANDARD Focus is displayed normally. FOCUS PEAK The camera heightens high-contrast outlines. Choose a color and HIGHLIGHT peaking level. N You can also choose MF assist options by holding the center of the rear command dial. FOCUS CHECK If ON is selected, the display will automatically zoom in on the selected focus area when the focus ring is rotated in manual focus mode.
AF/MF SETTING INTERLOCK SPOT AE & FOCUS AREA Select ON to meter the current focus frame when SINGLE POINT is selected for AF MODE and SPOT is selected for PHOTOMETRY. Options ON OFF INSTANT AF SETTING Choose whether the camera focuses using single AF (AF-S) or continuous AF (AF-C) when a button to which focus lock or AF-ON is assigned is pressed in manual focus mode.
DEPTH-OF-FIELD SCALE Choose FILM FORMAT BASIS to help you make practical assessments of depth of field for pictures that will be viewed as prints and the like, PIXEL BASIS to help you assess depth of field for pictures that will be viewed at high resolutions on computers or other electronic displays. Options PIXEL BASIS FILM FORMAT BASIS RELEASE/FOCUS PRIORITY Choose how the camera focuses in focus mode AF-S or AF-C.
AF/MF SETTING TOUCH SCREEN MODE Choose the focus operations performed using touch controls. Still Photography Mode Description • In focus mode S (AF-S), the camera focuses when you tap your AF AF OFF subject in the display. Focus locks at the current distance until you tap the AF OFF icon. • In focus mode C (AF-C), the camera initiates focus when you tap your subject in the display. The camera will continue to adjust focus for changes in the distance to the subject until you tap the AF OFF icon.
AF/MF SETTING Touch Controls for Focus Zoom Different touch controls are used during focus zoom (focus check enabled). Central Area Tapping the center of the display performs the operations below. Mode AF AREA OFF AF-S AF MF Instant AF OFF Other Areas Tapping other areas simply scrolls the display.
A SHOOTING SETTING Adjust shooting options. To display shooting options, press MENU/OK in the shooting display and select the A (SHOOTING SETTING) tab. SHOOTING SETTING SELF-TIMER SAVE SELF-TIMER SETTING INTERVAL TIMER SHOOTING AE BKT SETTING FILM SIMULATION BKT FOCUS BKT PHOTOMETRY SHUTTER TYPE EXIT N The options available vary with the shooting mode selected. SELF-TIMER Choose a shutter release delay.
SAVE SELF-TIMER SETTING If ON is selected, the chosen self-timer setting will remain in effect after a picture is taken or the camera is turned off. Options ON OFF INTERVAL TIMER SHOOTING Configure the camera to take photos automatically at a preset interval. 1 Highlight INTERVAL TIMER SHOOTING in the A (SHOOTING SETTING) tab and press MENU/OK. 2 Use the focus stick (focus lever) to choose the interval and number of shots. Press MENU/OK to proceed.
SHOOTING SETTING O Interval timer photography cannot be used with multiple exposure photography. In burst mode, only one picture will be taken each time the shutter is released. N • Use of a tripod is recommended. • Check the battery level before starting. We recommend using an optional AC-15V AC power adapter. • The display turns off between shots and lights a few seconds before the next shot is taken. • The display can be activated at any time by pressing the shutter button.
AE BKT SETTING Adjust exposure bracketing settings. Option Description Choose the number of shots in the bracketing sequence and the amount exposure is varied with each shot. FRAMES: Choose the number of shots in the bracketing • FRAMES/STEP SETTING sequence. • STEP: Choose the amount exposure is varied with each shot. • 1 FRAME: The shots in the bracketing sequence are taken one at a time. 1 FRAME/CONTINUOUS • CONTINUOUS: The shots in the bracketing sequence are taken in a single burst.
SHOOTING SETTING FOCUS BKT Adjust focus bracketing settings. Option FRAMES STEP INTERVAL Description Choose the number of shots. Choose the amount focus changes with each shot. Choose the interval between shots. N Do not adjust zoom during shooting. Focus and FRAMES/STEP The relation between focus and the options chosen for FRAMES and STEP is shown in the illustration. : Frames 1 2 Step 3 4 5 6 Starting focus position changes.
PHOTOMETRY Choose how the camera meters exposure. O The selected option will only take effect when G AF/MF SETTING > FACE/EYE DETECTION SETTING is FACE OFF/EYE OFF. Mode Description The camera instantly determines exposure based on an analo ysis of composition, color, and brightness distribution. RecMULTI ommended in most situations. The camera meters the entire frame but assigns the greatest p CENTER WEIGHTED weight to the area at the center.
SHOOTING SETTING SHUTTER TYPE Choose the shutter type. Choose the electronic shutter to mute the shutter sound. Option t MECHANICAL SHUTTER s ELECTRONIC SHUTTER t E-FRONT CURTAIN SHUTTER u MECHANICAL + ELECTRONIC Description Take pictures with the mechanical shutter. Take pictures with the electronic shutter. The camera chooses the mechanical or electronic front curtain shutter according to shooting conditions. The camera chooses the mechanical or electronic shutter according to shooting conditions.
FLICKER REDUCTION Select ON to reduce flicker in pictures and the display when shooting under fluorescent lighting and other similar light sources. Options ON OFF O • Enabling flicker reduction disables the electronic shutter and increases the time needed to record pictures. • Flicker reduction is not available during movie recording. IS MODE Reduce blur. Option l CONTINUOUS Description Image stabilization on.
SHOOTING SETTING ISO Adjust the camera’s sensitivity to light. Option Description Sensitivity is automatically adjusted in response to shooting AUTO1 conditions according to combination of standard and maxAUTO2 imum sensitivity and minimum shutter speed chosen for AUTO3 A SHOOTING SETTING > ISO. Choose from AUTO1, AUTO2, and AUTO3 (P 120). Adjust sensitivity manually. Selected value is shown in display. 12800–100 H (102400/51200/25600), Choose for special situations.
AUTO Choose the base sensitivity, maximum sensitivity, and minimum shutter speed for AUTO1, AUTO2, and AUTO3. Item DEFAULT SENSITIVITY MAX. SENSITIVITY MIN. SHUTTER SPEED Options 12800–100 12800–200 ⁄–¼ SEC AUTO1 800 Default AUTO2 100 1600 ⁄ SEC AUTO3 3200 The camera automatically chooses a sensitivity between the default and maximum values; sensitivity is only raised above the default value if the shutter speed required for optimal exposure would be slower than the value selected for MIN.
SHOOTING SETTING MOUNT ADAPTER SETTING Adjust settings for lenses attached via a mount adapter. Shutter Select When using lenses with an internal shutter, choose whether to use the shutter on the camera (BODY) or the lens (LENS). O This option may have no effect with some lenses. Saved Settings Store settings for up to 6 lenses, or choose OFF to disable corrections for focal length, distortion, color shading, and peripheral illumination.
Color Shading Correction Color (shading) variations between the center and edges of the frame can be adjusted separately for each corner. To use color shading correction, follow the steps below. NEXT SET 1 Rotate the rear command dial to choose a corner. The selected corner is indicated by a triangle. 2 Use the focus stick (focus lever) to adjust shading until there is no visible difference in color between the selected corner and the center of the image.
SHOOTING SETTING 35mm FORMAT MODE Enabling A SHOOTING SETTING > 35mm FORMAT MODE in the shooting menu sets the picture angle to 35 mm; the change is reflected in the display. Option ON OFF AUTO Description The picture angle is set to 35 mm; the change is reflected in the display. 35 mm format mode disabled. 35 mm format mode is enabled automatically when a mount adapter that supports automatic detection is attached. N • The D SCREEN SET-UP > DISP.
F FLASH SETTING Adjust flash-related settings. To display flash-related settings, press MENU/OK in the shooting display and select the F (FLASH SETTING) tab. N The options available vary with the shooting mode selected. FLASH SETTING FLASH FUNCTION SETTING RED EYE REMOVAL TTL-LOCK MODE LED LIGHT SETTING MASTER SETTING CH SETTING EXIT FLASH FUNCTION SETTING Choose a flash control mode, flash mode, or sync mode or adjust the flash level. The options available vary with the flash.
FLASH SETTING TTL-LOCK MODE Instead of adjusting flash level with each shot, TTL flash control can be locked for consistent results across a series of photographs. Option Description Flash output is locked at the value metered for the most LOCK WITH LAST FLASH recent photo. LOCK WITH METERING The camera emits a series of pre-flashes and locks flash FLASH output at the metered value. N • To use TTL lock, assign TTL-LOCK to a camera control and then use the control to enable or disable TTL lock (P 198).
FLASH SETTING MASTER SETTING Choose a flash group (A, B, or C) for the flash mounted on the camera hot shoe when it functions as a master flash controlling remote flash units via Fujifilm wireless optical flash control, or choose OFF to limit master flash output to a level that does not affect the final picture. Options Gr A Gr B Gr C OFF N In some cases, this option can also be accessed via the FLASH FUNCTION SETTING menu.
B MOVIE SETTING Adjust movie-recording options. To display options for movie recording, press MENU/OK in the shooting display and select the B (MOVIE SETTING) tab. N The options available vary with the shooting mode selected. MOVIE SETTING MOVIE MODE MOVIE AF MODE HDMI OUTPUT INFO DISPLAY HDMI REC CONTROL MIC LEVEL ADJUSTMENT MIC/REMOTE RELEASE EXIT MOVIE MODE Choose a frame size and rate for movie recording. Frame size Rate 29.97 fps 25 fps 24 fps 23.98 fps 29.97 fps 25 fps 24 fps 23.
MOVIE SETTING HDMI REC CONTROL Choose whether the camera sends movie start and stop signals to the HDMI device when the shutter button is pressed to start and stop movie recording. Options ON OFF MIC LEVEL ADJUSTMENT Adjust the recording level for the built-in and external microphones. MIC LEVEL ADJUSTMENT SET Option 20—1 OFF 6 CANCEL Description Choose a recording level. Disable the microphone. N • The display shows the peak recording level detected in a given period.
Playback and the Playback Menu 129
The Playback Display This section lists the indicators that may be displayed during playback. O For illustrative purposes, displays are shown with all indicators lit. A B C D E F G 01/01/2018 10:00 AM b Playback and the Playback Menu a H Z I Y J X K W V 7 U T S A Date and time ................................. 39, 41, 157 B Bluetooth ON/OFF .......................................185 C Image transfer order....................................147 D Image transfer status ....................
The Playback Display The DISP/BACK Button The DISP/BACK button controls the display of indicators during playback. Standard Information off Playback and the Playback Menu 01/01/2018 10:00 AM 1/1000 5.6 12800 +1.0 7 FAVORITES Favorites Info display The Info Display In the info display, you can press the focus stick (focus lever) up to cycle through a series of information and histogram displays.
The Playback Display Viewing Photo Information The photo information display changes each time the focus stick (focus lever) is pressed up. Basic data Histogram Playback and the Playback Menu NEXT 01/01/2018 10:00 AM 1/1000 S.S 1/1000 F 5.6 ISO 12800 5.6 12800 +1.0 BACK 7 Info display 2 +1.0 NEXT Info display 1 Zooming in on the Focus Point Press the center of the rear command dial to zoom in on the focus point. Press again to return to full-frame playback.
Viewing Pictures Read this section for information on playback zoom and multi-frame playback. Use the rear command dial to go from full-frame playback to playback zoom or multi-frame playback.
Viewing Pictures Playback Zoom Rotate the rear command dial right to zoom in on the current picture, left to zoom out. To exit zoom, press DISP/BACK, MENU/OK, or the center of the rear command dial. N • The maximum zoom ratio varies with the option selected for H IMAGE QUALITY SETTING > IMAGE SIZE. • Playback zoom is not available with cropped or resized copies saved at a size of a.
C The Playback Menu Adjust playback settings. The playback menu is displayed when you press MENU/OK in playback mode. PLAY BACK MENU SWITCH SLOT RAW CONVERSION ERASE SIMULTANEOUS DELETE(RAW SLOT1/JPG SLOT2) CROP RESIZE PROTECT IMAGE ROTATE EXIT N If two memory cards are inserted, you can press and hold the a button to choose a card for playback. Playback and the Playback Menu SWITCH SLOT Choose the card from which images will be played back.
RAW CONVERSION Even if you don’t have a computer, you can use the camera to modify RAW pictures and save them in JPEG or TIFF format. Saving RAW Pictures in Another Format 1 2 3 Display a RAW picture. Highlight RAW CONVERSION in the playback menu. Press MENU/OK. A list of settings will be displayed. RAW CONVERSION Playback and the Playback Menu REFLECT SHOOTING COND.
The Playback Menu The settings that can be adjusted when converting pictures from RAW to another format are: Setting 137 Playback and the Playback Menu Description Create a copy using the settings in effect at the time REFLECT SHOOTING COND. the photo was taken. FILE TYPE Choose a file format. IMAGE SIZE Choose an image size. IMAGE QUALITY Adjust image quality. PUSH/PULL PROCESSING Adjust exposure. DYNAMIC RANGE Enhance details in highlights for natural contrast.
ERASE Delete individual pictures, multiple selected pictures, or all pictures. O Deleted pictures cannot be recovered. Protect important pictures or copy them to a computer or other storage device before proceeding. Option FRAME SELECTED FRAMES ALL FRAMES Description Delete pictures one at a time. Delete multiple selected pictures. Delete all unprotected pictures. Playback and the Playback Menu FRAME 1 Select FRAME for ERASE in the playback menu.
The Playback Menu SELECTED FRAMES 1 Select SELECTED FRAMES for ERASE in the playback menu. Highlight pictures and press MENU/OK to select. • Selected pictures are indicated by check marks (R). • To deselect a highlighted picture, press MENU/OK again. 3 When the operation is complete, press DISP/BACK to display a confirmation dialog. 4 Highlight OK and press MENU/OK to delete the selected pictures. N Pictures in photobooks or printer orders are shown by S.
SIMULTANEOUS DELETE(RAW SLOT1/JPG SLOT2) Taking photos with RAW / JPEG selected for D SAVE DATA SET-UP > CARD SLOT SETTING (STILL IMAGE) creates two copies. Choose whether deleting the RAW image will also delete the JPEG copy. Option ON OFF Playback and the Playback Menu 7 Description Deleting the RAW image from the card in Slot 1 also deletes the JPEG copy from the card in Slot 2. Deleting the RAW image from the card in Slot 1 does not delete the JPEG copy from the card in Slot 2.
The Playback Menu RESIZE Create a small copy of the current picture. 1 2 3 Display the desired picture. 4 Press MENU/OK again to save the resized copy to a separate file. Select RESIZE in the playback menu. Highlight a size and press MENU/OK to display a confirmation dialog. Playback and the Playback Menu N The sizes available vary with the size of the original image.
PROTECT Protect pictures from accidental deletion. Highlight one of the following options and press MENU/OK. Option FRAME SET ALL RESET ALL Description Protect selected pictures. Press the focus stick (focus lever) left or right to view pictures and press MENU/OK to select or deselect. Press DISP/BACK when the operation is complete. Protect all pictures. Remove protection from all pictures. Playback and the Playback Menu O Protected pictures will be deleted when the memory card is formatted.
The Playback Menu IMAGE ROTATE Rotate pictures. 1 2 3 Display the desired picture. 4 Press MENU/OK. The picture will automatically be displayed in the selected orientation whenever it is played back on the camera. Select IMAGE ROTATE in the playback menu. Press the focus stick (focus lever) down to rotate the picture 90° clockwise, up to rotate it 90° counterclockwise. tating pictures. • The camera may not be able to rotate pictures created with other devices.
RED EYE REMOVAL Remove red-eye from portraits. The camera will analyze the image; if red-eye is detected, the image will be processed to create a copy with reduced red-eye. 1 2 3 Display the desired picture. Select RED EYE REMOVAL in the playback menu. Press MENU/OK. N • Results vary depending on the scene and the camera’s success in dePlayback and the Playback Menu tecting faces. • The amount of time needed to process the image varies with the number of faces detected.
The Playback Menu VOICE MEMO SETTING Add a voice memo to the current photograph. 1 2 3 Select ON for VOICE MEMO SETTING in the playback menu. Display a photo to which you wish to add a voice memo. Press and hold the Fn2 button to record the memo. Recording ends after 30 s or when you release the button. N • The new memo will be recorded over any existing memos. Playing Voice Memos Pictures with voice memos are indicated by q icons during playback.
COPY Copy pictures between the cards in the first and second slots. 1 2 Select COPY in the playback menu. Highlight one of the following options. Option Description Copy pictures from the card in the first slot to the card in SLOT1 y SLOT2 the second slot. Copy pictures from the card in the second slot to the card SLOT2 y SLOT1 in the first slot. Playback and the Playback Menu 3 4 Press the focus stick (focus lever) right. Highlight one of the following options and press MENU/OK.
The Playback Menu IMAGE TRANSFER ORDER Select photos for upload to a paired smartphone or tablet. 1 Select IMAGE TRANSFER ORDER > SELECT FRAMES in the playback menu. 2 Highlight photos and press MENU/OK to select or deselect. Repeat until all the desired photos have been selected. 3 Press DISP/BACK to exit to playback. N If ON is selected for both D CONNECTION SETTING > Bluetooth N • Image transfer orders can contain a maximum of 999 pictures.
WIRELESS COMMUNICATION Connect to smartphones running the latest version of the FUJIFILM Camera Remote app. The smartphone can then be used to: • Control the camera and take pictures remotely • Receive pictures uploaded from the camera • Browse the pictures on the camera and download selected pictures • Upload location data to the camera N For downloads and other information, visit: http://app.fujifilm-dsc.
The Playback Menu PHOTOBOOK ASSIST Create books from your favorite photos. Creating a Photobook 1 Select NEW BOOK for C PLAY BACK MENU > PHOTOBOOK ASSIST. 2 Scroll through the images and press the focus stick (focus lever) up to select or deselect. Press MENU/OK to exit when the book is complete. for photobooks. • The first picture selected becomes the cover image. Press the focus stick down to select the current image for the cover instead.
Viewing Photobooks Highlight a book in the photobook assist menu and press MENU/OK to display the book, then press the focus stick (focus lever) left or right to scroll through the pictures. Playback and the Playback Menu Editing and Deleting Photobooks Display the photobook and press MENU/OK. The following options will be displayed; select the desired option and follow the onscreen instructions. • EDIT: Edit the book as described in “Creating a Photobook”. • ERASE: Delete the book.
The Playback Menu PRINT ORDER (DPOF) Create a digital “print order” for DPOF-compatible printers. 1 2 Select C PLAY BACK MENU > PRINT ORDER (DPOF). 3 Display a picture you wish to include in or remove from the print order. 4 Press the focus stick (focus lever) up or down to choose the number of copies (up to 99). Select WITH DATE s to print the date of recording on pictures, WITHOUT DATE to print pictures without dates, or RESET ALL to remove all pictures from the print order before proceeding.
instax PRINTER PRINT To print pictures to optional Fujifilm instax SHARE printers, first select D CONNECTION SETTING > instax PRINTER CONNECTION SETTING and enter the instax SHARE printer name (SSID) and password, then follow the steps below. 1 2 Playback and the Playback Menu 7 Turn the printer on. Select C PLAY BACK MENU > instax PRINTER PRINT. The camera will connect to the printer.
The Playback Menu DISP ASPECT Choose how High Definition (HD) devices display pictures with an aspect ratio of 4∶3 (this option is available only when an HDMI cable is connected). 16:9 4:3 16∶∶9 16 Option 4∶3 N Select 16∶9 to display the image so that it fills the screen with its top and bottom cropped out, 4∶3 to display the entire image with black bands at either side.
MEMO 154
The Setup Menus 155
D USER SETTING Adjust basic camera settings. To access basic camera settings, press MENU/OK, select the D (SET UP) tab, and choose USER SETTING. USER SETTING FORMAT DATE/TIME TIME DIFFERENCE MY MENU SETTING SENSOR CLEANING BATTERY AGE RESET EXIT FORMAT To format a memory card: The Setup Menus 8 1 2 Select D USER SETTING > FORMAT in the D (SET UP) tab. 3 A confirmation dialog will be displayed. To format the memory card, highlight OK and press MENU/OK.
USER SETTING DATE/TIME To set the camera clock: 1 2 Select D USER SETTING > DATE/TIME in the D (SET UP) tab. 3 Press MENU/OK to set the clock. Press the focus stick (focus lever) left or right to highlight the year, month, day, hour, or minute and press up or down to change. To change the order in which the year, month, and day are displayed, highlight the date format and press the focus stick up or down.
Qa Choose a language. MY MENU SETTING Edit the items listed in the E (MY MENU) tab, a personalized custom menu of frequently-used options. 1 Highlight D USER SETTING > MY MENU SETTING in the D (SET UP) tab and press MENU/OK. MY MENU SETTING ADD ITEMS RANK ITEMS REMOVE ITEMS N To reorder items, select RANK ITEMS. To delete items, select REMOVE ITEMS. 2 The Setup Menus 8 Press the focus stick (focus lever) up or down to highlight ADD ITEMS and press MENU/OK.
USER SETTING SENSOR CLEANING Remove dust from the camera image sensor. Option OK Description Clean the sensor immediately. Sensor cleaning will be performed when the camera is WHEN SWITCHED ON turned on. Sensor cleaning will be performed when the camera turns WHEN SWITCHED OFF off (sensor cleaning is not however performed if the camera turns off in playback mode). N Dust that cannot be removed using sensor cleaning can be removed manually (P 246). BATTERY AGE Check battery age.
D SOUND SETTING Make changes to camera sounds. To access sound settings, press MENU/OK, select the D (SET UP) tab, and choose SOUND SET-UP. SOUND SETTING AF BEEP VOL. SELF-TIMER BEEP VOL. OPERATION VOL. SHUTTER VOLUME SHUTTER SOUND PLAYBACK VOLUME EXIT AF BEEP VOL. Choose the volume of the beep that sounds when the camera focuses. The beep can be muted by selecting eOFF. Options b (high) The Setup Menus 8 c (medium) d (low) eOFF (mute) SELF-TIMER BEEP VOL.
SOUND SETTING SHUTTER VOLUME Adjust the volume of the sounds produced by the electronic shutter. Choose eOFF to disable the shutter sound. Options b (high) c (medium) d (low) eOFF (mute) SHUTTER SOUND Choose the sound made by the electronic shutter. Options j SOUND 2 i SOUND 1 k SOUND 3 PLAYBACK VOLUME Adjust the volume for movie playback.
D SCREEN SETTING Make changes to display settings. To access display settings, press MENU/OK, select the D (SET UP) tab, and choose SCREEN SET-UP. SCREEN SETTING EVF BRIGHTNESS EVF COLOR EVF COLOR ADJUSTMENT LCD BRIGHTNESS LCD COLOR LCD COLOR ADJUSTMENT IMAGE DISP. AUTOROTATE DISPLAYS EXIT EVF BRIGHTNESS Adjust the brightness of the display in the electronic viewfinder. Option AUTO MANUAL The Setup Menus 8 Description Automatic brightness adjustment.
SCREEN SETTING LCD BRIGHTNESS Adjust monitor brightness. +5 +4 +3 +2 +1 Options 0 −1 −2 −3 −4 −5 +1 Options 0 −1 −2 −3 −4 −5 LCD COLOR Adjust monitor hue. +5 +4 +3 +2 LCD COLOR ADJUSTMENT Adjust the color of the display in the LCD monitor. 1 2 Adjust colors using the focus stick (focus lever). Press MENU/OK.
IMAGE DISP. Choose how long images are displayed after shooting. Option CONTINUOUS 1.5 SEC 0.5 SEC OFF Description Pictures are displayed until the MENU/OK button is pressed or the shutter button is pressed halfway. To zoom in on the active focus point, press the center of the rear command dial; press again to cancel zoom. Pictures are displayed for the selected time or until the shutter button is pressed halfway. Pictures are not displayed after shooting.
SCREEN SETTING PREVIEW EXP./WB IN MANUAL MODE Choose whether to enable exposure and/or white balance preview in manual exposure mode. Option Description PREVIEW EXP./WB Enable exposure and white balance preview. Preview white balance only. Choose this option in situations in which exposure and white balance are likely to change during PREVIEW WB shooting, as may be the case when you use a flash with an incandescent monitoring lamp. Disable exposure and white balance preview.
FRAMING GUIDELINE Choose a framing grid for shooting mode. Option G GRID 24 F GRID 9 Display P For “rule of thirds” composition. P H HD FRAMING P A six-by-four grid. Frame HD pictures in the crop shown by the lines at the top and bottom of the display. N • Framing guides are not shown at default settings but can be displayed using D SCREEN SET-UP > DISP. CUSTOM SETTING (P 168). framing can be customized using FUJIFILM Tether Shooting Plug-in PRO or Hyper-Utility Software HS-V5.
SCREEN SETTING AUTOROTATE PB Choose ON to automatically rotate “tall” (portrait-orientation) pictures during playback. Options ON OFF FOCUS SCALE UNITS Choose the units used for the focus distance indicator.
DISP. CUSTOM SETTING Choose the items shown in the standard indicator display. 1 In shooting mode, use the DISP/BACK button to display standard indicators. 2 Press MENU/OK and select D SCREEN SET-UP > DISP. CUSTOM SETTING in the D (SET UP) tab. 3 Highlight items and press MENU/OK to select or deselect.
SCREEN SETTING LARGE INDICATORS MODE(EVF) Select ON to display large indicators in the electronic viewfinder. The indicators displayed can be selected using D SCREEN SETTING > LARGE INDICATORS DISP. SETTING. OFF O ON Some icons are not displayed when ON is selected for LARGE INDICATORS MODE(EVF) (P 11). N If LARGE INDICATORS MODE is assigned to a function button, the button can be used to toggle LARGE INDICATORS MODE on (ON) and off (OFF) (P 174, 198).
LARGE INDICATORS MODE(LCD) Select ON to display large indicators in the LCD monitor. The indicators displayed can be selected using D SCREEN SETTING > LARGE INDICATORS DISP. SETTING. OFF O ON Some icons are not displayed when ON is selected for LARGE INDICATORS MODE(LCD) (P 13). N If LARGE INDICATORS MODE is assigned to a function button, the button can be used to toggle LARGE INDICATORS MODE on (ON) and off (OFF) (P 174, 198).
SCREEN SETTING LARGE INDICATORS DISP. SETTING Choose the indicators displayed when ON is selected for D SCREEN SETTING > LARGE INDICATORS MODE(EVF) or LARGE INDICATORS MODE(LCD). Option A Expo. DISP. B d Scale C L1, L2, L3, L4 D R1, R2, R3, R4 LARGE INDICATORS DISP. SETTING Expo. DISP. Scale Description Choose the items listed at the bottom of the display. Selected items are indicated by check marks (R); to deselect, highlight the check marks and press MENU/OK.
D BUTTON/DIAL SETTING Access options for camera controls. To access control options, press MENU/OK, select the D (SET UP) tab, and choose BUTTON/DIAL SETTING. BUTTON/DIAL SETTING FOCUS LEVER SETTING EDIT/SAVE QUICK MENU FUNCTION (Fn) SETTING COMMAND DIAL SETTING SHUTTER AF SHUTTER AE SHOOT WITHOUT LENS SHOOT WITHOUT CARD EXIT FOCUS LEVER SETTING Choose the functions performed by the focus stick (focus lever). Option LOCK (OFF) The Setup Menus Description The focus stick cannot be used during shooting.
BUTTON/DIAL SETTING EDIT/SAVE QUICK MENU Choose the items displayed in the quick menu. 1 Select D BUTTON/DIAL SETTING > EDIT/SAVE QUICK MENU in the D (SET UP) tab. 2 The current quick menu will be displayed; use the focus stick (focus lever) to highlight the item you wish to change and press MENU/OK. 3 Highlight any of the following options and press MENU/OK to assign it to the selected position.
FUNCTION (Fn) SETTING Choose the roles played by the function buttons. The Setup Menus 8 1 Select D BUTTON/DIAL SETTING > FUNCTION (Fn) SETTING in the D (SET UP) tab. 2 3 Highlight the desired control and press MENU/OK. Highlight any of the following options and press MENU/OK to assign it to the selected control.
BUTTON/DIAL SETTING N • AE LOCK ONLY, AF LOCK ONLY, AE/AF LOCK, and AF-ON cannot be assigned to the touch function buttons (T-Fn1 through T-Fn4). • Function button assignment options can also be accessed by holding the DISP/BACK button. AF-ON If AF-ON is selected, you can press the control instead of keeping the shutter button pressed halfway.
COMMAND DIAL SETTING Choose the roles played by the command dials. Option Description Assign shutter speed (S.S. (PROGRAM SHIFT)) or apFRONT COMMAND erture (APERTURE (PROGRAM SHIFT)) 1 to FRONT DIAL 1 COMMAND DIAL 1. FRONT COMMAND Assign shutter speed (S.S. (PROGRAM SHIFT)), aperture (APERTURE (PROGRAM SHIFT)) 1, exposure compenDIAL 2 sation (EXP. COMPENSATION) 2, sensitivity (ISO), or no FRONT COMMAND role (NONE) to FRONT COMMAND DIAL 2 or FRONT DIAL 3 COMMAND DIAL 3. Assign shutter speed (S.S.
BUTTON/DIAL SETTING SHUTTER AF Choose whether the camera focuses when the shutter button is pressed halfway. Option Description AF-S • ON: Focus locks when the shutter button is pressed halfway. • OFF: No focus operation is performed when the shutter button is pressed halfway. • ON: The camera focuses while the shutter button is pressed halfAF-C way. • OFF: No focus operation is performed when the shutter button is pressed halfway.
SHOOT WITHOUT CARD Choose whether the shutter can be released without a memory card inserted in the camera. Option ON OFF Description When no memory card is inserted, the shutter can be released to test camera function and the shooting and setup menus can be displayed. The shutter is disabled if no memory card is inserted, preventing accidental loss of pictures taken without a memory card. FOCUS RING Choose the direction in which the focus ring is rotated to increase the focus distance.
BUTTON/DIAL SETTING TOUCH SCREEN SETTING Enable or disable touch-screen controls. Option TOUCH SCREEN ON/OFF EVF TOUCH SCREEN AREA SETTINGS Description • ON: Touch controls enabled; the LCD monitor functions as a touch screen. • OFF: Touch controls disabled; the LCD monitor cannot be used as a touch screen. Select the area of the LCD monitor used for touch controls while the viewfinder is active.
D POWER MANAGEMENT Adjust power management settings. To access power management settings, press MENU/OK, select the D (SET UP) tab, and choose POWER MANAGEMENT. POWER MANAGEMENT AUTO POWER OFF SHOOTING STAND BY MODE AUTO POWER SAVE EXIT AUTO POWER OFF Choose the length of time before the camera turns off automatically when no operations are performed. Shorter times increase battery life; if OFF is selected, the camera must be turned off manually.
POWER MANAGEMENT AUTO POWER SAVE If ON is selected, the display frame rate will drop to save power if no operations are performed for a short period, but the normal frame rate can be restored by operating camera controls.
D SAVE DATA SETTING Make changes to file management settings. To access file management settings, press MENU/OK, select the D (SET UP) tab, and choose SAVE DATA SET-UP. SAVE DATA SETTING FRAME NO. SAVE ORG IMAGE EDIT FILE NAME CARD SLOT SETTING (STILL IMAGE) SWITCH SLOT (SEQUENTIAL) MOVIE FILE DESTINATION SELECT FOLDER COPYRIGHT INFO EXIT The Setup Menus FRAME NO. Frame number New pictures are stored in image files named using a four-digit file number assigned by adding one to the last file number used.
SAVE DATA SETTING SAVE ORG IMAGE Choose ON to save unprocessed copies of pictures taken using RED EYE REMOVAL. Options ON OFF EDIT FILE NAME Change the file name prefix. sRGB images use a four-letter prefix (default “DSCF”), Adobe RGB images a three-letter prefix (“DSF”) preceded by an underscore. Option sRGB AdobeRGB Default prefix DSCF _DSF Sample file name ABCD0001 _ABC0001 N File name prefixes can be edited using touch controls.
SAVE DATA SETTING MOVIE FILE DESTINATION Choose the slot used to store movies. Options SLOT 1 SLOT 2 SELECT FOLDER Create folders and choose the folder used to store subsequent pictures. Option SELECT FOLDER CREATE FOLDER The Setup Menus 8 Description To choose the folder in which subsequent pictures will be stored, press the focus stick (focus lever) up or down to highlight an existing folder and press MENU/OK.
D CONNECTION SETTING Adjust settings for connection to other devices. To access connection settings, press MENU/OK, select the D (SET UP) tab, and choose CONNECTION SETTING. CONNECTION SETTING Bluetooth SETTINGS NETWORK SETTING PRINTER CONNECTION SETTING PC CONNECTION MODE GENERAL SETTINGS INFORMATION RESET WIRELESS SETTING EXIT N For more information on wireless connections, visit: http://fujifilm-dsc.com/wifi/ Bluetooth SETTINGS Adjust Bluetooth settings.
N • Install the latest version of the FUJIFILM Camera Remote app on your smartphone or tablet before pairing the device with your camera or uploading images. • When ON is selected for both Bluetooth ON/OFF and AUTO IMAGE TRANSFER or images are currently selected for upload using the IMAGE TRANSFER ORDER option in the C (playback) menu, upload to paired devices will begin shortly after you exit to playback or turn the camera off.
CONNECTION SETTING instax PRINTER CONNECTION SETTING Adjust settings for connection to optional Fujifilm instax SHARE printers. The Printer Name (SSID) and Password The printer name (SSID) can be found on the bottom of the printer; the default password is “1111”. If you have already chosen a different password to print from a smartphone, enter that password instead. PC CONNECTION MODE Adjust settings for connection to a computer.
Option Description Connecting the camera to a computer via USB automatically enables USB RAW conversion/backup restore mode. The camera functions normally when not connected. USB RAW CONV. (requires FUJIFILM X RAW STUDIO): Use the • USB RAW CONV./ camera’s image processing engine to rapidly convert RAW BACKUP RESTORE files to high-quality JPEG images. • BACKUP RESTORE (requires FUJIFILM X Acquire): Save and load camera settings.
CONNECTION SETTING GENERAL SETTINGS Adjust settings for connection to wireless networks. Option Description Choose a name (NAME) to identify the camera on the wireless NAME network (the camera is assigned a unique name by default). Choose whether to resize images for upload to smartphones. Resizing applies only to the copy uploaded to the smartphone; RESIZE IMAGE FOR the original is not affected. SMARTPHONE ON: Larger images are resized to H for upload. This setting • H is recommended.
MEMO 190
Shortcuts 191
Shortcut Options Customize camera controls to suit your style or situation. Frequently-used options can be added to the Q menu or a custom “my” menu or assigned to an Fn (function) button for direct access: Description P The Q menu is displayed by pressing the Q button. The Q menu Use the Q menu to view or change the options se- 193 lected for frequently-used menu items.
The Q (Quick Menu) Button Press Q for quick access to selected options.
Viewing and Changing Settings 1 Press Q to display the quick menu during shooting. 2 3 Use the focus stick (focus lever) to highlight items and rotate the rear command dial to change. • Changes are not saved to the current settings bank. • Settings that differ from those in the current settings bank (t–u) are shown in red. SELECT CUSTOM SETTING BASE 400 SET Press Q to exit when settings are complete. Shortcuts N The quick menu can also be edited using touch controls.
The Q (Quick Menu) Button Editing the Quick Menu To choose the items displayed in the quick menu: 1 Press and hold the Q button during shooting. 2 The current quick menu will be displayed; use the focus stick (focus lever) to highlight the item you wish to change and press MENU/OK. 3 Highlight any of the following options and press MENU/OK to assign it to the selected position.
The Fn (Function) Buttons Assign a role to the function buttons for quick access to the selected feature. N The functions assigned to T-Fn1 through T-Fn4 can be accessed by flicking the monitor.
The Fn (Function) Buttons T-Fn1 (flick up) T-Fn2 (flick left) Histogram Film simulation T-Fn3 (flick right) T-Fn4 (flick down) White balance Electronic level Drive button Center of rear command dial Drive button Focus check Shortcuts 9 197
Assigning Roles to the Function Buttons To assign roles to the buttons: Shortcuts 9 1 Press and hold the DISP/BACK button until a control selection menu is displayed. 2 Highlight a control and press MENU/OK. 3 Highlight the desired role and press MENU/OK to assign it to the selected control.
The Fn (Function) Buttons N • AE LOCK ONLY, AF LOCK ONLY, AE/AF LOCK, and AF-ON cannot be assigned to the touch function buttons (T-Fn1 through T-Fn4). • Button assignments can also be selected using D BUTTON/DIAL SETTING > FUNCTION (Fn) SETTING. AF-ON If AF-ON is selected, you can press the control instead of keeping the shutter button pressed halfway.
E MY MENU Access a personalized menu of frequently-used options. To display “my menu”, press MENU/OK in the shooting display and select the E (MY MENU) tab. MY MENU SELF-TIMER INTERVAL TIMER SHOOTING FILM SIMULATION GRAIN EFFECT SHUTTER TYPE IS MODE FACE/EYE DETECTION SETTING ISO EXIT N The E tab is only available if options have been assigned to MY MENU.
MY MENU 3 Choose a position for the item and press MENU/OK. The item will be added to “my menu”. SELECT ITEM LOCATION 1 IMAGE SIZE 2 IMAGE QUALITY MOVE 4 5 SAVE Press MENU/OK to return to the edit display. Repeat Steps 3 and 4 until all the desired items have been added. N “My menu” can contain up to 16 items.
MEMO 202
Peripherals and Optional Accessories 203
Lenses The camera can be used with lenses for the FUJIFILM G-mount. Lens Parts Peripherals and Optional Accessories A Lens hood B Mounting marks C Focus ring D Aperture ring lock release E Mounting marks (focal length) F Aperture ring G Lens signal contacts H Front lens cap I Rear lens cap N A GF63mmF2.8 R WR lens is used here for illustrative purposes.
Lenses Lens Care • Use a blower to remove dust, then gently wipe with a soft, dry cloth. Any remaining stains can be removed by wiping gently with a piece of Fujifilm lens-cleaning paper to which a small amount of lens-cleaning fluid has been applied. • Replace the front and rear caps when the lens is not in use. Removing Lens Caps Remove lens caps as shown. Attaching Lens Hoods When attached, lens hoods reduce glare and protect the front lens element.
Lenses Aperture ring Rotate the lens aperture ring to choose the aperture (f-number). Aperture ring lock release Setting C( ) A( ) Peripherals and Optional Accessories Other values ( Aperture ring Description Set aperture to the value chosen with the camera command dial. Set aperture to the value chosen automatically by the camera. ) Set aperture to the selected value.
External Flash Units Flash units can be mounted on the hot shoe or connected via the sync terminal. Use optional external flash units for flash photography. Some units support high-speed sync (FP) and can be used at shutter speeds faster than the flash sync speed, while others can function as master flash units controlling remote units via optical wireless flash control. O You may be unable to test-fire the flash in some circumstances, for example when a setup menu is displayed on the camera.
Flash Settings To adjust settings for a flash unit mounted on the hot shoe or connected via the sync terminal: 1 2 Connect the unit to the camera. In shooting mode, select FLASH FUNCTION SETTING in the F (FLASH SETTING) menu tab. The options available vary with the flash unit.
External Flash Units SYNC TERMINAL The following options are available when no compatible flash unit is connected or if a unit is connected via the sync terminal or uses only the X-contact on the hot shoe. MODE SYNC TERMINAL ADJUST END Setting The Sync Terminal Use the sync terminal to connect flash units that require a sync cable.
SHOE MOUNT FLASH The following options are available when an optional shoe-mounted flash unit is attached and turned on. MODE SHOE MOUNT FLASH ADJUST Setting END Peripherals and Optional Accessories Description The flash control mode selected with the flash unit. This can in some cases be adjusted from the camera; the options available vary with the flash. • TTL: TTL mode. Adjust flash compensation (B).
External Flash Units Setting 211 Peripherals and Optional Accessories Description The options available vary with flash control mode. • TTL: Adjust flash compensation (the full value may not be applied if the limits of the flash control system are exceeded). In the cases of the EF-X20, EF-20, and EF-42, the selected value is added to the value selected with the flash unit. B Flash compensation/ • M/MULTI: Adjust flash output (compatible units only).
Setting E Zoom F Lighting G LED light G Number of flashes * Peripherals and Optional Accessories H Frequency * Description The angle of illumination (flash coverage) for units that support flash zoom. Some units allow the adjustment to be made from the camera. If AUTO is selected, zoom will automatically be adjusted to match coverage to lens focal length. If the unit supports this feature, choose from: • J (FLASH POWER PRIORITY): Gain range by slightly reducing coverage.
External Flash Units MASTER(OPTICAL) The options will be displayed if the unit is currently functioning as master flash for Fujifilm optical wireless remote flash control. MODE MASTER(OPTICAL) ADJUST C A B Peripherals and Optional Accessories The master and remote units can be placed in up to three groups (A, B, and C) and flash mode and flash level adjusted separately for each group.
Setting A Flash control mode (group A) B Flash control mode (group B) C Flash control mode (group C) Peripherals and Optional Accessories D Flash compensation/ output (group A) E Flash compensation/ output (group B) F Flash compensation/ output (group C) 10 214 Description Choose flash control modes for groups A, B, and C. TTL% is available for groups A and B only. • TTL: The units in the group fire in TTL mode. Flash compensation can be adjusted separately for each group.
External Flash Units Setting G Flash mode (TTL) I Zoom 215 Peripherals and Optional Accessories H Sync Description Choose a flash mode for TTL flash control. The options available vary with the shooting mode (P, S, A, or M) selected. • E (FLASH AUTO): The flash fires only as required; flash level is adjusted according to subject brightness. A p icon displayed when the shutter button is pressed halfway indicates that the flash will fire when the photo is taken.
External Flash Units Setting J Lighting K Master K Number of flashes Peripherals and Optional Accessories L Channel L Frequency 10 216 Description If the unit supports this feature, choose from: • J (FLASH POWER PRIORITY): Gain range by slightly reducing coverage. • K (STANDARD): Match coverage to picture angle. • L (EVEN COVERAGE PRIORITY): Slightly increase coverage for more even lighting. Assign the master flash to group A (Gr A), B (Gr B), or C (Gr C).
Connections 217
HDMI Output Camera shooting and playback displays can be output to HDMI devices. Connecting to HDMI Devices Connect the camera to TVs or other HDMI devices using a third-party HDMI cable. 1 2 Turn the camera off. Connect the cable as shown below. Insert into HDMI connector Insert into HDMI Micro connector (Type D) Connections 11 3 Configure the device for HDMI input as described in the documentation supplied with the device. 4 Turn the camera on.
HDMI Output Shooting Shoot photos and record movies while viewing the scene through the camera lens on or saving footage to the HDMI device. Playback To start playback, press the camera a button. The camera monitor turns off and pictures and movies are output to the HDMI device. Note that the camera volume controls have no effect on sounds played on the TV; use the television volume controls to adjust the volume. O Some televisions may briefly display a black screen when movie playback begins.
Wireless Connections (Bluetooth®, Wireless LAN/Wi-Fi) Access wireless networks and connect to computers, smartphones, or tablets. For more information, visit: http://fujifilm-dsc.com/wifi/ Smartphones and Tablets: FUJIFILM Camera Remote Connect to the camera via Bluetooth or wireless LAN. N To establish a wireless connection to the camera, you will need to in- stall the latest version of the FUJIFILM Camera Remote app on your smartphone or tablet.
Wireless Connections SmartPhones and Tablets: Bluetooth® Pairing Use D CONNECTION SETTING > Bluetooth SETTINGS > PAIRING REGISTRATION to pair the camera with smartphones or tablets. Pairing offers a simple method for downloading photos from the camera. O • Photos are downloaded via a wireless connection. • Once pairing is complete, you will be able to synchronize the camera clock and location data with the smartphone or tablet (P 185).
Wireless Connections Tethered Shooting: FUJIFILM X Acquire/FUJIFILM Tether Shooting Plug-in/FUJIFILM Tether Shooting Plug-in PRO/ Hyper-Utility Software HS-V5 SETTING • Before proceeding, select WIRELESS CONNECTION Bluetooth SETTINGS USB CARD READER NETWORK SETTING TETHER SHOOTING FIXED for D CONUSB TETHER SHOOTING AUTO PRINTER CONNECTION SETTING USB TETHER SHOOTING FIXED NECTION SETTING > PC CONNECTION PC CONNECTION MODE WIRELESS TETHER SHOOTING FIXED GENERAL SETTINGS USB RAW CONV.
Connecting to Computers via USB Connect the camera to a computer to download pictures or take pictures remotely. N Before downloading pictures or taking pictures remotely, connect the camera to a computer and check that it functions normally. 1 2 Turn the computer on. 3 4 Turn the camera off.
5 6 Turn the camera on. Copy pictures to your computer. • Tethered shooting: During tethered shooting, you can copy pictures using tethered shooting software such as the FUJIFILM Tether Shooting Plug-in PRO. • Image transfer: Use MyFinePix Studio or applications provided with your operating system. • RAW conversion: Process RAW images using FUJIFILM X RAW STUDIO. The power of the camera’s image processing engine is used for rapid processing.
Connecting to Computers via USB O • Turn the camera off before disconnecting the USB cable. • When connecting USB cables, be sure the connectors are fully in- serted in the correct orientation. Connect the camera directly to the computer; do not use a USB hub or keyboard. • Loss of power during transfer could result in loss of data or damage to the memory card. Insert a fresh or fully-charged battery before connecting the camera.
Tethered Shooting: FUJIFILM X Acquire/FUJIFILM Tether Shooting Plug-in/FUJIFILM Tether Shooting Plug-in PRO/ Hyper-Utility Software HS-V5 SETTING • Before proceeding, select USB TETHER CONNECTION Bluetooth SETTINGS USB CARD READER NETWORK SETTING SHOOTING AUTO for D CONNECTION USB TETHER SHOOTING AUTO PRINTER CONNECTION SETTING USB TETHER SHOOTING FIXED SETTING > PC CONNECTION MODE in PC CONNECTION MODE WIRELESS TETHER SHOOTING FIXED GENERAL SETTINGS USB RAW CONV./BACKUP RESTORE the camera menus.
Connecting to Computers via USB Copying Pictures to a Computer • Before copying pictures to a computer, select USB CARD READER for D CONNECTION SETTING > PC CONNECTION MODE. • The software that can be used to copy pictures varies with your computer operating system. CONNECTION SETTING Bluetooth SETTINGS USB CARD READER NETWORK SETTING USB TETHER SHOOTING AUTO PRINTER CONNECTION SETTING USB TETHER SHOOTING FIXED PC CONNECTION MODE WIRELESS TETHER SHOOTING FIXED GENERAL SETTINGS USB RAW CONV.
Connecting to Computers via USB Copying RAW Images in Other Formats: FUJIFILM X RAW STUDIO • Before proceeding, select USB RAW CONV./BACKUP RESTORE for D CONNECTION SETTING > PC CONNECTION MODE in the camera menus. • FUJIFILM X RAW STUDIO can be used to save copies of RAW images in other formats.
instax SHARE Printers Print pictures from your digital camera to instax SHARE printers. Establishing a Connection Select D CONNECTION SETTING > instax PRINTER CONNECTION SETTING and enter the instax SHARE printer name (SSID) and password. The Printer Name (SSID) and Password The printer name (SSID) can be found on the bottom of the printer; the default password is “1111”. If you have already chosen a different password to print from a smartphone, enter that password instead.
instax SHARE Printers Printing Pictures 1 Turn the printer on. 2 Select C PLAY BACK MENU > instax PRINTER PRINT. The camera will connect to the printer. PRINTER PRINT instax-12345678 CONNECTING FUJIFILM-CAMERA-1234 CANCEL 3 Use the focus stick (focus lever) to display the picture you want to print, then press MENU/OK. PRINTER PRINT 100-0020 SET instax-12345678 CANCEL N • Pictures taken with other cameras cannot be printed. • The area printed is smaller than the area visible in the LCD monitor.
Technical Notes 231
Accessories from Fujifilm The following optional accessories are available from Fujifilm. For the latest information on the accessories available in your region, check with your local Fujifilm representative or visit http://www.fujifilm.com/products/digital_cameras/index.html. Rechargeable Li-ion batteries NP-T125: Additional high-capacity NP-T125 rechargeable batteries can be purchased as required. Battery chargers BC-T125: Replacement battery chargers can be purchased as required.
Accessories from Fujifilm Shoe-mounted flash units EF-X500: This clip-on flash unit has a Guide Number of 50/164 (ISO 100, m/ft.) and supports FP (high-speed sync), allowing it to be used at shutter speeds that exceed the flash sync speed.
Software from Fujifilm The camera can be used with the following Fujifilm software. FUJIFILM Camera Remote Establish a wireless connection between your camera and a smartphone or tablet (P 220). http://app.fujifilm-dsc.com/en/camera_remote/ MyFinePix Studio Manage, view, print, and edit the many images downloaded from your digital camera (P 227). http://fujifilm-dsc.com/mfs/ Once download is complete, double-click the downloaded file (“MFPS_Setup.
Software from Fujifilm FUJIFILM X RAW STUDIO When the camera is connected to a computer via USB, FUJIFILM X RAW STUDIO can use the camera’s unique image processing engine to rapidly convert RAW files to create high-quality images in other formats. http://fujifilm-x.com/x-stories/fujifilm-x-raw-studio-featuresusers-guide/ FUJIFILM X Acquire This application for Windows and macOS lets you connect to the camera via USB or Wi-Fi and automatically download photos to a specified folder as they are taken.
For Your Safety IMPORTANT SAFETY INSTRUCTIONS Instructions: All the safety and operating instructions • Read Instructions should be read before the appliance is operated. Instructions: The safety and operating instructions • Retain Instructions should be retained for future reference. Warnings: All warnings on the appliance and in the • Heed Warnings operating instructions should be adhered to. Instructions: All operating and use instructions • Follow Instructions should be followed.
For Your Safety Power Lines: An outside antenna system should not be locat- Damage Requiring Service: Unplug this video product from ed in the vicinity of overhead power lines or other electric the wall outlet and refer servicing to qualified service personlight or power circuits, or where it can fall into such power nel under the following conditions: lines or circuits.
WARNING Do not disassemble Do not touch internal parts Technical Notes 12 238 Never attempt to change or take apart the camera (never open the case). Failure to observe this precaution can cause fire or electric shock. Should the case break open as the result of a fall or other accident, do not touch the exposed parts. Failure to observe this precaution could result in electric shock or in injury from touching the damaged parts.
For Your Safety CAUTION Do not cover or wrap the camera or the AC power adapter in a cloth or blanket. This can cause heat to build up and distort the casing or cause a fire. Do not use the plug if it is damaged or if it does not fit securely into the outlet. Failure to observe this precaution could result in fire or electric shock. When you are cleaning the camera or you do not plan to use the camera for an extended period, remove the battery and disconnect and unplug the AC power adapter.
AC Power Adapters Use only Fujifilm AC power adapters designated for use with this camera. Other adapters could damage the camera. • The AC power adapter is for indoor use only. • Be sure the DC plug is securely connected to the camera. • Turn the camera off before disconnecting the adapter. Disconnect the adapter by the plug, not the cable. • Do not use with other devices. • Do not disassemble. • Do not expose to high heat and humidity. • Do not subject to strong physical shocks.
For Your Safety NOTICES To prevent fire or shock hazard, do not expose the unit to rain or moisture. Please read the “Safety Notes” and make sure you understand them before using the camera. Perchlorate Material—special handling may apply. See: http://www.dtsc.ca.gov/hazardouswaste/perchlorate For Customers in the U. S. A.
For Customers in Canada CAN ICES-3 (B)/NMB-3(B) CAUTION: This Class B digital apparatus complies with Canadian ICES-003. Industry Canada statement: This device complies with Industry Canada’s licence-exempt RSSs. Operation is subject to the following two conditions: (1) This device may not cause interference; and (2) This device must accept any interference, including interference that may cause undesired operation of the device.
For Your Safety Technical Notes Wireless Network and Bluetooth Devices: Cautions This product complies with the following EU Directives: • Security: Wireless network and Bluetooth devices transmit data via radio and consequently their use requires great• RoHS Directive 2011/65/EU er attention to security than applies in the case of wired • RE Directive 2014/53/EU Hereby, FUJIFILM Corporation declares that the radio networks.
For Your Safety Be sure to read these notes before using the lens Safety Notes WARNING • Make sure that you use the lens correctly. Read these safety notes and the camera Owner’s Manual carefully before use. • After reading these safety notes, store them in a safe place.
Product Care To ensure continued enjoyment of the product, observe the following precautions. Camera body: Use a soft, dry cloth to clean the camera body after each use. Do not use alcohol, thinner, or other volatile chemicals, which could discolor or deform the leather on the camera body. Any liquid on the camera should be removed immediately with a soft, dry cloth. Use a blower to remove dust from the monitor, taking care to avoid scratches, and then gently wipe with a soft, dry cloth.
Cleaning the Image Sensor Dust that cannot be removed using D USER SETTING > SENSOR CLEANING can be removed manually as described below. O Note that there will be a charge to repair or replace the image sensor if it is damaged during cleaning. 1 Use a blower (not a brush) to remove dust from the sensor. O Do not use a brush or blower brush. Failure to observe this precaution could damage the sensor. 2 Check whether the dust has been successfully removed. Repeat Steps 1 and 2 as necessary.
Firmware Updates Updates to product firmware may result in changes not described in the manual. For more information, visit: http://www.fujifilm.com/support/digital_cameras/software Checking the Firmware Version O The camera will only display the firmware version if a memory card is inserted. 1 2 Turn the camera off and check that a memory card is inserted. 3 Turn the camera off. Turn the camera on while pressing the DISP/BACK button.
Troubleshooting Consult the table below should you encounter problems using your camera. If you don’t find the solution here, contact your local Fujifilm distributor. Power and Battery Problem Solution • The battery is exhausted: Charge the battery or insert a fully-charged spare battery (P 29). The camera does not turn on. • The battery is inserted incorrectly: Reinsert in the correct orientation (P 32). • The battery-chamber cover is not latched: Latch the battery-chamber cover (P 32).
Troubleshooting Problem Solution • Insert the battery (P 32). • Reinsert the battery in the correct orientation (P 32). Make sure that the charger is correctly plugged Charging does not start. • in (P 29). • Ensure that the plug adapter is correctly connected to the charger (P 29). Charging is slow. Charge the battery at room temperature. • There is dirt on the battery terminals: Clean the terminals with a soft, dry cloth (P 32).
Shooting Problem Solution • The memory card is full: Insert a new memory card or delete pictures (P 34, 138). • The memory card is not formatted: Format the memory card in the camera (P 156). • There is dirt on the memory card contacts: Clean the contacts with a soft, dry cloth. No picture is taken when The memory card is damaged: Insert a new memory card • the shutter button is (P 34). pressed. • The battery is exhausted: Charge the battery or insert a fully-charged spare battery (P 29).
Troubleshooting Problem Solution • The subject’s face is obscured by sunglasses, a hat, long hair, or other objects: Remove the obstructions (P 104). • The subject’s face occupies only a small area of the frame: Change the composition so that the subject’s face occupies a larger area of the frame (P 104). • The subject’s face is turned away from the camera: Ask the subject to face the camera (P 104). • The camera is tilted: Keep the camera level.
Problem Solution • The subject is not in range of the flash: Position the subject in The flash does not fully light the subject. range of the flash. • The flash window is obstructed: Hold the camera correctly. • Shutter speed is faster than the sync speed: Choose a slower shutter speed (P 58, 62, 262). Pictures are blurred. Pictures are mottled. Technical Notes 12 252 • The lens is dirty: Clean the lens. • The lens is blocked: Keep objects away from the lens (P 45).
Troubleshooting Playback Problem Pictures are grainy. Playback zoom is unavailable. No sound in movie playback. Solution The pictures were taken with a different make or model of camera. The pictures were created using RESIZE or with a different make or model of camera. • Playback volume is too low: Adjust playback volume (P 161). • The microphone was obstructed: Hold the camera correctly during recording. • The speaker is obstructed: Hold the camera correctly during playback.
Connections Problem The monitor is blank. Both the TV and camera monitor are blank. No picture or sound on TV. The computer does not recognize the camera. Cannot transfer RAW or JPEG files to computer. Technical Notes 12 254 Solution The camera is connected to a TV: Pictures will be displayed on the TV instead of in the camera monitor (P 218). The display mode selected with the VIEW MODE button is EVF ONLY + E: Put your eye to the viewfinder.
Troubleshooting Wireless Transfer For additional information on troubleshooting wireless connections, visit: http://digital-cameras.support.fujifilm.com/app?pid=x Problem Cannot connect to smartphone. The camera is slow to connect or upload pictures to the smartphone. Upload fails or is interrupted. Solution • The smartphone is too far away: Move the devices closer (P 220).
Troubleshooting Miscellaneous Problem Solution • Temporary camera malfunction: Remove and reinsert the battery (P 32). The battery is exhausted: Charge the battery or insert a The camera is unresponsive. • fully-charged spare battery (P 29). • The camera is connected to a wireless LAN: End the conThe camera does not function as expected. No sound. Pressing the Q button does not display the quick menu. Technical Notes 12 256 nection. Remove and reinsert the battery (P 32).
Warning Messages and Displays The following warnings appear in the display. Warning Description Low battery. Charge the battery or insert a fully-charged i (red) spare battery. Battery exhausted. Charge the battery or insert a fulj (blinks red) ly-charged spare battery. The camera cannot focus. Use focus lock to focus on ans (displayed in red with other subject at the same distance, then recompose the red focus frame) picture.
Warning Description • The memory card is not formatted for use in the camera: Format the card. • The memory card contacts require cleaning or the memory card CARD ERROR PROTECTED CARD BUSY b MEMORY FULL WRITE ERROR FRAME NO. FULL Technical Notes 12 258 is damaged: Clean the contacts with a soft, dry cloth. If the message is repeated, format the card. If the message persists, replace the card. • Incompatible memory card: Use a compatible card. • Camera malfunction: Contact a Fujifilm dealer.
Warning Messages and Displays Warning Description • The file is corrupt or was not created with the camera: The file cannot be viewed. READ ERROR • The memory card contacts require cleaning: Clean the con- tacts with a soft, dry cloth. If the message is repeated, format the card. If the message persists, replace the card. • Camera malfunction: Contact a Fujifilm dealer. An attempt was made to delete or rotate to a protected picPROTECTED FRAME ture. Remove protection and try again.
Memory Card Capacity The following table shows the recording time or number of pictures available at different image sizes. All figures are approximate; file size varies with the scene recorded, producing wide variations in the number of files that can be stored. The number of exposures or length remaining may not diminish at an even rate.
Specifications System Model Product Number Effective pixels Image sensor Storage media Memory card slots File system 261 Technical Notes FUJIFILM GFX 50R FF180004 Approx. 51.4 million 43.8 mm × 32.9 mm Bayer array with primary color filter Fujifilm-recommended SD/SDHC/SDXC memory cards Two SD memory card slots (UHS-II compliant) Compliant with Design Rule for Camera File System (DCF2.0), Exif 2.3, and Digital Print Order Format (DPOF) File format • Still pictures: Exif 2.
System Shutter speed Continuous • MECHANICAL SHUTTER, E-FRONT CURTAIN SHUTTER ⁃ Mode P: 4 s to ¼ s ⁃ Other modes: 60 min. to ¼ s ⁃ Time: 60 min. to ¼ s ⁃ Bulb: Max. 60 min. • ELECTRONIC SHUTTER, MECHANICAL + ELECTRONIC, E-FRONT + ELECTRONIC ⁃ Mode P: 4 s to ⁄ s ⁃ Other modes: 60 min. to ⁄ s ⁃ Time: 60 min. to ⁄ s ⁃ Bulb: Max. 60 min. • Available frame advance rates (JPEG): 3.
Specifications System Viewfinder 0.5-in., 3690k-dot OLED viewfinder; magnification 0.77× with 50 mm lens (35 mm format equivalent) at infinity and diopter set to −1.0 m−1; diagonal angle of view approximately 38° (horizontal angle of view approximately 30°) • Diopter adjustment: −4 to +2 m−1 • Eyepoint: Approximately 23 mm 3.2-in/8.1 cm, 2360k-dot color LCD touch screen with 2-way tilt LCD monitor Movies i 1080/29.97P h 720/29.97P (with stereo sound) i 1080/25P h 720/25P i 1080/24P h 720/24P i 1080/23.
Power supply/other Power supply Battery life • NP-T125 rechargeable battery (supplied with camera) • AC-15V AC adapter (available separately) • Battery type: NP-T125 • Lens: GF63mmF2.8 R WR • Flash: Disabled • Shooting mode: Mode P AUTO POWER SAVE ON OFF Number of shots LCD Approx. 400 Approx. 340 EVF Approx. 400 Approx. 340 Total length of footage that can be recorded on a single charge Continuance Actual Battery life of Battery life of movie Mode movie capture capture Approx. 70 minutes Approx.
Specifications Wireless transmitter Wireless LAN Standards Operating frequency (center frequency) Access protocols Bluetooth® Standards Operating frequency (center frequency) IEEE 802.11b/g/n (standard wireless protocol) 2,412 MHz–2,462 MHz (11 channels) Infrastructure Bluetooth version 4.0 (Bluetooth Low Energy) 2,402 MHz–2,480 MHz NP-T125 rechargeable battery Nominal voltage 10.8 V Nominal capacity 1250 mAh Operating −10 °C to +40 °C/+14 °F to +104 °F temperature Dimensions 36.0 mm × 54.4 mm × 26.
MEMO 266
MEMO 267
7-3, AKASAKA 9-CHOME, MINATO-KU, TOKYO 107-0052, JAPAN http://www.fujifilm.com/products/digital_cameras/index.