
Operating Manual

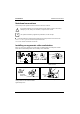
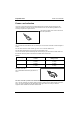
Table Of Contents
- Introduction
- Important notes
- For the United States and Canada
- Table A:
- For units set at 115 V:
- For units set at 230 V (outside of the United States and Canada):
- On the move with the notebook
- Transporting the notebook
- Before starting the journey
- Cleaning the notebook
- Preparation for use and operation
- Floppy disk drive
- Operating the CD-ROM drive and the DVD drive
- Power-on indicator
- Inserting or removing a CD/DVD
- Manual removal (emergency removal)
- Operating the Zip drive
- Installing the Iomega software
- Reinstalling the Iomega software from the Zip disk
- Operation
- Handling Zip disks
- Inserting the Zip disk
- Sleep mode of drive
- Removing the Zip disk
- Manual removal (emergency removal)
- PC€Cards
- Microphone and loudspeaker
- Using the power-management features
- Automatic activation
- Suspend mode
- Suspend to Disk
- Suspend to DRAM
- Activating
- Exit
- Automatic activation
- Display
- Activating
- Deactivating
- Automatic powerdown
- Hard disk's power-management feature
- Activating
- Loudspeaker
- Deactivating
- Activating
- Deactivating in BIOS€Setup
- Volume adjustment
- Increasing the volume
- Reducing the volume
- Changing display settings
- Settings in BIOS Setup
- Starting BIOS Setup
- Operating BIOS Setup
- Main menu - Making system settings
- System€Time/System€Date
- Diskette€A: - floppy disk drive
- IDE Adapter 0 Master/IDE Adapter 1 Master - hard disk drive
- Type - Hard Disk Type
- Cylinders, Heads, Sectors/Track, Write Precomp - hard disk parameter
- Multi-Sector Transfers - Block Transfer
- LBA Mode Control - Addressing
- 32 Bit I/O - Access width for data transfer
- Transfer Mode
- Ultra DMA Mode - Access Speed
- Display€Device€Selection
- TV€Mode
- Boot€Options - System startup options
- Summary screen - Displaying the configuration at system startup
- Floppy€check - Checking the disk drive
- Quiet€Boot
- System€Memory - Main memory
- Extended€Memory
- Advanced menu - Advanced system settings
- Mode - Infrared Interface Mode
- Parallel port
- Base I/O Address - Address of the parallel port
- Mode - parallel data transmission mode
- Diskette€Controller
- On-board IDE€Adapter - IDE hard disk controller
- On Board Audio - Audio Controller
- Base I/O Address
- IRQ Channel - Interrupt channel
- Capture DMA Channel - DMA channel for capture
- Playback DMA Channel - DMA channel for playback
- FM I/O - Base address for the FM synthesizer
- MPU I/O - Base address for the MIDI interface
- Joystick - Joystick Port
- FM I/O - Base address for the joystick
- QuickPort Audio - Audio options for QuickPort
- Speaker - Selecting the loudspeaker
- Microphone - Selecting the microphone
- PCI Devices - PCI configuration
- Cardbus Controller Select - Settings of the PC Card Controller
- PCI IRQ line 1,2,3 - Setting the PCI interrupt
- Plug€&€Play€O/S
- Enable€ACPI€ - ACPI€functionality
- Reset Configuration Data
- Large Disk Access Mode - Hard disk access
- Security menu - Setting up the security features
- Diskette€access - Access privilege for disk drive
- Flash€update - Permission for BIOS update
- Power menu - Setting energy saving functions
- PM€Control - Effectiveness of the energy saving functions
- Power€Savings - Extent of energy saving functions
- Standby€Timeout
- Auto Suspend€Timeout - Suspend mode
- Hard Disk€Timeout - Hard disk energy saving function
- Video€timeout - Energy saving functions for the monitor
- LID€Switch - LID mode
- Battery€Low€Suspend - Suspend mode for low battery capacity
- Suspend€Mode
- Resume€On€Modem€Ring - Switching on for modem ring
- Resume€On€Time - Switching on at a fixed time
- Resume€Time - Setting the switch-on time
- Cooling Control - Cooling mode
- Docking menu - Configuring the MobiDock
- Floppy disk€B: - Set external floppy disk drive
- IDE Adapter 1 Master/IDE Adapter 1 Slave - Setting external hard disk drives
- Boot€Hard€Disk - Specifying hard disk for system load
- Integrated IDE Adapter - Setting the IDE Controller in the MobiDock
- SCSI€Controller - Setting the MobiDock SCSI controller
- Docking€Station€Password€is - Password display
- Set Docking€Station€Password -Setting the Docking€Station€Password
- Boot menu - Defining boot sequence
- Exit menu - Exiting BIOS Setup
- Save€Changes€&€Exit - Saving and Exiting
- Exit€Without€Saving€Changes
- Get€Default€Values
- Load€Previous€Values
- Save Changes
- Property and data protection
- Preventing unauthorized access to the hard disk drives
- Preventing unauthorized access to floppy disk drive
- Preventing unauthorized access to MobiDock
- Preventing unauthorized update of flash BIOS
- Setting passwords
- Canceling password
- Troubleshooting and tips
- Installing new software
- The notebook does not start after switchon
- The battery is not installed correctly
- The battery is dead
- The power adapter is not connected correctly
- The display of the notebook remains blank
- Monitor is switched off
- The notebook's display is difficult to read
- Reflexes
- Defective pixels on the screen
- The external monitor stays blank
- Monitor is switched off
- Screen has been blanked
- Brightness control is set to dark
- The notebook has been configured to drive the internal display
- The external display's power cable or data cable is not connected properly
- The external display is blank or the image is unstable
- Installing new software
- The notebook stops working
- The notebook is in Standby or Suspend mode
- An application program has caused the malfunction
- The battery is dead
- The touchpad does not work
- Incorrect setting in Setup
- External PS/2 mouse connected
- The mouse does not work
- Incorrect setting in Setup
- Mouse driver not loaded
- Mouse not connected
- The floppy disk cannot be written
- The notebook's date or time is incorrect
- The printer does not print
- The PC card (PCMCIA card) cannot be accessed
- Acoustic warnings
- A beep sounds every few seconds
- One long tone, pause, three long tones, pause, three long tones, pause, one long tone
- A single continuous beep
- Three long beeps
- Error messages on the screen
- Diskette read failure - press F1 to retry boot
- No boot device available - press F1 to retry boot
- No boot sector on fixed disk - press F1 to retry boot
- No devices detected
- Not a boot disk - press F1 to retry boot
- _
- Restoring the hard disk contents under Windows€9x
- System expansions
- In order to install memory modules:
- In order to remove memory modules:
- Connecting external devices
- Connecting a MobiDock or QuickPort
- Transferring data with the infrared interface
- Technical data
- Fixed internal settings:
- Settings for external components (e.g. MobiDock, PC card):
- Shared IRQ:
- Port assignment
- Pinout in SPP mode (Standard Parallel Port)
- Pinout in EPP mode (Enhanced Parallel Port)
- Pinout in ECP mode (Enhanced Capabilities Port)
- Pinouts for connecting an external floppy disk drive

FCC Class B Compliance Statement Important notes
A26391-K84-Z100-1-7619
5
FCC Class B Compliance Statement
If there is an FCC statement on the device, then:
The following statement applies to the products covered in this manual, unless otherwise specified
herein. The statement for other products will appear in the accompanying documentation.
NOTE:
This equipment has been tested and found to comply with the limits for a "Class B" digital device,
pursuant to Part 15 of the FCC rules and meets all requirements of the Canadian Interference-Causing
Equipment Regulations. These limits are designed to provide reasonable protection against harmful
interference in a residential installation. This equipment generates, uses and can radiate radio
frequency energy and, if not installed and used in strict accordance with the instructions, may cause
harmful interference to radio communications. However, there is no guarantee that interference will not
occur in a particular installation. If this equipment does cause harmful interference to radio or television
reception, which can be determined by turning the equipment off and on, the user is encouraged to try
to correct the interference by one or more of the following measures:
•
Reorient or relocate the receiving antenna.
•
Increase the separation between equipment and the receiver.
•
Connect the equipment into an outlet on a circuit different from that to which the receiver is
connected.
•
Consult the dealer or an experienced radio/TV technician for help.
Siemens AG is not responsible for any radio or television interference caused by unauthorized
modifications of this equipment or the substitution or attachment of connecting cables and equipment
other than those specified by Siemens AG. The correction of interferences caused by such
unauthorized modification, substitution or attachment will be the responsibility of the user.
The use of shielded I/O cables is required when connecting this equipment to any and all optional
peripheral or host devices. Failure to do so may violate FCC rules.