HandyDrive User’s Guide We m a ke you r da ta p orta b le Copyright and Trademarks Copyright® 2007 FUJITSU LIMITED This document and all materials contained herein are subject to copyright. This document may not be copied, in whole or in part, without the written consent of FUJITSU LIMITED. Fujitsu is a trademark of FUJITSU LIMITED. All other companies and product names mentioned in this document are trademarks of their respective companies.
1. Name of Each Part Power/Operation Light 1 2 3 ON (bright) Idle ON (dim) Read and Write Blinking Read and Write Blinking at a fixed Power save interval In “blinking” the brightness of the Power/Operation Light may vary at display. USB connector Connect the USB cable that is supplied with this product. At connection, open the cover as indicated by the arrow. Power connector Connect the bus power assist cable that is supplied with this product or the optional HandyDrive AC adaptor.
. Operating Procedure on a Windows PC When using on a Windows Vista, Windows XP, 2000, or Me PC Connection to the PC This product does not support Windows 98 (including Windows 98 Second Edition) 1. Connect the USB cable (mini-B connector) to the USB connector of the HandyDrive. 2. Connect the USB cable (A connector) to the USB connector of the main unit of the PC. Please wait until [Your new hardware is installed and ready to use.] is displayed when you connect for the first time. 3.
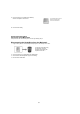
When using on a Windows Vista, Windows XP, 2000, or Me PC Disconnect from the PC 1. Left-click the icon displayed in the task tray. Left-click the [ ] in case of Windows Vista. Left-click the [ ] in case of Windows XP/ 2000/ Me. 2. Left-click the menu which is displayed as below.
When using on a Windows Vista, Windows XP, 2000, or Me PC Reformatting the HandyDrive All the data inside the HandyDrive is erased when reformat is executed. Please backup the necessary data. • This product is formatted in FAT32 format at the factory. You can use without change when using a Windows PC. • When saving a file of the size exceeding 4GB, HandyDrive must be reformatted to the NTFS format in advance. • The NTFS Format is supported by Windows Vista, Windows XP, and Windows 2000 Professional.
4. Operating Procedure on a Macintosh PC This product does not support Macintosh of Mac OS 9 and earlier versions. ● In Mac OS X 10.1 or Mac OS X 10.2, the drive icon is not displayed under the formatting at the factory. ● Applicable characters are different between Mac OS and Windows. If you write a file name that is not compatible with FAT32 and use this product in the default setting on Mac OS, it may not be read correctly.
11. Confirm that the icon is added to the desktop after the completion of the format. The volume name is not set. Click the volume name of the icon and reset it. 12. Close the Disk Utility. ■ Connection Procedure Connection to the Macintosh This product can be connected anytime. Connect by following step 3. Disconnecting the HandyDrive from the Macintosh 1. Drag-and-drop the icon of the HandyDrive displayed on the desktop to the Trash. It cannot be removed during the operation of the file.
When using on a Mac OS X 10.2 ■ Please first reformat for Mac All the data inside the HandyDrive is erased when reformat is executed. Please backup the necessary data. 1. Start the Mac OS without connecting the product. Connect the product at step 5. Log in with the administrator account. 2. Remove all USB devices other than this product. (Remove the drives besides the FireWire drive used for the start-up when using drives connected by FireWire.) 3. Double-click the icon of the start-up disk (Macintosh HD).
■ Connecting the HandyDrive to Macintosh 1. Connect the USB cable (mini-B connector) to the USB connector of the HandyDrive. 2. Connect the USB cable (A connector) to the USB connector of the main unit of the PC. 3. Wait until the HandyDrive drive is displayed. Disconnecting the HandyDrive from Macintosh 1. Drop the HandyDrive icon to the Trash. It cannot be removed during the operation of the file. Remove after finishing the Operation of the file. 2. Confirm that the icon of HandyDrive has disappeared.
When using on a Mac OS X 10.3 ■ Please first reformat for Mac All the data inside the HandyDrive is erased when reformat is executed. Please backup the necessary data. 1. Remove all USB devices other than this product. (Remove the drives besides the FireWire drive used for the start-up when using drives connected by FireWire.) 2. Start the Mac OS without connecting the HandyDrive. Connect the HandyDrive at step 5. Log in to the Mac OS. 3. Double-click the icon of the start-up disk (Macintosh HD). 4.
■ Connecting the HandyDrive to Macintosh 1. Connect the USB cable (mini-B connector) to the USB connector of the HandyDrive. 2. Connect the USB cable (A connector) to the USB connector of the main unit of the PC. 3. Wait until the HandyDrive drive is displayed. Disconnecting the HandyDrive from Macintosh 1. Drop the HandyDrive icon to the Trash. It cannot be removed during the operation of the file. Remove after finishing the Operation of the file. 2. Confirm that the icon of HandyDrive has disappeared.
When using on a Mac OS X 10.4 ■ Please first reformat for Mac All the data inside the HandyDrive is erased when reformat is executed. Please backup the necessary data. 1. Remove the USB connections other than this product. (Remove the drives besides the FireWire drive used for the start-up when using drives connected by FireWire.) 2. Start the Mac OS without connecting the HandyDrive. Connect the HandyDrive at step 5. Log in to the Mac OS. 3. Double-click the icon of the start-up disk (Macintosh HD). 4.
■ Connecting the HandyDrive to Macintosh 1. Connect the USB cable (mini-B connector) to the USB connector of the HandyDrive. 2. Connect the USB cable (A connector) to the USB connector of the main unit of the PC. 3. Wait until the HandyDrive drive is displayed. Disconnecting the HandyDrive from Macintosh 1. Drag-and-drop the icon of the HandyDrive displayed on the desktop to the Trash. It cannot be removed during the operation of the file. Remove after finishing the operation of the file. 2.