P3PC-E737-02EN fi-5750C Image Scanner Getting Started
■ Introduction Thank you for purchasing the fi-5750C Duplex Color Scanner product. This document describes how to handle fi5750C Duplex Color scanner and basic operation methods. Before you start using fi-5750C Duplex Color scanner, be sure to thoroughly read this manual to ensure correct use. The “Operator’s Guide” is guide is stored on the User Manual CD-ROM. The guide provides useful and detailed information on operation, daily care, replacement of consumables and trouble shooting, etc.
• Maschinenlärminformationsverordnung 3. GPSGV: Der höchste Schalldruckpegel beträgt 70 dB (A) oder weniger, gemäß EN ISO 7779. International ENERGY STAR® Program As an ENERGY STAR® Partner, PFU LIMITED has determined that this product meets the ENERGY STAR® guidelines for energy efficiency. transport systems, medical equipment for sustaining life, and missile firing control in weapons systems, and when provisionally the safety in question is not ensured.
How Trademarks Are Indicated In This Manual References to operating systems (OS) are indicated as follows: Windows 95: Microsoft® Windows® 95 operating system. Windows 98: Microsoft® Windows® 98 operating system. Windows Me: Microsoft® Windows® Millennium Edition operating system. Windows 2000: Microsoft® Windows® 2000 Professional operating system. Windows XP: Microsoft® Windows® XP Professional operating system, Microsoft® Windows® XP Home Edition operating system.
■ Preface Symbols Used In This Manual Safety Precautions This manual uses the following symbols in explanations in addition to warning indications. This manual describes important details for ensuring the safe and correct use of this product. Thoroughly read this manual before you start to use this product. In particular, be sure to read and fully understand the Safety Precautions described in this manual before you use this product.
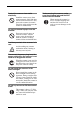
ScandAll 21 Image Capturing Utility Software, FUJITSU ISIS scanner driver, QuickScan™ image capturing software and Adobe Acrobat. About Maintenance The user must not perform repairs on this scanner. Contact the store where you purchased the scanner or an authorized FUJITSU Image Scanner service provider to make repairs to this product. ■ Safety Precautions WARNING The following describes important warnings described in this manual. Do not touch the AC cable with wet hands.
Do not put liquids inside the scanner. Do not insert or drop metal objects in to the scanner. Do not scan wet documents or documents with paper clips or staples. Do not splash or allow the scanner to get wet. If foreign objects (water, small metal objects, liquids, etc.) get inside the scanner, immediately turn off the scanner and disconnect the power plug from the power outlet, then contact the store where you bought the scanner or the Maintenance Service Center.
Protect the scanner from static electricity. Install the scanner away from strong magnetic fields and other sources of electronic noise. Also, protect the scanner from static electricity as this might cause the scanner to malfunction. Before moving the scanner, make sure the shipping lock and the ADF lock screws are locked. When moving the scanner, be sure to lock the shipping lock and the ADF lock screws in order to prevent damages to the scanner. Do not use aerosol sprays near the scanner.
viii
Contents Introduction................................................................. i Regulatory Information ............................................... i Note, Liability ............................................................ iii Preface ..................................................................... iv Safety Precautions .................................................... v Chapter1 Chapter 2 Appendix PREPARING THE SCANNER..... 1-1 1.1 Checking the contents of scanner package......
x
Chapter1 PREPARING THE SCANNER 1.1 Checking the contents of scanner package 1-2 1.2 Names and function of parts ...................... 1-2 1.3 Functions of the operator panel ..................
1.1 Checking the contents of scanner package When you unpack the scanner package, make sure that the package contains all the parts on the list included in the package. If any parts are missing or defective, contact your sales representative. Handle the scanner and accessories with care. TABLE 1. No. Name Function 5 Screw Storage Holes Holes in where the ADF Lock Screws are placed after unlocking the ADF. 6 Handle Used to open/close the Document Cover. • Front 1.
• Rear • ADF TABLE 3. No. Name Function 13 EXT connector Connector port for optional units. 14 USB Interface Connector Used for connecting a USB interface cable from a PC. 15 SCSI Interface Connector Used for connecting a SCSI interface cable from a PC. 16 SCSI ID Switch Used for setting SCSI ID (The setting at the factory shipment is ID=5). 17 Third Party Slot (Optional Slot) The slot for an option board. 18 Side Guide Button Used for adjusting the side guides.
You can change the overlay on the opeartor panel according to your language. Indications on the Function No. display The following shows the indications on the Function No. display. • 8 Blinks only one time upon turning on the scanner. • P Indicates that the scanner has been turned ON and is being initialized. • 0 Indicates that initialization will soon be completed. TABLE 5. Name Function Function No. display Indicates the function No. and error status.
Chapter 2 INSTALLATION OF THE SCANNER 2.1 Installing the scanner .............................................2-2 2.2 Connecting the scanner to your PC .......................2-2 2.3 Installing the Scanner Application..........................
2.1 Installing the scanner 1. 5. Mount the Stacker onto the scanner aligning the protrusions to the holes on the scanner. You can fix the stacker at two positions: the upper position or the lower position. Place the scanner at its installation site. For details on the scanner’s dimensions and required installation space, refer to "10 SCANNER SPECIFICATION" in the "fi5750C Operator's guide". 2. Setting the Stacker Unlock the Shipping Lock.
Windows XP, connect the scanner to your PC with either the USB or the SCSI interface cable. ATTENTION Do not connect both the USB interface cable and the SCSI cable at the same time. It is not possible to use the USB interface with Windows 95 and/or WindowsNT 4.0. Connecting the USB Cable 1. Please connect a USB cable to the Scanner. Connect the USB interface cable to the USB interface connector of the scanner.
the other device. To change the SCSI ID see the following procedure. 1. Turn the scanner OFF. 2. Set the SCSI ID. 2.3.1 For Fujitsu Twain 32 Scanner Driver Preparation Set the device address by using the SCSI ID switch on the rear of the scanner. Before installing the application, please confirm the following items: • Keep the Setup CD-ROM at hand. • Confirm if the scanner is connected to TABLE 1. No. Description: 0-7 Can be set as the ID. 8, 9 Used for the factory default value (SCSI ID=5).
Installing the FUJITSU TWAIN32 Scanner Driver HINT Turn the scanner ON. 2. Turn on your PC and log on to Windows. HINT 3. 5. Click [TWAIN Driver] on the window below. 6. Error Recovery Guide Installation window appears. When using Windows NT 4.0, Windows 2000 or Windows XP, log on as a user with "Administrator" privileges (privileges of the administrator of your PC) The scanner may be detected automatically.
7. Select a language used for installation on [Choose Setup Language] window and click [OK]. 2. When any alarm is displayed on [Hardware Installation] window, click the [Continue Anyway] button. 3. Click the [Finish] button. Now the installation of the scanner driver is completed. ATTENTION 8. Install the application following the instructions on the window. 9. When the [InstallShield Wizard Complete] window appears, click [Finish].
3. Click [ScandAll 21]. Confirming the installation 1. Set your documents into the ADF Paper Chute. For the loading of documents, please refer to 2.4 "Scanning documents" of the "fi5750C Operator's Guide". 2. Start ScandAll 21 From the [Start] Menu, select [Program][Scanner Utility for Microsoft Windows][ScandAll 21]. 4. Select an appropriate language from the menu and click [OK]. 3. Specify the scanner to be used Select [Select Source] from the [Scan] menu. 5.
6. Set the scanning resolution, document size etc. on the [TWAIN driver] window (for setting details of the scanning) and click the [Scan] button. • Setup CD-ROM • Confirm if the scanner is connected correctly to your PC. HINT About connecting your scanner to the PC, please refer to "2.1 Installing the scanner" on page 2" of this manual. Installing FUJITSU ISIS scanner driver HINT 7.
ATTENTION 4. 5. This screen may not be displayed when the, “Autoplay” setting of your PC is turned off. In this case, please run "Install.exe" on the CD-ROM directly from explorer or "My Computer". 7. Select an appropriate language used for the installation from the window and click [OK]. 8. Install the application following the instructions on the window. 9. When the [InstallShield Wizard Completed] appears, click on [Finish]. Click [Install Products].
Installing QuickScan Pro(Trial) 4. Install the application following the instructions on the window. 5. Input the requested information and click on the [Next] button. "QuickScan Pro" is an imaging software that complies with the ISIS standards. With the FUJITSU ISIS scanner driver you can capture scanned image data read with the scanner. ATTENTION 1. When using Windows NT 4.
1. Load the documents on the scanner. 5. For loading documents, please refer to Chapter 2 "BASIC SCANNER OPERATIONS" of the "fi-5750C Operator's Guide". 2. Select [Preview Scan] from the [Scan] menu to start the scanningIf the scanning is completed without any troubles, the installation was performed successfully. Start QuickScan Pro. Please select [Start], [Programs], [QuickScan] in turn, then click on [QuickScan]. 3. Select [Scan], and [Select Scanner...] from the menu bar.
2. Click [Install Products]. 3. Click [Error Recovery Guide] in the following screen. 6. When the [InstallShield Wizard Complete] screen is displayed, click [Finish]. Installing the Image processing software option (trial version) For the installation of the image processing software option (trial version), please refer to the "Image Processing Software Option User's Guide". Installing Adobe Acrobat 4.
ATTENTION The screen may not appear when the “Autoplay” setting of your PC is turned off. In this case, run" AutoPlay.exe" on the CD-ROM directly from the explorer or "My Computer". 2. Click the [Install] button when the following screen is displayed. Then click the [Install Acrobat 6.0 Standard] button. 3. Click the [Next] button when the following screen is displayed.
2-14
Appendix Appendix 1 Troubleshooting .......................... AP-2 Appendix 2 Daily Care ................................... AP-6 Appendix 3 Replacing Consumables ............ AP-8 Appendix 4 Setting the position of the ADF ...
Appendix 1 Troubleshooting Before you ask for repair service, check the following items. If the problem persists even after implementing remedies below, contact the dealer where your purchased the or an authorized FUJITSU service provider. Troubleshooting checklist TABLE 1. Symptom Check this Item Remedy Scanner cannot be tuned ON. Did you push the power switch? Push the power switch. Is AC cable connected correctly? Correctly connect the AC cable.
TABLE 1. Symptom Check this Item Remedy The printed scanned image shifts or is distorted. Are the documents loaded correctly? Load the documents correctly. Quality of scanned images is unsatisfactory. (When using the Flatbed) Is the document holding pad dirty? Install the document holding pad correctly. (When using the ADF) Is the glass inside the ADF dirty? Clean the glass following the instruction in “4.2 Cleaning ADF” of the “fi-5750C Operator’s Guide”.
TABLE 1. Symptom Check this Item Remedy There is a shadow on the leading edge of the scanned images. Are the Feed rollers dirty? Clean the Feed roller. For details, refer to "4 DAILY CARE OF THE EQUIPMENT" of the "fi5750C Operator's Guide" Adjust the offset. For Windows 98, Windows Me, Windows 2000 and Windows XP, adjust the [Sub-scan Setting\ on] Scanners and Cameras\ in the [Control Panel]. For Windows 95 and Windows NT 4.
TABLE 3. Temporary Error TABLE 2. Indication Meaning E0 Flatbed motor malfunction. E1 Optical error (Flatbed). E2 Optical error (ADF front). E3 Optical error (ADF back). Indication Meaning U0 Confirm that the shipping lock is released. U1 A paper feed error occurred. E4 Motor fuse malfunction. U2 A double feed error occurred. E5 Lamp fuse malfunction. U4 The ADF cover is opened. E6 Operator panel malfunction. E7 EEPROM malfunction. E8 SCSI interface fuse malfunction.
Appendix 2 Daily Care The glass of the inside of the ADF becomes hot during operation. CAUTION When you clean the inside of the scanner, turn OFF the power and unplug the AC cable from the outlet and wait for at least three minutes. Do not turn OFF the scanner when you clean the Feed rollers and Plastic Rollers. Cleaning Materials TABLE 4. Cleaning Materials Parts No. Remarks Cleaner F1 CA99501-0013 1 bottle. Moisten a cloth with this fluid and wipe the respective areas.
Locations and Cycle for Cleaning TABLE 5. Part to Clean Flat Bed Document Holding Pad Document Bed ADF Chute Roller Pick Arm Pick Roller Set Brake Roller Feed Rollers Plastic Rollers Sheet Guide Glass Ultra Sonic Sensor Standard Cleaning Cycle using Cleaner F1 Standard Cleaning Cycle using Cleaning Paper with Cleaner F1 Standard Cleaning Cycle using Cleaner F2 Clean these parts after every 10,000 scans. Clean these parts after every 10,000 scans. Clean these parts when dirty.
Appendix 3 Replacing Consumables of the used paper and how frequently the scanner is used and cleaned. ATTENTION CAUTION The glass of the inside of the ADF becomes hot during operation. When you clean the inside of the scanner, turn OFF the power and unplug the AC cable from the outlet and wait for at least three minutes. Use only the specified consumables. Do not use other consumables. The following pictures shows the locations of the parts to be replaced.
Appendix 4 Setting the position of the ADF - For left-handed operators As the factory default, ADF of fi-5750C is fixed with ADF lock screws. Be sure to remove the screws before changing the position of the ADF.
fi-5750C Image Scanner Getting Started P3PC-E737-02EN Date of issuance: June, 2006 Issuance responsibility: PFU LIMITED Printed in Singapore z Copying of the contents of this manual in whole or in part and copying of the scanner application is forbidden under the copyright law. z The contents of this manual are subject to change without notice.