P3PC-1112-01EN fi-60F Image Scanner Operator’s Guide
CONTENTS INTRODUCTION............................................................................ iii ■ Regulatory Information ........................................................ iii ■ Note, Liability ........................................................................ vi ■ Safety Precautions ............................................................. viii Chapter 1 BASIC SCANNER OPERATIONS............................ 1 1.1 Turning the Scanner ON ...............................................
Chapter 4 SCANNER SPECIFICATION .................................. 35 4.1 Basic Specifications......................................................... 36 4.2 Installation Specifications ............................................... 37 4.3 External Dimensions ........................................................ 38 INDEX ........................................................................................
INTRODUCTION Thank you for purchasing the fi-60F Scanner product. This document describes how to handle fi-60F Scanner and basic operation methods. Before you start using fi-60F Scanner be sure to thoroughly read this manual to ensure correct use. ■Regulatory Information FCC Declaration This equipment has been tested and found to comply with the limits for a Class B digital device, pursuant to Part 15 of the FCC Rules.
Canadian DOC Regulations This digital apparatus does not exceed the Class B limit for radio noise emissions from digital apparatus set out in the Radio interference Regulations of the Canadian Department of Communications. This Class B digital apparatus complies with Canadian ICES-003.
Trademarks Microsoft and Windows are registered trademarks of Microsoft Corporation in the United States and/ or other countries. ISIS, QuickScan and their respective logos are trademarks or registered trademarks of Pixel Translations, a division of Captiva Software Corporation in the United States. Adobe, the Adobe logo, and Acrobat are either registered trademarks of Adobe Systems Incorporated in the United States and/or other countries.
■Note, Liability BEFORE USING THIS PRODUCT, PLEASE READ THIS MANUAL CAREFULLY. IF THIS PRODUCT IS NOT USED CORRECTLY, UNEXPECTED INJURY CAN OCCUR TO USERS OR BYSTANDERS Keep this manual in a safe place so that it can be easily referred to during use of this product.
R Outline characters on a colored background show instructions users should follow. It may also include the drawing that shows the specific instruction. Screen Examples In This Manual The screen examples in this manual are subject to change without notice in the interest of product improvement. If the actual displayed screen differs from the screen examples in this manual, operate by following the actual displayed screen while referring to the User's Manual of the scanner application you are using.
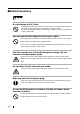
■Safety Precautions WARNING Do not damage the AC cable. A damaged AC cable may cause fire or electric shock. Do not place heavy objects on AC cables, or pull, bend, twist, heat, damage or modify AC cables. Do not use damaged AC cables or power plugs, or install any cables or power plugs to loose wall sockets. Use only specified AC cables and connector cables. Use only specified AC cables and connector cables. Failure to use the correct cables might cause electric shock and/or equipment failure.
Turn the scanner OFF if it is damaged. If the scanner is damaged for any reason, immediately unplug the power cable to turn off the scanner. Contact the store where you purchased the scanner. Do not put liquids inside the scanner. Do not insert or drop metal objects in to the scanner. Do not scan wet documents or documents with paper clips or staples. Do not splash or allow the scanner to get wet. If foreign objects (water, small metal objects, liquids, etc.
CAUTION Do not install the scanner on unstable surfaces. Make sure that the scanner is installed on a flat, level surface and that none of its parts extend beyond the surface top, such as a desk or table. Do not install the scanner on unstable surfaces. Install the scanner on a level surface that is free of vibration to prevent it from falling. Install the scanner on a strong surface that will support the weight of the scanner and other devices. Do not place heavy objects or stand on top of the scanner.
Do not use aerosol sprays near the scanner. Do not use aerosol sprays to clean the scanner. Aerosol sprays can blow dirt and dust inside the scanner, resulting in scanner failure or malfunction. Disconnect the power plug from the power outlet when the scanner is not used for a long period of time. When the scanner is not going to be used for a long period of time, be sure to disconnect the power plug from the power outlet. Do not install the scanner in direct sunlight.
xii
Chapter 1 1 BASIC SCANNER OPERATIONS This chapter describes basic scanner operations. In this chapter Windows XP screenshots are illustrated. The screens and operations may differ slightly if the OS that you are using is not Windows XP. Also, when FUJITSU TWAIN32 or FUJITSU ISIS is updated the screens and operations noted in this chapter will differ slightly. 1.1 Turning the Scanner ON .................................................................................... 2 1.
1.1 Turning the Scanner ON Because the power supply of this scanner is linked to the power supply of your PC, fi-60F is not equipped with a separate power button or switch. If you keep connecting the AC adapter to the the scanner, plugging the AC cable into a power outlet, and connecting the scanner to your PC, you can use the scanner without reminding of the switching. If you turn on your PC... The Scanner LED lights when starting up Windows (Scanner turned on) If you turn off your PC...
1.2 Loading Documents on the Scanner for Scanning 1.2 Loading Documents on the Scanner for Scanning 1. Lift up the document cover. 1 BASIC SCANNER OPERATIONS ATTENTION For Breakage prevention, the document cover may come off if you open the document cover too much. If it comes off, pull out the hinge pins from the scanner once, set them to the document cover shaft, then install the document cover to the scanner.
2. Load the document on the document bed with the scanning face down and the top left corner aligned to the reference point. 3. Gently close the document cover. 4. Start up the scanner application, and scan the document. For details on how to scan documents see "1.3 How to Use the Scanner Driver" (page 5). ATTENTION • You can pull out the document cover from the scanner when you scan the thick document like a book.
1.3 How to Use the Scanner Driver 1.3 How to Use the Scanner Driver ■ FUJITSU TWAIN32 Scanner Driver FUJITSU TWAIN32 Scanner Driver is designed for scanning documents with FUJITSU image scanner fi series by using application software that complies with the TWAIN standard. The following describes the procedure with examples of ScandAll 21 for ordinary scanning by using this driver software. 1 1) Startup the application.
5) Open the TWAIN Driver window. Select [To View] from the [Scan] menu. HINT ScandAll 21 provides scanning methods as follows: • [To View...]: Displays scanned images on the window. • [To File...:]: Saves scanned images as files (*.BMP, *.TIF, *.JPG). • [To Ftp...:]: Transfers scanned images to a FTP server. • [To Adobe PDF...:]: Saves scanned images as PDF files. (*Adobe Acrobat (sold separately) must be installed beforehand.) • [To Microsoft SharePoint Portal Server...
1.3 How to Use the Scanner Driver 1 BASIC SCANNER OPERATIONS Depending on the settings of the application software, images may not be displayed. For details, refer to the documentation or Help file of your application. e.x.) When you select [To File...] from the [Scan] menu of ScandAll 21, images of scanned documents are not displayed on the window. 7) Save the scanned images. Select [Save As...] from the [File] menu to save the scanned images. If you wish to start another scanning, return to procedure 4.
Setting Window for FUJITSU TWAIN32 Scanner Driver You can configure settings for the FUJITSU TWAIN32 Scanner Driver on this window. The following describes the main setting items. • For details on each functions, refer to "FUJITSU TWAIN32 Scanner Driver Help" (appears by clicking the [Help] button or pressing the [F1] key). • Depending on the type of your scanner, available setting items or range of setting values vary. Resolution Specifies the resolution of scanning.
1.3 How to Use the Scanner Driver Image Mode Specifies the image type for the scanned documents. Black & White Documents are scanned in binary (black and white). Halftone Documents are scanned through halftone processing in black and white. Grayscale Documents are scanned in gradations from black to white. For this mode you can select 256 gradations or 4 bit (16 gradations). Color Documents are scanned in color. For this mode, you can select 24 bit Color, 256 Color or 8 Color.
[Option...] button You can set up the details of optional functions on the window below. [Rotation] tab Select this tab when setting image rotation and detection of document size. [Generic] tab Select this tab to change the unit of the size displayed on the Setting Window for the FUJITSU TWAIN32 Scanner Driver. (Millimeters, Inches, and Pixels are available) [Filter] tab Select this tab for setting the image processing filter(s).
1.3 How to Use the Scanner Driver ■ FUJITSU ISIS Scanner Driver FUJITSU ISIS Scanner Driver is designed for scanning documents with FUJITSU image scanner fi series by using application software that complies with The ISIS standard. The following describes the procedure with examples of QuickScan for ordinary scanning by using this driver software. The procedure may vary depending on your application. If you use an application other than QuickScan, please refer to its Guide or Help for further information.
5) Select the profile for scanning. • • • When creating a new profile Select one from existing profiles and click [Add Profile...] button. ⇒ A new profile will be created based on the profile you select. When changing the settings of already existing profiles Select one from existing profiles and click [Edit Profile...] button. ⇒ The settings of the selected profile can be changed. When using an existing profile Select one from an existing profiles.
1.3 How to Use the Scanner Driver 7) Configure settings for scanning and click the [OK] button. 1 8) The [Profile Editor] window appears. Click the [OK] button to return to [New batch] dialog. 9) Load the documents on the scanner. 10) Click the [Scan] button. ⇒ Scanned images are displayed on the window. Refer to the "QuickScan Overview" or the "QuickScan Help" for further information on functions and operations of QuickScan. After the installation of QuickScan, it is registered in the [Start] menu.
Configuration Window of FUJITSU ISIS Scanner Driver Image Mode Select a color mode suitable for the purpose from the menu. Black & White Scans data in binary (black and white). Distinguishes black from white according to the fixed threshold. This scanning mode is suitable for scanning line drawings and text documents. 16-level Grayscale Scans data to 16 shades of gray. 256-level Grayscale Scans data to 256 shades of gray. This mode uses 8 bits per pixel.
1.3 How to Use the Scanner Driver Brightness Sets the brightness of the entire image. Specify the brightness as a number within the range of 1 (dark) to 255 (bright). To brighten the entire image, increase the value of the setting. To darken the entire image, decrease the value. Contrast Sets the contrast between light and shadow of the scanned image. Specify the contrast as a number within the range of 1 (low [soft]) to 100 (high [sharp]). Increasing this value makes the contrast sharper.
[Area...] button Opens the Scan Area dialog box. Specify scan area for the document size. The size can be set by dragging the frame with mouse. Otherwise, enter any value for the setting. [About...] button This button displays the version information. [More...] button Opens [More Settings] window. Used for setting advanced features. Gamma Specifies Gamma correction. Correction patterns are: "Normal", "Soft", "Sharp", "Custom", or "Download".
1.3 How to Use the Scanner Driver Edge Processing This option specifies the sharpness of contour extraction. Low, Mid, High Emphasizes contour of images. Available settings are: Low, Mid, High Smoothing Smoothes jaggy images. Reverse Colors of scanned images are reversed. fi-60F Image Scanner Operator’s Guide 17 1 BASIC SCANNER OPERATIONS Dropout Color This option excludes a selected color (the three primary colors of light i.e. green, red, blue) from scanned images.
1.4 Correcting skewed documents You can set the scanner so that skew of documents are detected and corrected automatically when skewed documents are fed into the ADF. Change the setting in the [TWAIN Driver] dialog box to enable this function. The following shows the procedure for changing the setting in the dialog box: 1. Click [Option] button in the [TWAIN Driver] dialog box. ⇒ The [Option] dialog box appears. 2. Click the [Rotation] tab. 3.
1.
1.5 Excluding a Color in the Image (dropout color) A selected color (primary colors: red, green or blue) can be removed (dropped out) from the scanned image data. For example, if the document contains black text in a green frame, you can set the scanner to read only the text and eliminate (drop out) the green frame. To set the scanner to drop out a color, change the settings in the [TWAIN Driver] dialogbox before scanning. 1. Click the [Advance...] button in the [TWAIN Driver] dialog box.
Chapter 2 DAILY CARE This chapter describes how to clean the scanner. 2 2.1 Cleaning Materials............................................................................................ 22 2.2 Cleaning the Scanner.......................................................................................
2.1 Cleaning Materials The table below shows the cleaning materials that are used on this scanner. Cleaning Materials Part No. Remarks Cleaner F1 (or isopropyl alcohol) CA99501-0013 1 bottle (100 ml) Moisten cloth with this fluid and wipe the scanner clean. Soft, dry, lint-free cloth Any commercially available cloth For details on Cleaner F1, consult the agent where you bought your scanner. 2.
2.2 Cleaning the Scanner 1. Open the document cover. 2 2. Clean the following locations using a soft, dry cloth moistened with cleaning fluid. DAILY CARE Document holding pad Document bed • Document holding pad Wipe gently. • Document bed Wipe lightly. ATTENTION Do not allow moisture to get inside the device during cleaning. 3. Wait for cleaned parts to dry. 4. Gently close the document cover.
24
Chapter 3 TROUBLESHOOTING This chapter describes how to remedy troubles, items to check and how to check device labels before contacting the agent where you bought the scanner. ATTENTION About troubles that are not described here, and the details of the errors, refer to the FUJITSU TWAIN32 Scanner Driver Help. 3 3.1 Remedying Typical Troubles .......................................................................... 26 3.2 Items to Check Before Contacting the Agent Where You Bought the Scanner .........
3.1 Remedying Typical Troubles This section describes troubles that may occur during scanning and how to remedy that trouble. Before you ask for repair, check the following flowcharts. If the remedies in these flowcharts do not solve the problem, check the items in "3.2 Items to Check Before Contacting the Agent Where You Bought the Scanner" (page 32) and then contact the agent where you bought the scanner. Symptom 1 Scanner cannot be turned ON.
3.1 Remedying Typical Troubles Symptom 2 The scanning does not start. Did you unlock the shipping lock of the flatbed? NO Turn OFF the scanner and unlock the shipping lock. (*1) NO Connect the USB cable correctly. (*2) If you use an USB hub, connect the scanner directly to your PC. YES Is the USB cable connected correctly? YES Is the connector of the USB cable broken? YES Use a new USB cable and correctly connect it.
Symptom 3 Images are distorted or blurred. Are the document bed, and the document holding pad clean? NO Clean the dirty locations. (*) YES Do not allow anything to cause the scanner to vibrate while scanning. YES Is something causing the scanner to vibrate during scanning? NO Is the scanner installed on a flat, level surface? NO Install the scanner on a flat, level surface. YES Is the document curled or folded? YES Place the document flat and hold it down slightly with the document cover.
3.1 Remedying Typical Troubles Symptom 4 There is a shadow on the leading edge of the scanned images. Did you adjust the offset (starting position for scanning the document)? YES Check the items in "3.2 Items to check before contacting the dealer where you bought the scanner" and contact the dealer or an authorized FUJITSU service provider. NO Adjust the offset.
Symptom 5 When the document is scanned in Black & White mode, the image generated becomes black. Are the Document holding pad and the Document bed of the scanner clean? NO Clean the unclean part (*1) YES Have you tried to adjust the settings of the scanner driver (Threshold or Brightness)? NO Adjust the Threshold and/or Brightness. YES Do you scan a thin document that the contents of the backside is seen through? YES Place a piece of white paper behind the document and scan again.
3.1 Remedying Typical Troubles Symptom 6 Automatic papersize detection is failed. NO Are the Document holding pad and the Document bed of the scanner clean? Clean the unclean part (*1) YES NO Did you scan with the document cover closed? Close the document cover and scan it again. YES Does the document have rectangular or square shape ? NO If the document is other than rectangular or square, the scanner may fail to detect the size correctly.
3.2 Items to Check Before Contacting the Agent Where You Bought the Scanner Check the following items before you contact the agent where you bought the scanner. ■ General Details Item Model (Example) fi-60F For details on model, see "3.3 Checking the Label on the Scanner" (page 34). Serial No. (Example) 000001 For details on serial No., see "3.3 Checking the Label on the Scanner" (page 34). Production date (Example) 2004-9 (September, 2004) For details on production date, see "3.
3.2 Items to Check Before Contacting the Agent Where You Bought the Scanner ■ Installation or PC connection issues ■ Problem at the time of personal computer connection Item findings OS (Windows) Displayed error message Interface USB 2.
3.3 Checking the Label on the Scanner This section describes how to check the label on the scanner. ■ Position of the Labels on the Scanner (scanner bottom) The following shows where the labels are located on the scanner. Label A (example): Indicates various standards that the scanner conforms with. Label B (example): Indicates scanner information.
Chapter 4 SCANNER SPECIFICATION 4 This chapter lists the scanner specifications. 4.1 Basic Specifications......................................................................................... 36 4.2 Installation Specifications ............................................................................... 37 4.3 External Dimensions........................................................................................
4.1 Basic Specifications 1 Scanner Type Flatbed 2 Image sensor Color Contact Image Sensor (CMOS IC) 3 Light source Three LEDs (RGB) 4 Scanning area Maximum Scanning Speed 5 (Note (*1)) - 148 x105mm 5.8 in X 4.13 in A6 Binary (monochrome) 1.0 sec 200 dpi, max size USB 2.0 Color 1.3 sec 150 dpi max size USB 2.
4.2 Installation Specifications 4.2 Installation Specifications Item Dimensions (mm) (just the scanner, document cover closed) Installation Space (mm) Specification Depth 234 (9.21 in) 40 (1.58 in) Width 145 (5.71 in) Height 257 (10.12 in) 4 0.
4.3 External Dimensions (1.58in) (9.21in) The following shows the external dimensions of the fi-60F: (5.
INDEX A Ambient condition Input power .............................................. 37 ................................... 37 Installation Space .................................... 37 Interface .................................................. 36 C L Checking Labels on the Scanner ............ 34 Cleaning Materials Cleaner F1 .................................. 22 .......................................... 22 Cleaning the Flat bed .............................. 22 Light source .................
Light source ........................................ 36 ............................... 36 Optional resolution Output resolution ................................. 36 ............................. 37 Power consumption Scanner Type ...................................... 36 Scanning area ..................................... 36 Scanning Speed .................................. 36 Shipping Weight .................................. 37 Weight ................................................
fi-60F Image Scanner Operator’s Guide P3PC-1112-01EN Date of issuance: October, 2004 Issuance responsibility: PFU LIMITED Copying of the contents of this manual in whole or in part and copying of the scanner application is forbidden under the copyright law. z The contents of this manual are subject to change without notice. z PFU LIMITED.