C141-E198-02EN MAS3735FC MAS3367FC DISK DRIVES PRODUCT/MAINTENANCE MANUAL
FOR SAFE OPERATION Handling of This Manual This manual contains important information for using this product. Read thoroughly before using the product. Use this product only after thoroughly reading and understanding especially the section "Important Alert Items" in this manual. Keep this manual handy, and keep it carefully. FUJITSU makes every effort to prevent users and bystanders from being injured or from suffering damage to their property. Use the product according to this manual.
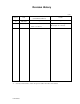
Revision History (1/1) Edition Date Revised section (*1) (Added/Deleted/Altered) Details 01 2003.07.29 — — 02 2003.10.07 *1 • Table 2.1, 2.2 and 3.2 are altered. Capacity notation is changed. • Table 2.3 is altered Misdescription is corrected. Section(s) with asterisk (*) refer to the previous edition when those were deleted.
This page is intentionally left blank.
Preface This manual describes the MAS3735FC and MAS3367FC (hereafter, MAS series), 3.5 type fixed disk drives with an embedded fibre channel controller. This manual details the specifications and functions of the above disk drive, and gives the requirements and procedures for installing it into a host computer system. This manual is written for users who have a basic understanding of fixed disk drives and their use in computer systems.
Preface APPENDIX A Connector Signal Allocation The appendix gives supplementary information, including the signal assignments of interface connectors. Conventions for Alert Messages This manual uses the following conventions to show the alert messages. An alert message consists of an alert signal and alert statements. The alert signal consists of an alert symbol and a signal word or just a signal word.
Preface (Example) Data loss For MAS series, Reed Solomon codes are applied for their ECC. The sector-data is divided into 4 interleaving sectors, and ECC is performed in each sector where the maximum number of errors (up to 5 byte) can be corrected. [Total maximum byte: 5 byte × 4 ( interleave) = 20 byte] If the error of read sector keeps allowable error byte number, correction is performed. However, if error byte exceeds its allowable number, correction may not be performed properly.
This page is intentionally left blank.
Important Alert Items Important Alert Messages The important alert messages in this manual are as follows: A hazardous situation could result in minor or moderate personal injury if the user does not perform the procedure correctly. Also, damage to the product or other property, may occur if the user does not perform the procedure correctly. Task Mounting Installation Alert message Data loss Page 2-5 For MAS series, Reed Solomon codes are applied for their ECC.
Important Alert Items Task Mounting Installation Alert message Page Damage 5-5 1. When dismounting the drive which is mounted on the system while power is supplied to it. • The drive to be dismounted must be separated from the loop. Dismounting the drive which is not separated from the loop may cause an unexpected error. • If the drive is not separated from the loop, issue an LPB to the drive from the initiator in a primitive sequence of the order set.
Important Alert Items Task Mounting Installation Alert message Caution 1. Page 6-6 Always ground yourself with a wrist strap connected to ground before handling. ESD (Electrostatics Discharge) may cause the damage to the device. 2. Do not remove a PCA. This operation is required to prevent unexpected or unpredictable operation. 3. Do not use a conductive cleaner to clean a disk drive assembly. Damage 6-6 Never open the disk enclosure in the field.
This page is intentionally left blank.
MANUAL ORGANIZATION PRODUCT/ MAINTENANCE MANUAL (This manual) Fibre Channel Interface Specifications C141-E198 1. 2. 3. 4. 5. 6. 7. General Description Specifications Data Format Installation Requirements Installation Diagnostics and Maintenance Error Analysis 1. 2. 3. 4. 5.
REFERENCED STANDARDS The product specifications and functions described in this manual conform to the following ANSI (*1) standards: Document number Title NCITS TR-19 FIBRE CHANNEL PRIVATE LOOP SCSI DIRECT ATTATH (FC-PLDA) ANSI X3.230-1994 FIBRE CHANNEL PHYSICAL AND SIGNALING INTERFACE (FC-PH) ANSI X3.297-1996 FIBRE CHANNEL PHYSICAL AND SIGNALING INTERFACE-2 (FC-PH-2) ANSI X3.272-199X FIBRE CHANNEL ARBITRATED LOOP (FC-AL) ANSI X3.
CONTENTS CHAPTER 1 CHAPTER 2 General Description .................................................................. 1-1 1.1 Standard Features .................................................................................... 1-2 1.2 Hardware Structure ................................................................................. 1-5 1.3 System Configuration.............................................................................. 1-7 Specifications .........................................
Contents 4.1.1 4.1.2 4.1.3 4.2 Power Supply Requirements ...................................................................4-7 4.3 Connection Requirements .......................................................................4-9 4.3.1 4.3.2 CHAPTER 5 5.1 Notes on Handling Drives .......................................................................5-1 5.2 Setting......................................................................................................5-3 5.3 5.3.1 Loop ID setting..
Contents 6.2.4 6.2.5 6.2.6 6.3 6.3.1 6.3.2 6.3.3 6.4 6.4.1 6.4.2 6.4.3 6.4.4 6.4.5 CHAPTER 7 Revision numbers.................................................................................. 6-9 Tools and test equipment .................................................................... 6-10 Tests .................................................................................................... 6-10 Operation Check....................................................................................
Contents Illustrations Figures Figure 1.1 Figure 1.2 Figure 1.3 Figure 3.1 Figure 3.2 Figure 3.3 Figure 3.4 Figure 3.5 Figure 3.6 Figure 3.7 Figure 3.8 FC model drives outer view ........................................................1-5 Disk/head configuration..............................................................1-6 Example of FC-AL system configuration...................................1-7 Cylinder configuration ................................................................
Contents Tables Table 2.1 Table 2.2 Table 2.3 Table 3.1 Table 3.2 Table 4.1 Table 5.1 Table 6.1 Table 6.2 Table 6.3 Table 7.1 Table A.1 C141-E198 Model names and order numbers................................................ 2-1 Function specifications ............................................................... 2-2 Environmental/power requirements............................................ 2-4 Zone layout and track capacity ................................................... 3-3 Format capacity......
This page is intentionally left blank.
CHAPTER 1 General Description 1.1 Standard Features 1.2 Hardware Structure 1.3 System Configuration This chapter describes the feature and configuration of the MAS series intelligent disk drives (IDD). IDDs are high performance large capacity 3.5 type fixed disk drives with an embedded Fibre-Channel controller.
General Description 1.1 Standard Features (1) Compactness In a compact enclosure having the 3.5-inch HDD form factor, the IDD contains an FC-AL controller, which supports the Arbitrated Loop technology (FC-AL), a Fibre Channel technology defined by the related ANSI standard.
1.1 Standard Features (7) Cache feature After executing the READ command, the IDD reads automatically and stores (prefetches) the subsequent data blocks into the data buffer (Read-ahead caching). The high speed sequential data access can be achieved by transferring the data from the data buffer without reaccessing the disk in case the subsequent command requests the prefetched data blocks. The Write Cache feature is supported.
General Description (12) Automatic alternate block reassignment If a defective data block is detected during read or write the IDD can automatically reassign its alternate data block. (13) Programmable data block length Data can be accessed in fixed-block length units. The data block length is programmable, and can be specified at initializing with a multiple of four within the range of 512 to 528 bytes. Error rate increase (14) 1. The drive format at factory shipment is generally 512 bytes. 2.
1.2 Hardware Structure (19) Low power consumption By using highly integrated LSI components, the power consumption of the IDD is very low, and this enables the unit to be used in wide range of environmental conditions. (20) Low noise and low vibration The noise level is low; approx. 3.6 Bels Ready for MAS series. This makes it ideal for office use. (21) Microcode downloading The IDD implements the microcode download feature. This feature achieves easy maintainability of the IDD and function enhancing.
General Description (2) Heads The MR (Magnet - Resistive) of the CSS (contact start/stop) type heads are in contact with the disks when the disks are not rotating, and automatically float when the rotation is started. Figure 1.2 shows the configuration of disks and heads Base MAS3735FC MAS3367FC 0 1 0 1 2 3 4 5 6 7 2 3 Cover Figure 1.2 (3) Disk/head configuration Spindle motor The disks are rotated by a direct-drive hall-less DC motor.
1.3 System Configuration (6) Read/write circuit The read/write circuit utilizes a read channel mounted with a head IC that supports high-speed transmission and an MEEPR4ML (Modified Enhanced Extended Partial Response Class 4 Maximum Likelihood) modulation/demodulation circuit in order to prevent errors being triggered by external noise and to improve data reliability.
General Description (1) Loop configuration A port embedded with sending and receiving circuits uses differential signals to send and receive data on electric signal lines. A pair of signal lines is called a link. Since signals are sent in one direction on a link, the links in a system must be connected to form a loop. The FC-AL interface sends and receives data via nodes on the loop.
CHAPTER 2 Specifications 2.1 Hardware Specifications This chapter describes specifications of the IDD. 2.1 Hardware Specifications 2.1.1 Model name and order number Each model has a different recording capacities when shipped. Table 2.1 lists the model name and order number. The data format can be changed by reinitializing with the user's system. Table 2.
Specifications 2.1.2 Function specifications Table 2.2 shows the function specifications of the IDD. Table 2.2 Function specifications Specification Item MAS3735FC MAS3367FC 73.49 GB (*6) 36.77 GB (*6) Number of disks 4 2 Number of heads 8 4 27,094 27,150 Formatted capacity/device (*1) Number of cylinders (*2) Formatted capacity/track (B) 285,696 to 360,960 -1 Number of rotations min (rpm) 15,000 ± 0.2% Average latency time Seek time (*3) (Read/Write) 2.00 msec Track to Track 0.
Seek tim [ms] 2.1 Hardware Specifications Seek Difference [2048 Cyl/div] (*4) The start time is the time from power on or start command to when the IDD is ready, and the stop time is the time for disks to completely stop from power off or stop command. (*5) This value indicates at ready mode.
Specifications 2.1.3 Environmental specifications Table 2.3 lists environmental and power requirements. Table 2.
2.1 Hardware Specifications (*1) For detail condition, see Section 4.1. (*2) Vibration applied to the drive is measured at near the mounting screw hole on the frame as much as possible. (*3) At random seek write/read and default on retry setting with log sweep vibration. (*4) At power-off state after installation Vibration displacement should be less than 2.5 mm. (*5) Input voltages are specified at the drive connector side, during drive ready state.
Specifications Note: The MTBF is defined as: Operating time (hours) at all field sites MTBF= The number of equipment failures from all field sites Failure of the equipment means failure that requires repair, adjustments, or replacement. Mishandling by the operator, failures due to bad environmental conditions, power trouble, host system trouble, cable failures, or other failures not caused by the equipment are not considered.
2.1 Hardware Specifications (4) Data security at power failure Integrity of the data on the disk is guaranteed against all forms of DC power failure except on blocks where a write operation is being performed. The above does not applied to formatting disks or assigning alternate blocks.
This page is intentionally left blank.
CHAPTER 3 Data Format 3.1 Data Space 3.2 Logical Data Block Addressing 3.3 Defect Management This chapter explains data space definition, logical data block addressing, and defect management on the IDD. 3.1 Data Space The IDD manages the entire data storage area divided into the following three data spaces.
Data Format Cylinder –99 to Cylinder –92 ~ Internal test cylinder ~ Cylinder –88 to Cylinder –4 Zone Cell 0 1 0 Cylinder 0 1 • 27 28 29 • 55 ~ Internal test space ~ SA84 ~ • SA0 ~ ~ System space ~ User Space for Cell 0-0 Spare Sectors per Cell 0 User Space for Cell 1-0 Spare Sectors per Cell 1 • User Space (Primary Cylinder 0 - (n-1)) m-27 User Space for Cell P1-0 P1 • m Spare Sectors per Cell P1 Alternate Cylinder (1) User Space for Cell xx-1 1 : 17 n User Space for Cell yy-17 n
3.1 Data Space Table 3.
Data Format A number starting with 0 is assigned to each cylinder required in the user space in ascending order. If the number of cylinders do not reach the maximum, the rest of the cylinders will not be used. Always one cylinder that is located at the end of each zone in the user space can be established as an alternate cylinder. Alternate cylinders will be used for alternate blocks when primary cylinders in the user space are used up. See Subsections 3.1.2 and 3.3.2 for details.
3.1 Data Space Cell Note: This drive manages alternate spare areas for each cell, which is a set of cylinders. One cell consists of 28 cylinders. Figure 3.2 Spare area in cell An alternate cylinder is used when spare sectors in a cell are used up or 0 is specified as the number of spare sectors in a cell. 1 cylinder at the end of each zone of the user space is allocated as alternate cylinders as shown in Figure 3.3. The user space and the CE space share the alternate cylinders. Zone Figure 3.
Data Format 4.0 msec Servo frame n = 211 (zone 0) ~ 266 (zone 17) Figure 3.4 (2) Track format Track skew and head skew To avoid waiting for one turn involved in head and cylinder switching, the first logical data block in each track is shifted by the number of sectors (track skew and head skew) corresponding to the switching time. Figure 3.5 shows how the data block is allocated in each track.
3.1 Data Space Cylinder skew Head Cylinder skew P Track skew Head P+1 Leading logical sector in head p+1 Figure 3.5 Track skew/head skew The number of physical sectors (track skew factor and head skew factor) corresponding to the skew time varies depending on the logical data block length because the track skew and the head skew are managed for individual sectors.
Data Format Each sector on the track consists of the following fields: (1) Gaps (G1, G2, G3) No pattern is written on the gap field. (2) PLO Sync In this field, pattern X'00' is written. (3) Sync Mark (SM1, SM2) In this field, special pattern is written. This special pattern indicates the beginning of the data field. (4) Data field (DATA1-DATA4) User data is stored in the data field of the sector.
3.2 Logical Data Block Addressing 3.1.5 Format capacity The size of the usable area for storing user data on the IDD (format capacity) varies according to the logical data block or the size of the spare sector area. Table 3.2 lists examples of the format capacity when the typical logical data block length and the default spare area are used. The following is the general formula to calculate the format capacity.
Data Format (1) Block address of user space The logical data block address number is consecutively assigned to all of the data blocks in the user space starting with 0 to the first data block. The IDD treats sector 0, track 0, cylinder 0 as the first logical data block. The data block is allocated in ascending order of addresses in the following sequence (refer to Figure 3.5): 1) Logical data blocks are assigned in ascending order of sector number in the same track.
3.3 Defect Management 3.3 Defect Management 3.3.1 Defect list Information of the defect location on the disk is managed by the defect list. The following are defect lists which the IDD manages. • P list (Primary defect list): This list consists of defect location information available at the disk drive shipment and is recorded in a system space. The defects in this list are permanent, so the INIT must execute the alternate block allocation using this list when initializing the disk.
Data Format (1) Alternate block allocation during FORMAT UNIT command execution When the FORMAT UNIT command is specified, the allocation of the alternate block to those defective sectors included in the specified lists (P, G, or D) is continued until all spare sectors in the same cell are used up. When they are used up, unused spare sectors in the alternate cylinder are allocated to the subsequent sectors in the cylinder by means of alternate sector treatment. Figure 3.
3.3 Defect Management *1 Certification is permitted when DCRT flag is cleared (DCRT flag=0) in FORMAT UNIT command. The IDD checks all initialized logical data blocks by reading them out after the above alternate block allocation is made to initialize (format) the disk.
Data Format (3) Automatic alternate block allocation • Automatic alternate block allocation at read operation If the ARRE flag in the MODE SELECT parameter permits the automatic alternate block allocation, the IDD automatically executes the alternate block allocation and data duplication on the defective data block detected during the READ or READ EXTENDED command. This allocation method is the same as with the REASSIGN BLOCKS command (alternate sector treatment).
3.3 Defect Management Type 2 (Reassignment of write fail sector) 1) Commands to be applied WRITE command WRITE EXTENDED command 2) Application requirements / processing When WRITE/WRITE EXTENDED command detects any Servo error (e.g. Write offtrack error) and cannot be recovered within pre-determined retry number (specified in Mode Parameter). For the sectors around defective Servo, alternate blocks are allocated and the data of this WRITE commands are re-written.
This page is intentionally left blank.
CHAPTER 4 Installation Requirements 4.1 Mounting Requirements 4.2 Power Supply Requirements 4.3 Connection Requirements This chapter describes the environmental, mounting, power supply, and connection requirements. 4.1 Mounting Requirements 4.1.1 External dimensions Figures 4.1 show the external dimensions of the IDD and the location of the holes for the IDD mounting screws. Note: Dimensions are in mm.
Installation Requirements The value marked with (*) indicates the dimension between mounting holes on the bottom face. Figure 4.
4.1 Mounting Requirements 4.1.2 Mounting The permissible orientations of the IDD are shown in Figure 4.2, and the tolerance of the angle is ±5° from the horizontal plane. (a) Horizontal –1 (b) Horizontal –2 (c) Vertical –1 (d) Vertical –2 (e) Upright mounting –1 (f) Upright mounting –2 Direction of gravity Figure 4.2 4.1.3 Notes on mounting (1) Mounting frame structure IDD orientations Special attention must be given to mount the IDD disk enclosure (DE) as follows.
Installation Requirements c) Tightening torque of screw must be secured with 0.59N· m (6kgf· cm) ±12%. d) Impact caused by the electric driver must be within the device specifications. e) Must be handled on an anti-static mat. 5.0 or less 5.0 or less Figure 4.3 (2) Mounting frame structure Limitation of side-mounting Mount the IDD using the 4 screw holes at the both ends on the both sides as shown in Figure 4.4. Do not use the center hole by itself.
4.1 Mounting Requirements (3) Limitation of bottom-mounting Use all 4 mounting holes on the bottom face. (4) Environmental temperature Temperature condition at installed in a cabinet is indicated with ambient temperature measured 3 cm from the disk drive. At designing the system cabinet, consider following points. • Make a suitable air flow so that the DE surface temperature does not exceed 60°C. • Cool the PCA side especially with air circulation inside the cabinet.
Installation Requirements (5) Service clearance area The service clearance area, or the sides which must allow access to the IDD for installation or maintenance, is shown in Figure 4.6. [Surface R] - Hole for mounting screw [Surface P] - Cable connection [Surface Q] - Hole for mounting screw Figure 4.6 (6) Service clearance area External magnetic field The drive should not be installed near the ferromagnetic body like a speaker to avoid the influence of the external magnetic field.
4.2 Power Supply Requirements 4.2 Power Supply Requirements (1) Allowable input voltage and current The power supply input voltage measured at the power supply connector pin of the IDD (receiving end) must satisfy the requirement given in Subsection 2.1.3. (For other requirements, see Items (4) below.) (2) Current waveform (reference) Figure 4.7 shows the waveform of +12 VDC. MAS3735FC Figure 4.
Installation Requirements (5) Noise filter To eliminate AC line noise, a noise filter should be installed at the AC input terminal on the IDD power supply unit. The specification of this noise filter is as follows: • Attenuation: 40 dB or more at 10 MHz • Circuit construction: T-configuration as shown in Figure 4.8 is recommended. Figure 4.
4.3 Connection Requirements 4.3 Connection Requirements 4.3.1 Connector Figure 4.9 shows the locations of interface connector. Interface connector (CN1) (including power supply connector) Figure 4.9 4.3.2 Connector location Interface connector The connector for the Fibre Channel Loop is an unshielded SCA-2 connector which has two 20pin rows spaced 1.27 mm (0.05 inch) apart. Figure 4.10 shows the connector. See Appendix A for signal assignments on the connector.
Installation Requirements Figure 4.
CHAPTER 5 Installation 5.1 Notes on Handling Drives 5.2 Setting 5.3 Mounting Drives 5.4 Dismounting Drives 5.5 Checking Operation after Installation and Preparing the IDD for Use 5.6 Spare Disk Drive This chapter describes the notes on handling drives, setting, mounting drives, confirming drive operations after installation and preparation for use, and dismounting drives. 5.1 Notes on Handling Drives The items listed in the specifications in Table 2.1 must be strictly observed.
Installation (2) Unpackaging a) Use a flat work area. Check that the "This Side Up" sign side is up. Handle the package on soft material such as a rubber mat, not on hard material such as a desk. b) Be careful not to give excess pressure to the internal unit when removing cushions. c) Be careful not to give excess pressure to the PCAs and interface connector when removing the drive from the antistatic bag. d) Do not remove the sealing label or cover of the DE and screws.
5.2 Setting 5.2 Setting 5.2.1 Loop ID setting When setting the fibre channel loop ID, use SEL0 to SEL6 of interface connector CN1. IN bit weighting, SEL6 corresponds to the MSB, SEL0 to the LSB, and 126 types of X'00' to X'7D' can be specified as loop IDs. 5.2.2 Mode settings (1) Motor start mode The method for start control of the IDD spindle motor can be set in accordance with Table 5.1. Table 5.
Installation 5.3 Mounting Drives 5.3.1 Mounting procedures Since mounting the drive depends on the system cabinet structure, determine the work procedures considering the requirements specific to each system. The general mounting method and items to be checked are shown below. See Subsection 4.1 for the details of requirements for installing the IDD.
5.4 Dismounting Drives 5.4 Dismounting Drives Since the method and procedure for dismounting the disk drive for replacement of the drive, etc. depends on the locker structure of the system, etc., the work procedure must be determined in consideration of the requirements specific to the system. This section describes the general procedure and notes on dismounting the drive. Damage 1. When dismounting the drive which is mounted on the system while power is supplied to it.
Installation 5.5 Checking Operation after Installation and Preparing the IDD for Use 5.5.1 Checking initial operation This section explains how to check operation after power is turned on. Since the initial operation of an IDD differs depending on the settings of the motor start mode, check the following initial operations according to the motor start mode set during installation.
5.5 Checking Operation after Installation and Preparing the IDD for Use c) Continuous sending of the Fault LED Out signal to the interface connector indicates the initial self-diagnosis has detected a problem. In this event and if the situation allows, sense data should be obtained by issuing the REQEUST SENSE command from the initiator (host system). Sense data is information required for troubleshooting. The Active LED goes off while the IDD command is being executed.
Installation Motor starts when power is turned on (60 Figure 5.
5.5 Checking Operation after Installation and Preparing the IDD for Use Motor starts by START/STOP command * Executing time: about 60 seconds 1 Figure 5.
Installation (2) Checking at abnormal end a) When sense data can be obtained with the REQUEST SENSE command, analyze the sense data and retry recovery for a recoverable error. Refer to Chapter 5 of Fibre Channel Interface Specifications for further details. b) Check the setting of the terminals. Note that the checking procedure of loop connection differs depending on the setting of the motor start mode and UNIT ATTENTION report mode. 5.5.
5.5 Checking Operation after Installation and Preparing the IDD for Use (2) FORMAT UNIT command Initialize all sides of the disk with the FORMAT UNIT command. The FORMAT UNIT command initializes all sides of the disk using the P lists, verifies data blocks after initialization, and allocates an alternate block for a defect block detected with verification. With initialization, the value "00" is written into all bytes of all logical data blocks.
Installation 5.5.4 Setting parameters The user can specify the optimal operation mode for the user system environments by setting the following parameters with the MODE SELECT or MODE SELECT EXTENDED command: • • • • Error recovery parameter Disconnection/reconnection parameter Caching parameter Control mode parameter With the MODE SELECT or MODE SELECT EXTENDED command, specify 1 for the "SP" bit on CDB to save the specified parameter value on the disk.
5.5 Checking Operation after Installation and Preparing the IDD for Use (1) Error recovery parameter The following parameters are used to control operations such as IDD internal error recovery: a.
Installation Notes: 1. The user can arbitrarily specify the following parameters according to the system requirements: • • • • 2. (2) ARRE AWRE TB PER The user also can arbitrarily specify parameters other than the above. However, it is recommended to use the default setting in normal operations.
5.5 Checking Operation after Installation and Preparing the IDD for Use (3) Caching parameters The following parameters are used to optimize IDD Read-Ahead caching operations under the system environments. Refer to Chapter 2 of Fibre Channel Interface Specifications for further details.
Installation a. Control mode parameters Parameter • Queue algorithm modifier 5.6 • QErr: Resume or abort remaining suspended commands after sense pending state • DQue: Disabling tagged command queuing Default value 0 (Execution sequence of read/write commands is optimized.) 0 (command is resumed) 0 (enabled) Spare Disk Drive See Subsection 2.1.
CHAPTER 6 Diagnostics and Maintenance 6.1 Diagnostics 6.2 Maintenance Information 6.3 Operation Check 6.4 Troubleshooting Procedures This chapter describes diagnostics and maintenance information. 6.1 Diagnostics 6.1.1 Self-diagnostics The IDD has the following self-diagnostic function. This function checks the basic operations of the IDD. • • Initial self-diagnostics Online self-diagnostics (SEND DIAGNOSTIC command) Table 6.
Diagnostics and Maintenance Brief test contents of self-diagnostics are as follows. a. Hardware function test This test checks the basic operation of the controller section, and contains following test. • • • • RAM (microcode is stored) Peripheral circuits of microprocessor (MPU) Memory (RAM) Data buffer b. Seek test This test checks the positioning operation of the disk drive using several seek modes (2 points seek, 1 position sequential seek, etc.).
6.1 Diagnostics The IDD does not reply to the loop for up to 2 seconds after the initial self-diagnostics is started.
Diagnostics and Maintenance The INIT should issue the REQUEST SENSE command when the CHECK CONDITION status is posted. The sense data collected by the REQUEST SENSE command indicates the detail information of the error detected in the self-diagnostics. The IDD status after the CHECK CONDITION status is posted differs according to the type of the detected error. a) When an error is detected in the seek or write/read test, the subsequent command can be accepted correctly.
6.2 Maintenance Information (1) Interface (loop) test The operations of the loop and data buffer on the IDD are checked with the WRITE BUFFER and READ BUFFER commands. (2) Basic operation test The basic operations of the IDD are checked by executing self-diagnosis with the SEND DIAGNOSTIC command (see Subsection 6.1.1).
Diagnostics and Maintenance 1. Always ground yourself with a wrist strap connected to ground before handling. ESD (Electrostatics Discharge) may cause the damage to the device. 2. Do not remove a PCA. 3. Do not use a conductive cleaner to clean a disk drive assembly. 6.2.2 Maintenance requirements (1) Preventive maintenance Preventive maintenance such as replacing air filters is not required. Damage Never open the disk enclosure in the field.
6.2 Maintenance Information (3) Parts that can be replaced in the field The PCA cannot be replaced in the field. The DE cannot be replaced in the field. (4) Service system and repairs Fujitsu has the service system and repair facility for the disk drive. Contact Fujitsu representative to submit information for replacing or repairing the disk drive.
Diagnostics and Maintenance See Section 5.1 for notes on packing and handling when returning the disk drive. 6.2.3 Maintenance levels If a disk drive is faulty, replace the whole disk drive since repair requires special tools and environment. This section explains the two maintenance levels. (1) (2) 6-8 Field maintenance (disk drive replacement) • This replacement is done at the user's site. • Replacement uses standard tools.
6.2 Maintenance Information 6.2.4 Revision numbers The revision number of the disk drive is represented with a letter and a number indicated on the revision label attached to the DE. Figure 6.1 shows the revision label format. Figure 6.1 (1) Revision label (example) Indicating revision number at factory shipment When the disk drive is shipped from the factory, the revision number is indicated by deleting numbers in the corresponding letter line up to the corresponding number with = (see Figure 6.2).
Diagnostics and Maintenance When the revision number is changed after the drive is shipped from the factory, Fujitsu issues "Engineering Change Request/Notice" in which the new revision number is indicated. When the user changes the revision number, the user should update the revision label as described in item (2) after applying the modification. At shipment Rev. A2 Revising at field Rev. A3 Figure 6.2 6.2.
6.2 Maintenance Information Start Start self-test by turning the power on No Test results OK? Check host system (Table 6.
Diagnostics and Maintenance 6.3 Operation Check 6.3.1 Initial seek operation check If an error is detected during initialization by the initial seek operation check routine at power-on, the IDD sends the Fault LED Out signal to the interface connector. The spindle motor of the disk drive then stops, and the disk drive is unusable. For an explanation of the operation check before the initial seek, refer to the Section 5.5. 6.3.
6.4 Troubleshooting Procedures 6.4 Troubleshooting Procedures 6.4.1 Outline of troubleshooting procedures This section explains the troubleshooting procedures for disk drive errors. Depending on the maintenance level, analyze the error to detect a possibly faulty part (disk drive, or disk drive part). Full-scale troubleshooting is usually required if the error cause is not known. If the error cause is clear (e.g., abnormal noise in disk enclosure or burning of a PCA), troubleshooting is straightforward.
Diagnostics and Maintenance Table 6.2 Item DC power level System-level field troubleshooting Recommended work Check that the DC voltage is within the specified range (±5%). Check that the +5 VDC value (pin of the interface connector) is 4.75 to 5.25 VDC. Check that the +12 VDC supply (pin of the interface connector of disk drive) is 11.4 to 12.6 VDC. Electrical noise Make sure the maximum ripple peak-to-peak value of +5 VDC is within 250 mV and +12 VDC is within 250 mV.
6.4 Troubleshooting Procedures 6.4.3 Troubleshooting at the repair site For maintenance at this level, we recommend additional testing of the disk drive and signal checking. The sense data posted from the IDD helps with troubleshooting. This sense data makes the error type clear (functional, mechanical, or electrical error). Chapter 7 error analysis by sense data, and gives supplementary information on finding the error cause (faulty part). Table 6.3 lists how to detect a faulty disk drive subassembly.
Diagnostics and Maintenance 6.4.4 Troubleshooting with parts replacement in the factory This manual does not cover troubleshooting at the factory level. 6.4.5 Finding possibly faulty parts Finding possibly faulty parts in the field was explained in Subsection 6.4.2. This manual does not cover finding possibly faulty parts at the factory level.
CHAPTER 7 Error Analysis 7.1 Error Analysis Information Collection 7.2 Sense Data Analysis This chapter explains in detail how sense data collected from a disk drive is used for troubleshooting. Sense data reflects an error in the disk drive, and helps with troubleshooting. A sense key, sense code, and subsense code, taken from various sense data are repeated. Also in this chapter, troubleshooting is performed using these three codes.
Error Analysis Bit 7 Byte 0 6 5 Valid 4 3 2 1 0 X‘70’ or X‘71’ (error code) 1 X‘00’ 2 0 3 [MSB] 0 ILI 0 Sense key 4 Information 5 6 [LSB] 7 Basic information 8 X‘28’ (additional sense data length) [MSB] 9 Command-specific information 10 11 [LSB] 12 Sense code 13 Subsense code 14 X‘00’ 15 SKSV 16 Sense key-specific information 17 18 X 0 0 19 Additional information 0 SCSI ID CDB operation code 20 Detail information 47 Figure 7.
7.2 Sense Data Analysis 7.2 Sense Data Analysis 7.2.1 Error information indicated with sense data Subsection 7.2.2 onwards explain troubleshooting using sense data. Table 7.1 lists the definition of sense data. For details of sense data, refer to the Fibre Channel Interface Specifications. Table 7.1 Definition of sense data Sense data Sense key Sense Code Sub Sense Code 00 00 00 Operation was normal. 3 0C 03 A write to a disk terminated abnormally.
Error Analysis 7.2.2 Sense data (3-0C-03), (4-40-xx), (4-44-xx), and (4-C4-xx) Sense data (3-0C-03), (4-40-xx), (4-44-xx), and (4-C4-xx) indicate one of the following: • A target sector could not be detected using the sector counter. • A seek process overran the specified time. • A write to a disk terminated abnormally. • An error occurred in power-on self-diagnosis. • A hardware error occurred inside IDD. • A drive error occurred.
APPENDIX A Connector Signal Allocation A.1 Interface (FC-SCA) Connector Signal Allocation This appendix describes the connector signal allocation.
Connector Signal Allocation A.1 Interface (FC-SCA) Connector Signal Allocation Table A.1 FC-SCA connector: CN1 Pin No. Signal Signal Pin No.
Glossary CCS Common Command Set This is the standard form of SCSI logical specifications stipulated by the operations subcommittee of the American National Standards Institute (ANSI) which stipulates functions which a direct access device (magnetic disk, etc.) should support. CDB Command Descriptor Block A series of data which describes commands related to input/output operations, sent from the initiator to the target.
Glossary Target (TARG) This is the FC device that executes the input/output operations initiated by the initiator (INIT). In this manual, target is abbreviated "TARG.
Acronyms and Abbreviations DTE Disable Transfer on Error A ACK AEN ALT ARRE ACKnowledge Asynchoronous Event Notification ALTernated (block) Automatic Read Reallocation Enabled ASCII American Standard Code for Information Interchange ASG ASiGned block ATN ATTeNtion AWG American Wire Gauge AWRE Automatic Write Reallocation Enabled E ECC EER EVPD Error Correction Code Enable Early Recovery Enable Vital Product Data F FG FIFO FmtData FOV FUA Frame Ground First In First Out Format Data Format Options Vali
Acronyms and Abbreviations M MR MS MSG Magnetro Resistive Multiple Select MeSsaGe T TB TPI TRM Transfer Block Tracks Per Inch TeRMinator O OEM Original Equipment Manufacturer U UnitOfl Unit Offline P P list Primary defect list P/N Parts/Number PBdata Physical Block data PC board Printed Circuit board PCA Printed Circuit Assembly PER Post ERror PF Page Format PLOSync Phase Lock Oscillator Syncronous PMI Partial Medium Indicator PR4ML Partial Response class 4 Maximum Likelihood V VCM VPD VU Voice Coi
Index +12 VDC ........................................................ 4-7 1-1x-xx ........................................................... 7-4 3-0C-03........................................................... 7-4 3-1x-xx ........................................................... 7-4 4-40-xx ........................................................... 7-4 4-44-xx ........................................................... 7-4 4-C4-xx...........................................................
Index example of FC-AL system configuration ....... 1-7 external dimension.......................................... 4-1 external magnetic field ................................... 4-6 F factory maintenance........................................ 6-8 FC model drives outer view............................ 1-5 FC-AL standard .............................................. 1-2 FC-SCA connector......................................... A-2 fibre channel interface error............................
Index reserve and release function ........................... 1-3 revision label .................................................. 6-9 revision number .............................................. 6-9 S sector format................................................... 3-7 seek test .......................................................... 6-2 self-diagnostic................................................. 6-1 SEND DIAGNOSTIC command.................... 6-3 sense data.....................................
This page is intentionally left blank.
Comments concerning this manual can be directed to one of the following addresses: FUJITSU LIMITED Storage Products Group 4-1-1 Kamikodanaka, Nakahara-ku, Kawasaki, 211-8588, Japan TEL: 81-44-754-2130 FAX: 81-44-754-8346 FUJITSU COMPUTER PRODUCTS OF AMERICA, INC. 2904 Orchard Parkway, San Jose, California 95134-2009, U.S.A. TEL: 1-408-432-6333 FAX: 1-408-894-1709 FUJITSU CANADA INC. 2800 Matheson Blvd.
This page is intentionally left blank.
READER’S COMMENT FORM Your comments or suggestions on this document are cordially solicited. For any comments and suggestions you may have, please complete and submit this form to your FUJITSU representative. The comments and suggestions will be used in planning future editions. Thank you for your cooperation.
This page is intentionally left blank.