Contents Introduction ...........................................................................................................3 ■ ■ ■ ■ ■ ■ ■ ■ About This Manual .................................................................................................. 3 Opening Help .......................................................................................................... 4 Warning Indications Used in This Document .......................................................... 4 For Safe Use .......
Introduction ■ About This Manual Thank you for purchasing the Network Scanner ScanSnap N1800. This easy-to-operate network scanner is used to scan documents for further use. Symbols Used in This Manual Besides warning indicators, the following symbols are also used in this manual: Trademarks Microsoft, Windows, and Windows Vista are either registered trademarks or trademarks of Microsoft Corporation in the United States and/or other countries.
Abbreviation Used WARNING Option Central Admin Console Scanner Central Admin Console Central Admin Server Scanner Central Admin Server In one of the following situations, immediately turn off the scanner, and disconnect the power cable from the AC outlet. Not doing so may cause a fire or electric shock. z The scanner is damaged for any reason. z Smoke or heat coming from the scanner is detected. z Strange noise or smell is detected. z Foreign objects (water, liquids, small metal objects, etc.
To avoid injuries, do not place the scanner in an area where small children may be able to reach. Do not use any aerosol sprays or alcohol based sprays to clean the scanner. Dust blown up by strong air from the spray may enter the inside of the scanner. This may cause the scanner to fail or malfunction. Sparks, caused by static electricity, generated when blowing off dust and dirt from the outside of the scanner may cause a fire.
Replacing Batteries When carrying the scanner outside while it is raining or snowing, pay special attention so the scanner does not get wet. In order to retain data such as BIOS information, this product has a battery (CMOS RAM battery) on board. When you perform cleaning, make sure that the inside of the scanner is free of any foreign objects, and be careful not to get your hand or the cloth caught on the pick spring (metal part) as a deformed pick spring (metal part) may cause injury.
ENERGY STAR® z Connect the equipment into an outlet on a circuit different from that to which the receiver is located. z Consult your dealer or an experienced radio/TV technician FCC warning: Changes or modifications not expressly approved by the party responsible for compliance could void the user's authority to operate the equipment. PFU Limited, a Fujitsu company, has determined that this product meets the ENERGY STAR® guidelines for energy efficiency.
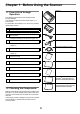
Chapter 1 Before Using the Scanner Scanner 1.1 From Arrival through Operation The following shows the flow from scanner arrival through operation. This manual provides information about Steps 1 to 5 shown below. For information about Steps 6 to 9, refer to the manuals downloaded in Step 5. 1 ADF paper chute Check package D"1.
1.3 Part Names This section explains names of the scanner parts.
Chapter 2 Setting up the Scanner 3. Connect the AC cable to the AC adapter 2.1 Removing the Protective Packaging (collectively called "power cable"). Use only the AC adapter and AC cable provided with the scanner. The scanner comes with a protective foam sheet and protective card attached. Follow the procedure described below to remove the protective packaging before using the scanner. AC adapter 1. Remove the tape and protective foam sheet that covers the LCD touch panel. 2.
Chapter 3 Configuring Scanner Basic Settings CAUTION You can select whether or not to display this window again at the next start up. To display the window again, for "Show this message at next start up?", select [Yes]. To not display this window at next start up, select [No].
7. Set the region/timezone. On the [Region / Timezone] window, select the region/timezone and whether to apply daylight saving time, and press the [Next] button. 6. Set the scanner name. On the [Scanner Name] window, specify the scanner name and group or domain for joining the network, and press the [Next] button. z To enter characters, press 8. Set the date and time. to show the on- screen keyboard. The button turns into the on-screen keyboard is shown.
10. Change the admin password. 12. Set the DNS server. On the [Admin Password] window, specify the administrator password, and press the [Next] button. The default value for the [Current Password] is "password". On the [DNS Server] window, set the IP address for the DNS server, and press the [Next] button. If the scanner is not connected to the network, the FQDN may not be displayed correctly. 11. Set the scanner's IP address.
. Confirm the configured settings. On the settings confirmation window of the installation wizard, confirm the configured basic settings, and press the [OK] button. DThe wizard finishes and the login window appears. z When the scanner name or domain name has been changed, the scanner is restarted. z If you select [No] for [Show the Installation Wizard at next start up?], the [Installation Wizard] window does not appear immediately after the next scanner startup.
Chapter 4 Checking the Network Connection 3. Select [Network Settings] J [Basic] J [Ping]. This section describes how to check the status of the network connection. The network connection can be checked by performing a ping test. 1. Log in to the scanner with the user name and password of the administrator. Enter "admin" for [User Name] and the password specified in the basic settings for [Password]. The default password is "password". DThe [Ping] window appears. 4.
Chapter 5 Downloading the Manual 4. Select a folder, and click the [Save] button. For this scanner, the Operator's Guide (PDF), which contains information about scanner settings, administration, and operations, is provided in addition with this manual. Read it when using the scanner. Use Adobe Reader (*) to view the Operator's Guide. *: Adobe Reader can be downloaded from the following site. http://www.adobe.com/ This section describes how to download the manual. 1.
Appendix A Troubleshooting [Ping statistics] shows "Lost=N (1 to 99% loss)" Network Connection Troubleshooting ■ Details ■ Checking Basic Network Operation with a Ping Test Communication with the device specified as the ping target is unstable. ■ Action The network connection may be checked by performing a ping test. For more details on how to perform a ping test, refer to "Chapter 4 Checking the Network Connection" (page 15).
■ Failure to Connect to a Server Using Its IP Address Another host or communication device is connected using the same IP address as the scanner.
■ Failure to Connect to a Server Using Its Host Name or FQDN ■ Failure to Access the Scanner Using a Web Browser, Admin Tool, or Central Admin Server If the scanner cannot connect to a server by specifying its host name or FQDN, or if a server does not respond to a ping test by specifying its host name or FQDN, try the following: If access is not possible when attempting to connect to the scanner using a Web browser, the Admin Tool, or the Central Admin Server, or when attempting to connect to the Centra
The URL of the target scanner is not registered as a trusted site. The scanner is in standby mode. ■ Action Press the power button to start the scanner. ■ Action Set the scanner URL as a trusted site for Internet Explorer. A proxy server is being used. 1. In Internet Explorer, select the [Tools] menu J [Internet Options]. ■ Action Set the proxy server not to be used. 2. On the [Security] tab, select [Trusted sites] and press the [Sites] button. 1.
Power Troubleshooting Login Troubleshooting Scanner cannot be turned on. Cannot login with administrator password. ■ Check item Has the power button been pressed? ■ Check item Was the Caps Lock on when the password was entered? ■ Action Press the power button. ■ Action Turn off the Caps Lock and try logging in again. If the password has been lost or forgotten, contact your FUJITSU scanner dealer or an authorized FUJITSU scanner service provider.
Copyright NetAdvantage 2007 Redistribution and use in source and binary forms are permitted provided that the above copyright notice and this paragraph are duplicated in all such forms and that any documentation, advertising materials, and other materials related to such distribution and use acknowledge that the software was developed by the University of California, Berkeley.
WinDump3.9.5 THE SOFTWARE IS PROVIDED "AS IS" AND DIGITAL EQUIPMENT CORP. DISCLAIMS ALL WARRANTIES WITH REGARD TO THIS SOFTWARE, INCLUDING ALL IMPLIED WARRANTIES OF MERCHANTABILITY AND FITNESS.