P3PC-1752-01ENZ0 Color Image Scanner S500M for Macintosh Operator’s Guide SC AN PO W ER
Introduction Thank you for purchasing the Color Image Scanner ScanSnap S500M. ScanSnap S500M is a feature-rich, office-ready color image scanner. It is designed to help you improve productivity and solve problems in scanning. The ScanSnap scanner has the following features: ■ Converting paper documents into PDFs by pressing a single button! You can turn the documents cluttering up your desk into PDFs, and manage and archive them on your computer.
CONTENTS ■ Regulatory Information ........................................................ iv ■ Note, Liability ....................................................................... vii ■ Preface ................................................................................. vii ■ Safety Precautions ................................................................ x Chapter 1 Before You Start Using Your Scanner................... 1 1.1 Names and Functions of Parts .....................................
Chapter 5 Troubleshooting .................................................... 79 5.1 Clearing Document Jams................................................. 80 5.2 Troubleshooting Checklist .............................................. 82 Chapter 6 Daily Care .............................................................. 87 6.1 Cleaning Materials ............................................................ 88 6.2 Cleaning the Scanner Exterior & Stacker....................... 89 6.
■ Regulatory Information FCC declaration This equipment has been tested and found to comply with the limits for a Class B digital device, pursuant to Part 15 of the FCC Rules. These limits are designed to provide reasonable protection against harmful interference in a residential installation. This equipment generates, uses, and can radiate radio frequency energy and, if not installed and used in accordance with the instruction manual, may cause harmful interference to radio communications.
Bescheinigung des Herstellers / Importeurs Für den S500M wid folgendes bescheinigt: • In Übereinsstimmung mit den Bestimmungen der EN45014(CE) funkentstört • Maschinenlärminformationsverordnung 3. GPSGV: Der höchste Schalldruckpegel beträgt 70 dB (A) oder weniger, gemäß EN ISO 7779. International ENERGY STAR® Program As an ENERGY STAR® Partner, PFU LIMITED has determined that this product meets the ENERGY STAR® guidelines for energy efficiency.
Trademarks Mac, and Mac OS are trademarks of Apple Computer, Inc., registered in the United States and other countries. Adobe, the Adobe logo, and Acrobat are either registered trademarks of Adobe Systems Incorporated in the United States and/or other countries. Other product names are the trademarks or registered trademarks of the respective companies. How Product Names Are Indicated In This Manual References to operating systems (OS) are indicated as follows: Mac OS X v10.
■ Note, Liability READ ALL OF THIS MANUAL CAREFULLY BEFORE USING THIS PRODUCT. IF THIS PRODUCT IS NOT USED CORRECTLY, UNEXPECTED INJURY MAY BE CAUSED TO USERS OR BYSTANDERS.
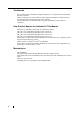
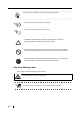
This symbol alerts operators to helpful advice regarding operation. HINT Operation Operation This symbol shows operation with your computer. This symbol shows operation with your scanner. A TRIANGLE symbol indicates that special care and attention is required. The drawing inside the triangle shows the specific caution. A CIRCLE with a diagonal line inside shows action which users may not perform. The drawing inside or under the circle shows the specific action that is not allowed.
Screen Examples In This Manual The screen examples in this manual are subject to change without notice in the interest of product improvement. If the actual displayed screen differs from the screen examples in this manual, operate by following the actual displayed screen while referring to the User's Manual of the scanner application you are using. Furthermore, the screenshots in this manual are for ScanSnap Manager. About Maintenance The user must not perform repairs on this scanner.
■ Safety Precautions WARNING The following describes important warnings described in this manual. Do not touch the AC cable with wet hands. Do not touch the power plug with wet hands. Doing so might cause electric shock. Do not damage the AC cable. A damaged AC cable may cause fire or electric shock. Do not place heavy objects on AC cables, or pull, bend, twist, heat, damage or modify AC cables. Also, do not use damaged AC cables or power plugs, and AC cables or power plugs when the wall socket is loose.
Do not use the scanner if you smell strange odor. If you detect heat coming from the device or detect other problems such as smoke, strange smells or noises, immediately turn off the scanner and then disconnect its power plug. Make sure that the smoking has stopped, and then contact the store where you purchased the scanner or an authorized FUJITSU scanner service provider. Turn the scanner OFF if it is damaged.
CAUTION The following describes important cautions described in this manual. Do not install the scanner on unstable surfaces. Install the scanner on a desk so that none of its parts protrude outside of the desktop. Also, make sure that the scanner is installed on a flat, level surface. Do not install the scanner on unstable surfaces. Install the scanner on a level surface that is free of vibration to prevent it from falling.
Protect the scanner from static electricity. Install the scanner away from strong magnetic fields and other sources of electronic noise. Also, protect the scanner from static electricity as this might cause the scanner to malfunction. Do not use aerosol sprays near the scanner. Do not use aerosol sprays to clean the scanner. Aerosol sprays cause dirt and dust to enter the scanner, which will result in scanner failure and malfunction. Avoid any contact when scanner is in use.
xiv
Chapter 1 1 Before You Start Using Your Scanner This chapter describes the necessary preparations for using ScanSnap. 1.1 Names and Functions of Parts ..............................................................................
1.1 Names and Functions of Parts This section describes the name and function of each part. ■ Front Side Paper chute Open the cover to use the scanner. ⇒Opening the cover turns on the scanner. ADF (ADF stands for Automatic Document Feeder) Paper chute Open the paper chute and load the documents to scan. Side guide Adjust the side guides to the width of documents so that the scanned images will not be skewed. Cover open lever Pull this lever towards you and open the ADF. Buttons See the next page.
1.1 Names and Functions of Parts ■ Operation Button [SCAN] button Press this button to start scanning. 1 [POWER] button Hold down 1 sec. to turn on/off the power supply. SCAN POWER Power lamp Before You Start Using Your Scanner Indicates the scanner status.
4
Chapter 2 Connecting ScanSnap 2 This chapter describes how to connect ScanSnap to your computer. Install ScanSnap Manager on your computer before connecting the ScanSnap scanner. ATTENTION More than one ScanSnap scanner cannot be connected to one computer. For details about the specifications of the scanner such as the installation area, refer to the Appendix, "Installation Specifications" (page 109). 2.1 Installing ScanSnap..............................................................................
2.1 Installing ScanSnap "Installation" is the operation to copy the supplied program file or ScanSnap Manager to the hard disk of your computer and create the environment for using ScanSnap on the computer. ■ Before Installing ScanSnap Manager 1. Before installing ScanSnap Manager, check the following system requirements. ■ Operating system One of the following operating systems is required: • Mac OS X v10.2.8, v10.3, or v10.4 Mac OS X v10.1 Mac OS X v10.2 *2 Mac OS X v10.3 Mac OS X v10.
2.1 Installing ScanSnap ■ Free disk space • • ScanSnap Manager Adobe Acrobat 7.0 20 MB 450 MB 2. Make sure that ScanSnap is not connected to your computer yet. 3. Start up your computer. Login as a user with Administrator rights. 4. Close all currently running programs.
■ Installing Adobe Acrobat Install Adobe Acrobat from the "Adobe Acrobat 7.0 CD-ROM" supplied with the scanner, following the procedures below. ATTENTION HINT System requirements for "Adobe Acrobat 7.0 Standard": • OS: Mac OS X v10.2.8, v10.3, or v10.4. • Screen Resolution: 800 x 600 or higher * For further details, please visit Adobe Web Site at: http://www.adobe.com Adobe Acrobat is required for displaying the "ScanSnap S500M Operator’s Guide.
2.1 Installing ScanSnap HINT • To open the CD tray or to eject a CD, press the button on the key- board. If the keyboard does not have the button, press and hold down the [F12] key instead. • If the "Acrobat 7.0 Standard" window is not displayed automatically, copy the [Adobe Acrobat 7.0 Standard] folder into the [Applications] folder using Finder. 2. Click the Finder icon in the Dock menu. 2 Connecting ScanSnap ⇒ The Finder window appears. 3. Select the [Applications] folder in the Finder window.
5. After finishing copying, eject CD-ROM, open the [Adobe Acrobat 7.0 Standard] folder in the [Applications] folder, double-click the Acrobat Standard icon and follow the instructions on-screen. HINT 10 Click the "How to install" button on the "Adobe Acrobat 7.0 Standard" window to learn more about the Adobe Acrobat 7.0 installation. Refer to "Adobe Acrobat Help" about how to use Adobe Acrobat 7.0.
2.1 Installing ScanSnap ■ Installing ScanSnap Manager follow the procedure below to install ScanSnap Manager. Operation 1. Insert the "ScanSnap Setup CD-ROM" into the CD-ROM drive. ⇒ The "ScanSnap" window appears. HINT To open the CD tray or to eject a CD, press the 2. Double-click the ScanSnap icon button, press and hold down the . 1) With Mac OS X v10.2 ⇒ The "Welcome to ScanSnap Manager Installer" window appears. ATTENTION With Mac OS X v10.2, a window may appear to require your password.
2) With Mac OS X v10.3 or v10.4 ⇒ The "This Installer package needs to run a program to determine if it can be installed. Do you want to continue?" dialog appears. ⇒ Click the [Continue] button. 3. In the "Welcome to the ScanSnap Manager Installer" window, click the [Continue] button.
2.1 Installing ScanSnap ⇒ The "Important Information" window appears. 2 Connecting ScanSnap When you have finished reading, click the [Continue] button. ⇒ The "Software License Agreement" window appears. 4. Check the contents of the "Software License Agreement," and click the [Continue] button. When you have finished reading, click the [Continue] button.
⇒ The agreement confirmation window appears. To accept the agreement, click the [Agree] button. If you click the [Disagree] button, the installation would be aborted, and the "Software License Agreement" window returns. ⇒ If you click the [Agree] button, the "Select a Destination" window appears. 5. In the "Select a Destination" window, specify the installation directory, and click the [Continue] button. Select the volume to install the software, and click the [Continue] button.
2.1 Installing ScanSnap 6. In the 'Easy Install on "" 'window, click the [Install] button. 2 Connecting ScanSnap ⇒ The message "Installing this software requires you to restart your computer when the installation is done. Are you sure you want to install the software now?" appears. Click the "Continue Installation" button. ScanSnap Manager and its documentation will be installed. HINT ⇒ The "Installing ScanSnap Manager" window appears. ATTENTION With Mac OS X v10.3 and v10.
⇒ The "Startup item registration" window appears before the installation is complete. ⇒ Clicking the [OK] button in the "Startup item registration" window closes the window. Even if you do nothing, the window closes automatically in 10 seconds. 7. In the "The software was successfully installed" window, click the [Close] button. ⇒ ScanSnap Manager starts and the ScanSnap Manager icon appears in the Dock menu.
2.2 Connecting ScanSnap to your Computer 2.2 Connecting ScanSnap to your Computer Follow the procedure below to connect ScanSnap to your computer. 1. Connect ScanSnap to a power outlet with the AC cable. 2. Connect ScanSnap to your computer with the USB cable. ATTENTION • Be sure to connect the AC cable before connecting the USB cable. • Be sure to install ScanSnap Manager before connecting ScanSnap to your 2 computer. [For details about the installation, refer to "Installing ScanSnap" (page 6)].
■ Connecting the USB Cable Connect the USB cable as shown below. ATTENTION • Use only the USB cable supplied with the scanner. Operation with a commercially available USB cable is not guaranteed to work. • When connecting to a USB hub, be sure to use a powered hub and connect the scanner to the first connected hub (root hub). If you do not connect the ScanSnap scanner to the root hub, the scanner may not function. • If you connect the scanner with the USB 2.
2.2 Connecting ScanSnap to your Computer 3. Open the paper chute of ScanSnap. Paper chute [POWER] button Power lamp 2 ⇒ ScanSnap is automatically turned on and detected by your computer. ATTENTION If the scanner is not automatically turned on (Blue Power lamp is ON), push the [POWER] button on the scanner. It may take some time for the "ScanSnap Manager" icon in the Dock to become .
20
Chapter 3 Basic Scanner Operations This chapter describes the basic operations of ScanSnap. 3 3.1 Flow of Operations ............................................................................................... 22 3.2 Scanning Different Document Types .................................................................. 29 3.3 Loading Documents ............................................................................................. 31 3.4 Changing Scan Settings......................................
3.1 Flow of Operations This section describes the flow of operations from scanning documents with ScanSnap to saving scanned images to PDF files. ■ Preparation Operation 1. Make sure that the AC cable is firmly connected to the scanner. 2. Make sure that the scanner is correctly connected to your computer. HINT Connecting the scanner to the computer that is already turned on presents no problem. If the scanner is already connected to your computer, you do not have to reconnect it. 3.
3.1 Flow of Operations ⇒ The scanner is turned on and the status of the "ScanSnap Manager" icon will change from to HINT . If the scanner is not automatically turned on (Power lamp illuminates blue) even when the paper chute is opened, press the [POWER] button on the scanner.
■ Scanning documents Operation 1. Make sure that the "ScanSnap Manager" icon is displayed in the Dock menu. If the "ScanSnap Manager" icon is not displayed, from Finder, select the destination in which "ScanSnap" is installed (generally, you select "Applications," and then "ScanSnap"), and select "ScanSnap Manager" to start up "ScanSnap Manager." The icon has been added to the Startup Item on the Mac operating system during installation, and therefore it appears in the Dock menu when the Mac OS starts.
3.1 Flow of Operations ATTENTION • Do not connect or disconnect other USB devices to or from the computer during scanning. • Do not close the paper chute or press the [POWER] button on the scanner during scanning. ⇒ The Power lamp on the scanner blinks blue during scanning. The following window appears to indicate the scanning status. 3 Basic Scanner Operations ⇒ The selected application (Adobe Acrobat, Preview, etc.) is started up and the scanned image is displayed.
HINT • Default settings for scanning are as follows: • • • • 26 SCAN button: "Duplex scan" Image quality: "Normal (Fastest)" Color mode: "Auto Color Detection" Before scanning documents that contain printed or handwritten text, mark the "Setting for text only document" checkbox in the [Read Mode Option] window; to open the [Read Mode Option] window, click the [Option] button on the [Scanning] tab of the "Scan and Save Settings" window. For details, refer to "3.4 Changing Scan Settings" (on page 34).
3.1 Flow of Operations ■ Turning the Scanner ON/OFF ScanSnap can be turned on/off by: • Turning on/off the computer, • Opening/closing the paper chute of the scanner. You do not have to turn on/off the scanner when it is connected to your computer. Turning off your computer or closing the paper chute. The Power lamp on the scanner goes off and the scanner is turned off. Turning on your computer or opening the paper chute. The Power lamp on the scanner illuminates and the scanner is turned on.
■ End of Operation Exiting "ScanSnap Manager" Operation Click and hold the mouse button on the "ScanSnap Manager" icon in the Dock menu, and select "Quit" from the menu. To operate ScanSnap, "ScanSnap Manager" must be active (stay resident). When you want to resurrect "ScanSnap Manager," select the destination where ScanSnap is installed (generally, "Applications" - "ScanSnap") from Finder, and then select "ScanSnap Manager." (*You do not have to quit "ScanSnap Manager" under normal conditions.
3.2 Scanning Different Document Types 3.2 Scanning Different Document Types The table below shows the types of documents that you can scan with ScanSnap. Target Paper commonly used in offices, Post cards, Business cards Weight 52 g/m2 to 127 g/m2 (14 lb to 34 lb) Size (8.5 x 11 in (216 x 279.4 mm)) (8.5 x 14 in (216 x 355.6 mm))) (210 mm × 297 mm) (148 mm × 210 mm) (105 mm × 148 mm) (182 mm × 257 mm) (128 mm × 182 mm) (100 mm × 148 mm) (90 mm × 55 mm, 55 mm × 90 mm) Width: 50.8 to 216 mm (2 to 8.
ATTENTION • To prevent the rollers from becoming dirty, avoid scanning documents written in pencil. If you scan such documents, clean the rollers as frequently as possible. For details, refer to "6.2 Cleaning the Scanner Exterior & Stacker" (page 89). • Carbonless paper contains chemical substances that may damage the Pad ASSY or rollers (e.g. Pick roller). When scanning carbonless paper, pay attention to the following: − Clean the Pad ASSY and rollers as frequently as possible.
3.3 Loading Documents 3.3 Loading Documents This section describes how to load documents onto the scanner. ■ How to load documents 1. Align the edges of the document. How to align the edges of the document is as follows: 1) Align both edges of the document, and you can scan the document correctly. 2) Check the number of sheets in the stack. As a guide, load up to the following number of sheets onto the feeder: - With A4 or smaller size paper, the thickness of the document stack must be 3 0.2 in.
3) Hold the batch firmly with both hands so that the both edges remain beveled, and then unbend the batch as shown in the figure below. 4) Repeat steps 1) to 3) a few times. 5) Turn the batch 90 degrees to hold the other two sides of it, and then perform steps 1 to 4 again. 2. Load the document onto the paper chute. Load the batch so that the front side of the document (the first page when the number of sheets is more than one) faces down (to the paper chute).
3.3 Loading Documents 3. Adjust the side guides to the document width. Move the side guides so that they are touching the document edge. If there is clearance between the document edge and the guide, the scanned images may be skewed. Side guide Document 3 Basic Scanner Operations HINT If you use the stacker, it will be easy to gather scanned documents. Use the stacker as described below. 1. Pull the stacker towards you. Stacker 2. Use the indent and extend the stacker extension.
3.4 Changing Scan Settings All the settings on ScanSnap are configured with "ScanSnap Manager." The ScanSnap icon is added to the Dock menu at the middle- bottom of the Mac OS X screen. The following menu appears when you press and hold the mouse button on the icon. From this menu, you can start scanning, configure settings for scanning, and check the consumable status. Start Duplex/Simplex scanning. Display the "Scan and Save Settings" window. Display the "Check consumable supplies" window.
3.4 Changing Scan Settings The following describes how to change the settings. Operation 1. Click and hold down the mouse button on the ScanSnap icon in the Dock menu, and select "Settings" from the menu. 3 Basic Scanner Operations ⇒ The "Scan and Save Settings" window appears. You can also open the "Scan and Save Settings" window by simultaneously HINT pressing the [Command ( )] and [S] keys on the keyboard. (This can be used only when ScanSnap Manager is active.) 2.
[Application] tab ■ Application: Specify the application to interact with ScanSnap. The specified application starts running after the document is scanned with ScanSnap. Click You can select one of the following applications: • Scan to File (image data will be simply saved to file) to select the application. • Adobe Acrobat Standard • Adobe Acrobat Professional • Adobe Acrobat Reader or Adobe Reader • Preview • Any program that supports ".pdf "or ".jpg" can be added.
3.4 Changing Scan Settings ■ [Add or Remove] button Applications can be added to and removed from the "Application" list. When you click the [Add or Remove] button, the following screen is displayed. (Up to ten applications can be registered.) 3 • Click the [Browse] button, and select the alias file or the executable file (.app) of the application you want to add.
HINT When adding an application, select one that supports either JPEG (*.jpg) or PDF (*.pdf) format, and that can open when a file is dragged-and-droppted onto its alias. Otherwise scanned images cannot be displayed properly. Do the following: 1. Create an alias of the application you wish to add. 2. Drag-and-drop any file in JPEG format (*.jpg) onto the alias.
3.4 Changing Scan Settings [Save] tab 3 ScanSnap S500M Operator's Guide 39 Basic Scanner Operations ■ Folder path to save images: Specify the folder to save the scanned images. When you click the [Browse] button, the "Browse for Folder" window is displayed. Select the folder to save the scanned images, and click the [Choose] button.
■ [Filename format] button Set the filename format used for files to save the scanned images. When you click the [File name format] button, the following window appears. One of three settings can be specified. • "Use Operating System Setting." Files are named according to the settings of the operating system of your computer. • "yyyyMMddHHmmss" The date and time are used as the file name when saving a scanned image to a file.
3.4 Changing Scan Settings [Scanning] tab 3 Basic Scanner Operations ■ Image quality: Specify whether to scan documents quickly or at higher quality. Select one of the following modes: • Normal (Fastest) Select this mode when you wish to scan documents quickly. • Better (Faster) Select this mode when you wish to scan documents at a high quality. • Best (Slow) Select this mode when you wish to scan documents at a higher quality.
■ Color mode: Specify whether to scan documents in color mode or in black-and-white mode. By clicking , you can select one of the following modes: • Auto Color Detection (Automatically recognizes the document color) ScanSnap automatically recognizes whether the document to be scanned is color or black-and-white, and switches the scan mode accordingly. • Color All documents are scanned in the color mode. This setting is for scanning color documents. • B&W All documents are scanned in B&W mode.
3.4 Changing Scan Settings ■ [Option] button Configure other scanning-related settings. Clicking the [Option] button displays the following window. • • ATTENTION The following types of documents may be accidentally recognized as blank pages: • Almost blank documents containing only a few characters • Documents of only one color (solid color including black) and without any patterns, lines, or characters Before discarding the scanned documents, check for pages accidentally removed from the output image.
• Correct skewed character strings automatically. If this checkbox is marked, ScanSnap detects a skew of the documents and outputs corrected images. Up to +/-5 degrees of skew can be corrected . ATTENTION • Allow automatic image rotation This setting automatically detects the orientation of a text on the document, and changes the orientation of the image. ATTENTION 44 This function detects a document skew based on the characters on the document.
3.4 Changing Scan Settings [File option] tab 3 Click to select the file format. You can select either of the following file formats: • PDF (*.pdf) • JPEG (*.jpg) ATTENTION "JPEG" is not available when "Auto Color Detection" or "B&W" is selected from the "Color mode" drop-down list on the [Scanning] tab. In addition, the file format is automatically changed from "JPEG" to "PDF" when you select "Auto Color Detection" or "B&W.
• "Multipage PDF (whole batch in one PDF)" Create a merged PDF file of all the scanned images. • "Generate one PDF file per x page(s)" Create PDF files, each of which includes the specified number of pages, per scan. For example, when "2" is selected as the number of pages, scanning six pages of documents creates three files. ATTENTION 46 The number of files displayed after the scanning depends on the application interacting with ScanSnap, which you selected in the Application tab.
3.4 Changing Scan Settings [Paper size] tab 3 Basic Scanner Operations ■ Paper size: Specify the paper size of the document to be loaded on the scanner. Click to select the size. The following paper sizes (Width x Length) can be selected. • Automatic detection • Letter (8.5 x 11 in (216 x 279.4 mm)) • Legal (8.5 x 14 in (216 x 355.
■ [Custom] button With this function, you can add up to ten custom document sizes into the [Paper size] list. Clicking this button displays the following window. 1) Click the [Add] button. ⇒ The following window appears. 2) Configure settings as desired. - Enter a document size within the range given below: Width: 50.8 mm to 216 mm (2 in. to 8.5 in.) Length: 50.8 mm to 360 mm (2 in. to 14.17 in.) - Enter the name you want to use in the [Name] field.
3.4 Changing Scan Settings 1) In the "Add or Remove Custom sizes" window, select the document size you want to delete and click the [Remove] button. ⇒ The confirmation message appears. 2) Click the [Yes] button. ⇒ In the "Add or Remove Custom sizes" window, confirm that the selected document size is deleted. 3) Click the [Close] button to close the "Add or Remove Custom sizes" window.
[Compression] tab ■ Compression rate: Change the compression rate and adjust the file size of the scanned image. The compression rate is changed by moving the slider. The higher the compression rate is, the smaller the file size is. ATTENTION 50 As the compression rate increases, the quality of scanned images decreases.
3.4 Changing Scan Settings Image data size HINT The following table shows rough estimates of sizes of generated images when a single-sided color document is scanned in respective modes.
3.5 Various settings according to your needs When you use default settings on ScanSnap, all you have to do is simply press the [SCAN] button to scan the documents, save images in the best condition, and display the scanned images on the screen; any complicated operations are not required. In addition, you can manually configure the settings for specific scanning. This section, using typical examples, describes how to scan documents based on preferences of you.
3.5 Various settings according to your needs ■ Scanning only one side of a document Pressing the [SCAN] button on ScanSnap starts scanning documents in "Duplex scan" mode by default. If you want to change the [SCAN] button setting to "Simplex scan" mode, follow the procedure below. Operation 1. Click and hold down the mouse button on the ScanSnap icon , and select 3 "Settings" from the displayed menu. 2.
4. Load the document onto the scanner. 5. Press the [SCAN] button . ⇒ The document is scanned in "Simplex scan" mode. HINT 54 To select the "Duplex scan" mode again, go to step 2 and select "Duplex Scan (double-sided)" instead. The selected setting is valid until you change it again.
3.5 Various settings according to your needs ■ Scanning color document in black-and-white By default, ScanSnap automatically recognizes whether a document is black-and-white or color. Color documents are output as color image data, and black-and-white documents are output as monochrome image data. If you want to output all documents as monochrome image data, change the settings following the procedures below. Operation 1.
■ Skipping blank pages ScanSnap is able to remove blank pages automatically. When documents in which double-sided and single-sided pages are mixed are scanned in "Duplex scan" mode, the backside of single-sided (blank) pages are automatically removed, and the image data of only necessary pages is generated. To change the setting, follow the procedure below. Operation 1. Click and hold the mouse button on the ScanSnap icon from the displayed menu. ⇒ The "Scan and Save Settings" window appears. 2.
3.5 Various settings according to your needs 3. Mark the [Allow automatic blank page removal] checkbox. 4. Click the [OK] button and close all the windows. ⇒ The setting takes effect the next time you scan documents.
■ Correcting skewed documents ScanSnap is able to automatically correct document skew. To change the setting, follow the procedure below. Operation 1. Click and hold the mouse button on the ScanSnap icon from the displayed menu. 2. On the [Scanning] tab, click the [Option] button. ⇒ The "Read Mode Option" window appears.
3.5 Various settings according to your needs 3. Mark the [Correct skewed character strings automatically] checkbox. 4. Click the [OK] button and close all the windows. ⇒ The setting takes effect the next time you scan documents. Up to +/-5 degrees of skew can be corrected. This function detects a skew of the document based on the character strings on each sheet.
■ Correcting the orientation of scanned image When there are pages of different orientations in a scanned document, ScanSnap is able to automatically rotate the orientation (view direction) of the scanned images. For example, it often happens that some pages are portrait (text) and some are landscape (tables) in a document. In addition, the backside of double-sided documents in calendar style is printed upside down. To change the setting, follow the procedure below. Operation 1.
3.5 Various settings according to your needs 3. Mark the [Allow automatic image rotation] checkbox. 4. Click the [OK] button and close all the windows. ⇒ The setting takes effect the next time you scan documents. This function determines the orientation of pages based on the character’s direction. Therefore, the following kinds of documents may not be recognized correctly.
■ Scanning documents of different widths or sizes at a time By marking the "Scan mixed paper size" checkbox, you can scan documents of different widths or sizes in one batch. To scan documents of various sizes, do the following. Operation 1. Click and hold the mouse button on the ScanSnap icon from the displayed menu. 2. Select the [Paper size] tab. 3. Mark the "Scan mixed paper size" checkbox.
3.5 Various settings according to your needs 4. Click the [OK] button and close all the windows. ATTENTION 3 Basic Scanner Operations This function is available only when "Automatic detection" is selected from the "Paper size" drop-down list. 5. Align the leading edge and centerline of all documents.
6. Load the documents onto the paper chute. ATTENTION • Place all documents centering them under the pick roller. (Documents that are not under the pick roller cannot be fed.) • Adjust the side guide to the widest document. • Carefully load the smaller documents, which cannot contact the side guide, so that they can be fed straight.
3.5 Various settings according to your needs 7. Press the [SCAN] button . ⇒ The size of all images output conforms to the respective documents. ATTENTION If the document was skewed during scanning, the output image size may be different from the original document size.
■ Rotating the page view of a PDF file Even after scanning a document and saving it as a PDF file, you can change the view direction of this PDF file with Adobe Acrobat. When you want change the orientation of any other pages, follow the procedure below. Operation 1. With Adobe Acrobat, open the PDF file you want to change the view direction. 2. From the menu bar, select [View] and [Rotate View], and then specify the direction of the rotation. In this case, select [Clockwise].
3.5 Various settings according to your needs 3. You see the view direction is changed. 3 Basic Scanner Operations For details on this function, refer to "Adobe Acrobat Help.
■ Saving scanned images in multiple files ScanSnap can save scanned images to multiple PDF files, each of which contains a preset number of pages. For example, you can scan a batch of filled forms and create a separate file for each. To change the setting, follow the procedure below. Operation 1. Click and hold the mouse button on the ScanSnap icon , and select "Settings" from the displayed menu. 2. On the [File option] tab, click the [Option] button. ATTENTION 68 Make sure that "PDF(*.
3.5 Various settings according to your needs 3. In the "PDF file format option" window, select "Generate one PDF file per x Page" and a number. Every PDF file created contains the specified number of pages. HINT 4. Click the [OK] button to close the window. ⇒ The setting takes effect the next time you scan documents. ScanSnap S500M Operator's Guide 69 3 Basic Scanner Operations In "Duplex scan" mode, one sheet of paper has two pages (a front and a back).
■ Continuing/stopping scanning after an error If an error such as the paper jam occurs while you scan a document containing more than one pages, you will see the following message. You can continue or stop scanning using the following procedure. Operation To continue scanning: 1. Check the last scanned page in the "Message" window. 2. Load the un-scanned pages back onto the ADF. 3. Click the [Continue scanning] button to restart the scanning. To quit scanning: 1. Click the [Quit] button.
3.5 Various settings according to your needs ATTENTION The [Continue Scanning] button may be grayed out as shown in the example below. 3 Basic Scanner Operations If this is the case, it is not possible to continue scanning.
■ Converting scanned images to searchable text with OCR If you scan a text document, you will get an image of the document containing all the signs, letters, and numbers. However, the image data cannot be recognized as text. This means that you are not able to search the content of your document until processing it with OCR (Optical Character Recognition). You can convert such image data into searchable text by processing with OCR ("Recognize Text" function) of Adobe Acrobat 7.0. Operation 1.
3.5 Various settings according to your needs ⇒ The text information is added to the image data by the "Recognize Text" function. ATTENTION An error may occur when data scanned at 600dpi or more is converted with Adobe Acrobat 7.0.0. To avoid the error, do the following: If you are scanning color documents, in the "ScanSnap Manager - Scan and Save Settings" window, select the [Scanning] tab and set "Image quality" to "Better (Faster)" or "Best (Slow)" and scan the documents.
74
Chapter 4 Uninstalling ScanSnap The "Uninstallation" process removes the ScanSnap program files, which are installed on your computer, from the hard disk and restores the system environment to its original state. This chapter describes how to uninstall ScanSnap. 4 4.1 Uninstalling Supplied Programs .........................................................................
4.1 Uninstalling Supplied Programs Follow the procedure below to uninstall ScanSnap Manager. ■ To uninstall ScanSnap Manager in Mac OS X v10.2 1. Start your computer. 2. Quit ScanSnap applications; all users must quit those running applications. (Click and hold the mouse button on the ScanSnap icon , and select "Quit" from the displayed menu.) 3. If the ScanSnap icon still remains on the Dock menu, drag the ScanSnap icon into the Trash. 4. From the Apple ( ) menu, select "System Preferences.
4.1 Uninstalling Supplied Programs ■ To uninstall ScanSnap Manager in Mac OS X v10.3/v10.4 1. Start your computer. 2. Quit ScanSnap Manager; all users must quit those running applications. (Click and hold the mouse button on the ScanSnap icon , and select "Quit" from the displayed menu.) 3. If the ScanSnap icon still remains on the Dock menu, drag the ScanSnap icon into the Trash. 4. From the Apple ( ) menu, select "System Preferences." 4 5. In the "System Preferences" window, select "Accounts.
78
Chapter 5 Troubleshooting This chapter describes how to remove jammed documents and troubleshoot other problems. 5 5.1 Clearing Document Jams..................................................................................... 80 5.2 Troubleshooting Checklist...................................................................................
5.1 Clearing Document Jams Cautions in clearing a paper jam are as follows: CAUTION • Do not pull out the jammed paper by force; be sure to open the ADF before removing the jammed document. • Do not touch sharp objects inside the scanner when removing jammed paper or you might be injured. • When removing the jammed paper, be careful not to get your necktie or necklace entangled in the scanner. • The surface of the ADF glass can become very hot during operation. Take care not to get burned.
5.1 Clearing Document Jams 3. Remove the jammed paper. 4. Close the ADF. ADF Paper chute 5 Troubleshooting ⇒ You should hear the ADF click when it returns to its original position. ATTENTION Make sure that the ADF is firmly closed. Otherwise, paper jams or other feeding errors may occur.
5.2 Troubleshooting Checklist This section describes common problems that may occur during the use of ScanSnap and how to solve them. Check the items as described in the following table before requesting repair service. If you cannot solve the problem even after checking the following items, contact an authorized FUJITSU scanner service provider. Symptom The scanner cannot be turned on.
5.2 Troubleshooting Checklist Symptom Scanning does not start. Check The Item Out Resolution Is the USB cable connected correctly? Connect the USB cable correctly. (When a hub is used, check the hub’s power supply.) Is the LED light blinking? Disconnect and then re-connect the AC cable and AC adapter. (Wait at least 5 seconds before reconnecting the AC or USB cable.
Symptom Check The Item Out Resolution Thin lines are faint on the document. (Example: The ruled lines of the table are invisible.) Are you scanning documents including typed text, tables with ruled lines, or handwritten text in color mode? The color mode is used for capturing color images such as the photo in high quality.
5.2 Troubleshooting Checklist Symptom Sheets of paper are not fed (stops midway). Check The Item Out Resolution Is the Pick roller dirty? Clean the Pick roller following the instructions in section "6.3 Cleaning the Inside of the Scanner" (page 90). Is the Pick roller worn? Replace the Pick roller following the instructions in "7.3 Replacing the Pick Roller" (page 101). Are there any foreign materials on the document feed path? Remove any foreign materials from the document feed path. Refer to "5.
Symptom Check The Item Out Resolution The orientation of scanned images is not displayed correctly (when "Allow automatic image rotation" is enable.) Depending on the contents of the document, the automatic image rotation may not work properly. For information about the "Allow automatic image rotation" checkbox, refer to "Correcting the orientation of scanned image" (page 60) Letters on the scanned images cannot be read.
Chapter 6 Daily Care This chapter describes how to clean ScanSnap. WARNING Fire/Electric Shock Before you clean the scanner, turn off the scanner and disconnect the AC adapter from the power outlet. 6 6.1 Cleaning Materials ................................................................................................ 88 6.2 Cleaning the Scanner Exterior & Stacker ........................................................... 89 6.3 Cleaning the Inside of the Scanner ....................................
6.1 Cleaning Materials Cleaning Materials Parts No. Cleaner F1 CA99501-0013 Lint-free dry cloth Commercially available. (*2) Remarks 1 bottle (100ml) Moisten a cloth with this fluid and wipe the scanner clean. (*1) *1) To purchase cleaning materials, contact the FUJITSU scanner dealer where you purchased the scanner. *2) Any lint-free cloth can be used.
6.2 Cleaning the Scanner Exterior & Stacker 6.2 Cleaning the Scanner Exterior & Stacker Clean the scanner exterior and the stacker with a cloth moistened with a small amount of Cleaner F1 (isopropyl alcohol) or any neutral detergent. ATTENTION • Do not use paint thinner or other organic solvents. • When cleaning, prevent water or moisture from getting inside the scanner.
6.3 Cleaning the Inside of the Scanner Clean the inside of the scanner with a cloth moistened with Cleaner F1. After the scanner has been in use for a period of time, its inside will be contaminated with paper debris and dust. The accumulation of debris and dust may cause scanning problems. As a guideline, clean the ADF at least every 1,000 scans. Note that this depends on the type of the documents scanned.
6.3 Cleaning the Inside of the Scanner 2. Clean the following locations with a cloth moistened with cleaner F1. Pad ASSY Eject roller Plastic roller Pick roller Feed roller Glass Turn off the scanner before cleaning the following locations. • Pad ASSY (x 1) Remove the dirt on the rubber tabs by wiping downward. When cleaning the Pad ASSY, take care to prevent the cloth from catching on to the metal parts.
Turn on the scanner before cleaning the following locations, and rotate the rollers to clean them thoroughly. • Feed rollers (x 2) Clean lightly taking care not to scratch the surface of the rollers. Take particular care in cleaning the feed rollers since black debris on the rollers adversely affect the feed performance. • Eject rollers (x 2) Clean lightly taking care not to scratch the surface of the rollers.
6.3 Cleaning the Inside of the Scanner 3. Close the ADF. Paper chute ADF ⇒ You should hear the ADF click when it returns to its original position. ATTENTION When closing the ADF, make sure that it is completely closed. Otherwise, paper jams or other feeding errors may occur.
94
Chapter 7 Replacing Consumables This chapter describes how to replace consumables. WARNING Fire/Electric Shock Before you replace the consumables, turn off the scanner and disconnect the AC adapter from the power outlet. 7 7.1 Replacing Consumables ...................................................................................... 96 7.2 Replacing the Pad ASSY ...................................................................................... 98 7.3 Replacing the Pick Roller....................
7.1 Replacing Consumables This section describes how to replace consumables. ■ Part Nos. and Replacement Cycles of Consumables The following tables list the part numbers of consumables and their suggested replacement cycles. No. Description P/N Suggested Replacement Cycle 1 Pad ASSY PA03360-0002 50,000 sheets or one year 2 Pick roller PA03360-0001 100,000 sheets or one year The suggested replacement cycles are based on A4/Letter sized paper free of wood fibers 80 g/m2 (21 lb).
7.1 Replacing Consumables HINT Use the following procedure to check the target values for replacement and usage information of consumables. 1. Click and hold the "ScanSnap Manager" icon in the Dock menu. 2. Click [Check consumable supplies...] on the menu. ⇒ The "Check consumable status" screen appears. This screen indicates how many times consumables have been used. 7 Replace consumables using "Target value to change supplies" as guidelines.
7.2 Replacing the Pad ASSY Replace the Pad ASSY following the procedure below. 1. Remove the documents on the paper chute. 2. Pull the cover open lever to open the ADF. Paper chute Cover open lever ADF 3. Remove the Pad ASSY. Pinch both ends of the Pad ASSY and pull it out as shown below.
7.2 Replacing the Pad ASSY 4. Attach the new Pad ASSY. Pad ASSY ADF ATTENTION Make sure that the Pad ASSY is firmly attached. Otherwise, document jams or other feeding errors may occur. 5. Close the ADF. Paper chute ADF 7 Replacing Consumables ⇒ You should hear the ADF click when it returns to its original position. 6. Turn on the scanner.
7. Click and hold the "ScanSnap Manager" icon on the Dock menu, and select [Check consumable supplies...] from the menu. ⇒ The "Check consumable status" window will appear. 8. In the "Check consumable status" window, click the [Reset] button of the "Pad ASSY Count." ⇒ A confirmation pop-up screen appears. ⇒ When you click the [Yes] button, the counter is reset to "0.
7.3 Replacing the Pick Roller 7.3 Replacing the Pick Roller Replace the Pick roller following the procedure below. 1. Remove the documents on the paper chute. 2. Open the ADF while pulling the cover open lever. Paper chute Cover open lever ADF 3. Adjust the Side guide to the "A5" size.
4. Remove the sheet guide. Pinch the handle and claw together on both sides of the sheet guide to remove it. Handle Sheet guide 5. Rotate the Pick roller bushing (on the left side).
7.3 Replacing the Pick Roller 6. Remove the Pick roller with its shaft. Slightly pull up the left part of the Pick roller shaft (about 5mm), move it towards the left side, and then raise it to remove from the scanner. Pick roller shaft Pick roller ATTENTION If the area around the Pick roller is contaminated by paper debris, it may cause scanning errors. Remove the dirt using a dry cloth moistened with Cleaner F1. * Do not use water, neutral detergent or aerosol spray. 7.
ATTENTION If you push up the pick roller tab using your fingernail, your fingernail may be chipped. If you cannot push it up successfully with your fingernail, you can use a paper clip to push up the pick roller tab. 1 2 8. Attach a new Pick roller to the Pick roller shaft. Aligning the key with the slot on the Pick roller, insert the Pick roller shaft into the pick roller. Pick roller Key Slot Pick roller shaft 9. Install the Pick roller with its shaft to the scanner.
7.3 Replacing the Pick Roller 10. Rotate the roller bushing (on the left) by rotating it as shown below. Pick roller Pick roller bushing Pick roller shaft 11. Attach the sheet guide to the scanner. Pinch the handles on both sides of the sheet guide and attach it to the scanner. Sheet guide Handle Claw 7 ATTENTION Make sure that the sheet guide is fully attached. Otherwise, document jams or other feeding errors may occur.
12. Close the ADF. Paper chute ADF ⇒ You should hear the ADF click when it returns to its original position. 13. Turn on the scanner. 14. Click and hold the "ScanSnap Manager" icon on the Dock menu, and select [Check consumable supplies] from the menu. ⇒ The "Check consumable status" window appears. 15. In the "Check consumable status" window, click the [Reset] button of the "Pick Roller Count.
7.3 Replacing the Pick Roller ⇒ A confirmation pop-up screen appears. ⇒ When you click the [Yes] button, the counter is reset to "0.
108
Appendix A A Installation Specifications The following table summarizes the installation specifications of ScanSnap. Item Dimensions (Note) Width Depth Height Minimum 284 mm 11.18 in. 157 mm 6.18 in. 158 mm 6.22 in. Maximum 284 mm 11.18 in. 436.7 mm 17.19 in. 299.5 mm 11.79 in. Weight Input power supply Power consumption Temperature/ Humidity Allowable Ranges Specifications 2.7 kg (approxiamtely 5.
110
Index A Continuing/stopping scanning after error 70 AC adapter connector ............................... 3 Correcting skewed documents ................ 58 ADF ........................................................... 2 Cover open lever ....................................... 2 ...... 43 Custom size ............................................. 48 Allow automatic blank page removal Allow automatic image deskew ............... 44 D Allow automatic image rotation ......... 44, 61 ................
M Media Scan mixed paper size ...................... 49, 62 ...................................................... 29 Menu ....................................................... 34 Scanning color document in .............................. 55 black-and-white Scanning documents of different widths or N ................................ 62 sizes at a time Normal quality ......................................... 41 Scanning only one side of a document ... 53 Scanning side ..........................
Repairs Contact the store where you purchased your ScanSnap or an authorized service provider for performing repairs on this product. • The user must not perform any repairs on the scanner.
114
ScanSnap S500M Operator’s Guide P3PC-1752-01ENZ0 Date of issuance: July, 2006 Issuance responsibility: PFU LIMITED The contents of this manual are subject to change without notice. z PFU LIMITED assumes no liability for incidental or consequential damages arising from the use of this manual, and any claims by a third party. z Copying of the contents of this manual in whole or in part and copying of the scanner application is forbidden under the copyright law.