ServerView Resource Orchestrator Virtual Edition V3.1.
Preface Resource Orchestrator Documentation Road Map The documentation road map for Resource Orchestrator is as shown below. Resource Orchestrator Documentation Road Map For information about the documents for Resource Orchestrator, refer to "Chapter 1 Documentation Road Map" in the "Design Guide VE". Purpose This manual provides an outline of the operation method of the ROR console provided by ServerView Resource Orchestrator (hereinafter Resource Orchestrator).
Chapter 9 Changing Resources Explains how to change settings for the admin server or resources registered on the admin server. Chapter 10 Configuring the Operating Environments of Managed Servers Explains how to install software to the registered managed servers and set up their operating environment. Chapter 11 Deleting Resources Explains how to delete resources.
[Red Hat Enterprise Linux] Sections related to Red Hat Enterprise Linux [Solaris] Sections related to Solaris or Solaris Containers [VMware] Sections related to VMware [Hyper-V] Sections related to Hyper-V [Xen] Sections related to Xen [KVM] Sections related to RHEL-KVM [Solaris Containers] Sections related to Solaris containers [Physical Servers] Sections related to physical servers [VM host] Sections related to VMware, Windows Server 2008 with Hyper-V enabled, Xen, RHEL-KVM, and Solaris c
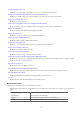
Abbreviation Products Microsoft(R) Windows Server(R) 2008 R2 Standard Microsoft(R) Windows Server(R) 2008 R2 Enterprise Microsoft(R) Windows Server(R) 2008 R2 Datacenter Microsoft(R) Windows Server(R) 2003 R2, Standard Edition Microsoft(R) Windows Server(R) 2003 R2, Enterprise Edition Microsoft(R) Windows Server(R) 2003 R2, Standard x64 Edition Microsoft(R) Windows Server(R) 2003 R2, Enterprise x64 Edition Windows(R) 7 Professional Windows(R) 7 Ultimate Windows Vista(R) Business Windows Vista(R) Enterprise
Abbreviation Products Red Hat(R) Enterprise Linux(R) ES (4.8 for x86) Red Hat(R) Enterprise Linux(R) AS (4.8 for EM64T) Red Hat(R) Enterprise Linux(R) ES (4.8 for EM64T) Red Hat(R) Enterprise Linux(R) 5 (for x86) Red Hat(R) Enterprise Linux(R) 5 (for Intel64) Red Hat(R) Enterprise Linux(R) 5.1 (for x86) Red Hat(R) Enterprise Linux(R) 5.1 (for Intel64) Red Hat(R) Enterprise Linux(R) 5.2 (for x86) Red Hat(R) Enterprise Linux(R) 5.2 (for Intel64) Red Hat(R) Enterprise Linux(R) 5.
Abbreviation Products Red Hat(R) Enterprise Linux(R) ES (4.8 for x86) Red Hat(R) Enterprise Linux(R) AS (4.8 for EM64T) Red Hat(R) Enterprise Linux(R) ES (4.8 for EM64T) Red Hat(R) Enterprise Linux(R) 5 (for x86) Red Hat(R) Enterprise Linux(R) 5 (for Intel64) Red Hat(R) Enterprise Linux(R) 5.1 (for x86) Red Hat(R) Enterprise Linux(R) 5.1 (for Intel64) Red Hat(R) Enterprise Linux(R) 5.2 (for x86) Red Hat(R) Enterprise Linux(R) 5.2 (for Intel64) Red Hat(R) Enterprise Linux(R) 5.
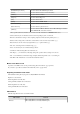
Abbreviation Products Xen Citrix XenServer(TM) 5.5 Citrix Essentials(TM) for XenServer 5.5, Enterprise Edition Citrix XenServer(TM) 6.0 Citrix Essentials(TM) for XenServer 6.0, Enterprise Edition Red Hat(R) Enterprise Linux(R) 5.3 (for x86) Linux Virtual Machine Function Red Hat(R) Enterprise Linux(R) 5.3 (for Intel64) Linux Virtual Machine Function Red Hat(R) Enterprise Linux(R) 5.4 (for x86) Linux Virtual Machine Function Red Hat(R) Enterprise Linux(R) 5.
Abbreviation Products VMware vCenter Server VMware(R) vCenter(TM) Server VMware vClient VMware(R) vClient(TM) VIOM ServerView Virtual-IO Manager BladeLogic BMC BladeLogic Server Automation ServerView Agent ServerView SNMP Agents for MS Windows (32bit-64bit) ServerView Agents Linux ServerView Agents VMware for VMware ESX Server Excel Microsoft(R) Office Excel(R) 2010 Microsoft(R) Office Excel(R) 2007 Microsoft(R) Office Excel(R) 2003 Excel 2010 Microsoft(R) Office Excel(R) 2010 Excel 2007 Mi
- Red Hat, RPM and all Red Hat-based trademarks and logos are trademarks or registered trademarks of Red Hat, Inc. in the United States and other countries. - Spectrum is a trademark or registered trademark of Computer Associates International, Inc. and/or its subsidiaries. - SUSE is a registered trademark of SUSE LINUX AG, a Novell business. - VMware, the VMware "boxes" logo and design, Virtual SMP, and VMotion are registered trademarks or trademarks of VMware, Inc.
Contents Chapter 1 Login and Logout.....................................................................................................................................................1 Chapter 2 Home.......................................................................................................................................................................4 2.1 Editing the Home Messages..................................................................................................................
8.1 Changing Admin IP Addresses..........................................................................................................................................................55 8.2 Changing Port Numbers.....................................................................................................................................................................59 8.3 Changing the Maximum Number of System Image Versions...........................................................................
11.7 Deleting Admin LAN Subnets.........................................................................................................................................................89 11.8 Unregistering ETERNUS SF Storage Cruiser.................................................................................................................................89 Chapter 12 Pre-configuration for Resource Registration and Modification............................................................................
18.3 Changing Server Switchover Settings...........................................................................................................................................147 18.4 Canceling Server Switchover Settings...........................................................................................................................................147 Chapter 19 Collecting Power Consumption Data and Displaying Graphs............................................................................
Chapter 1 Login and Logout This chapter describes how to open and close the ROR console. Preparations Before opening the ROR console, be sure to read through the following instructions and restrictions. - When accessing the ROR console using Internet Explorer 8 or 9, be sure to enable the Compatibility View in Internet Explorer. Select [View]-[Encoding] in Internet Explorer, and check if [Auto-Select] is checked. If [Auto-Select] is not checked, select it.
Refer to "Chapter 10 Installing and Defining Single Sign-On" in the "Design Guide VE" for details on Single Sign-On. URL: https://Admin_server_IP_address:23461/ On a Windows admin server, the ROR console can also be opened by selecting [start]-[All Programs]-[Resource Orchestrator]-[ROR console]. Note - If the login screen is not displayed, confirm the following. - URL entered in address bar of the Web browser. - The proxy settings of the Web browser are correct.
- If the ROR console or BladeViewer has been opened simultaneously in several Web browser windows, those login sessions may be terminated.
Chapter 2 Home This chapter explains the ROR Console Home window display. When the ROR Console is started, the Home window is displayed. Refer to "Chapter 1 Login and Logout" for information on how to start the ROR Console. The elements of the Home window are explained below. - Functions list The functions list displays the items that can be operated using ROR Console tabs. Click the triangle icon next to the Function list to toggle Display/Hide.
c. Set the following items: Schedule There is no specified format. When not displaying the date, leave this field blank. Enter up to 30 alphanumeric characters or symbols. Commas (",") cannot be used. Messages Enter up to 250 alphanumeric characters or symbols. d. Click [OK]. The information is updated. Moving Information This section explains how to move information in the list. Perform the following procedure to move information: a. Select the information to move from the list. b.
Chapter 3 Resource Management Overview This chapter provides an overview of the two views available on the [Resource] tab in Resource Orchestrator. Resource Orchestrator provides two different GUIs on the [Resource] tab: the default window and BladeViewer. Choosing an appropriate GUI depends on the administrator's authority level, or the kind of operations to be performed. - ROR console The ROR console gives access to all functions of Resource Orchestrator.
Chapter 4 License Setup and Confirmation This chapter explains how to configure and confirm licenses. License Setup When using Resource Orchestrator, it is necessary to configure the license first. Use the following procedure to configure the license: 1. After logging in to Resource Orchestrator, select [Tools]-[Licenses] from the menu, and click in the displayed dialog. The [Register License] dialog is displayed. 2. In the [Register License] dialog, enter the license key to register. 3.
Chapter 5 Managing User Accounts This chapter explains how to register, modify, and delete user accounts. Add User Account Only privileged users can perform this operation. When using Single-Sign-On, register user information in ServerView Operations Manager beforehand. 1. From the ROR console menu, select [Settings]-[User Accounts]. The [User Accounts] dialog is displayed. 2. Click . The [Add User Account] dialog is displayed. 3. Set the following: User ID Enter a string of up to 16 characters.
New password (Confirm password) Enter a string using up to 16 alphanumeric characters or symbols. Authority Level No change/Change Select the appropriate action. By default, the "No change" option is selected. Authority level Select either "Manage" or "Monitor". By default, the current authority level is selected. 4. Click . The password and authority level for the user account are changed. Delete User Account Only privileged users can perform this operation.
Chapter 6 BladeViewer This chapter provides an overview of BladeViewer and explains its features. Please note that BladeViewer is only available for PRIMERGY BX servers. For details on the ROR console, refer to "Appendix A User Interface". 6.1 Overview This section provides a functional overview of BladeViewer. BladeViewer provides an intuitive representation of blade servers and their statuses. This makes it easier to monitor resource states or perform basic operations on blade servers. Figure 6.
- Display of contact information BladeViewer allows users to define technical (support) contact information for their entire IT system. This contact information can be shown by clicking on the Contact icon. Registering contact details of technical support staff beforehand can help streamline recovery procedures when problems occur. 6.2 Screen Layout This section explains how the BladeViewer screen is organized. The BladeViewer screen consists of a status panel, a chassis panel, and a blade panel.
6.3.1 Status Panel The status panel displays a summary of resources statuses (including resources other than PRIMERGY BX servers). When a problem occurs in the system, a red or yellow light icon starts blinking on the left side of the status panel. Clicking the light icon changes its color back to gray. The table below shows the status and meaning associated with each light icon. Table 6.
Table 6.4 Chassis Icon Icon Meaning Chassis See For details on the different chassis statuses, refer to "Table 6.3 Status Icons" of "6.3.1 Status Panel". If a chassis icon shows a warning or error status, it means that a problem occurred in a resource contained in the chassis. For details on how to identify faulty resources, refer to "6.3.3 Blade Panel". Information Selecting a chassis icon from the chassis panel displays the contents of that chassis in the blade panel. For details, refer to "6.3.
Figure 6.3 Blade Panel: Resource List Server Blade A power button is displayed in the upper-part of each server blade. This power button is used to represent the power status of each server, as shown below. Table 6.7 Server Blade Power Buttons Power button Color Status Meaning Green (lit) Power ON Power ON status. Gray (not lit) Power OFF Power OFF status. Green (blinking) Power ON in progress Power ON or reboot in progress. Orange (blinking) Power OFF in progress Power OFF in progress.
Table 6.8 Physical Server Icons Icon Meaning Server Spare server Unregistered server Maintenance mode server See For details on the different physical server statuses, refer to "Table 6.3 Status Icons" in "6.3.1 Status Panel". When a server blade is used as the admin server, the following admin server icon is displayed. Table 6.9 Admin Server Icon Icon Status Admin server Meaning Indicates the server used as the admin server. An OS icon is displayed below the physical server icon.
- If the OS name cannot be acquired (because the OS has not been installed or for other reasons) The server name (physical server name or VM guest name) is displayed. The following table shows the resource icons used in BladeViewer and their associated meanings. Table 6.11 Resource Icons Icon Meaning Physical OS VM host VM guest See For details on the resource status, refer to "Table 6.3 Status Icons" in "6.3.1 Status Panel".
Figure 6.4 Blade Panel: VM Guest List A VM guest icon is shown on the left side of each VM guest displayed in the VM guest list. Table 6.13 VM Guest Icon Icon Meaning VM guest See For details on the different VM guest statuses, refer to "Table 6.3 Status Icons" in "6.3.1 Status Panel". A user-defined label is displayed on the upper-right side of the VM guest icon. - If no label is set The OS name is displayed.
Power button Color Status Orange (blinking) Power OFF in progress Meaning Power OFF in progress. Information The power status of a VM guest can be easily controlled by clicking on its power button. Refer to "6.4.2 VM Guest" for details. 6.3.4 Resource Details To view a resource's details, click on its icon (chassis, LAN switch, or physical server icon) from the blade panel. - Chassis Clicking a chassis icon (from the blade panel) opens up its management blade's Web interface in a new window.
Power Off and Reboot Clicking on a power button that shows "Power ON" status will either shut down or reboot the target server blade. A [Power Operation] dialog is displayed, in which the appropriate action can be selected. Figure 6.5 Power Operation Dialog - "Shutdown" Selecting "Shutdown" will shut down the target server blade. A confirmation dialog is displayed first. Clicking in the confirmation dialog shuts down the OS and powers off the managed server.
Figure 6.6 Power Operation Dialog (with Additional Options) - "Force Shutdown" Selecting "Force Shutdown" will forcibly power off the target server blade. A confirmation dialog is displayed first. Clicking in the confirmation dialog will power off the managed server without waiting for its OS to shut down cleanly. At this time, the power button changes to an intermediate "Power OFF in progress" state (orange - blinking).
Power button Color Green (lit) Status Power ON Action Shuts down or reboots a VM guest. Note - VM guests need to be properly configured in order to use the shut down or reboot buttons. Attempting to shut down or reboot a VM guest that is not properly configured will result in an error. For details, refer to "D.2 Configuration Requirements" in the "Design Guide VE".
Contact icon Displays the [Contact] dialog. This dialog shows the contact information that was set for the entire system. Tools icon Enables selection of the following menu options: Display Label List Displays the [Label List] dialog. Displays a list of labels. This list also allows modification of labels and comments. For details on editing labels and comments, refer to "6.5.1 Listing and Editing of Labels and Comments". Set Contact Information Displays the [Set Contact Information] dialog.
Editing Labels and Comments This function is only available to privileged users. General users are only able to consult labels and comments. - Privileged user In the [Label List] dialog, select a server and click . The [Modify Server Settings] dialog is displayed. The label and comment of the selected server can be edited directly from the [Modify Server Settings] dialog. Enter the following items: Label Enter up to 32 alphanumeric characters or symbols (ASCII characters 0x20 to 0x7e).
- Privileged user New password (Confirm password) Enter a string using up to 16 alphanumeric characters or symbols. - General user Current password Enter the password that is currently set. Enter a string using up to 16 alphanumeric characters or symbols. New password (Confirm password) Enter a string using up to 16 alphanumeric characters or symbols.
Chapter 7 Registering Resources This chapter explains how to register, change, and delete resources used by Resource Orchestrator. The Resource Orchestrator manager must be completely installed beforehand. In addition to the usual method of registering each resource individually, it is also possible to register or change registration settings of multiple resources in batches using the pre-configuration function.
Note HBA address rename and VIOM cannot be used together within the same chassis. When using backup and restore or cloning, prioritize the following two boot operations: 1. Boot from the first admin LAN network interface (NIC1 (Index1)) 2. Boot from the network interface used by the admin LAN (NIC2 (Index2)) 7.2 Registering VM Management Software This section explains how to register VM management software.
Password Enter the password for VM management software. Enter up to 128 characters, including alphanumeric characters and symbols (ASCII characters 0x20 to 0x7e). 3. Click . VM management software is registered with the entered information. Information Registration and management of multiple VM management software (VMware vCenter Server) are possible. 7.3 When using Blade Servers This section explains how to register resources when using blade servers.
3. Click . The mounted chassis will be displayed under the server resource tree. Any server blade mounted within this chassis will be detected automatically and shown as: [chassis_nameSlot_number[Unregistered]]. The only operation available for those unregistered server blades is server registration, while the ROR console can only display their hardware statuses and properties.
1. In the ROR console server resource tree, right-click an unregistered server blade or partition in the target chassis, and select [Register]-[Server] from the popup menu. The [Register Server] dialog is displayed. 2. To use this feature, the following settings must first be defined: Physical Server Name Enter a name to assign to this physical server. Enter a character string beginning with an alphabetical character and containing up to 15 alphanumeric characters and hyphens ("-").
Server OS category This option is displayed if the target server runs a physical OS or VM host. Select the appropriate server OS category (Physical OS or VM host). Selecting [VM Host] activates the user ID and password input fields. Those refer to the user name and password entered during installation of this VM host. Select the server OS category depending on whether the relevant server is used on a physical OS or a VM host.
- When not performing admin LAN redundancy Note - For details about the network interface(s) used on the admin LAN, refer to "7.1 Network Configuration" in the "Design Guide VE". If an incorrect network interface is used, Resource Orchestrator will not be able to detect the correct admin LAN IP address from the operating system running on the target server. An admin LAN IP address is required even when registering a spare server.
1. In the ROR console server resource tree, right-click an unregistered LAN switch blade from the target chassis, and select [Register][LAN Switch] from the popup menu. The [Register LAN Switch] dialog is displayed. 2. To use this feature, the following settings must first be defined: LAN switch name Enter the name to assign to this LAN switch blade. Enter up to 15 characters, including alphanumeric characters (upper or lower case), underscores ("_"), and hyphens ("-").
- LAN switch blade PY CB Eth Switch/IBP 1Gb 18/6 (3.12 or later version) 7.3.4 Configuring VLANs on LAN Switches On managed LAN switch blades, VLANs should be set on both internal ports (those connected to network interfaces on managed servers) and external ports (those connected to external, adjacent LAN switches). Note VLANs cannot be configured on PRIMERGY BX 900 and BX 400 LAN switch blades operating in IBP mode. 7.3.
3. To use this feature, the following settings must first be defined: Port VLAN VLAN ID Enter the VLAN ID to assign to the LAN switch blade port that is connected to the network interface selected in step 2. Tagged VLAN VLAN ID Enter the tagged VLAN ID(s) to assign to the LAN switch blade port that is connected to the network interface selected in step 2. Multiple VLAN IDs can be entered by separating them with commas (","). 4.
Figure 7.2 Status Transition Diagram for Managed Servers Use the following procedure to register rack mount or tower servers. 1. In the ROR console server resource tree, right-click [Server Resources], and select [Register]-[Server] from the popup menu. The [Register Server] dialog is displayed. 2. To use this feature, the following settings must first be defined: Enter items differ depending on whether the [Register agent] checkbox is selected, as described below.
- Admin LAN - IP address - MAC address (NIC1) - SAN Boot/Admin LAN Redundancy - MAC address (NIC2) Automatic registration of agents is not performed after server registration. After registering servers, register agents as required. If registering agents, register agents after checking the product name is displayed in the General Area of [Resource Details] tab. Executing [Update] acquires the latest information.
Association with server management software (ServerView) Enable/Disable For PRIMERGY BX servers Select [Enable] and enter an [SNMP Community]. For servers other than PRIMERGY servers Select [Disable]. By default, [Enable] is selected. SNMP Community Enter the SNMP community that was set on this server. Either select "public" or enter an arbitrary string. Enter a string of up to 32 alphanumeric characters, underscores ("_"), and hyphens ("-").
For a Physical OS Select [Windows/Linux]. For a VM Host Select [VM Host], and enter the VM host login account information. This login account information will be used by Resource Orchestrator to control and communicate with the registered VM host. User ID Enter the user ID to log in to the VM host. Specify a user ID that has VM host administrator authority. Password Enter the password of the user to log in to the VM host. Note - For details about the network interface(s) used on the admin LAN, refer to "7.
7.4.2 Registering LAN Switches Use the following procedure to register LAN switches: 1. Discover LAN switches. For instructions, refer to "Discovery". 2. Register LAN switches displayed in the network device tree. For instructions, refer to "Registration". Discovery 1. From the ROR console menu, select [Tools]-[Topology]-[Discover LAN switches]. The [Discover LAN Switches] dialog is displayed. 2.
SNMP Community Enter the SNMP community that was set on this LAN switch. Either select [public] or enter an arbitrary string. Enter a string of up to 32 alphanumeric characters, underscores ("_"), and hyphens ("-"). 3. Click . The registered LAN switch will be displayed in the network device tree. Note It is possible to set an automatically detected IP address to another unregistered LAN switch.
2. Define the following settings: WWNN Specify the WWNN value provided by the "I/O virtualization Option". The admin server generates WWPNs automatically from the values that are input into the WWNN and the number of HBA ports. HBA ports Specify the following values according to the system configuration. - To create a single-path configuration, specify "1". For details, refer to "Figure 7.3 Procedures for Single-path Configurations". - To create a multi-path configuration, specify "2".
Figure 7.4 Procedures for Multi-path Configurations Example For a server with two ports, WWNs could be configured as follows.
The server restart is not required in other cases. The WWN that has been set is enabled at the next restart. 4. Click . Information When using a server without an OS, the resource name displayed on the server resource tree is the same as that of the physical server. 5. Restart the HBA address rename setup service. The HBA address rename setup service must be running to use the HBA address rename function.
Password Enter the password of the above remote server management user account. This password must be between 8 and 16 alphanumeric characters long. Note The [User ID] and [Password] of [Remote server management] are different from the user name and password used to log in on the Web-UI for management board. 3. Click . The mounted chassis will be displayed under the server resource tree.
SNMP Community Enter the SNMP community of the XSCF used to manage the target chassis. Either select [public] or enter an arbitrary string. Enter a string of up to 32 alphanumeric characters, underscores ("_"), and hyphens ("-"). Remote management controller (XSCF) User ID Enter the ID of an XSCF user account with administrative authority over the target chassis. Enter a string of up to 31 alphanumeric characters, hyphens ("-"), and underscores ("_"). This name must start with an alphabet character.
Physical Server Name Enter a name to assign to this physical server. Enter a character string beginning with an alphabetical character and containing up to 15 alphanumeric characters and hyphens ("-"). [Register agent] checkbox - Without Agent Registration Automatic registration of agents is not performed after server registration. After registering servers, register agents as required.
Password Enter the password of the above ILOM user account. Enter between 8 and 16 characters, including alphanumeric characters, blank spaces (" "), and any of the following symbols. "!", "@", "#", "$", "%", "^", "&", "*", "[", "]", "{", "}", "(", ")", "-", "+", "=", "~", ",", ">", "<", "/", "'", "?", ";", ":" SNMP Community Enter the SNMP community name of this server's remote management controller (ILOM). Either select [public] or enter an arbitrary string.
2. To use this feature, the following settings must first be defined: Device name Enter a name to assign to this power monitoring device. When exporting power consumption data, use this name to select power monitoring devices for which to export data. Enter a character string beginning with an alphabetical character and containing up to 15 alphanumeric characters and hyphens ("-"). Admin LAN (IP address) Enter the IP address that was set on this power monitoring device.
3. To use this feature, the following settings must first be defined: Subnet name Set the subnet name for registration. The name must start with an alphabetic character and can be up to 16 alphanumeric characters long (including underscores, "_", hyphens, "-", and periods, "."). Network address Configure the network address of the subnet used as the admin LAN. Enter valid values for the network address. Subnet mask Enter valid values for the subnet mask.
Resources for Deletion Registry Key [HKEY_LOCAL_MACHINE\]SOFTWARE\Wow6432Node\Fujitsu \SystemcastWizard\ResourceDepot Deployment Service [HKEY_LOCAL_MACHINE\]SOFTWARE\Wow6432Node\Fujitsu \SystemcastWizard\DatabaseBroker\Default [HKEY_LOCAL_MACHINE\]SOFTWARE\Wow6432Node\Fujitsu \SystemcastWizard\DHCP PXE Services [HKEY_LOCAL_MACHINE\]SOFTWARE\Wow6432Node\Fujitsu \SystemcastWizard\PXE\ClientBoot\ - x86 Resources for Deletion Registry Key [HKEY_LOCAL_MACHINE\]SOFTWARE\Fujitsu\SystemcastWizard \ResourceDepo
Example When the OS has been installed on the C drive, it is %SystemRoot%C:\Windows. 9. Configure access rights for the folder for the DHCP Server that was copied to the shared disk. Execute the following command using the command prompt of the primary node: >cacls Drive_name:\Fujitsu\ROR\SVROR\dhcp /T /P "NT AUTHORITY\SYSTEM:F" "BUILTIN \Administrators:F" "NT SERVICE\DHCPServer:F" 10. Add the DHCP Server to "Services and Applications" for the manager. a.
12. Configure the dependencies of the resources of the manager "service or application". Configure the dependencies of resources based on the following table. If some resources have been configured, select AND from [AND/OR] and add the dependent resource. Resource for Configuration PXE Services Dependent Resource DHCP Server 13. Restart the manager.
# ln -s shared_disk local_disk Table 7.1 Files to Link Shared Disk Local Disk Mount_destination_of_shared_disk/Fujitsu/ROR/SVROR/etc/dhcpd.conf (*1) /etc/dhcpd.conf Mount_destination_of_shared_disk/Fujitsu/ROR/SVROR/etc/dhcp/dhcpd.conf (*2) /etc/dhcp/dhcpd.conf Mount_destination_of_shared_disk/Fujitsu/ROR/SVROR/var/lib/dhcpd /var/lib/dhcpd *1: When using Red Hat Enterprise Linux 5 *2: When using Red Hat Enterprise Linux 6 6.
11. Start cluster applications. Use the cluster system's operation management view (Cluster Admin) and start the manager cluster service (cluster application). 12. Register the admin LAN subnet. 7.9 Registering ETERNUS SF Storage Cruiser This section explains how to register ETERNUS SF Storage Cruiser. Registering ETERNUS SF Storage Cruiser enables server switchover integrated with Fibre Channel switch zoning using ESC and host affinity reconfiguration on storage devices.
Chapter 8 Changing Admin Server Settings This chapter explains how to change the settings for the admin server. 8.1 Changing Admin IP Addresses Use the following procedure to change the IP address used on the admin LAN by the admin server. 1. Log on to the admin server with OS administrative privileges. 2. Stop the manager. Stop the manager, referring to "2.1 Starting and Stopping the Manager" in the "Operation Guide VE". 3.
8. Stop the agents on managed servers. [Windows] [Hyper-V] [Linux] [Xen] [KVM] Stop the agent referring to "2.2 Starting and Stopping the Agent" in the "Operation Guide VE". 9. Change Agent settings. [Windows] [Hyper-V] [Linux] [Xen] [KVM] Use the rcxadm agtctl modify command to set the new manager IP address. [Windows] [Hyper-V] >"Installation_folder\Agent\bin\rcxadm" agtctl modify -manager IP_address [Linux] [Xen] [KVM] # /opt/FJSVrcxat/bin/rcxadm agtctl modify -manager IP_address 10.
2. Log in to the admin server's primary node. Log in to the operating system of the admin server's primary node with administration privileges. 3. Mount the shared disk on the primary node. Mount the admin server's shared disk on the primary node. 4. Change takeover the logical IP address. Release PRIMECLUSTER GLS virtual interface settings from the PRIMECLUSTER resource, then change the PRIMECLUSTER GLS configuration. For details, refer to the PRIMECLUSTER Global Link Services manual. 5.
b. Click on the [Registry Replication] tab. The [Registry Key] window will be displayed. c. Configure the above registry key in [Root registry key]. d. Click . e. After configuration of the registry keys is complete, click . f. Click to close the dialog. 4. Assign the manager's shared disk and IP address to the secondary node.
Example When the takeover logical IP address is 192.168.4.100 before being changed # # DHCP Server Configuration file. # see /usr/share/doc/dhcp*/dhcpd.conf.sample # ddns-update-style none; option vendor-class-identifier "PXEClient"; option dhcp-server-identifier 192.168.4.100; (*) subnet 192.168.4.0 netmask 255.255.255.0 { * Note: Change the IP address in this line to the new takeover logical IP address. 6. Unmount the shared disk Un-mount the shared disk from the primary node. 7.
- Related Services - Deployment Service - TFTP Service - PXE Services - DHCP Server (*) [Linux Manager] - Manager Services - rcxmanager - rcxtaskmgr - rcxmongrel1 - rcxmongrel2 - rcxhttpd - rcxdb - Related Services - scwdepsvd - scwpxesvd - scwtftpd - dhcpd (*) * Note: Necessary when managing a managed server in a separate subnet to the admin server. Change the ports used by the above services if there is a possibility that they will conflict with other applications or services.
# /opt/FJSVrcvmr/bin/rcxadm mgrctl modify -port name=number In a clustered manager configuration, bring offline all cluster resources except for the manager's shared disk and IP address, move all cluster resources from the primary node to the secondary node, then execute the rcxadm mgrctl modify command on all the nodes that are hosting cluster resources. 3. Restart manager services. Start the manager referring to "2.1 Starting and Stopping the Manager" in the "Operation Guide VE".
c. From the menu, select [Edit]-[Modify]. The [Edit DWORD Value] dialog is displayed. d. Select [Decimal] and click . This port value will define the first port of the range used by deployment services. However, because the related services can use up to 16 port numbers, ensure that all ports included between "PortBase" (defined here) and "PortBase+15" do not conflict with any other applications or services.
8.4 Changing the Maximum Number of Cloning Image Versions Use the following procedure to change the maximum number of cloning image versions. 1. Change the maximum number of cloning image versions. 2. Check the maximum number of cloning image versions. For details of the methods for changing and checking the generations of cloning images, refer to "5.8 rcxadm imagemgr" in the "Reference Guide (Command) VE".
a. In the [Failover Cluster Management] window, right-click the [Deployment Service] resource in [Summary of RC-manager][Other Resources], and select [Properties] from the popup menu. The [Deployment Service Properties] window is displayed. b. In the [Registry Replication] tab, select the above registry key. c. Click . The selected key is removed from the "Root registry key" list. d. After removing the registry key, click . e. Click to close the dialog. 2.
1. Log on to the admin server with OS administrative privileges. 2. Stop the manager. Stop the manager, referring to "2.1 Starting and Stopping the Manager" in the "Operation Guide VE". 3. Change the password for the Resource Orchestrator database. Execute the rcxadm dbctl modify command. Enter the new password interactively.
Chapter 9 Changing Resources This chapter explains how to change settings for the admin server or resources registered on the admin server. 9.1 Changing Chassis and Managed Server Settings This section explains how to change the settings for the chassis and managed servers. If collecting the system images and cloning images of managed servers, collect them after completing changes to managed server settings. For details on backing up system images, refer to "16.2 Backup".
4. If the network parameter auto-configuration function is used in the deployment of the cloning images, the "Physical Server Name" set in the definition file must also be changed. For details on the network parameter auto-configuration function, refer to "17.6 Network Parameter Auto-Configuration for Cloning Images". 9.1.3 Changing Admin IP Addresses This section explains how to change admin IP addresses. To change the IP addresses of remote management controllers, refer to "9.1.
5. Change [Admin LAN (IP address)]. 6. Click . The admin IP address of the managed server is changed. Note It is not possible to change IP address settings of a managed server (primary server) with a spare server configured to a different subnet from the spare server. 9.1.4 Changing SNMP Communities This section explains how to change SNMP community settings.
2. In the ROR console server resource tree, right-click the target chassis and select [Modify]-[Registration Settings] from the popup menu. The [Modify Chassis Settings] dialog is displayed. 3. Change [SNMP Community]. 4. Click . The SNMP community is changed. 9.1.5 Changing Server Management Unit Configuration Settings This section explains how to modify server management unit settings. - For rack mount or tower servers Use the following procedure to change remote management controller settings. 1.
2. In the ROR console server resource tree, right-click the target chassis and select [Modify]-[Registration Settings] from the popup menu. The [Modify Chassis Settings] dialog is displayed. 3. Select the [Modify remote server management login account] checkbox. Then, change the [User ID] and [Password] of [Remote Server Management]. - For SPARC Enterprise M4000/M5000/M8000/M9000 servers Use the following procedure to change remote management controller (XSCF) settings. 1.
1. In the ROR console server resource tree, right-click the target VM host, and select [Modify]-[VM Host Login Account] from the popup menu. The [Change Login Information] dialog is displayed. 2. Enter the new login account information that was changed on the VM host. User ID Enter the user ID to log in to the VM host. Specify a user ID that has VM host administrator authority. Password Enter the password of the user to log in to the VM host. 3. Click . VM host login information is changed. 9.1.
1. From the ROR console menu, select [Settings]-[Admin LAN Subnet]. The [Admin LAN Subnet] dialog is displayed. 2. Select the subnet to change. The [Change Admin LAN Subnet] dialog is displayed. 3. In the [Change Admin LAN Subnet] dialog, set the following items. Subnet name The name must start with an alphabetic character and can be up to 16 alphanumeric characters long (including underscores, "_", hyphens, "-", and periods, "."). Network address Enter valid values for the network address.
When this setting is changed, the HBA address rename setup service automatically checks whether it can communicate with the new admin server IP address. Changing this setting also requires changing the port on the admin server side beforehand. Change the IP address of the admin server according to "9.1.3 Changing Admin IP Addresses", and change the admin IP address for the HBA address rename setup service according to step 12. 9.2.
3. Click . To change registered VIOM server profiles, follow the procedure described in "7.1.1 Registering VIOM Server Profiles" to open the Web interface of ServerView Virtual-IO Manager and change the settings. Changes made inside Virtual-IO Manager are automatically reflected in Resource Orchestrator. 9.4 Changing LAN Switch Settings This section explains how to change LAN switch settings. 9.4.1 Changing LAN Switch Basic Settings This section explains how to change LAN switch basic settings.
Note - VLANs cannot be changed on PRIMERGY BX900/BX400 LAN switch blades operating in IBP mode. - If the port VLAN ID is unspecified or 1, a tagged VLAN ID cannot be set to 1. - When using End-Host Mode for the following LAN switch blades, cannot modify a port vlan id, and remove a tag vlan for the external ports which meet the follwoing conditions. When doing the operation, inactivate a target external port, or change vlan id for internal ports which have the same vlan id as a target external port.
Physical Port, Link Aggregation Select [None] from the VLAN type of the port number to configure or link aggregation group name. 3. Click . The VLAN ID set for the selected LAN switch blade port is released. 4. Repeat step 1 and set the new VLAN ID in the [VLAN Settings] dialog. VLAN Select "Create new" or "Change" in the VLAN information and select the VLAN ID to be changed.
- Deleting VLAN IDs from LAN switch ports Use the following procedure to delete VLAN IDs: 1. In the ROR console server resource tree, right-click the target LAN switch blade and select [Modify]-[Network Settings] from the popup menu. The [VLAN Settings] dialog is displayed. 2. To use this feature, the following settings must first be defined: VLAN Select "Change" and select the VLAN ID that has been changed.
User ID Enter the user ID to use to control VM management software. Password Enter the password for VM management software. 3. Click . VM management software settings are changed. 9.6 Changing Power Monitoring Environment Settings This section explains how to change power monitoring environment settings. Power environment settings include environmental data settings, collection cancel settings, and power monitoring device settings. 9.6.
Use the following procedure to cancel the collection of power consumption data. 1. Select [Tools]-[Options] from the ROR console menu. The [Options] dialog is displayed. 2. Click the [Environmental Data] category title, and modify the values for the following items in the displayed area. Data to collect Clear the [Power] checkbox. 3. Click . Collection of environmental data is canceled. 9.6.3 Changing Power Monitoring Devices This section explains how to change power monitoring device settings.
2. Make changes to the values as needed. 3. Click . The settings for the monitoring information are changed to the entered settings. 9.7.2 Canceling Monitoring Information Settings This section explains how to cancel monitoring information settings. Use the following procedure to cancel the monitoring information settings: 1. In the ROR console server resource tree, right-click the target physical OS and the VM hosts, and select [Modify]-[Monitoring Settings] from the popup menu.
1. In the ROR console storage tree, right-click the target storage unit, and select [Modify]-[Registration Settings] from the displayed menu. The [Resource Change Setting] dialog is displayed. 2. Modify the values for the following items: Label Enter up to 32 alphanumeric characters or symbols. Comments Enter up to 256 alphanumeric characters or symbols. 3. Click . Basic information for the storage unit is modified. 9.8.
3. Modify the values for the following items: Label Enter up to 32 alphanumeric characters or symbols. Comments Enter up to 256 alphanumeric characters or symbols. 4. Click . The basic information for disk resources is modified.
Chapter 10 Configuring the Operating Environments of Managed Servers This chapter explains how to install software to the registered managed servers and set up their operating environment. Figure 10.1 Procedure for Setting up Operating Environments *1: HBA address rename and VIOM cannot be used together within the same chassis. I/O virtualization settings for all the servers mounted in one chassis must be made using either HBA address rename or VIOM.
1. In the ROR console server resource tree, right-click the target physical server, and select [Modify]-[WWN Settings] from the popup menu. The [WWN Settings] dialog is displayed. 2. To use this feature, the following settings must first be defined: HBA ports Select the following values according to the system configuration. - Procedures for Single-path Configurations Specify "1" for HBA ports. - Procedures for Multi-path Configurations Select the number of multi-paths for HBA ports.
- If the target CA is not displayed, confirm the status of the following settings: - ESC is correctly registered on Resource Orchestrator. - Fibre Channel switches and storage units are correctly registered. - Only one access path is configured on ESC for each CA of an HBA. 10.2 Deploying Cloning Images For the second and subsequent servers, operating systems are created using the cloning image collected from the first server. For details on cloning, refer to "Chapter 17 Cloning [Physical Servers]".
Chapter 11 Deleting Resources This chapter explains how to delete resources. It is possible to register and delete a managed server and LAN switch as a single resource when they are in the same chassis. Note that operation of a server cannot be performed while the LAN switch is being registered and removed. If the operation is performed simultaneously for multiple resources, one of the following messages is displayed.
Information - If HBA address rename has already been set up on the managed server, the HBA WWN is reset to the factory default. When this occurs, the managed server is turned on temporarily, after the power is forcibly turned off once. When the operating system is running on a managed server, it is recommended to shut it down before deleting the server. - VM guests can be deleted using the management console of the server virtualization software used.
- Server blades that are managed using VIOM, and are currently the target of operations by Resource Orchestrator (power control, image-related processes, etc.) 11.4 Deleting LAN Switches This section explains how to delete LAN switches. There are two methods for LAN switch deletion, based on the LAN switch registration method used. - Deleting LAN Switch Blades - Deleting LAN Switches 11.4.1 Deleting LAN Switch Blades This section explains how to delete LAN switch blades.
Use the following procedure to delete power monitoring devices: 1. In the ROR console power monitoring devices tree, right-click the target power monitoring device and select [Delete] from the popup menu. The [Delete Resource] dialog is displayed. 2. Click . The target power monitoring devices are deleted from the tree view. 11.7 Deleting Admin LAN Subnets This section explains how to delete admin LAN subnets. Use the following procedure to delete an admin LAN subnet. 1.
Chapter 12 Pre-configuration for Resource Registration and Modification This chapter provides an overview of the pre-configuration function and explains how to use system configuration files. 12.1 Overview Using the Pre-configuration function, it is possible to create system definition files that can be later used to setup a Resource Orchestrator environment. Importing system configuration files makes it easy to perform various registration settings in one operation.
- When saving a file in CSV format from the system configuration template, or exporting a system configuration file from the ROR console Export will be performed using the latest file format given in "B.2 File Format". The following operations, usually performed from the ROR console, can be equally performed using the pre-configuration function. - Registration - "7.1 Registering VIOM Coordination" - "7.3 When using Blade Servers" - "7.4.2 Registering LAN Switches" - "7.
Note - The following operations cannot be performed by the pre-configuration function, and should be performed from the ROR console.
4. Specify a configuration file prepared in step 1. 5. Click . The import process starts. The system configuration file is verified first, and then resources are imported one by one, following the order defined by the system configuration file. The processing of resource registration or change is executed after the verification. The process status can be checked in the Recent Operations area of the ROR console.
6. When the import is completed successfully, a message is displayed in the Recent Operations area. Point - Error handling The processing of resource registration or change is executed after the verification of the system configuration file during import. If an error occurs during the verification process, which means an invalid value exists in the system configuration file, an error message is displayed only in the event log. Correct the system configuration file, and import it again.
12.3 Exporting the System Configuration File This section explains the method for exporting a system configuration file containing the current system settings. Use the following procedure to export the system configuration file in CSV format from the ROR console. 1. Open and log in to the ROR console according to "Chapter 1 Login and Logout". 2. In the ROR console, select [File]-[System Configuration File]-[Export] from the menu. 3. The export process starts automatically. 4.
Chapter 13 Network Map This chapter provides an overview of the Network Map and describes its features. 13.1 Overview The Network Map displays the following information for resources managed in Resource Orchestrator. - Network configuration of physical and virtual servers (including virtual switches and VM guests) - Statuses of network links between all resources - VLAN configuration affecting each physical and virtual server Two different maps (listed below) are available within the Network Map.
- Screen scrolling - Scroll button - Map drag and drop - Navigation map drag and drop - Maximizing and minimizing of the display area - Configuring automatic update to show the latest status - Updating to show the latest status - Hiding of the navigation map - Hiding of display filter options - Showing or hiding of the following information - Resource descriptions - Network links - VLANs - Resetting to initial display - Highlighting of a selected resource - Showing or hiding of details for the following res
b. Click . Note - If no LAN switch blades have been registered, only network links between external LAN switches will be displayed. If only one external switch is registered, no network links will be displayed at all. - If a non-supported LAN switch is registered, network links may not be properly displayed for that switch.
Display filter area Provides checkboxes to select which information to display in the network view. Map navigation area Shows a zoomed-out version of the selected map (including items which are too far away to be displayed in the network view). VLAN display area Displays the selected VLAN ID in the VLAN tree. 13.3.2 Map Types This section explains the different types of map available.
- NICs In addition, the following items will be displayed when the selected server is a VM host: - VM guests - Virtual switches - Ports - Network links - When selecting a LAN switch blade The following items are displayed: - Ports Selecting a LAN switch blade will show all its ports. For PRIMERGY BX900/BX400 LAN switch blades operating in IBP mode, a list of port groups is displayed. Selecting a port group from the list will highlight (in blue) the ports belonging to the selected port group.
Icon Status Meaning warning A warning was detected from the chassis. unknown The status of the chassis could not be obtained. error An error was detected from the chassis. fatal A fatal error was detected from the chassis, which is now unusable. stop The chassis was detected to have been powered off. Table 13.2 Server Icons Icon Status Meaning normal No new errors or warnings were detected from the server. warning A warning was detected from the server.
Icon Status Meaning warning A warning was detected from the LAN switch blade. unknown The status of the LAN switch blade could not be obtained. error An error was detected from the LAN switch blade. fatal A fatal error was detected from the LAN switch blade, which is now unusable. stop The LAN switch blade was detected to have been powered off. (*) (*) (*) * Note: When operating in IBP mode Table 13.
Icon Status Meaning warning A warning was detected from the VM guest. unknown The status of the VM guest could not be obtained. error An error was detected from the VM guest. fatal A fatal error was detected from the VM guest, which is now unusable. stop The VM guest was detected to have been powered off. Table 13.6 Virtual Switch Icons Icon Status Meaning normal No new errors or warnings were detected from the virtual switch. warning A warning was detected from the virtual switch.
Icon Status Meaning warning A warning was detected from the LAN switch. unknown The status of the LAN switch could not be obtained. error An error was detected from the LAN switch. fatal A fatal error was detected from the LAN switch, which is now unusable. stop The LAN switch was detected to have been powered off. Table 13.8 Port Icons Icon Status Meaning (*) normal No errors were detected from the port. (*) error An error was detected from the port (e.g.
Icon Meaning (*) LAN switch blade VM host VM guest Virtual switch LAN switch Port * Note: When operating in IBP mode Information If a problem occurs on a resource, a status icon indicating the problem is shown on top of the resource's own icon. For details on status icons, refer to "13.4.1 Resource Statuses". 13.4.3 Other Icons The following tables detail the icons displayed in the Network Map. Table 13.
Icon Meaning Server VM host VM guest Switch VM switch 13.5 Network Links This section details the network links displayed in the Network Map. 13.5.1 Link Display The following table details the physical and virtual links displayed between resources. Table 13.12 Links Link Meaning Represents a physical or virtual link. Represents a VLAN link. Represents a VLAN link related to the selected resource. Represents a disabled port. 13.5.
Example Note Selecting a displayed resource will focus display on that resource. In such a focus mode, all links that are not directly related to the selected resource will be shown in lighter colors. 13.6 Display Filters This section explains how to use display filters.
Resource descriptions The display filter area includes the following filters (checkboxes). Selecting or clearing a filter's checkbox will either show or hide the content associated with that filter. Physical links The display filter area includes the following filters (checkboxes). Disabling this filter will hide all physical links between resources on the network map. VLANs Only displayed when the VLAN tree is displayed. The display filter area includes the following filters (checkboxes).
Chapter 14 Power Control This chapter explains how to remotely control the power state of managed resources. 14.1 Server Power Control This section explains how to remotely control the power states of physical servers, VM hosts, and VM guests. Use the following procedure to perform power control operations. 1.
[Windows] - Take caution regarding the following points when shutting down or rebooting a managed server running a Windows operating system. - If Windows is not configured to shut down when the computer's power button is pressed, the power operations in Resource Orchestrator may not function properly. To check this option, access the Control Panel, open the [Power Options], and check the settings of the [Advanced] tab in the [Power Options Properties] window.
Chapter 15 Control of VM Environments This chapter explains the Resource Orchestrator functions that are specific to VM guests and VM hosts. Some functions may or may not be available depending on the server virtualization software used. Refer to "D.1 Common Functions of Server Virtualization Software" in the "Design Guide VE" for details. Other functions are similar in use to those available for regular physical OSs (without server virtualization software). 15.
15.2 VM Maintenance Mode of VM Hosts This section explains how to set and release VM maintenance mode on VM hosts. For details on VM maintenance mode, refer to "D.3 Functional Differences between Products" in the "Design Guide VE". VM maintenance mode can also be set or released from the command-line, using the rcxadm server set command. For details, refer to "3.2 rcxadm server" in the "Reference Guide (Command) VE". 15.3 VM Home Position This section explains VM Home Position.
15.3.2 Migrating to VM Home Position Migrate VM guests back to their original VM hosts using the relationship information that was registered in advance. The method used for VM guest migration is automatically selected from cold migration and live migration after each VM guest's power status is checked. Migrating all VM Guests to their VM Home Positions Use the following procedure to migrate the VM guests of a system to their VM Home Position: 1.
15.4 External Software This section explains how to configure the settings required by Resource Orchestrator to interact with third party software. VM management console To launch an external VM management console (provided by the virtualization software used) from the ROR console, users must be granted the permission to launch this management console in the Java Plug-in policy settings. For details on the VM management consoles that can be started from the ROR console, refer to "D.
Chapter 16 Backup and Restore This chapter explains how to use the backup and restore functions provided in Resource Orchestrator. 16.1 Overview The backup and restore functions allow the backup and restoration of system images from physical OSs or VM hosts. The system image backup and restore function enables back up of images of physical OSs and VM hosts over the network, and stores them on a disk on the admin server. A system image backup can be used for the following purposes.
files). During restore, because the target VM host will be automatically set to VM maintenance mode, the VM host should be in a state that allows VM maintenance mode to be set. If the target VM host is in a high-availability configuration, all VM guests stored on shared disks should be migrated to another VM host beforehand. After restoring the VM host, migrate the VM guests back to their original VM host. Refer to the server virtualization software manual and "D.
>Installation_folder\SVROR\Manager\bin\rcxadm server set -name physical server -attr bootagt=dos [Linux Manager] #/opt/FJSVrcvmr/bin/rcxadm server set -name physical server -attr bootagt=dos - When using the Red Hat Enterprise Linux 6 ext4 file system, and one of the following conditions is met - In a SAN boot environment using HBA address rename - When using a rack mount or tower server and the server is registered with "Disable" of "Association with server management software (ServerVie
b. Set the following items as necessary: Comments Enter a comment to identify the system image. A comment can be up to 128 characters long. Use of percent signs ("%"), backslashes ("\"), double quotes ("), and linefeed characters are not allowed. Note A list of the resources that will be powered off during backup is displayed in the text area. Confirm that it is safe to shut down those resources before continuing with the backup operation.
16.3 Restore This section explains how to restore a system image backup. System images can also be restored using commands. Refer to "Chapter 4 Image Operations" in the "Reference Guide (Command) VE" for details. Restoring a System Image Use the following procedure to restore a system image to a managed server. 1. Place the target server into maintenance mode. a.
b. Click . The target server is released from maintenance mode. Note If the target VM host is in a high-availability configuration, all VM guests stored on shared disks should be migrated to another VM host beforehand. During restore, because the target VM host will be automatically set to VM maintenance mode, the VM host should be in a state that allows VM maintenance mode to be set. After restoring the VM host, migrate the VM guests back to their original VM host.
16.4 Viewing This section explains how to browse and view existing system image backups. System images can also be listed using commands. Refer to "Chapter 4 Image Operations" in the "Reference Guide (Command) VE" for details. In the ROR console, select the [Image List] tab. The System Image List is displayed. Figure 16.1 System Image List Refer to "A.8 [Image List] Tab" for details on the System Image List.
Chapter 17 Cloning [Physical Servers] This chapter explains how to use the server cloning function. 17.1 Overview Cloning is a function used to deploy a cloning image collected from a single managed server (source server) to other managed servers (destination servers). This function shortens the time required for an initial installation as it can be used to install the same operating system and software on multiple servers.
- Cloning images can be collected with the following file systems. Note that LVM (Logical Volume Manager) partitions are not supported. - NTFS - EXT3 - EXT4 - LinuxSwap - The following conditions must be met for the managed server to collect the cloning image from and the managed server to deploy the cloning image to. - All server models must be identical. - The hardware configuration of each server must be identical, including optional cards, expansion boards, and the slots they are mounted in.
- The status is either "normal" or "warning" - Has been placed into maintenance mode Cloning images cannot be collected from VM hosts or VM guests. Preparations - Install the desired operating system and necessary applications on the managed server from which a cloning image will be collected. Additionally, apply any required patches and other necessary settings. Make sure that the source server operates properly after those steps.
If the same server names are detected on the same network, a network duplication error will occur. Some programs may experience problems when started with a different hostname. If such programs have been installed, configure their services not to start automatically. This has to be configured before collecting the cloning image. Some programs may experience problems when the same server name exists. If such programs have been installed, configure their services not to start automatically.
Format Parameter Value Automatically searches KMS hosts. - MANUAL Specify the KMS host. When "MANUAL" is selected, make sure to set .cmd.remotescript. 1.params.kmsname. MAK Comm on .cmd.remotescript. 1.params.kmsname The host name (FQDN), computer name, or IP address of the KMS host. .cmd.remotescript. 1.params.kmsport KMS host port number. The default is 1688. .cmd.remotescript. 1.params.makkey (Mandatory) MAK key. .cmd.remotescript. 1.params.
"encrypted=yes" is added to indicate that the password is encrypted. For details, refer to "5.6 rcxadm deployctl" in the "Reference Guide (Command) VE". >"Installation_folder\Agent\bin\rcxadm" deployctl passwd -encrypt - With MAK (Already Encrypted Password) [ActivationInfo] .cmd.remotescript.1.params.makkey=11111-22222-33333-44444-55555 .cmd.remotescript.1.params.ieproxy=proxy.activation.com:8080 .cmd.remotescript.1.params.
b. To use this feature, the following settings must first be defined: Cloning Image Name Enter a name to identify the collected cloning image. New When creating a new cloning image, select [New] and enter a new cloning image name. For a cloning image name, enter a character string beginning with an alphabetic character and containing up to 32 alphanumeric characters and underscores ("_"). Update When updating an existing cloning image, select [Update] and select a cloning image from the list.
b. Click . The target server is released from maintenance mode. - While a cloning image is being collected, no other operations can be performed on that image or other versions of that image (images sharing the same image name). - Communication errors between the admin and source servers (resulting in an image collection failure or an [unknown] status on the source server) may be caused by improper use of the network parameter auto-configuration function (described in "17.
- When using a rack mount or tower server and the server is registered with "Disable" of "Association with server management software (ServerView)" is selected [Windows Manager] >Installation_folder\SVROR\Manager\bin\rcxadm server set -name physical server -attr bootagt=winpe [Linux Manager] #/opt/FJSVrcvmr/bin/rcxadm server set -name physical server -attr bootagt=winpe - In a SAN boot environment using HBA address rename, and the following model - PRIMERGY BX960 S1 [Windows Manager] >Ins
Deploying a Cloning Image Use the following procedure to deploy a cloning image to one or more destination servers: 1. Place the destination server(s) into maintenance mode (only for agent-registered servers). a. In the ROR console server resource tree, right-click the desired server (or its physical OS), and select [Maintenance Mode][Set] from the popup menu. The [Set Maintenance Mode] dialog is displayed. b. Click . The target server is placed into maintenance mode. 2. Deploy a cloning image.
c. Click . The cloning image deployment process starts. The process status can be checked in the Recent Operations area of the ROR console. Clicking in the Recent Operations area displays a confirmation dialog and stops the process. Note Please note that canceling the deployment of a cloning image does not restore the destination server to the state before the deployment took place. - Deploying a cloning image to multiple destination servers a. In the ROR console, select the [Image List] tab.
Note When this process is cancelled, cloning image deployment to all destination servers is cancelled. Please note that canceling the deployment of a cloning image does not restore the destination server to the state before the deployment took place. 3. Restart applications on the destination server(s).
- Network card driver settings (drivers without a digital signature should be replaced by the latest updated drivers with a digital signature) - Access rights to the '\Documents and Settings\Default User' folder - While a cloning image is being deployed, collection, deployment, and deletion cannot be performed simultaneously on the cloning images with the same name.
Figure 17.1 Cloning Image List For details on the "Cloning Image List", refer to "A.8 [Image List] Tab". 17.5 Deleting This section explains how to delete a cloning image. Use the following procedure to delete cloning images: 1. In the ROR console, select the [Image List] tab. A list of cloning images is displayed under the cloning image list. 2. In this list, right-click the name of the cloning image to delete and select [Delete] from the popup menu. The confirmation dialog is displayed. 3.
- When Using LAN Redundancy [Linux] - The "NIC switching mode (Physical IP address takeover function)" of PRIMECLUSTER Global Link Services Figure 17.2 Setup Procedure When Using the Network Parameter Auto-configuration Function Note [Physical Servers] The network parameter auto-configuration function cannot be used on the admin LAN. If it is used, deployment commands may fail when deploying new servers may fail, or communication issues may occur during collection or deployment of cloning images.
[Windows] Installation_folder\Agent\etc\FJSVrcx.conf Installation_folder\Agent\etc\ipaddr.conf [Linux] /etc/FJSVrcx.conf /etc/opt/FJSVnrmp/lan/ipaddr.conf Sample configuration of the definition file (FJSVrcx.conf) admin_LAN=192.168.1.11 hostname=node-A - admin_LAN Enter the IP address used by the reference server on the admin LAN. - hostname Enter the physical server name of the reference server. Format of the definition file (ipaddr.
Table 17.3 Node Entry Settings Setting Managed server name Keyword NODE_NAME Expected Values: Physical server name Description Physical server name that was set when registering the managed server. Note Specify additional entries for any node (server) that may be added in the future (one entry per server). - Interface Entries (without Redundancy) The following table explains how to define each interface entry. Keywords for interface entries should be appended with a number between 0 and 99.
When there is a mixture of interfaces with and without redundancy, assign values in ascending order to the interfaces without redundancy as well. Interface entries with redundancy settings are only activated with Linux. With Windows, these interface entries will be ignored. Table 17.5 Interface Entry Settings (with Redundancy) Setting Keyword Expected Values: Description PRIMECLUSTER GLS virtual interface name VIF_NAME shaX X is an integer between 0 and 255.
2. Enable the Network Parameter Auto-Configuration Function Enable the network parameter auto-configuration function by executing the following command. Execute this command from a managed server. [Windows] >"Installation_folder\Agent\bin\rcxadm" lanctl enable [Linux] # /opt/FJSVrcxat/bin/rcxadm lanctl enable For details on the command, refer to "5.9 rcxadm lanctl" in the "Reference Guide (Command) VE". 17.6.
Items to confirm - The status of the virtual interface must be "Active". - When the standby patrol function is used ("p" mode), the status of the virtual interface set in standby patrol ("sha2" in the output example above) must be "Active".
[Linux] /var/opt/FJSVnrmp/logs/error_lan.log For details on meanings of message and the appropriate corrective actions, refer to "Messages". The file size limit is 32 KB and only one version is maintained. Old logs will have the extension ".old" appended to the file name and remain in the same directory. 17.6.3 Clearing Settings This section explains how to disable the network parameter auto-configuration function and clear the settings that were applied.
Deploying New Managed Servers with Automated Public LAN Configuration Use the following procedure to add new managed servers and automate their public LAN settings using the network parameter autoconfiguration function: 1. Register the newly added servers. 2. Perform the following procedure on a reference server chosen between already running servers: a. Clearing Network Parameter Settings Execute the rcxadm lanctl unset command to clear the network parameters configuration. b.
Chapter 18 Server Switchover Settings This chapter explains how to use server switchover settings and automatically recover from server failures. 18.1 Status Display Current recovery settings can be confirmed by selecting a physical OS or VM host in the server resource tree of the ROR console and from the spare server settings displayed in the [Resource Details] tab.
Servers that have agents registered can be used as spare servers. When using a server on which an agent is registered as a spare server, the server must meet one of the following conditions: - When the WWPN of the target CA is the same value as that of the primary server - When the AffinityGroup value is different from the value of the primary server - When agents are not registered on ETERNUS SF Storage Cruiser ETERNUS SF Storage Cruiser cannot perform event monitoring of spare servers.
[Switchover to server where VM guest exists] checkbox When a spare server is a VM host, check this checkbox if switching to a spare server in which the VM host contains a VM guest. When not switching to a VM host which contains a VM guest, clear this checkbox. This option is not selected by default. 3. Click . The server switchover settings are configured. 4. Set the boot agent for the spare server.
Note For servers other than those using I/O virtualization and those with WWN settings registered, the following checks will not be enabled. - [Power off forced when the server is switched over] checkbox - [Switchover to server where VM guest exists] checkbox [VM Host] The automatic startup of VM guests after the switchover of their VM host depends on their virtual machines' startup configuration within the server virtualization software used.
Chapter 19 Collecting Power Consumption Data and Displaying Graphs This chapter explains how to export the power consumption data collected from registered power monitoring targets and how to display it as graphs, and also describes the exported data's format. 19.1 Exporting Power Consumption Data This section explains how to export power consumption data. The power consumption data for each power monitoring target that is registered in the power monitoring environment can be exported in CSV format.
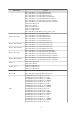
Target Resources Specify the power monitoring target to export the power consumption data of. Select the checkboxes of each desired target. More than one target can be selected. Data Type Specify the type of data to export. Check the checkbox of each desired data type. More than one data type can be selected. Output time span Select the time span for which to export data from the drop-down menu.
Rate Output time span Output device count Daily Last year 30 Monthly Select "Custom" and specify 5 years 60 Annual Select "Custom" and specify 5 years 60 19.2 Displaying Power Consumption Data Graphs This section explains how to display power consumption data as graphs. The power consumption data for each power monitoring target that is registered in the power monitoring environment can be displayed as graphs.
Target Resources Specify the power monitoring target name to display the power consumption data graph of. Select the checkboxes of each desired target. Up to 18 targets can be selected. Graph Settings Data Type Specify the type of data to display the graph. Specify either one of the following for the data type: - Power (Instantaneous power consumption) - Average power (Average power consumption during the selected time span) Output Time Span Select the time span for the data from the drop-down menu.
3. Click . After switching to the graph display window, the selected power consumption data can be displayed in line graphs. Figure 19.3 Graph Display Window The following operations can be performed from the graph display window. - Switching resource display By selecting and clearing the checkbox of the [Target Resources], it is possible to display or hide the corresponding graph.
Appendix A User Interface Resource Orchestrator includes two graphical user interfaces: the ROR console and BladeViewer. This appendix provides an overview of the ROR console. For details on how to open and close the ROR console, refer to "Chapter 3 Login to the ROR Console" in the "Setup Guide VE ". For details on BladeViewer, refer to "Chapter 6 BladeViewer". A.1 ROR Console This section explains how the [Resource] tab of the ROR console is organized.
- Physical OS - VM Host - VM Guest - LAN Switch (LAN Switch Blades) Network Devices The resources below are shown in a tree view. A status icon is displayed over each resource's icon. - Network Devices (Firewalls) - Network Devices (Server Load Balancers) - Network Devices (L2 Switches) Network Resources The resources below are shown in a tree view. A status icon is displayed over each resource's icon.
- [Recovery Settings] Tab Displays information on the spare servers assigned to the resource selected in the resource tree. - [Image List] Tab Displays system and cloning image information. - [Network Map] Tab Displays a network diagram of registered resources. - Events Resource Orchestrator events and related information are displayed. The event log displays a history of events that have occurred on managed resources.
Privileged User General User Function - Yes Yes Returns the layout of the ROR console to its initial state. Chassis Yes No Registers a chassis. Server Yes No Registers a server. SPARC Enterprise (M3000/T Series) Yes No Registers a SPARC Enterprise (M3000/T series) server. SPARC Enterprise (Partition Model) Yes No Registers SPARC Enterprise M4000/ M5000/M8000/M9000 servers. PRIMEQUEST Yes No Registers a PRIMEQUEST. LAN switch Yes No Registers a LAN switch.
Privileged User General User Function OFF Yes No Powers off a server after shutting down its operating system. OFF (Forced) Yes No Powers off a server without shutting down its operating system. Reboot Yes No Reboots a server after shutting down its operating system. Reboot (Forced) Yes No Reboots a server without shutting down its operating system. ON Available No Turns the maintenance LED on. OFF Yes No Turns the maintenance LED off.
*1: If multiple ROR consoles or BladeViewer sessions exist, the login sessions may be terminated. *2: Cannot be selected for a VM guest. *3: Cannot be selected for PRIMEQUEST and SPARC Enterprise Partition Models. *4: Available only for PRIMERGY BX servers. *5: Cannot be set for PRIMERGY BX900/BX400 LAN switch blades operating in IBP mode. *6: Cannot be selected for PRIMEQUEST. *7: Can only be selected for SPARC Enterprise servers.
Popup Menu Function Menu Update Submenu - Updates a server. Registration Settings Modifies a server's registration settings. HBA address rename settings (*2) Modifies the HBA address rename settings of a server. Network Settings (*3, *4) Modifies the network settings of a server. Spare Server Settings (*2) Modifies a server's recovery settings. Set Places a server into maintenance mode. Release Sets a server to active mode. ON Powers on a server.
Popup Menu Function Menu Submenu Registration Settings Modifies a SPARC Enterprise server's registration settings. WWN Settings Modifies the WWN settings for a server. Spare Server Settings Modifies a server's recovery settings. Set Places a server into maintenance mode. Release Sets a server to active mode. ON Powers on a SPARC Enterprise server. OFF Powers off a SPARC Enterprise server after shutting down its operating system.
Popup Menu Function Menu Submenu Failback Switches back a server to its pre-switchover state. Takeover Accepts a switched over configuration as final (without switching back to the original configuration). Maintenance Mode (*1, *4) Set Places a server into maintenance mode. Release Sets a server to active mode. Backup/Restore (*1, *4) Backup Backs up a system image from a server. Restore Restores a system image to a server. Collect Collects a cloning image from a server.
Popup Menu Function Menu Spare Server Submenu Reboot Reboots a SPARC Enterprise server after shutting down its operating system. Reboot (Forced) Reboots a SPARC Enterprise server without shutting down its operating system. Switchover Switches over a server with one of its spare servers. Failback Switches back a server to its pre-switchover state. Takeover Accepts a switched over configuration as final (without switching back to the original configuration).
Table A.11 Popup Menus Available for Network Devices Popup Menu Function Menu Submenu Discover LAN switches Discovers LAN switches within the admin LAN. Detect physical links Acquires physical link data from registered LAN switches. Topology Table A.12 Popup Menus Available for the "Power Monitoring Devices" Tree Node Popup Menu Function Menu Submenu Register Power Monitoring Device Registers a power monitoring device. Export Environmental Data Exports environmental data. Table A.
A.3 Status Panel This section explains the different statuses that are displayed in the ROR console. Figure A.3 Status Panel Status Monitoring Area The Event Log monitors a history of events that have occurred on managed resources. Based on detected events, the status monitoring area will change color and blink. Clicking the status monitoring area will stop the blinking. The following table details the different statuses and their associated corrective actions. Table A.
Figure A.4 Tree Panel In the tree panel, clicking the area on the upper-left enables selection and display of the following 5 types of tree: server resources, network devices, power monitoring devices, management software, and VLAN. Server Resources Chassis, servers, physical OSs, VM hosts, VM guests, and LAN switches managed in Resource Orchestrator are displayed in a tree view. Resources are primarily displayed in registration order.
Information For a VM host coordinated with VMware vCenter Server, the name (IP address or host name) entered when registering with VMware vCenter Server will be displayed. network device External LAN switches (those other than LAN switch blades) managed in Resource Orchestrator are shown in a tree view. Resources are sorted and displayed by name in alphabetical order. Resources displayed in the resource tree are represented by an icon and their resource name.
Storage Location of the Definition File [Windows Manager] Installation_folder\SVROR\Manager\etc\customize_data [Linux Manager] /etc/opt/FJSVrcvmr/customize_data Definition File Name gui_config.rcxprop Definition File Format RESOURCE_TREE_SORT_ORDER=RESOURCE_TREE_ORDER Items in the Definition File RESOURCE_TREE_ORDER Specify either one of the following options: name: Displays the resource list in ascending (alphabetical) order of resource names.
Network Resources Information on all registered network resources is displayed. Power Monitoring Devices Information on all registered power monitoring devices. Management Software Information on all registered management software. Management Software (vCenter Server, SCVMM, or VIOM) Information on the selected management software. Double-clicking a resource in the [Resource List] tab displays its [Resource Details] tab in the Main Panel. This tab shows detailed information on the selected resource.
Figure A.5 Chassis The resource images shown in the above chassis image are explained in the table below. Table A.19 Meaning of the Resources Shown in the Chassis Image Image Meaning A. Registered server blade. B. Detected storage blade. C. Currently displayed server blade. D. Server blade selected within the chassis image. E. Server blade that has not been registered yet. F. Empty slot.
See Refer to "11.2 Resource Status" in the "Operation Guide VE" for details on resource statuses. Hardware Details Area Launch Management Blade Web UI The link to the management blade's Web interface is displayed. Not displayed for SPARC Enterprise M4000/M5000/M8000/M9000 servers. Launch XSCF Web UI The link to the remote management controller (XSCF) Web UI is displayed. Only displayed for SPARC Enterprise M4000/M5000/M8000/M9000 servers.
Model name The model name of the server is displayed. When the server has been registered as a managed server and powered on, the server model name obtained from ServerView Operations Manager is displayed. For other servers, no model name is displayed. Product name The product name of the server is displayed. For PRIMERGY BX servers, the product name obtained from the management blade is displayed. For other servers, the model name is displayed. Status Server status is displayed.
Hardware Maintenance Mode The hardware maintenance mode of the server is displayed. Displayed only for PRIMEQUEST servers. Boot option The boot option setting specified when registering servers is displayed. See - Refer to the Management Blade's manual for details on management blades' product names. - Refer to the ServerView Operation Manager manual for details on the server models displayed and obtained from ServerView Operation Manager. - Refer to "11.
Partition Configuration The following information is displayed only when a PRIMEQUEST or SPARC Enterprise M4000/M5000/M8000/M9000 server is selected. Partition name The name used to identify a partition is displayed. SB The ID of the system board used to configure a partition is displayed. IOB The ID of the IO board used to configure a partition is displayed. GSPB (Giga-LAN SAS and PCI_Box Interface Board) The ID of the GSPB used to configure a partition is displayed.
See Refer to "11.2 Resource Status" in the "Operation Guide VE" for details on resource statuses. VM Host Information Area The following information is displayed only for VM Hosts. VM type The type of the VM is displayed. VM software name The name of the VM software used is displayed. VM software VL The version and level of the VM software used is displayed. Number of VM guests The number of VM guests is displayed.
Latest System Image Area The following information is not displayed for VM guests or SPARC Enterprise servers. Version The latest version of the system image is displayed. Backup date The date and time of the most recent system image backup is displayed. Comments Comments describing the system image are displayed. Spare Server Settings Area The following information is not displayed for VM guests. Primary server Displays the name of the physical server that will be replaced when server switchover occurs.
WWPN 2 The second WWPN set on the HBA is displayed. The WWPN should be set to the I/O address of each HBA (in descending order). Therefore, for rack mount or tower servers, the order may not correspond with port number order described for the HBA. Network Properties Area (VLAN) The following information is not displayed for VM guests. Index The mounted position (index) of each network interface on the server is displayed.
Target CA AffinityGroup The AffinityGroup for the CA connected to the port n is displayed. Automatic Network Configuration The following information is displayed when the VM host is a target of network auto configuration and only when automatic network configuration has been performed. Network resource name The network resource name for which automatic network configuration is performed is displayed. VLAN ID The VLAN ID configured for the network resource is displayed.
Slot A slot number representing the mounted location is displayed. This is only displayed for LAN switch blades. A hyphen ("-") is displayed in other cases. Port Properties Area Port Number The number of the port of the selected network device is displayed. Port Name The name assigned to the port of the selected network device is displayed.
Untagged Port(s) A list of ports set with a port VLAN ID is displayed. The logical port for link aggregation is only displayed for LAN switch blades (*). Tagged Port(s) A list of ports set with tagged VLAN ID(s) is displayed. The logical port for link aggregation is only displayed for LAN switch blades (*).
Hardware Details Area Serial number The serial number of the PDU or UPS is displayed. Voltage The voltage supplied to the PDU or UPS is displayed. Hardware version The hardware version of the PDU is displayed. This is not displayed for UPSs. Firmware version The firmware version of the device (PDU or UPS) is displayed. Date of manufacture The date of manufacture of the PDU or UPS is displayed. Outlets The number of outlets provided by the PDU is displayed. This is not displayed for UPSs.
[Recovery Settings] Tab Server Name The name used to identify a physical OS or VM host is displayed. Admin LAN IP Address The IP address on the admin LAN is displayed. Primary Server The name of the server on which the physical OS or VM host is operating is displayed. Switchover State The current switchover state is displayed. Spare Server The configured spare server is displayed. The switchover state is indicated by an arrow shown next to the currently active Primary Server.
Collection Date The name used to identify a cloning image is displayed. OS The name of the operating system stored in the cloning image is displayed. Comments Comments describing the cloning image are displayed. Right-clicking a resource in the list displays a list of available operations in a popup menu. Refer to "A.2.2 Popup Menus" for details on the operations available from popup menus.
Started The date and time at which the operation was started is displayed. Status The status of the executed operation is displayed. The date and time at which the process was completed is displayed. Point When an operation is executed in a tab other than the [Resource] tab, e.g., the [L-Platform] tab, multiple entries might be displayed in the Recent Operations for that single operation.
Event Information Status Displays the level of the event. There are three levels: "Error", "Warning", or "Info". Date Date and time at which the event occurred. Resource Name Name of the resource associated with the event. Event ID Identifier related to the event. No event ID is displayed for network resources. Event Log Content of the event. When the link in the [Event Log] column is clicked, an error dialog is displayed. The error dialog provides detailed information of events.
A.12 Dialogs This section explains how to enable or disable display of some of the confirmation (or warning) dialogs used by the ROR console. Use the following procedure to change dialog display settings: 1. Select [Tools]-[Options] from the ROR console menu. The [Options] dialog is displayed. 2. Click the "Dialog" category title, and change the following settings in the displayed area.
Appendix B Format of CSV System Configuration Files This appendix explains the format of the CSV system configuration files used by Resource Orchestrator's pre-configuration function. B.1 Obtaining the System Configuration File (CSV Format) The system configuration files can be obtained as follows. - From the selection window of the Resource Orchestrator DVD-ROM [Windows] Setting the Resource Orchestrator DVD-ROM in the CD-ROM drive automatically displays the screen below.
- From the ROR console The System Configuration Template can be obtained from a Resource Orchestrator manager installation. 1. Open and log in to the ROR console according to "Chapter 1 Login and Logout". 2. Select [File]-[System Configuration File]-[Download Template] from the ROR console menu. Displays the [File Download] window. 3. Click . 4. Specify the destination directory and the file name. 5. Click . B.
- RCXCSV V3.2 and Later "PRIMERGYPartitionModelChassis", "PRIMERGYPartitionModelServer" - RCXCSV V3.3 and Later "Subnet", "SPARCEnterprisePartitionModelChassis", "SPARCEnterprisePartitionModelServer", "MonitorSetting" - RCXCSV V3.4 and Later "VIOManager" - RCXCSV V3.5 and Later "SPARC" SPARC Enterprise (M3000-/T series) performs import/export of a system configuration file (CSV format) by a section name [SPARC]. The section name [SPARCEnterprise] only imports a system configuration file (CSV format).
- change Modification - Hyphens, ("-") Do nothing - Parameter This describes the parameter value to be set. Note The order of operation and parameter columns should follow the order defined in section header under "B.3 Resource Definitions". Allowed Characters For details on the characters allowed for each resource definition, refer to "B.3 Resource Definitions". Optional parameters can be omitted by using hyphens ("-").
Order Section Name 3 Chassis 4 PRIMERGYPartitionModelChassis 5 SPARCEnterprisePartitionModelChassis 6 LanSwitch 7 LanSwitchNet 8 Server 9 SPARCEnterprise 10 PRIMERGYPartitionModelServer 11 ServerNet 12 SPARCEnterprisePartitionModelServer 13 SPARC 14 ServerWWNN (*1) 15 SpareServer (*1) 16 VMManager 17 ServerAgent (*2, *3) 18 ServerVMHost (*2, *3) 19 MonitorSetting 20 PowerDevice 21 Memo (*2) *1: When loading from the system configuration template in the Excel format, t
Character Code The system configuration files (CSV format) used for pre-configuration are saved using ASCII (often referred to as "ANSI" in Windows systems). When files that use a character code other than ASCII are imported, the system may not operate correctly. When directly editing configuration files using a text editor, please do not save the file using a character code other than ASCII. B.
login_passwd Enter the password of the above VIOM user account. passwd_enc Enter one of the following. - If login_passwd is plain text "plain" - If the password is encrypted "encrypted" Chassis Data - Section Name Enter [Chassis] as the section name. - Section Header operation Enter the desired operation for the current line. Enter a hyphen ("-") to skip this line. chassis_name Enter the name that will be used to identify the chassis.
chassis_name Enter the name that will be used to identify the chassis. Enter a character string beginning with an alphabetical character and containing up to 10 alphanumeric characters and hyphens ("-"). Note Chassis names should be unique between all chassis. Names are not case-sensitive. ip_address Enter the same IP address as that set on the management board. Enter a string of numeric values (between 0 and 255) and periods. Note IP addresses should be unique between all resources.
Note Chassis names should be unique between all chassis. Names are not case-sensitive. ip_address Enter the same IP address as that configured on the XSCF. Enter a string of numeric values (between 0 and 255) and periods. Note IP addresses should be unique between all resources. snmp_community_name Enter the name of a SNMP community (with read permission) configured on this server's remote management controller (XSCF).
Note LAN switch blade names should be unique between all LAN switch blades. The names are case-sensitive. ip_address Enter the same IP address as that set on the LAN switch blade. Enter a string of numeric values (between 0 and 255) and periods. Note IP addresses should be unique between all resources. snmp_community_name Enter the same SNMP community (read-only permission) as that set on the LAN switch blade. Enter a string of up to 32 alphanumeric characters, underscores ("_"), and hyphens ("-").
- PY CB Eth Switch/IBP 10Gb 18/8 - BX600 GbE Switch Blade 30/12 - PRIMERGY BX600 GbE Switch 16/2x10Gb - PRIMERGY BX600 GbE Switch 16x1Gb - Cisco Catalyst Blade Switch 3040 connection_type Enter the connection method to use for the LAN switch blade. If you configure "ssh" for a LAN switch blade which does not support SSH, or specify a character string other than ssh, the configuration is regarded as "telnet".
Server Management Information - Section Name Enter [Server] as the section name. - Section Header operation Enter the desired operation for the current line. Enter a hyphen ("-") to skip this line. chassis_name Enter the chassis name (the value of "chassis_name" in the [Chassis] section). Note This field is only required for PRIMERGY BX servers. slot_no Enter the slot number where the server blade is installed. Enter a number between 1 and 18. Note - This field is only required for PRIMERGY BX servers.
Enter a string delimited by hyphens ("-") or colons (":") ("xx-xx-xx-xx-xx-xx" or "xx:xx:xx:xx:xx:xx"). Note - This field can be omitted in the following cases. - When not using the HBA address rename setup service - When not using GLS for admin LAN redundancy on the managed server - For a spare server whose primary servers are not using admin LAN redundancy - The "second_mac_address" header is the equivalent of the "hbaar_mac_address" header defined in RCXCSV V3.0.
ipmi_ passwd_enc Enter one of the following. - If ipmi_passwd is plain text "plain" - If the password is encrypted "encrypted" admin_lan1_nic_number The index of the NIC to use for the admin LAN. Enter a number (1 or larger). Note This field is only required for PRIMERGY BX servers. admin_lan2_nic_number The Index number of NICs used for the HBA address rename setup service or for admin LAN redundancy. Enter a number (1 or larger). For the following cases, enter a hyphen ("-").
ip_address Enter the same IP address as that set within the server's operating system. Enter a string of numeric values (between 0 and 255) and periods. mgmt_snmp_community_name Enter the name of a SNMP community (with read permission) configured on this server's remote management controller (ILOM/ XSCF). Enter a string of up to 32 alphanumeric characters, underscores ("_"), and hyphens ("-"). mgmt_ip_address Enter the IP address of this server's remote management controller (ILOM/XSCF).
PRIMEQUEST Server Management Data - Section Name Enter [PRIMERGYPartitionModelServer] as the section name. - Section Header operation Enter the desired operation for the current line. Enter a hyphen ("-") to skip this line. chassis_name Enter the chassis name (the value of "chassis_name" in the [PRIMERGYPartitionModelChassis] section). partition_no The number of a partition. Enter a number between 0 and 3. server_name Enter the resource name that will be used to identify the server.
server_name Enter the server name (the value of "server_name" in the [Server] section). nic_no This is the index number of the server blade's network interface. Enter a number between 1 and 12. vlan_id (optional) Enter the VLAN ID and tag type ("/T" or "/U") to be assigned to the LAN switch blade port connected to this server's network interface. Enter a VLAN ID followed by tag types. To specify multiple VLAN IDs, separate each set of VLAN settings using semicolons (";").
Note Server names should be unique between all servers. Names are not case-sensitive. ip_address Enter the same IP address as that set within the server's operating system. Enter a string of numeric values (between 0 and 255) and periods. Note IP addresses should be unique between all resources. HBA address rename Information of a Server - Section Name Enter [ServerWWNN] as the section name. - Section Header operation Enter the desired operation for the current line.
spare_server Enter the physical server name of a server to be assigned as a spare server. To specify multiple spare servers, separate each server name using semicolons (";"). To remove current spare server settings, enter "-DELETE". vlan_switch (optional) Specify whether VLAN settings or port group settings should be automatically transferred to the spare server when a server switchover occurs. Enter "ON", "OFF" or a hyphen ("-").
product Enter the name of this VM management software. Enter one of the following. - When using VMware vCenter Server as VM management software. "vmware-vc" - When using System Center Virtual Machine Manager as VM management software. "ms-scvmm" login_name Enter the name of the user account set for this VM management software. Use a string of up to 84 alphanumeric characters and symbols (ASCII character codes: from 0x21 to 0x7e). When specifying a domain, use the following syntax: "domain_name\user_name".
vm_login_name Enter the name of the user account used to remotely log into the VM Host. vm_login_passwd Enter the password of the above user account (for remote login). vm_passwd_enc Enter one of the following. - If the password is plain text "plain" - If the password is encrypted "encrypted" Monitoring Settings - Section Name Enter [MonitorSetting] as the section name. - Section Header operation Enter the desired operation for the current line. Enter a hyphen ("-") to skip this line.
Power Monitoring Device Data - Section Name Enter [PowerDevice] as the section name. - Section Header operation Enter the desired operation for the current line. Enter a hyphen ("-") to skip this line. device_name Enter the name that will be used to identify the power monitoring device. Enter a character string beginning with an alphabetical character and containing up to 15 alphanumeric characters and hyphens ("-"). Note Device names should be unique between all power monitoring devices.
Memo - Section Name Enter [Memo] as the section name. This is required when registering the labels, comments, and contact information (displayed in BladeViewer) using the pre-configuration function. - Section Header operation Enter the desired operation for the current line. Enter a hyphen ("-") to skip this line. resource_type Enter the type of the resource for which to set this memo. Enter one of the following.
RCXCSV,V3.5 # ServerView Resource Orchestrator # System configuration file [Subnet] operation,subnet_name,network_address,subnet_mask,gateway -,subnet1,172.16.0.0,255.255.0.0,172.16.0.1 -,subnet2,192.168.1.0,255.255.255.0,192.168.1.1 [VIOManager] operation,name,ip_address,login_name,login_passwd,passwd_enc -,VIOM,127.0.0.1,administrator,administrator,plain [Chassis] operation,chassis_name,ip_address,snmp_community_name -,chassis01,192.168.3.
-,chassis01,2,40,1/U -,chassis01,2,41,1/U -,chassis01,2,42,1/U -,chassis01,2,43,1/U -,chassis01,2,44,1/U [Server] operation,chassis_name,slot_no,server_name,ip_address,mac_address,second_mac_address,snmp_community_name,ipm i_ip_address,ipmi_user_name,ipmi_passwd,ipmi_passwd_enc,admin_lan1_nic_number,admin_lan2_nic_number,admin_ lan_nic_redundancy -,chassis01,1,blade001,192.168.3.151,,,,,,,,1,4,ON -,chassis01,7,blade002,192.168.3.157,,,,,,,,1,4,ON -,chassis01,9,blade003,192.168.3.
[SpareServer] operation,server_name,spare_server,vlan_switch,auto_switch,boot_type,spare_server_force_off,spare_server_with_vm_g uest -,blade001,blade003,ON,ON,local,OFF,OFF [VMManager] operation,name,ip_address,product,login_name,login_passwd,passwd_enc -,vCenterServer,127.0.0.
Appendix C Maintenance Mode This appendix explains the maintenance mode available in Resource Orchestrator and how to use it. Maintenance mode is used during hardware maintenance of managed servers. It is also used during the installation and maintenance of physical OSs and VM hosts. Maintenance mode avoids unwanted error notifications and disables execution of Auto-Recovery upon server failure.
Glossary access path A logical path configured to enable access to storage volumes from servers. active mode The state where a managed server is performing operations. Managed servers must be in active mode in order to use Auto-Recovery. Move managed servers to maintenance mode in order to perform backup or restoration of system images, or collection or deployment of cloning images. active server A physical server that is currently operating.
BASP (Broadcom Advanced Server Program) LAN redundancy software that creates teams of multiple NICs, and provides functions such as load balancing and failover. blade server A compact server device with a thin chassis that can contain multiple server blades, and has low power consumption. As well as server blades, LAN switch blades, management blades, and other components used by multiple server blades can be mounted inside the chassis. blade type A server blade type.
environmental data Measured data regarding the external environments of servers managed using Resource Orchestrator. Measured data includes power data collected from power monitoring targets. ESC (ETERNUS SF Storage Cruiser) Software that supports stable operation of multi-vendor storage system environments involving SAN, DAS, or NAS. Provides configuration management, relation management, trouble management, and performance management functions to integrate storage related resources such as ETERNUS.
HBA address rename setup service The service that starts managed servers that use HBA address rename in the event of failure of the admin server. HBAAR (HBA address rename) I/O virtualization technology that enables changing of the actual WWN possessed by an HBA. host affinity A definition of the server HBA that is set for the CA port of the storage device and the accessible area of storage.
license The rights to use specific functions. Users can use specific functions by purchasing a license for the function and registering it on the manager. link aggregation Function used to multiplex multiple ports and use them as a single virtual port. With this function, if one of the multiplexed ports fails its load can be divided among the other ports, and the overall redundancy of ports improved. logical volume A logical disk that has been divided into multiple partitions.
VM (Virtual Machine) A virtual computer that operates on a VM host. VM guest A virtual server that operates on a VM host, or an OS that is operated on a virtual machine. VM Home Position The VM host that is home to VM guests. VM host A server on which server virtualization software is operated, or the server virtualization software itself. VM maintenance mode One of the settings of server virtualization software, that enables maintenance of VM hosts.
XSCF (eXtended System Control Facility) The name of the Remote Management Controller for SPARC Enterprise M series servers. zoning A function that provides security for Fibre Channels by grouping the Fibre Channel ports of a Fibre Channel switch into zones, and only allowing access to ports inside the same zone.