
Installation Instructions

EN
7
4 - Installation Instructions
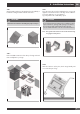
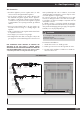
STEP 1
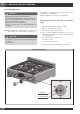
Cut the banding and remove the appliance from the pallet by a
hand-truck inserting the blade under the foam base.
CAUTION
Stand clear. The ends of the cut banding may snap toward you.
STEP 2
Remove Installation Instructions from the top of range and read
them carefully before you begin.
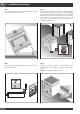
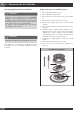
STEP 3
Move the range indoors before installing the legs, position the
appliance near its final location as the legs are not suitable for
moving the appliance over long distances.
Legs are packed in the cardboard top pack.
CAUTION
Doors and passageways leading to the installation location
require at least 31” opening. If the opening is less than 31”,
the oven door(s) and control knobs must be removed.
(see Use & Care manual for oven door removal instructions).
Note: the legs with collar must be mounted on the back of range
to engage the anti tip device.
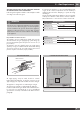
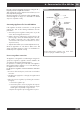
STEP 4
With the foam base still in place, tilt the range laterally and
screw in the first pair of legs.