
Installation Manual
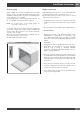

EN
10
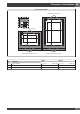
Final checklist
To prevent improper connections leading to damage of
electrical components and so voiding the warranty, the
following steps must be performed:
1. Check the electrical requirements and make sure you have
the correct electrical supply and that the oven is properly
grounded.
2. Turn on the power supply to the oven.
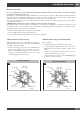
3. Check power at the junction box wires using a voltmeter
having a range of 0-250 VAC.
If you have installed the oven for use on 240 Volt supply,
you should find that the voltage reading between the black
and red wires (Line to Line) should be 220 to 240 Volts.
If you have modified the oven(s) for use on 208 Volt, the
voltage reading between the black and red wires should
be 190 to 208 Volts.
4. Test the oven mode. Select the
BAKE
mode. See the Use
and Care Manual for detailed operation instructions.
5. Verify that the oven light comes on and the oven begins
to preheat.
6. Test the door lock. Set the
SELF CLEAN
mode. Confirm that
the door locks when the lock icon appears in the display.
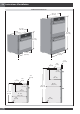
7. If installing a double oven, test the second oven as well.
8. To check the other oven functions refer to the “Using the
Oven Controls” section of the USE AND CARE MANUAL.
9. If the oven is working properly, turn off the power supply
to the oven.
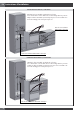
10. Place the cover on the junction box and make sure the
cover is securely fastened and turn on the power to the
oven.
Leave these INSTALLATION instructions as well as the USE AND
CARE MANUAL with the owner.
Installation Instructions