
Operation Manual


10
EN
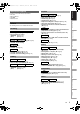
Functional Overview
You can also turn on the unit by pressing these buttons.
You can turn on the unit by pressing these buttons only when a videotape is in this unit.
Press to turn on the unit, or to turn the unit into the standby mode. (To completely shut down the unit, you must unplug the
AC power cord.)
1 STANDBY-ON indicator
2 Cassette compartment
3 DUBBING indicator
4 OPEN\CLOSE A button*
1
(DVD)
5 RECORD indicator (HDD)
6 RECORD indicator (DVD)
7 Disc tray
8 DV-IN jack (AV3)
9 USB input jack
10 RECORD I button (HDD/DVD)
11 PLAY B button*
1
(HDD/DVD)
12 STOP C button (HDD/DVD)
13 Device select buttons / indicators
(HDD/DVD/VCR)
14 DUBBING VCR M DVD button
15 DUBBING HDD M DVD button
16 PROG. K \ L buttons
17 Display (“Off” in standby)
18 Infrared sensor window
19 RECORD indicator (VCR)
20 RECORD I button (VCR)
21 PLAY B button*
2
(VCR)
22 F.FWD D button*
2
(VCR)
23 REW E button*
2
(VCR)
24 STOP\EJECT CA button (VCR)
25 STANDBY-ON Q button*
3
1 Mains cable
2 HDMI OUT jack (HDD/DVD/VCR)
3 DIGITAL AUDIO OUT (COAXIAL) jack
(HDD/DVD/VCR)
4 AUDIO OUT (L\R) jacks (HDD/DVD/VCR)
5 COMPONENT VIDEO OUT jacks
(HDD/DVD/VCR)
6 AV2 (DECODER) socket (HDD/DVD/VCR)
7 AV1 (TV) socket (HDD/DVD/VCR)
8 ANTENNA IN
9 ANTENNA OUT
Note
• Do not touch the inner pins of the jacks on the rear panel. Electrostatic discharge may cause permanent damage to the unit.
• After turning off the unit, leave the mains cable plugged for about one minute. Otherwise it may cause data loss or the unit may
not work properly.
• This unit does not have an RF modulator.
Front Panel
1
24
23
*
2
25
*
3
22
*
2
20 13 11
*
1
2
4*
1
756
21
*
2
171819 16 14
15
12 10
9
3
8
Button names described in the Owner’s Manual
The instructions in this manual are described mainly with the operations using the remote control. Some operations can be
carried out using the buttons on the front panel.
Rear Panel
1 3 456 87 92
E3TF0ED_EN.book Page 10 Wednesday, March 17, 2010 11:20 AM