
Remote Blower Kit Installation


WARNINGS:
1.) Only specialized technicians are authorized to carry out installation work.
2.) Before connecting the equipment to the power supply line, make sure the line voltage corresponds to the voltage indicated on the equipment's
rating label.
3.) The equipment must be used exclusively with the 4-speed control panel installed on the hood.
4.) Do not connect the equipment to combustion fume outlet pipes of boilers, stoves, fireplaces, etc.
5.) Check that the air pipe and outlet pipe are not obstructed.
6.) Use the pipe fitting supplied to connect the fume outlet pipe of the hood to the external suction unit. Do not use pipes with smaller diameter. Avoid
using angled pipes. Make sure that the length of the pipes meets minimum pipe length requirements.
7.) Do not use the Remote Blower Kit for outdoor blower motor installation.
SAFETY:
1.) Do not allow children or impaired persons to operate the equipment unless they are supervised by a person who shall make sure the equipment is
used safely.
2.) The hood is designed exclusively to extract cooking fumes from household kitchen appliances. The manufacturer shall not be liable for damage
caused by different uses of the hood.
3.) Before cleaning or maintenance, make sure that the equipment is disconnected from the power supply line.
4.) The manufacturer shall not be liable for any damage caused by an incorrect installation, or incorrect use of the equipment, in which case the
warranty shall be void and no request for damage shall be accepted.
WARRANTY:
1.) The new equipment is covered by warranty in compliance with the current regulations.
2.) The warranty terms are indicated either on the last page of the instructions for use, or in a warranty document supplied by distributor along with the
equipment.
INSTALLING THE REMOTE UNIT:
The equipment can be wall-mounted, ceiling-mounted, or floor-mounted, horizontally or vertically (Figure 1).
1.) After having decided where and how the equipment is going to be installed, secure the brackets (provided) with the screws (provided).
2.) Place the equipment exactly where it is going to be installed. Mark the location of the holes on the wall. Drill the holes and insert the screw anchors
provided. The diameter of the holes must be suitable for the diameter of the screw anchors (see Figure 2).
3.) Align the holes of the brackets with the holes of the screw anchors, and screw in the screws.
4.) Make sure that the anchoring points are able to bear the weight of the equipment.
5.) Install (using 4 screws supplied) the provided pipe fitting (see Figure 3) above the hood motor in order to connect the fume outlet pipe of the hood
to the external extraction unit.
A. Do not use pipes with diameter smaller than 150 millimeters (6 inches), avoid using angled or flexible pipes, make sure that the pipes are
at least of the minimum length.
B. Make sure that the direction of the air inlet and outlet is as indicated on the arrow on the equipment label.
C. The equipment must be used exclusively with the 4-speed electronic control panel installed on the hood.
6.) Connect the 6-pole connector C1 of the equipment to connector C2 of the electronic control panel of the hood. First, make sure that the conveyor
that is normally installed on the hood has been removed and disconnected from the power supply line and from the 4-speed electronic control panel.
7.) Connect the appliance to the power supply in compliance with the relevant regulations.
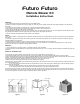
Futuro Futuro
Remote Blower Kit
Installation Instructions
6-pole
connectors
(control panel)
Power supply
Figure 1 Figure 2 Figure 3