Table of Contents CHAPTER 1 PRODUCT OVERVIEW ................................................................................ 1 1.1 Functions overview .............................................................................................................. 1 1.2 Notes ..................................................................................................................................... 1 1.3 Packaging list ...................................................................................
5.4 Recently run apps .............................................................................................................. 16 5.5 Changing wallpaper ........................................................................................................... 16 5.6 Power control ..................................................................................................................... 16 CHAPTER 6 APPS .......................................................................................
8.1.3 Receiving and reading e-mail ................................................................................. 34 8.1.4 Replying / Forwarding e-mail ................................................................................. 34 8.1.5 Managing e-mail ...................................................................................................... 34 8.1.6 Email Settings ..........................................................................................................35 8.2 Recorder..
CHAPTER 10 USING MICRO SD (TF) CARD ................................................................. 47 CHAPTER 11 CONNECTING TO USB DRIVE ................................................................ 48 CHAPTER 12 ABOUT THE BATTERY AND POWER ..................................................... 49 CHAPTER 13 FIRMWARE UPDATING / RESETTING TO FACTORY ............................ 50 CHAPTER 14 FREQUENTLY ASKED QUESTIONS .......................................................
CHAPTER 1 PRODUCT OVERVIEW 1.1 Functions overview z 8 inch wide screen True Color TFT touch screen with a high resolution of 1024*768 pixels. z Surf the Internet wirelessly via Wi-Fi to enjoy the Internet on the go. z Support all mainstream e-mail services for more convenient e-mail sending and receiving. z Switching between portrait mode and landscape mode is possible through gravity sensing. Four-direction rotation display is supported. z Shooting images or videos via 0.
Nickel-Cadmium batteries. However, if the lithium battery is degrading, contact the local Service Center. z The company is not liable for the data loss or deletion on machine resulting from the misuse of software, z The actual product may be different from that described in the Instructions due to the software updates. improper operation of the battery, servicing, other accidents, or other indirect loss thereof. These Instructions are for informational purposes only.
Audio output Headset: Stereo output; Internal speakers: Mixed output. Power specifications Voltage Current Battery used Power adapter Supply voltage: 5V Charging voltage: 5V Max. current for playback is 1.2A DC. Max. current for charging is 1.5A DC. Built-in lithium-ion polymer rechargeable battery, 3.7V, 4550mAh AC input:100-240V 50/60Hz DC input:5V 2A It takes about 5 hours for the battery to be fully charged when the provided charger is used while powered-down.
Chapter 2 Buttons and Appearance A B C E D A. Operation indicator B. Power button C. Volume “+” and “-” buttons D. Front camera E. Touch screen (“Screen”) M F G H I J K L F. Headset jack H. Power cable jack G.
I. HDMI jack J. Built-in MIC Recording K. TF card slot (Micro SD) L. External speaker M. Rear Camera Note 1: During operation, sounds will be automatically output from the Audio speaker if there is audio output. Note 2: In the Instructions, “Press” means pressing a button while “Press and Hold” means continuously pressing a button for 2 ~ 3 seconds.
Chapter 3 EasyConfig When first using your Breeze tablet,the EasyConfig application will launch and walk you through the basic setup where you will select your Language, Date/Time and Wi-Fi settings. Touch "Next" to setup language, and then choose a language you want. Touch "Next" to setup date, time zone and time.
Tap "Next" to go to the Wi-Fi settings interface. Touch "Menu icon ( ) -> Scan" to search for the available wireless networks in the vicinity. Touch the desired wireless network name to connect to it. You will be prompted, if a password is required. 1. If static IP address needs to be entered, click on “show advanced options” to show “IP settings”. Touch the pop-up menu and select “static”. Then enter the IP address, gateway, network mask, and DNS information required for such Wi-Fi network connections.
2. If you use dynamic IP address keep the default "DHCP" in the “IP settings” option. Note: The word "Connected" displayed under the network name indicates a successful connection. Afterwards you can surf the Internet, connect to email services, etc.
6.1 Main interface A B C D E F G H After booting and unlocking, you can go to the main interface (as shown below). A. Notification bar Touch for details on system notice, new coming email, etc. B. Quick search box Touch to begin search. C. Voice Search Touch for voice search. D. Shortcut setting To set Clock/ Wi-Fi signal / Settings menu E. Apps icon Touch to go to APPS and Widgets Interface. F. Back icon Touch to go back one screen. G.
4.3 Shutdown In any mode, Press and hold the Power button for about 2 seconds. The device shutdown window will appear: a. Power off: Touch to turn off the product. b. Airplane mode: Touch to turn on or turn off Airplane mode. c. Silent mode: Touch to turn on or turn off sound. Note 1: If the battery is low, the product will shutdown automatically. Note 2: If the product freezes during operation, press and hold the Power button for 6 to 10 seconds to force shutdown. 4.
4. If the “Mass Storage” option is selected, (in Storage Settings / menu / USB computer connection), the USB connected interface will pop up on the tablet with the option to “Turn on USB storage”. Tap the button "Turn on USB storage” to connect. When the message changes to “Turn off USB storage”, the connection has successfully been established. The tablet (and SD card if installed) will be mounted on your computer as mass storage devices.
4.8 Charging When the battery is low, the provided adapter can be used to charge it. 1. If the product is powered on during charging, the status bar will show the charging icon ( battery is fully charged, the bar will show the full battery icon ( ). After the ). 2. If the product is shutdown during charging, the large charging icon interface will be displayed.
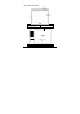
When the product is on, plug the smaller end of the HDMI cable to the HDMI port on the side, and the larger end to the HDMI port of TV. The device will enter into HDMI mode automatically. Note: When you are in HDMI mode, you can control the system through USB mouse, USB keyboard, Bluetooth mouse and Bluetooth keyboard. 4.11 Search icon In the main interface, touch the “Search” icon to search for the relevant information using the browser.
Chapter 5 Common Features 5.1 Landscape/Portrait display switching 1. In the “Settings” interface, touch “Accessibility ->Auto-rotate screen.” When the “√” symbol appeared, the Landscape/Portrait screen display switching is on; when the “√” symbol disappeared, the Landscape/Portrait screen display switching is off. 2. Hold this product vertically with your hands and tilt it to the left or right.
A B G C H D E F I J A. Show box: Show the text typed. Touch and hold this box to display the Edit Text menu for you to cut, copy, and paste the text. B. Tab:Touch this key to switch to next input table. Touch Shift key and then touch this key to switch to previous position. C. Touch this key to switch between numeric keypad and symbol keyboard; For numeric keypad and symbol keyboard, touch the “~\{” key to display the special symbols (such as ~, ±, ÷, ×,etc.). D.
Copy Copy text typed Paste Paste cut or copied text Share Share the selected text via Bluetooth, Gmail or Email. 5.3 Notification bar The notification icon appears when a message is received, PC is connected, or music is played. You can open the notification bar to check for messages and played music. 5.3.1 Opening notification bar After a new notification icon appears in the notification bar, touch the notification bar to open the notification bar. 5.3.
In the apps interface, slide your finger toward left to go to the Widgets interface, then continue sliding to the next widgets interface, find “Power control” widgets. Touch and hold the widgets icon to move it to main interface, as the picture show below: A B C D A. Wireless network on/off Touch to turn on or off the wireless network. B. Bluetooth Touch to turn on or off the Bluetooth. C. Sync icon D.
Chapter 6 Apps Make sure the Wi-Fi wireless network connection is established to use the following functions. 6.1 Apps interface Touch the Apps & Widgets icon at the right corner of the main interface to go to the Apps interface, as shown below: 6.2 Browser Open the browser to enjoy a colorful experience. You can also access news, weather forecast, and sports or traffic information when needed. 6.2.1 Opening browser In the “Apps” interface, touch “Browser” to open a webpage.
A. Back icon Touch to go to previous webpage. B. Next icon Touch to go to next webpage. C. Refresh icon Touch to refresh the current webpage. D. Close icon Touch to close the current tab. E. Add icon Touch to open a new tab. F. Delete text/Add Touch “x” to delete the text in the table. /Touch “☆” to bookmark icon add the current webpage to bookmark. G. Menu icon Touch to show menu options. H. Bookmark icon Touch to go to bookmark interface.
Selecting link in webpage The selected link will be put in a blue box. ·Touch it to open a webpage. ·Touch and hold to open the Actions menu, Open, Open in new tab, Save link, Copy link URL and Select text. Selecting text in webpage Touch and hold the text in webpage, the selected slider and menu option will display, slide the left and right slider to select the text for easier copying or sharing. Saving webpage You can save webpage for offline reading.
SAVED PAGES: Show the list of saving webpage. Adding bookmark Touch “☆” to add the current webpage to bookmark. Opening bookmark In the “Bookmark” interface, perform any of the following steps to open a bookmark: · Touch the bookmark you want to open. · Touch and hold the bookmark you want to open, and touch “Open” or “Open in new window”. Editing bookmark 1. In the bookmark interface, touch and hold the bookmark you want to edit. 2. Touch “Edit Bookmark” in the options to show the Edit Bookmark window. 3.
6.3.1 Video playing In the file list, slide your finger up and down to find the videos you want to play. Touch one to play. L J K A B C D E F G H I Touch the screen to show the Hide menu: A. Add video bookmark C. Touch: Previous video file Touch and hold: Rewind B. Adjust screen brightness D. Play/pause E. Touch:Next video file F. Screen extension:Touch to select Touch and hold: Fast forward Full Screen, Normal,16:9, 4:3 Touch to display the video in floating mode. G.
Play mode Subtitle Select Audio Track Select Repeat mode Select one subtitle while there is more than one kind of subtitle in the video. Select one audio track while there is more than Select one kind of audio track in the video. Help Tips icon function Return Return to the Play interface L. Play progress Touch any position of the play progress bar to skip to this position; bar Touch and hold it to move to any position to continue playing.
Artists Sort by “Artist” Albums Sort by “Album” Songs Display the all music stored on built-in Flash memory, SD card and USB device Playlists Display the play list Now playing Go to the currently played music file 6.4.1 Playlist In the music file list, touch “playlists” to go to the playlist. Touch and hold “Recently added” to play or edit the time of the “Recently added” list.
A B C D E F G H I A. Play list Touch to open the playlist. B. Shuffle Playing songs at random mode. C. Play mode B. Repeat playing all songs in the current directory. D. LRC Touch to show or hide lyrics. A. Stop after the end song is played. C. Repeat the current song. E. File info When the network connection is established, touch it to check the link information about the currently played music file. F. Rewind Touch: Switch to the previous song. /previous Touch and hold: Rewind. G.
To select pre-set music type equalizer settings, touch the drop-down menu that show the current “type” selected. Select your preferred sound effects by choosing a type of music type from the menu or by sliding your finger up and down on the sound effect frequency bars. Note: Few MP3/WMA audio files that are specifically encoded may not be played by the product. Convert them using an audio conversion tool and download the converted files to the product to play. 6.
6.5.1 Browsing pictures In the directory, touch the pictures you want to browse to open the picture browsing interface. Touch the screen to pop up or hide the menu: A. Share icon Share the current picture through Bluetooth, Picasa, Gmail, or for others touch “See all”. B. Trash can Delete the current picture. C. Menu Touch to show the menu options.
Slideshow Automatically browse pictures. Edit Touch to edit the current picture. Rotate the picture 90° counter-clockwise. Touch this icon to rotate Rotate left the picture counter-clockwise in the following order: 90°, 180°, 270° and restore. Rotate the picture 90° clockwise. Touch this icon to rotate the picture Rotate right clockwise in the following order: 90°, 180°, 270° and restore. Crop Crop current picture.
D. Delete Delete the selected pictures. E. Menu Touch to show more options. 6.6 Camera Touch the camera icon to go to the camera interface. Touch " " icon for camera mode, touch " " icon for video record mode, touch “ ” for panorama mode. Slide along the arc icon to zoom in or out. Touch " Touch " " icon to take photo or start recording video. Touch “ ” to end recording video. " icon to switch between front camera and rear camera.
Chapter 7 Apps In the main interface, click “Apps” icon to go to the “Apps” interface in which the installed apps will be shown. 7.1 Moving a program icon to another interface To create a program alias icon and move it to other interfaces, touch and hold the program icon and the screen will switch to last interface viewed. Then place the icon at a desired position and release. 7.2 Deleting a program icon In the main interface, touch and hold the program icon you want to remove.
Chapter 8 Common Tools 8.1 E-mail When you use the e-mail for the first time, you need to create an e-mail account first. 1. Enter the address and password for your e-mail account and Touch “Next”. 2. Select an account type. Touch “POP3” for a POP3 account. 3. Touch “POP3 Server” and “Port”, enter “pop.+ account suffix” and port number. For example, if the e-mail account is 123456@163.com and the port number is 110, enter “pop.163.com” and “110”. Then touch “Next”.
4. Touch “SMTP Server” and “Port”, enter “smtp.+ account suffix” and port number, for example “smtp.163.com”.Then touch “Next”. 5. Set the account options and touch “Next” to finish settings. Note: Since the e-mail service providers may vary, configure the server settings based on the actual e-mail account. This product can support the accounts provided by the popular e-mail service providers, such as Yahoo, Sohu, etc. 8.1.1 Opening e-mail In the “apps” interface, touch “E-mail” to enter.
Tip 1: By default, this product can be used to browse the inbox after the e-mail app has synchronize with email provider. All e-mails you received will be put into the inbox. Tip 2: Touch “ ” icon to send or receive a new e-mail and synchronize your e-mails with your e-mail accounts. 8.1.2 Creating and sending e-mails 1. Touch the “ ” (Compose) icon at the top right of the E-mail interface. 2. Next to “To”, enter the e-mail address of the receiver.
Tip: If you want to add a picture attachment, touch the “ ” (paper clip) icon, select the picture you want to attach, and touch it to confirm or touch the “Cancel” icon to cancel. 4. After composing your e-mail, touch “Send”. Tip: When you compose your e-mail, touch the “Save draft” or back icon to save your e-mail to Draft. 8.1.3 Receiving and reading e-mail When a new e-mail is received, the notification bar will show the new e-mail ( ) icon.
“ “ ” Delete Delete an e-mail ” Mark as read/unread The unread e-mails in the Inbox are highlighted with white background. Menu Touch to show more options. 8.1.6 Email Settings In the e-mail interface, touch the menu icon, and touch “Settings” to go to the e-mail settings interface. Touch “Add Account” to add a new e-mail account. Note: You can set several e-mail accounts. The default account will show whenever you perform e-mail apps.
Remove account Remove user account. 8.2 Recorder In the “Apps” interface, touch “Sound Rec” to go to the record interface. Touch “ ” to start recording or “ ” to stop recording. After recording is finished, touch “ ” to play the just recorded file. Touch “Done” to save the just recorded file or touch “Discard” to not save the recorded file. Note 1: The recorded file can be automatically saved in flash so that you can find them in the AudioPlayer “ playlists ->My recordings” to play.
8.3.1 Set alarm 1. Touch the preset alarm to select an alarm or touch “Add alarm” to add new alarm. 2. Touch “Time”, and set the time for the alarm. Slide your finger up and down to adjust the time, and touch “Set” to complete. 3. Touch “Repeat,” select the date you want the alarm to ring, and touch “OK”. 4. Touch “Ringtone” and select alarm ringtone. After selection, the ringtone will be played temporarily. 5. Touch the “Label”, set the name of the alarm. 6.
8.6 Installing apps 1.Copy the setup file to your PC. (Make sure the format of the setup file is xxx.apk format supported by this product.) 2.Connect the device to PC using USB cable. 3.Copy the setup file xxx.apk to the device. 4.Disconnect the device from PC. 5.Turn on the device and activate Explorer. 6.Locate the xxx.apk file and touch it to open. 7.Install the app according to the on-screen prompts. 8.After completion, you will see the installed app in the apps interface. 8.7 Uninstall app 1.
Chapter 9 Settings In apps interface, touch the “Settings” icon to go to the “Settings” interface. 9.1 WIRELESS & NETWORK Settings 9.1.1 Wi-Fi network connection Connection 1. Touch “Wi-Fi” to enter into Wi-Fi settings interface. 2. Slide the slider to right to enable Wi-Fi and scans for available wireless networks. 3. Touch the desired wireless network name to connect to it. You will be prompted, if a password is required. 4.
Note 3: Auto search for Wi-Fi is performed, i.e., no additional steps are required to connect to the Wi-Fi network. For some closed wireless networks, the username or password may be required. Note 4: The availability of Wi-Fi signals may depend on the distance, infrastructure, and objects through which a signal must pass. Scan Touch the “SCAN” icon at the top right corner of screen to search for the available wireless networks in the vicinity.
9.1.2 Bluetooth connection Turn on Bluetooth 1. Touch “Bluetooth” to enter into Bluetooth interface. 2. Slide the slider to right to enable Bluetooth and the Bluetooth zone show the name of the available Bluetooth device. 3. Tap the menu icon at the top right of screen. Rename Device Touch to change the name of your device. Visibility timeout Touch to choose how long (2 minutes, 5minutes, 1 hour or Never time out) to keep your device in discoverable mode.
9.1.3 Data usage Show the usage per app statistics in per day. 9.2 DEVICE Settings 9.2.1 Sound Music, video, games & other media Volumes Notifications Set the media volume for music and video. Touch the volume bar to adjust the volume level. Set the notification volume by touching the volume bar to adjust the volume level. Set the alarm volume by touching the volume Alarms bar to adjust the volume level. Default notification Set your default notification ringtone.
Set the location of screenshot storage Set a location to store the screenshots. Show the screenshot button in the Click on check-box to display the shortcuts status bar screenshot camera-icon on status bar. 9.2.5 Storage Total space INTERNAL Apps STORAGE Available Total space Apps NAND FLASH Show the total capacity of the Internal Memory. Show the used space of the apps. Show the remaining free space of the data memory. Show the total capacity of the built-in Flash memory.
9.2.7 Apps Manage and delete installed apps: For uninstall apps, clear data, clear cache, clear default and force stop. 9.3 PERSONAL Settings 9.3.1 Location services Google’s location Select to allow Google’s location service to collect approximate service location data from Wi-Fi or mobile networks. Location & Google Select to allow Google to use location for improved search results search and other services. 9.3.
Backup my data Select to back up app data, Wi-Fi passwords and other Google settings. Backup account Choose the backup account. Automatic restore When reinstalling an app, restore backed up settings and data. Factory data reset Erases all data on tablet. 9.4 ACCOUNTS Settings SYNC: Selected the options to turn on sync. ADD ACCOUNT: Touch “+ADD ACCOUNT” to add corporate, Email or Google account. 9.5 SYSTEM Settings 9.5.1 Data & Time Automatic Use network-provided time.
version, Kernel version and Build number.
Chapter 10 Using Micro SD (TF) Card The external card supported by this product is a Micro SD card, through which the capacity of storage can be expanded. To install, insert the Micro SD card into the slot with the silk screen lettering facing front of tablet. Push into card slot until it is fully inserted and locks inside the product. To remove Micro SD card, press the Micro SD card inward to eject it. Note: · Insert cards face-up into the card slot. · Do not bend the card.
Chapter 11 Connecting to USB Drive Insert your USB drive into the OTG port at the right side of the product. Open Explorer and you can see the “USB” directory. This directory is your USB drive. Touch USB to check the files on USB drive. Note that when unit is connected to a USB drive, it should be turn off / shutdown. Avoid insertion and removal when the files on USB drive are in play / use to avoid damaging the data on USB drive.
Chapter 12 About the Battery and Power This product uses a built-in 4500mAh polymer lithium battery. When the provided power adapter is connected, the battery is automatically charged. When you charge this product for the first time, it is recommended to shutdown the product and charge it continuously for more than 8 hours for optimal battery use. When using a new product, the battery should be fully charged and totally discharged for the first three times, to activate set a battery’s ideal lifecycle.
Chapter 13 Firmware Updating / Resetting to Factory For Firmware Updating: 1. Go to for the website (www.aoc.com or www.breezetablet.com) to download the current / latest firmware for your device. 2. Follow the instructions provided for the model of AOC tablet being updated. For Resetting to Factory: Go to Settings \ Backup & reset a select “Factory data reset”. (This will erase all data on tablet!) Another way to reset to factory settings is to: a.
Chapter 14 Frequently Asked Questions · Product cannot be turned on or boots-up abnormally There are various ways to recover/reset the tablet once a problem has occurred: ① Plug the AC adapter and see if powers up; (because battery may be low on power). ② Another option is to press and hold the Power button for 6 to 10 seconds, to restart. ③ If above two methods do not restore the tablet to normal operating state; a. Shut down the tablet and make sure the USB and power cables are unplugged. b.
If static IP addresses are needed, make to enter a valid IP address. If dynamic IP addresses are used, static IP addresses should be disabled while the network is connected. · Cannot connect to computer Make sure the tablet is turned on Make sure the tablet is not in sleep mode Make sure to use the correct USB cable · Cannot view files in AudioPlayer, PhotoBrowser, Video Player, Shelves and/or Explorer. Cannot record sound. Confirm the correct files have been downloaded to your tablet.
Chapter 15 Troubleshooting 1. When I view JEPG pictures, some of them cannot be viewed. Why? Some JPEG files may have a non-standard resolution, they may not be viewed in full screen, or zoomed in or out. 2. The product cannot play my videos. Why? Make sure the video format is supported by this product. Some video files are encoded in different formats and versions. We cannot guarantee that all formats are playable. 3.
FCC Caution: Any changes or modifications not expressly approved by the party responsible for compliance could void the user's authority to operate this equipment. This device complies with Part 15 of the FCC Rules. Operation is subject to the following two conditions: (1) This device may not cause harmful interference, and (2) this device must accept any interference received, including interference that may cause undesired operation.
-- Consult the dealer or an experienced radio/TV technician for help. FCC RF Radiation Exposure Statement: 1. This Transmitter must not be co-located or operating in conjunction with any other antenna or transmitter. 2. This equipment complies with FCC RF radiation exposure limits set forth for an uncontrolled environment. This device was tested for typical hand held operations with the device contacted directly to the human body to the sides of the device.