2.0.1 Dec 2007 www.fxpansion.
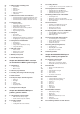
Contents .
:4 Mixer toolbar and utility panel 81 5:3 Loading Grooves 55 55 55 55 55 56 81 • 83 5:4 Playing Grooves in the Palette 83 84 84 • Triggering Grooves with MIDI notes • Triggering Grooves with Preview buttons • Auto-Play and transport controls 57 3:5 Mixer channel controls and indicators 85 5:5 Working with Grooves in the Palette 57 59 59 • • • 61 3:6 Using the mixer 85 85 86 86 61 61 61 62 62 63 87 5:6 Groove Action
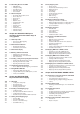
108 6:6 Recording Grooves via MIDI 125 8:4 Key mapping view 108 108 108 108 108 109 6:7 Groove FX panel 109 109 109 109 110 110 110 110 111 111 111 111 125 125 125 125 126 127 127 127 127 128 8:5 Working with the key mapper 128 128 129 129 130 8:6 Mapping inspector 112 chapter 07: GROOVES PAGE part 3 auto-play, drum track and other ways of using grooves 130 130 130 130 130 131 8:7
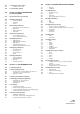
144 9:5 Positional snare control 164 chapter 12: MIXING AND EFFECTS USAGE 144 • Variable snare controls 144 9:6 Controlling cymbals 164 164 • • 145 chapter 10: BFD2 PREFERENCES customizing BFD2 165 12:1 Mixing basics 145 10:1 Preferences page overview 165 165 165 166 146 10:2 Data preferences 167 12:2 EQ and filtering 146 146 146 • • • 167 167 168 • • • 147 10:3 Groove preferences 169 12:3 Dynamics processing 147 147 148 149
chapter 01 INTRODUCING BFD2 1:1 An introduction to BFD2 Welcome to BFD2 Thank you for purchasing BFD2! Welcome to the most advanced acoustic drum production environment ever. As you begin to explore the software and manual you’ll start to realise the sheer power you have at your fingertips. About this manual There is a huge amount of functionality in BFD2, so please take the time to study this manual as you delve into the software.
1:2 BFD2 Architecture How BFD2 works Disk-streaming multi-channel sample playback engine At the heart of BFD2 is a sample playback engine that streams multi-channel audio recordings of drum, hihat, cymbal and percussion instruments – called kit-pieces – being played in various ways, and recorded with multiple sets of microphones. There is an inherent latency when accessing files on a hard drive. Because of this, BFD2 caches a short segment of the start of every sound in system memory.
Articulations Here is a summary of possible articulations in BFD2. Please note that some kit-pieces do not contain all possible articulations. Kicks Hit No Snare Snares Hit Rim Sidestick Drag Half-edge* *Half-edge is the skin or head struck half-way between the centre and the edge.
Direct mic channels (mono) Kick In The signal from the mic inside the kick drum. Kick Out The signal from the mic outside the kick drum. Snare Bottom The signal from the mic underneath the snare drum. Snare Top The signal from the first mic above the snare drum. Snare Top2 The signal from the second mic above the snare drum. BFD2’s library is the first to contain this mic channel, which does not exist in previous BFD libraries.
Microphone buses As well as mic channels, when using BFD you need to be aware of the four microphone buses, which are ‘virtual groups’ of the mic channels. Ambience buses The ambience buses allow you to approach mixing in BFD2 in the same way as a real drumkit recording. Even though BFD2’s kitpieces possess discrete ambience signals, this is impossible to achieve when recording a real drumkit, when any ambient mics capture the sound of the whole of the kit.
1:3 Recording notes BFD2’s sounds were recorded in studio 1 at AIR Studios at Lyndhurst Hall, Hampstead, London. AIR Studios was started in 1969 by George Martin, a producer famous for his work with The Beatles. It moved to its present location at Lyndhurst Hall, a stunning grade II listed converted church in Hampstead, in 1991. It offers one of the best live rooms in the UK. Studio 1’s recording room could be described as medium to large sized.
Microphones Several microphones were set up for many mic positions, with the most appropriate sets being used for each kit. Some snares were mic’d using a slightly different technique involving the top snare mics pointing at the side of the snare shell instead of at the top skin. BFD2’s snares offer two mics for the top snare position, allowing even more flexibility than before when mixing.
1:4 Introduction to the BFD2 interface Control conventions Faders Faders are controlled by clicking and dragging vertically. Faders are oriented vertically but some controls, such as the send level controls in the FX/Sends mixer view, are horizontally aligned but are still controlled by clicking and dragging vertically. Vertical fader movement Knobs Knobs are controlled by clicking and dragging vertically (up/down) by default.
Interface overview Page buttons: These change the contents of the main interface. Control bar: Features the Load, Save and Help menus, the Page buttons and other functions. See section 1:5. See section 1:5. Main interface: This changes according to the currently selected page. Status bar: Contains various displays and readouts, and several important functional controls. See section 1:6.
Load menu Clicking the Load button shows a menu allowing you to load various elements into BFD2. The Load menu is partly contextdependent, varying according to whichever Page is currently in view. The menu has 3 sections: 1. BFD2 Preset A Preset is a snapshot of the entire state of BFD. The Preset loader panel allows you to selectively load different elements of Presets. For a full guide to loading Presets, please see the ‘Loading presets’ section later in this chapter. 2.
1:6 Status Bar CPU & HD RAM performance Controller indicator meters learn MIDI Log MIDI & audio stream indicators Offline switch Rude solo light Context info display Transport controls Tempo Beat light Playback position Time signature MIDI Log Clicking this button opens an external MIDI log window, making it easy to view and troubleshoot incoming MIDI events. The contents of the log are identical to the smaller log built into the Keymap page.
Controller learn The controller learn function gives you a quick method of assigning BFD2 controls to MIDI continuous controllers (MIDI CCs) and even to MIDI notes, so that you can use physical keys, knobs, faders or other controllers to control BFD2 controls such as knobs, faders and buttons. Using controller learn 1. When the controller learn button is enabled, an overlay appears on the interface, with all MIDI-controllable parameters highlighted in green. 2.
Rude Solo light The Rude Solo indicator is always lit whenever one or more channels are soloed in the BFD2 mixer. You can ALT-click this light in order to un-solo all channels currently in a solo state. Beat light This indicator flashes on every beat when BFD2’s Groove engine is playing. Tempo When using BFD2 as a standalone application, you can enter a tempo for the Groove Engine by double-clicking the Tempo indicator. Simply type a new tempo and hit ENTER.
1:7 Loading BFD2 Presets BFD2 Presets store the entire state of a BFD2 session. To load a Preset, click the Load button in the Control bar and click on Load BFD2 Preset... from the Load menu that appears. This opens the Preset chooser panel. Any available preset is displayed with an image representing its contents. Delete Preset from database Sticky button Preset listing: click to select or double-click to load Photo & Star rating Click to load the selected Preset Click a Preset to select it.
you click ‘Yes’, the preset file and its associated photo are deleted from the /BFD2/Presets folder. If you click ‘No’, the preset’s files remain untouched. If you leave user kit files on disk, they are scanned during the next full rescan of the database (Trash and rebuild all databases in the BFD2 Data preferences). BFD2 never prompts to delete factory-installed Preset files.
Photo & Rating The large photo of the Preset, showing a representation of the included kit-pieces, is especially useful when using ‘List’ or ‘Details’ View settings. Above the photo is the star rating control, with which you can rate the preset by clicking on one of the stars. This is used as a ‘favourites’ system when the Sorting type is set to ‘Star rating’: Presets are shown in order of their rating. This means that those with a higher rating are shown first.
1:9 BFD2 Help functions BFD2 offers a number of different help methods to make learning the software as painless as possible. Context info display The context info display in the BFD2 Status bar shows information about the control element currently underneath the mouse cursor. This also displays the current values of controls, and updates to show any adjustments made while they are adjusted. Tool-tips Tool-tips are shown when the mouse is hovered over a control for a definable length of time.
When moving a control I like to drag... [up and down / around (circular)] Setting this item to ‘up and down’ requires vertical mouse movement to adjust circular knobs in BFD2, while setting it to ‘around (circular)’ requires circular mouse movement. The preference that this item affects – Circular knob movement – is located in the BFD2 GUI preferences. My main host application is...
chapter 02 KIT PAGE building and adjusting your kit 2:1 Kit page overview 1 5 6 3 2 7 4 1. Loading and saving kits – 2:3, 2:4 Use the Load and Save menus in order to load and save kits. 2. Kit Size – 2:2 This selector lets you choose between 10, 18 and 32 piece kits. 3. Kit display – 2:5 This changes for each kit size. Click a kit-piece in the display in order to select it. Each kit-piece in the display flashes when it is played. 4.
2:2 Kit Size You can choose between 3 kit sizes using the selector buttons on the toolbar. All slots have an intended purpose – when the kit-piece chooser panel is displayed for each slot, it sets the Type and Search controls to show the intended variety of kit-piece. However, you can load any kit-piece into any slot by changing the Type and Search criteria.
32-piece kit 1 2 3 4 5 6 7 8 9 Kick 1 Snare 1 Hihat Floor Tom Mid Tom High Tom Crash 1 Cymbal 1 Ride 1 10 11 12 13 14 15 16 17 18 Kick 2 Snare 2 Perc Tom 4 (all toms) Tom 5 (all toms) Tom 6 (all toms) Crash 2 Cymbal 2 Ride 2 19 20 21 22 23 24 25 Perc 2 Perc 3 Perc 4 Perc 5 Perc 6 Perc 7 Perc 8 26 27 28 29 30 31 32 Perc 9 Perc 10 Perc 11 Perc 12 Perc 13 Perc 14 Perc 15 The 32-piece kit features the same first 18 slots as the 18-piece kit, but with an extra 14 percussion slots as shown above.
2:3 Loading and saving in the Kit page Loading in the Kit page You can load and save a number of different elements in the Kit page: Kits (section 2:4) A kit is comprised of a number of kit-pieces loaded into kit-piece slots, as well as any Link setups and additional parameters for each kit-piece (adjustable in the kit-piece inspector). You can, if you wish, choose to load only the kit-piece arrangement, and dispense with the additional settings.
2:4 Loading and saving kits Loading kits – overview To load a kit, click the Load button in the BFD Control bar and click on Load Kit... from the Load menu that appears. This opens the kit chooser panel. Delete kit from database Sticky button Kit listing: click to select or doubleclick to load Info Click to load the selected kit All available kits are displayed with an image representing its contents. To see more information about a kit, click it to select it.
Sorting With this drop-down menu you can sort kits either by name or by star rating. Rating your favourite kits and sorting chooser contents by Star rating can make it easier to find your favourite kits. This setting is recalled between sessions. Its state is stored in the BFD2 preferences – therefore, if you re-initialize your BFD2 preferences this setting is returned to the default (sorting by ‘Name’).
• Invalid kit-pieces are shown in red – this usually means that the kit-pieces have not been authorized or are somehow corrupt. If you suspect they are not authorized, exit BFD2 and run the FXpansion License Manager to verify their authorization status. If necessary, authorize the expansion pack containing the kit-pieces. Then re-run BFD2. It may also be necessary to trash and rebuild the BFD2 database. Import BFD1 kit Original BFD kits are very different types of files to the kit files used in BFD2.
2:5 Kit display and kit-piece slot windows Kit display Slot windows Kit display The kit display serves a number of purposes in the Kit page. Visual representation of the current kit The kit shown differs depending on the current kit size. See section 2:2 for details of the 3 kit sizes. When the mouse cursor is moved over a part of the kit in the display, its corresponding slot window is highlighted (this behaviour can be turned off in the BFD2 GUI preferences using the Connect kit and slot setting).
Kit-Piece Slot windows Slot number Load kit-piece Image Selected slot Trim Clear kit-piece Direct Pan Mute & Solo Each available kit-piece slot window in the display shares some common features. Kit Display highlight When the mouse cursor is moved over any slot window, its corresponding part of the kit display is highlighted. Selecting a kit-piece When using the Select tool, clicking on a kit-piece slot selects it, and its settings are displayed in the kit-piece inspector.
2:6 Loading Kit-Pieces Overview To load a kit-piece into a slot, click the Load button on the slot to open the kit-piece chooser panel. You can also double-click anywhere on a kit-piece slot in order to open the panel. Delete kit-piece from database Sticky button Kit-piece listing: click to select or double-click to load Preview & Info Click to load the selected kit-piece Click on a kit-piece to select it. You can preview individual articulations at any velocity before loading the kit-piece.
Sorting Using this drop-down menu you can sort kit-pieces in the listing by the following criteria: • Manufacturer • Star rating • Articulation count • Kit-piece class • Disk size • Name Rating your favourite kits and sorting chooser contents by ‘Star rating’ can make it easier to find your favourite kit-pieces. This setting is used for all kit-piece slot choosers, and is recalled between sessions.
Import Clicking this button opens the sample import panel. BFD2 allows you to create single-articulation mono or stereo kit-pieces with multiple velocity layers from a set of one of more samples. See section 2:7 for a full guide to using this feature. Load / Cancel buttons To load the currently selected kit-piece, click the Load button. You can also double-click any kit-piece in the listing in order to load it.
Possible problems when loading If a problem is encountered when loading a kit-piece, an error icon is displayed in the slot. If you experience any of these, please get in touch with our technical support team for further advice. Not found his error appears when BFD2 can’t find a kit-piece that exists in the database in any T of the current data paths. You may have deleted or moved some files or folders by accident, or there may be other reasons the data could be missing.
2:7 Importing your own sounds into BFD2 BFD2 allows you to import mono or stereo WAV files to make your own single-articulation kit-pieces, which can have multiple velocity layers. There are a number of things to be aware of when using kit-pieces created with the Sample Import function: • There can be only 1 articulation in the kit-piece. It can be either one amplitude-scaled sample, or multiple samples for velocity layers. • They only produce sound in the direct bus.
Photo settings You can specify any JPEG, PNG or TGA image file as a photo to associate with the kit-piece. If no image is specified, a default image is used. Browse button Clicking the browse button opens a system file open dialog allowing you to browse to a JPEG, PNG or TGA file to specify as the imported kit-piece’s photo. The file must have a resolution of 180x150 pixels. Clear button Clicking this button removes the photo currently specified for the kit-piece.
2:8 Kit page toolbar The toolbar on the left of the interface provides a number of functions in the Kit Display. Select The Select tool is the default tool in the Kit Display. It allows you to select kit-piece slots by clicking on them. You can also ALT-click a kit-piece slot in order to preview its main articulation (hit, or closed tip for hihats) at a velocity of 95.
2:9 Kit-piece inspector Photo Star rating The kit-piece inspector on the right hand side of the Kit panel allows you to tweak each part of the kit just like you would in a real-world drum recording environment. It operates on the currently selected kit-piece. Kit-piece quick-load Kit-piece presets With the exception of the Articulation controls, the kit-piece inspector is also available in the Mixer page Utility panel, when selecting kit-piece direct channels in the mixer.
Next/Previous buttons Clicking these buttons steps through to the next or previous available preset. They offer a quick way of cycling through presets with the minimum of effort. Saving kit-piece presets In order to save the currently selected kit-piece’s settings as a preset, click the Save button on BFD2’s control-bar. Click on ‘Save kit-piece preset’ from the Save menu that appears. A system file save dialog is shown, allowing you to name and save your preset.
Ambience sends By adjusting the OH Send, Room Send and Amb3 Send controls, you can control the level of the currently selected kit-piece’s ambience channels – Overhead, Room and Amb3. You can also set up custom routing of each type of ambience for the selected kit-piece. It is important to realise that these are ‘artificial’ controls: you would not have such control in a real-world drum recording situation. However, the creative possibilities are too great to omit this functionality.
Kit-piece bleed controls In BFD2, bleed is the sound of other kit-pieces picked up by the kick 1 and snare 1 direct mics. In real-world situations, bleed occurs across all direct mics. For various reasons, bleed only exists within BFD2 in the kick and snare mic channels. For further details on bleed, please see sections 1:2, 3:3, and 12:1.
Vel to Amp default During the BFD2 setup wizard which runs when you first launch BFD2, you are asked if you want an amplitude-scaled response. Your choice initializes the state of the Vel to Amp default amount preference. If you choose a natural response – a Vel to Amp setting of 0% – there is no amplitude scaling with different velocities within BFD2: the velocity layer samples, played at varying degrees of force, take care of the ‘loudness’ over the velocity range.
2:10 Mini-mixer Master dynamics, Master tune and Humanize controls The mini-mixer allows you to blend between the ambience channels and the direct master bus, as well as offering global control over tuning, dynamics and humanization for the kit. Please note that if you need to control the overall volume of BFD2, the easiest way to do so is by using the BFD2 main volume on the Control bar – see section 1:2 for details.
2:11 MIDI Note Learn wizard The MIDI Learn Wizard is provided so that you can quickly assign MIDI mappings by playing the notes for each articulation on your MIDI input device. If you intend to use an electronic drumkit for hihat control, it is recommended that you refer to chapters 8 and 9, which deal with manual mapping and configuring BFD2 to respond to specialized electronic drumkit control systems.
Next slot mode If this mode is enabled, the wizard continues to the next occupied kit-piece slot after a kit-piece is mapped. This is repeated either until there are no more filled slots, or until the end of the kit is reached. The order of slots is dictated by the slot numbers – section 2:2 contains a summary of the slots in each kit size. To map the whole kit, click on the kick 1 slot (slot 1) and enable the Next Slot mode setting.
chapter 03 MIXER PAGE engineering your drum sound 3:1 Mixer page overview To access the Mixer page, click the Mixer page button in the BFD2 control bar. 1 5 3 2 4 1. Loading and saving mixer presets (section 3:2) Use the Load and Save menus in order to load and save mixer presets. 2. Mixer channels (sections 3:3, 3:5) All mic channels, ambience buses and auxes are represented by channels in the BFD2 mixer. 3.
3:2 Loading and Saving in the Mixer page Loading mixer presets To load mixer presets (also known as mixers in BFD2), click the Load button in the BFD2 Control bar and click on Load Mixer... on the Load menu that appears. This opens the mixer preset chooser panel. Note that you can also use the mixer preset panel, located in the Utility panel, in order to load, document and rate mixer presets – see section 3:10.
Search The search facility allows you to narrow down the amount of presets shown in the chooser panels. Delete mixer preset from database Clicking this button removes the selected mixer preset from the BFD2 database. This feature is provided if you find you have too many presets and you want to get rid of those which may not be to your taste, making presets you do like easier to find. You are asked for confirmation before you can continue.
Saving Mixer presets Using the Save Mixer... function on the Control bar Save menu shows a system Save dialog allowing you to save the current mixer to any location. Save location When you save your own Mixer presets, you are prompted by default to save them in the user level BFD2 folder as follows: /Mixers We recommend that you save your kits into this folder in order for them to be visible in the mixer preset chooser panel and the mixer preset panel in the Utility panel.
3:3 Introduction to BFD2 mixer channels Channel views BFD2 features two distinct channel strip views. Regular view This is the default channel strip view in BFD2. If the FX and Send slots are showing, disable the FX/Sends view button in the toolbar to switch to the Regular view. Regular view displays a long throw fader and any essential additional controls, such as mute, solo, Record-enable, phase flip and the channel context menu button.
Unused direct channels A kit-piece’s direct channel can be in an unused state if: • no kit-pieces are loaded into the slot and no other kit-pieces’ bleed exists within it • a snare with 3 direct mic channels is replaced with one with 2 direct mic channels These channels still exist in the mixer and are simply inactive until they become used again. The coloured tab at the top of the channel strip turns grey instead of green or teal.
Aux channels Aux channels exist in order to allow the creation of sub-mixes for parallel bus compression and other routing and processing needs, such as when using sidechains with certain FX. To create an Aux channel, click the Add Aux button. A new aux channel strip appears in the mixer, and is available as an destination for custom ambience routing in the kit-piece inspector, and also as an output or send destination on suitable mixer channels.
3:4 Mixer toolbar and utility panel Reset Mixer Clicking the Reset mixer button resets all channel settings to their defaults, as well as removing any loaded FX and send settings completely. You are asked for confirmation before you can continue. If there are any unused channels in the current mixer, BFD2 also asks if you would like to remove them. Unused channels are kit-piece direct channels that are not being used by loaded kit-pieces or by bleed signals from other kitpieces.
Utility Panel The Utility panel is a multi-page panel providing a number of functions while mixing. It hosts 5 panels, accessed by clicking the 5 selector buttons at the top. Panel selector buttons Here, the currently displayed panel is the kit-piece inspector, allowing access to kit-piece parameters without switching to the Kit page.
3:5 Mixer channel controls and indicators Pan Label strip and coloured tab Controls/indicators in Regular and FX/Sends views Label strip and coloured tab Channel image The label strip allows you to name each channel. Double-click the label strip to edit its contents, and press ENTER when you’re done. FX/sends power indicators We recommend that you keep names short, as only a small number of characters are visible on the strip! Just above the label strip is a coloured tab.
Mute & Solo All channels have a mute and solo button. Mute and Solo behaviour: Implied and Hard Mute/Solo BFD2’s mixer features very flexible mute and solo behaviour. It features two types of mute and solo states: implied and hard. • Engaging only the solo button on a channel results in implied mutes on all other channels: mutes are shown elsewhere, but the mute state of those channels is only implied.
Controls/indicators available in Regular view only Channel Image The channel image serves several purposes. Firstly, it makes it easier to visualize the purpose of each channel – for kit-piece direct channels, the loaded kit-piece is shown. If a kit-piece direct channel exists for which a kit-piece is not yet loaded (for example snare1 bleed channels when nothing has been loaded into the snare1 slot), a generic image of a direct mic is shown.
Sends You can set up 4 sends per channel, which are used for parallel processing and sidechaining. They can be routed to any available aux channel as long as the destination channel is to the right of the source channel (see the ‘Channel processing order’ sub-section in section 3:6). Sends can also be routed to the master channel. You can route a send into the main input or the sidechain input of the destination.
3:6 Using the mixer Selecting channels Click anywhere on a channel in order to select it. When a channel is selected, its settings are shown in the following parts of the mixer page: • FX rack • Sends inspector in Utility panel • Kit-piece inspector in Utility panel (if a kit-piece channel is selected) The selected channel is highlighted. Selecting multiple channels You can select multiple channels in order to manipulate their controls simultaneously.
Keyboard shortcuts for mixer operation BFD2 provides a number of keyboard shortcuts for mixer operation. If you’re using BFD2 as a plugin in a host, you should be aware that some hosts take control of the keyboard and do not allow keyboard shortcuts to be routed to BFD2.
Signal Routing indicators In order to make it easier to visualize output, send and sidechain routings, BFD2 features routing overlay indicators to graphically represent current signal routings. By default, these routing indicators are turned off. Click the Signal button in the mixer toolbar in order to enable them. Output routing indicators Moving the mouse cursor over the Output Routing selector for a channel displays a red arrow from it to the destination channel.
3:7 Using FX The FX rack FX, or effects, are BFD2’s built-in audio processors. The FX rack shows the contents of the 4 FX slots on the selected channel. When BFD2 is initialized, the FX rack shows the master channel’s FX by default, as the master channel is selected by default. Select any channel on the mixer in order to show its FX in the FX rack.
FX Preset browser The preset browser provides a drop-down menu showing all available presets for an effect, as well as buttons to step to the previous and next available presets. It also serves to display the name of the last loaded preset. Clicking the name of the preset displays a menu showing all available presets. Simply click on a preset to load it. Managing FX with the Effect context menu Clicking the effect menu button makes the effect context menu appear.
3:8 Using Sends and Sidechains Sends panel Send To Main/ sidechain selector The Sends inspector panel is located in the Utility panel. In order to display it, the Utility panel needs to be visible – click the ‘Utility’ view switch if it is not currently visible. Then, click the Sends button at the top of the Utility panel. This panel offers control over the 4 sends in the currently selected channel. Send level Send Power This button switches the send on (lit) and off (unlit).
Using sends for parallel processing Parallel processing for multiple channels is the main reason for using sends. There are a variety of situations when you might want to use parallel processing. For example, you may want to send a small amount of the hihat and snare channels to a reverb or flanger on an aux channel, or compress all the kick channels through a compressor, while also leaving the original signals in the mix. These kinds of methods are commonly used in drum mixing.
3:9 Mic tools panel Click the Mic Tools button at the top of the Utility panel to display the Mic Tools panel. This panel offers some additional ways to control BFD2’s mic channels and buses. Mic display Direct controls Level & Meter This fader controls the level of all direct channels together. It is a pre-mixer control – it alters the level of all mic channels before they enter their direct channels on the mixer. The meter provides a visual representation of the level.
3:10 Mixer preset panel The Mixer preset panel allows you to rate and view information about the current Mixer preset. You can also enter your own information to document own presets before saving them using the Save Preset button in the Mixer Page Toolbar. Additionally, this panel allows you to quickly browse through mixer presets without needing to use the mixer preset chooser panel. Photo Photo Mixer presets can have an associated picture.
3:11 Audio Export panel The audio export panel panel is located in the Utility panel. In order to display it, the Utility panel needs to be visible – click the ‘Utility’ view switch if it is not currently visible. Then, click the Sends button at the top of the Utility panel. BFD2’s audio export functions allow you to create convenient multi-channel mixdowns from BFD2, without having to depend on your host’s mixdown features, which can often be quite limited.
Export Sync mode Free The Free Export Sync mode lets you manually start and stop the export by clicking the Export button. Audio is written in real time as BFD2 is used, until the Export button is clicked again. Range This Export Sync Mode starts and stops exporting within a definable Start point and duration. This mode is intended to be used when using BFD as a plugin in a host. Before performing the export, you must first ‘arm’ the Export function by clicking the Export button.
chapter 04 GROOVES PAGE - overview an introduction to BFD2’s groove engine 4:1 Introduction BFD2’s Grooves page is an advanced rhythm production environment, giving you a great interface to write and edit drum patterns, as well as providing performance playback methods and even a track on which to sequence patterns. This chapter is intended as an introduction to how the Groove engine works, while chapters 5, 6 and 7 provide an in-depth guide to all its features.
4:2 Grooves page interface 4 1 2 5 3 6 1. Palette (chapter 5) You can have up to 128 Grooves loaded in memory at any one time. Each of these must be assigned to a slot in the Palette, each of which also corresponds to a MIDI key. Each slot in the Palette can be set as a Fill and has its own definable behaviour regarding how it starts and what happens when it ends. Grooves can be triggered via MIDI or using BFD2’s Auto-Play features. 2.
4:3 Loading and saving in the Groove page There are several different elements that can be loaded and saved in the Groove page. All of these load and save functions are available from the Load and Save menus situated on BFD2’s Control bar. Load Groove... This function brings up the Groove chooser in order to load a Groove into the current slot, or multiple Grooves on sequentially higher slots starting at the current slot. If the currently selected Groove slot is empty, a shortcut to the Load Groove...
4:4 Undo function Every operation performed in the Groove page can be reversed by clicking the Undo button. This multiple-level Undo function is very useful as many functions which can drastically change your work are only a click away. The Undo button exists on the Groove page toolbar (see section 6:3). It does not operate like the rest of the toolbar buttons for changing Edit modes, and is not restricted to Editor functions – virtually any action performed in the Groove page can be undone.
Beat light This indicator flashes on every beat when BFD2’s Groove engine is playing. Tempo This indicator displays the current tempo. If BFD2 is running as a plugin within a host sequencer that provides tempo information, this control is not editable and follows the current tempo in the host. When running BFD2 in standalone mode, or in a host that doesn’t provide tempo information, a tempo between 30 and 999 BPM can be entered.
chapter 05 GROOVES PAGE part 1 palettes, grooves and fills Default Groove Actions 5:1 An Introduction to the Palette Auto-Fill button The Palette is central to the Groove engine. It consists of 128 slots, each corresponding to a key on your MIDI keyboard. Any Groove you want to use in BFD2 must be assigned to a slot in the Palette, whether you want to trigger it with a MIDI key, or use it in the other possible playback modes.
5:2 Loading Palettes To load a Palette, bring up the Palette chooser using one of the following methods: 1. Click the Load button on the BFD2 Control bar and click on Load Palette... from the Load menu that appears. 2. If the current Groove slot is empty, click the shortcut to the Load Palette function that is shown in the editor area. Palette chooser The main area of the Palette Chooser shows a listing of the available Palettes in the BFD2 database.
Audition Preview buttons When a Palette in the listing is expanded to show its constituent Grooves by clicking the expand/ collapse button to its left, an extra column appears in the listing, containing an audition preview button for each Groove in the Palette. These buttons allow you to audition a Palette’s Grooves before loading it. Click a Groove’s audition preview button to start auditioning it. Click the button again to stop the audition, or click another Groove’s audition preview button.
Category filters 3 category filters are available to narrow down the Groove listing, in order to make it easier to find what you need. Each filter can be set to one of the following categories: • Library • Genre • BPM range • Author • Time signature • Star rating By default, these are turned off, as each filter is set to [all].
5:3 Loading Grooves Using the Groove chooser panel to load Grooves To load a Groove into a Palette slot in, firstly bring up the Groove Chooser in one of the following ways: 1. Select a slot in the Palette on which to load a Groove. Then click the Load button on the BFD2 control bar and click on Load Groove... from the Load menu that appears. 2. Double-click a slot in the Palette on which you want to load a Groove 3.
Show Palettes button By default, the Groove Chooser shows a listing of all Grooves in the database. By clicking the Show Palettes button, you can show Grooves as ‘children’ of their parent Palettes, which can make Grooves easier to find. Like in the Palette chooser, Palettes can be ‘expanded’ to show the Grooves they contain by clicking the expand/collapse button to its left. When expanded, clicking this button returns the Palette to its ‘collapsed’ state.
5:4 Playing Grooves in the Palette Triggering Grooves with MIDI notes Once a Groove is loaded into a slot, you can trigger the slot’s MIDI key in order to play the Groove. The Groove in the Palette’s F#3 slot plays while an F#3 note is played into BFD2. When the note is released, playback of the Groove stops. Groove playback occurs while the key is held down, and stops when it is released. The slot’s key label turns light blue while the Groove plays, and its playback indicator lights up.
Triggering Grooves with Preview buttons The playback indicators on the right of each slot in the Palette double as preview buttons. Clicking a slot’s preview button plays the Groove contained in the slot. When previewing, playback follows the behaviour defined by Groove Actions. See section 5:6 for more details of Groove Actions. Click another slot’s Preview button in order to change to that slot’s Groove. The method of transition is dictated by the Default and Slot Start Actions.
5:5 Working with Grooves in the Palette Selecting Grooves Click a Groove slot in the Palette in order to select it. If the slot contains a Groove, it is shown in the Editor. Multiple Selection You can select multiple Grooves in the Palette by holding down the CTRL or SHIFT keys while clicking on Grooves. Please note that when multiple Grooves are selected, you cannot use the Editor. • CTRL-click on a Groove (windows) • Apple click on a Groove (Mac) Adds the Groove to the current selection.
Blending elements of other Grooves in the editor As mentioned in the previous section, each Groove can be ‘expanded’ to show its constituent kit-piece elements – kicks, snares, hihats, toms, cymbals and so on. When editing one Groove you can replace or merge an element of another Groove by dragging an element from the Palette to the Editor grid. See section 6:5 for a guide to using these features.
5:6 Groove Actions The Palette area contains 2 sets of controls above and below the list of slots, which let you define Groove Actions, or playback characteristics. Default Start Action Auto-Fill Default End Action Selected Groove slot Slot Start Action Fill button Slot End Action The area above Groove slots forms the Default Action controls. Meanwhile, the area below the Groove slots forms the Slot Action controls.
Summary of available Groove Actions Below is a summary of the available Default Start and End Groove Actions, as well as the available Slot Start and End Groove Actions for individual slots. Default Actions Start End • Next Bar • End of Groove • Play in Sync • Immediate • Random Groove/Fill • Random Groove • Loop • Move Up • Move Down • Stop Slot Actions The available Slot End Actions vary according to whether a slot is set to be a Groove or a Fill.
End Actions for Grooves Random Groove/Fill When the Groove ends, any available Groove or Fill in the Palette is played. Random Groove When the Groove or Fill ends, a random Groove from the Palette is played. Loop When the Groove ends, it is played again. Default End Actions Move Up When the Groove ends, the next slot up in the Palette containing a Groove is played. Move Down When the Groove ends, the next slot down in the Palette containing a Groove is played.
5:7 Importing BFD 1.x Grooves and MIDI files Importing BFD 1.x Grooves and Bundles Groove formats BFD2 Groove files are stored in a proprietary format which allows the software to associate events with specific articulations, and are therefore independent of MIDI mappings. A Palette lets you assemble up to 128 Grooves, while a saved Palette also includes the state of the entire Grooves page. On the other hand, BFD 1.
Importing MIDI files into the Palette BFD2 allows you to import a MIDI file into a slot in the Palette, and optionally split the file into smaller Grooves to be placed on ascending slots beginning with the destination slot. Initiating MIDI import There are two ways of initiating the MIDI import process. Using drag & drop Drag & drop a MIDI file onto the destination Palette slot from a system file location such as the desktop or a folder window.
5:8 Groove and Palette Info Inspectors The Groove and Palette Info Inspectors displays and allows you to edit additional information for loaded Grooves and the entire current Palette. Documenting Grooves and Palettes You can set a number of text fields for documenting information about currently loaded Grooves and Palettes, such as the name, recommended tempo, time signature and musical genre.
Palette Info inspector The following information is available, and can be edited, for the currently loaded Palette if one has been loaded. If you have assembled your own set of individual Grooves in the Palette, this information is empty. With the exception of the rating, any changes are stored with the Palette when it is next saved. Star rating If the Groove Info inspector is currently showing, click the Palette button in order to view the Palette Info Inspector.
5:9 Saving and exporting Grooves Saving Grooves If you create a new Groove or modify an existing Groove, it is likely that you will want to save your Groove into the BFD2 database. With the desired Groove selected, use the Save Groove... function in the BFD2 Save menu (located in the Control bar). A system file save dialog is displayed, prompting you to save the Groove to disk.
Using drag & drop to export Grooves You can also drag and drop to export a single or multiple Groove selection either to a MIDI file or to a MIDI or audio instrument track in your host sequencer. The same MIDI export preferences described above also apply to drag & drop exports. To initiate a drag & drop export, select one or more Grooves in the Palette and drag them outside the BFD2 window.
5:10 Saving Palettes To save the current Palette, use the Save Palette function on the BFD2 control bar Save menu. A system file save dialog is displayed, prompting you to save the Palette to disk. Save location When you save your own Palettes, you are prompted by default to save them in the user level BFD2 folder as follows: /Grooves If you wish, you can save them in any other folder within the Grooves folder.
chapter 06 GROOVES PAGE part 2 editing, recording and groove FX 6:1 Introduction to the Editor The BFD2 Groove Editor provides a complete integrated editing environment for modifying the BFD2 grooves or for creating your own. The Editor shows the contents of the Groove in the currently selected slot. Editor interface overview 3 2 1 4 1. Editor grid 6:2 The Editor grid is made up of articulation lanes for kit-pieces, which contain events to trigger sounds.
Creating a new Groove in a slot If the currently selected Groove slot is empty, a shortcut to the New Groove function is shown in the Editor area. Click it to create a new 1-bar Groove in the slot. Alternatively, even if the slot is currently occupied by a Groove, right-click on a slot and select the New Groove function from the slot context menu that appears.
6:2 Editor Grid View controls Ruler Velocity lane Kit-piece and articulation lanes Events Kit-piece and Articulation lanes Kit-Piece Lane Kit-piece lanes. Note that the kick slot has nothing loaded. If a Kit-Piece is loaded, its name is shown on the kit-piece lane. If no kit-piece is loaded yet in the slot, the slot name is greyed out, and a [!] indicator is shown to the left of the mute and solo buttons.
A single lane is always shown for each articulation, regardless of whether you have mapped the articulation to a MIDI key or not. If an articulation does not exist in the slot’s currently loaded kit-piece, its name is greyed out and a [!] indicator is shown to the left of the mute and solo buttons. While in expanded mode, clicking the button again returns to collapsed mode. When in collapsed mode, you can edit the kit-piece’s events.
Velocity lane Velocity lane Velocity show/hide The velocity lane underneath the Ruler shows event velocities as vertical stalks, with higher stalks denoting high velocity events, while lower velocity events are represented by shorter stalks. You can draw directly onto the velocity lane in order to ‘paint’ in velocity changes quickly. If you hold down the ALT key you can draw lines in the velocity lane, which is very useful programming velocity ‘ramps’.
Zoom and scroll controls Vertical scrollbar Horizontal scrollbar Zoom in/out Zoom in/out The zoom in/out buttons at the bottom-right of the Editor grid control the horizontal zoom level. Scrollbars If the Zoom level results in part of the Groove not being visible in the Editor grid, use the horizontal scrollbar to change the visible area. If there are too many kit-pieces or articulations to be visible at once, use the vertical scrollbar to change the visible area.
6:3 Grooves toolbar To the left of the Editor grid is the Grooves toolbar, containing a number of tools with which to manipulate events in the grid. It also contains the Undo function, which can undo any operation performed in the Grooves page. Left mouse button tool Left and right mouse button tools You can have two tools available at once, one for each mouse button. If you’re using a Mac with only one mouse button available, you can use [CTRL-click] for right mouse button functionality.
Erase tool Click an event or selection of events with the Erase tool to erase it. If you hold down the mouse button in an empty area and drag, a selection box is created. Any events enclosed within the selection are deleted when the mouse button is released. You can also use the DELETE key while in other Edit modes in order to delete the current selection. Mute tool Clicking on a selection of events with the Mute tool causes it to be muted – it becomes silent but is not deleted.
6:4 Other Editor functions A number of additional editing functions are available in the Editor area. Editor display settings Grid controls Editor display settings Edit menu Grid-based destructive processes Follow If you’re zoomed into a Groove so that only part of it is visible, enabling the Follow function causes the display to scroll and follow the playback position indicator. Focus By default, the Editor shows the currently selected Groove.
Edit menu The Edit menu allows you to perform several selection and editing operations. You can also perform these operations using keyboard shortcuts, although many hosts do not allow all keyboard events to get through to BFD2. In such cases, the Edit menu is invaluable. A summary of the Editor’s keyboard shortcuts is given later in this section. Select all events This function selects all events in the current Groove.
6:5 Combining elements of other Grooves You can combine elements of any Groove in the Palette with the currently selected Groove. Firstly, select the destination Groove for editing. Then expand the relevant source Groove in the Palette so that its kit-piece components are showing. Make sure you click on the expand/collapse button to expand the source Groove – clicking anywhere else in the slot results in the Groove replacing the current selection and being shown in the Editor.
6:6 Recording Grooves via MIDI BFD2 provides the ability to record a new Groove, or add events to an existing Groove, using MIDI input in real time. It is not possible to record directly onto the Drum Track. All recording is conducted only on the current Groove selected in the Palette, which is displayed in the Editor.
6:7 Groove FX panel Power Quantize effect Simplify effect Double/ Half-time effect Compress effect Swing effect Humanize effects Apply Show/hide functions advanced Groove FX The Groove FX section is a set of effects that allow you to manipulate the velocity and timing of the contents of the Groove engine.
Quantize effect The Quantize effect allows you to apply a variable amount of non-destructive quantize to playing Groove events. You can quantize to a variety of resolutions, with optional swing. This is a non-destructive Quantize function as opposed to the destructive Quantize function in the Editor Functions. Quantize type Select a timing resolution using this drop-down menu.
Swing effect The Swing effect applies a variable amount of non-destructive swing to playing Groove events. A number of timing grids are available, with variable amounts of swing. This is a non-destructive Swing function as opposed to destructively quantizing events to a swung grid in the Editor Functions. Also, within the Groove FX section, do not confuse the Swing effect with the Q-Swing parameter in the Quantize effect.
chapter 07 GROOVES PAGE part 3 auto-play, drum track and other ways of using grooves 7:1 Auto-Play mode Auto-Play vs. MIDI triggering MIDI Triggering BFD2’s Grooves can be triggered with MIDI notes – by default playing while the note is held down. Optionally, you can enable Latching mode in the Grooves preferences, which toggles playback of a Groove when its MIDI note is played. As described in chapter 5, a Groove’s playback behaviour when it is started and when it ends are configurable.
Current When playback is started the currently selected Groove in the Palette is played, following the behaviour defined by Groove Actions. Since the currently selected Groove is also the Groove shown in the Editor, this Auto-Play mode is very useful when editing a Groove. Set its End Groove Action to ‘Loop’ so that the Groove keeps looping while you edit. Clicking on another Palette slot that contains a Groove causes it to start playing and stops the original Groove.
7:2 Drum Track Introduction The Drum Track allows you to put together a sequence of Grooves to form an entire track of drums. Enabling the Drum Track The Drum Track remains inactive until Auto-play is enabled and the Auto-play Mode is set to ‘Drum Track’. Drum Track synchronization Playback follows the host tempo and time signature if you are running BFD as a plugin within a host, and synchronizes to its the host playback position when the host transport is running.
7:3 Drum Track display Loop start marker Scrollbar Start marker Track ruler Insert Position marker marker Loop end marker Parts Track lane Zoom in/out Track ruler The ruler represents the Drum Track’s timeline in bars and beats. Track lane Grooves are added as Parts into the Track lane using drag & drop. Only one Part can play on the Track at any one time! Position marker The blue playback position marker indicates the current playback position when the Drum Track is playing.
7:4 Working with the Drum Track Adding parts to the Drum Track Dragging a Groove to the desired point in the track, represented by the insert marker To add a Groove as a Part on the Drum Track, drag and drop any groove from the palette to the desired point in the Drum Track. Here, the Groove has been dropped into position, creating a new part on the track Once a Groove has been dropped onto the Drum Track, it is referred to as a ‘Part’.
Moving selected Parts To move Parts on the Track lane select one or more parts and then drag them along the Track lane. The position at which they will be dropped is shown by the insert marker. Release the mouse button to drop the part at the desired position. If there is a gap of the same or greater size as the moved Part between the insert marker and another Part in the track, the Part simply slots into the gap.
7:5 Loading, saving and exporting the Drum Track Saving and loading Drum Track contents You cannot load and save only the contents of the Drum Track, since they are dependent on Grooves in the Palette. Therefore, the Drum track can only be saved and loaded along with the Palette. Exporting the Drum track as MIDI You can export the entire Drum Track as a MIDI file by using the Export Drum Track MIDI... function on the BFD2 Control bar Save menu.
7:7 Using BFD2’s MIDI Out In compatible hosts, you can use the output of the BFD2 plugin’s Groove engine as a MIDI input stream to trigger other instruments on entirely different MIDI tracks. Currently, the only plugin format that supports this feature is VST, and even then only in some hosts – the main sequencing hosts that include this functionality are Ableton Live and Steinberg’s Cubase and Nuendo.
chapter 08 MAPPING PAGE key and automation mapping 8:1 Overview The Mapping page allows you to map MIDI control devices and host automation parameters to BFD2’s articulations and software controls. Key mapping view Automation mapping view Loading and saving maps (sections 8:2, 8:3) You may not even need to use the Mapping functions as BFD2 comes supplied with a number of pre-made maps for common pad controllers and electronic drumkits.
8:2 Loading in the Mapping page Loading key maps To load a key map, click the Load button in the BFD2 Control bar and use the Load Key Map... function on the Load menu that appears. This opens the key map chooser. All available key maps are displayed with an image representing their contents. Delete key map from database Sticky button Key map listing: click to select or double-click to load Info Click to load the selected key map To load a map, select it by clicking on it and then click the Load button.
Current Key Map indicator The key map currently loaded into BFD2 is shown here. If no map has been loaded, the factory default BFD 2.0 key map is indicated. If you have made any modifications to the current map since it was loaded, an asterisk is shown next to the current keymap name. Import BFD1 Map This function is provided in case you are a previous BFD 1.x user, and already have a custom keymap that you would like to use in BFD2.
Loading Automation maps To load an automation map, click the Load button in the Control bar and use the Load Automation Map... function on the Load menu that appears. This opens the automation map chooser panel. This panel operates in almost exactly the same way as the key map chooser described previously, with two differences: • It displays and allows you to load automation maps instead of key maps.
8:3 Saving in the Mapping page The Mapping page allows you to save a number of different types of files. The save functions are accessed from the Load menu on the BFD2 control bar. Save Key Map This function opens a system file save dialog, prompting you for a filename in order to save the current articulation mappings as a BFD2 key map.
8:4 Key mapping view BFD2’s keymapping mapping process involves dragging and dropping a kit-piece from the kit-piece listing to a MIDI key in the keyboard layout. Kit-piece listing Clear All Keys Keyboard layout Selected key MIDI event log Keyrange selector Mapping inspector Kit-piece listing The kit-piece listing shows all the kit-piece slots in the current kit size.
Key labelling Keys containing a single articulation mapping are shown in the following format: [Slot name] : [Artic index] [Kit-piece] [Articulation] If more than one articulation has been mapped to a key, it is labelled as follows: [no.
Single-articulation previews If a key contains a single articulation, click the key while holding down the ALT key to hear a preview of the articulation. For quieter velocities, click towards the left of the key. Clicking the key towards its right results in higher velocity previews. Previews are not available for keys containing multiple articulations, or for keys containing a single articulation of a non-loaded kit-piece (labelled with a (!) indicator).
8:5 Working with the key mapper Mapping an articulation to a MIDI key 1. Using the keyrange selector, select the desired part of the keyboard 2. Drag & drop the kit-piece to a key. If you want to move to a different area of the keyboard without abandoning the drag & drop operation, move the mouse cursor at the top or bottom edge of the keyboard layout, so that the viewed area scrolls up or down the keyboard. 3.
Layering multiple articulations on a single key You can place as many articulations as you like, from any kit-pieces, on a single key. This offers a more advanced means of layering sounds than using the Link function in the Kit page. Simply keep dragging additional articulations from any kit-piece to the same key. Please note that you cannot layer slot choke articulations.
8:6 Mapping inspector When any MIDI key is selected by clicking on it or playing the note via MIDI (as long as the Select keys with MIDI notes preference is enabled), the mapping inspector displays a number of settings for the key, which can be applied to any of the articulations currently mapped to it. Articulation list Selected key Variable articulation controls Low & High velocity Articulation list Each articulation that has been mapped to the key is shown in the articulation list.
8:7 Introduction to BFD2 automation Overview BFD2 allows you to change most of its controls over time by using hardware controllers or messages from your host. MIDI continuous controllers (MIDI CCs), MIDI notes and host automation parameters can be assigned to the available software controls. MIDI CCs and host automation MIDI CCs and host automation both have their own set of advantages and disadvantages. BFD2 supports both methods so it’s entirely up to you which to use.
Automation view interface Learn mode Delete selected mapping Automation type Clear All Auto Key and Auto buttons BFD2 parameters Automation source table Key and Auto buttons If the Mapping page is currently in key mapping view, click the Auto button to show the automation mapping view. Click the Key button to return to key mapping view. Automation type These three buttons allow you to choose between the 3 automation mapping types. Each automation type covers a different type of automation method.
Clear All Auto Click this button to clear all assignments for the current automation type. The labelling of this button changes to reflect the current automation type. BFD2 asks for confirmation before applying this function. Learn mode With the Learn mode button enabled, sending a MIDI CC or playing a MIDI note causes the relevant CC or note to become selected in the automation source table.
8:8 Mapping MIDI CCs to BFD2 controls To map MIDI continuous controllers (CCs) to BFD2 controls, select ‘MIDI CC’ as the automation type. Automation source table in MIDI CC view When ‘MIDI CCs’ is selected as the automation type, the automation source table switches to MIDI CC mode. It is comprised of three columns. CC ID There are 128 available CCs per MIDI channel in the MIDI specification, with an ID from 0-127. MIDI CCs are listed in the table arranged numerically by their IDs.
8:9 Mapping MIDI notes to BFD2 controls To map MIDI notes to BFD2 controls, select ‘MIDI note’ as the automation type. Automation parameters table in MIDI note view When ‘MIDI note’ is selected as the automation type, the automation source table switches to MIDI note mode. It is comprised of three columns. Note There are 128 available notes per MIDI channel in the MIDI specification. Notes are arranged in the table from the lowest note (C-2) to the highest note (G8).
8:10 Mapping host automation to BFD2 controls To map host automation to BFD2 controls, select ‘MIDI note’ as the automation type. Automation parameters table in host automation view When ‘Host automation’ is selected as the automation type, the automation source table switches to host automation mode. It is comprised of two columns. Auto ID There are 128 available host automation parameters, with an ID from 0-127. Host automation parameters are listed in the table arranged numerically by automation IDs.
chapter 09 ELECTRONIC DRUMS AND BFD2 9:1 Intoduction to using electronic drumkits with BFD2 BFD2 supports the use of electronic drumkits for triggering sounds. Pre-made maps are provided for most kits. However, if you want to customize the response, or if you need to map a kit that isn’t supported in the provided presets, this section explains how to best use BFD2’s mapping system for working with electronic kits. Most triggers/pads on electronic kits are fairly straightforward to map to BFD2’s sounds.
Bus traffic problems You may find it particulatly difficult to achieve low latencies on laptops and smaller machines with limited expansion potential – no ability to install dedicated internal drives or audio interfaces. This means you may need to chain devices on the same firewire bus, for example. This often leads to dropouts at lower latencies. It is highly recommended to run the hard drive containing BFD2’s sounds from a separate bus to the audio interface.
9:3 Variable hihat control Overview As discussed in the last section, variable hihat MIDI recordings can be tedious to edit or quantize. Therefore, if you use this method of hihat control, it’s advisable to either make sure your takes are spot-on, or to be resigned to tedious editing operations. Of course, if you’re predominantly using BFD2 for playing live, this is not a concern.
Assigning the hihat height pedal MIDI CC The hihat pedals of most electronic kits transmit a MIDI continuous controller in order to represent the position of the pedal between open and closed. A MIDI CC value of 0 means that the pedal is open (fully up). As the pedal is moved down, the value of the MIDI CC increases. The maximum possible value is 127. Usually, the MIDI CC used is #4.
Possible problems Apart from a problem in getting the MIDI to BFD2 (check your host MIDI filter settings), it is possible that your pedal may not be sending out the maximum possible range of MIDI CC values. For example, its maximum value (when fully closed) may be 90 instead of 127. If this is the case, adjust the transition point between closed and 1/4-open so that it is at or below 90, and move the other sliders to appropriate points over the rest of the available range moving down towards 0.
9:4 Other settings related to hihat control Preferences Hihat reopen threshold Most drum brains constantly send out hihat pedal movement MIDI CC messages while the pedal is moved. One of the few brains that does not operate in this manner is the Roland TD20, which only sends out hihat pedal CC messages during and very close to a hihat trigger.
Hihat choke fade settings The hihat has more choke fade settings than other kit-pieces, because of its more complex nature. The default Hihat choke fade settings should be adequate for most purposes, using both e-drums and more conventional input means. Please see 10:5 for more details about the fade settings. The default values are as follows: Hihat choke fade (base) Hihat choke fade (range) Hihat closed tip choke fade Hihat pedal choke fade 1.000 1.000 0.030 0.
9:5 Positional snare control The BFD2 soundset features a ‘half-edge’ snare articulation, which is the head of the snare struck halfway between the centre and the edge. The regular ‘hit’ articulation, on the other hand, is a result of the snare head being struck in the centre. The Variable snare articulation allows you to access the hit and half-edge articulations using the positional sensing of snares in electronic drum systems such as those by Roland.
chapter 10 BFD2 PREFERENCES customizing BFD2 10:1 Preferences page overview Click the Preferences button in the BFD2 Control bar in order to show the Preferences page. Sub-categories containing relevant preferences Preferences toolbar containing various categories BFD2 contains two types of preferences: 1. Session preferences: These are settings that are not needed often enough to merit a place on the main user interface.
10:2 Data preferences Preference Options RESET ALL PREFERENCES Clicking this button, and agreeing to the subsequent confirmation dialog, results in all your preference settings being trashed, reverting to factory default settings. Scan Data Paths for new files Clicking this button causes BFD2 to scan its data locations for new files. The locations that are scanned include any set up in the Data Path setting (see below) and the BFD2 user storage location.
10:3 Groove preferences Show Groove Session preferences There are a number of session-based preferences concerning the behaviour of the Groove engine. You can view and edit these settings by clicking this button, which is a shortcut to the Session Preferences category, also accessible using the Session button on the Preferences toolbar. Session preferences are saved with a BFD2 preset or host project containing the BFD2 plugin. Therefore, they can be set independently for each BFD2 session.
Editor Preferences MIDI export Mode This setting specifies the track structure of exported MIDI files in BFD2. You can choose between 3 settings: • One track for all kit-pieces • One track per kit-piece • One track per articulation Record lead-in (bars) You can set a lead-in time in bars for BFD2’s Groove recording functions. Recording only starts after this time when hitting the Play button while MIDI recording is armed. Simply enter a number of bars to use as a lead-in.
High-accuracy song position display This setting is enabled by default and results in a highly accurate position marker in the Groove Editor grid. This can cause more CPU usage on some systems so if you find you are experiencing audio artifacts when using the Groove Editor, disable this setting. Metronome Metronome type There are a selection of metronomes included with BFD2. Select the one which suits you best.
10:4 Session preferences Session preferences are settings that are not needed often enough to merit a place on the main interface, but which are useful to save on a session-by-session basis. If you want any settings in this category to be applied when BFD2 is launched, you need to create a suitable startup preset with BFD2 set up the way you want it. To do so, proceed as follows: 1. set BFD2’s parameters as you want them 2. set up BFD2’s session preferences as desired 3. save a BFD2 preset 4.
Session Playback preferences Revert to factory defaults Clicking this button reverts to the factory defaults for MIDI session preferences. Auto-fill period This setting defines how often fills are triggered when using the Auto-fill function. Set the number of bars you want between fills here.
10:5 MIDI preferences MIDI Channels Show Session MIDI There are a number of song-based preferences concerning the behaviour of the Groove engine. Click the Show MIDI Song Settings button to view and edit these Preferences. Song preferences are saved with a BFD2 program. Therefore, they can be set independently for each BFD2 session. Song preferences allow you to save a set of defaults to use as initial settings when BFD2 is launched.
Key Mapping preferences These settings concern the behaviour of the MIDI page. Prompt for Choke note overwrite With this setting enabled, attempting to map a slot Choke articulation to a key already containing other articulations results in a warning and request for confirmation. Assign only 1 note per articulation When enabled, this setting disables the layering of multiple articulations on a key.
10:6 Engine preferences Streaming Engine Load all to RAM With the Load all to RAM setting enabled, BFD2 loads the entire kit to RAM, and no data is streamed from the disk. Please ensure you have enough RAM before using this option! The size of each kit-piece is shown in the Info tab of the kit-piece chooser panels. To use this option with the highest kit-piece detail levels, you would realistically require several gigabytes of RAM.
RAM buffer This value, in sample frames, is the size of the portion of each sound held in RAM to enable low latency operation within BFD2 (to circumvent the inherent latency involved with hard disk seek times). The portion held in RAM plays while BFD2’s streaming engine cues up the rest of the data from the hard disk. A larger value gives the hard drive longer to deliver the data, but is more demanding on RAM.
Anti-machinegun mode With this setting enabled, BFD2 never plays the same velocity layer twice in sucession for an articulation. This effectively removes the ‘machinegun’ effect which can make drum rolls and other intricate parts sound unrealistic. If the Vel Rnd parameter is set to 0 for any articulation, it is not affected by the Anti-machinegun mode setting. See section 2:8 for more information on using the Vel Rnd parameter for articulations.
Special concerns for hihats Hihats have a few extra fade parameters, as in many ways the hihat has the most complex choking behaviour within a drumkit. There are 3 separate choke fade types for hihats: pedal notes and closed tip notes have separate choke fade times to the rest of the hihat’s articulations.
10:7 GUI preferences Control behaviour Circular knob motion When this setting is enabled, circular mouse movement is required to control knobs in BFD2. When the setting is disabled, knobs are controlled by vertical mouse movement. The setting is disabled by default. Left-right velocity-scaled preview support With this setting enabled, BFD2 reverts to a BFD1-style preview mechanism of velocity increasing from left to right.
Mixer GUI Options Show mixer signal routing Show Utility panel Show ambience channels Show aux channels Show direct channels Regular channel view These preferences set the default states of the mixer view switches in the Mixer page toolbar (see section 3:4 for details). Animate mixer meters Animate FX meters These settings allow you to disable metering on mixer channels and in FX interfaces.
Chapter 11 PROGRAMMING TIPS 11:1 Building the kit Choose the right kit-pieces Choosing the right Kit-pieces is paramount to getting the right sound. If you want a tight kick sound, start with the tightest-sounding kick you can find! Pay close attention to the composition of your kit and be creative – BFD2 allows you a lot of freedom by allowing you to mix and match toms and to load any type of Kit-piece into any type of slot - it’s very easy to use a floor tom as a kick, for example.
11:3 Using articulations effectively The various articulations are a very important aspect of BFD2, and making intelligent use of them can contribute to the realism of your drum tracks. Articulations such as snare drags offer quick access to elements of a drum performance which are not always straightforward to program or play. Other articulations represent different ways of playing a Kit-Piece.
11:4 Layering Introduction to layering This technique is widely used in modern production, whereby a sampled snare and kick are layered over the original drum track’s kicks and snares, doubling them up. The usual method for this production trick, called ‘drum replacement’, is fairly cumbersome - you need to isolate the kicks and snares from any bleed in their tracks, and use the transients to trigger the required sounds in a sampler. When using BFD2, it’s far easier.
11:5 Programming patterns A guide to drum pattern programming is beyond the scope of this manual - like good melody and harmony parts, there are no shortcuts to good drum composition! However, here are a few hints and tips to point you in the right direction. Drumming fundamentals Consider how a drummer would play a pattern. Most drummers have 2 hands and 2 feet: 4 limbs in total. It therefore logically follows that generally, up to 4 things can be played at any one time.
chapter 12 MIXING AND EFFECTS USAGE Overview The aim of this chapter is to help you approach mixing with BFD2, covering everything from use of mic channels to the built-in FX suite. Mixing advice These sections give you pointers on mixing – from using BFD2’s built-in control over mic channels, bleed and panning to routing functions, external processing and understanding how to mix each part of the kit.
12:1 Mixing basics Mic channel usage Using ambience It’s important to remember you do NOT need all mic channels at maximum levels in the mix. In most normal mixing situations, drum ambience is turned down to quite subtle levels. You wouldn’t normally have three wet reverb signals turned up as loud as the dry sound, so why do it with real ambience? The ambience in BFD2 is there if you need it. If you don’t, turn it down and work with the direct signals.
Approaching EQ and compression EQ (equalization) and compression can be used in a variety of ways. The traditional approach is to use these processors in a subtle way so that instruments fit together better in the mix, tame over-dynamic tracks to ‘level them out’ more, and so on. In terms of getting a good mix, well-balanced levels (between the various drum mic channels, and between the drums and the other instruments in your song) tend to be more important than EQ or compression.
12:2 EQ and filtering EQ BFD2’s EQ is based on a well-known classic console design. It offers 4 bands of EQ, including two parametric mid bands. Low and High bands The Low and High bands are switchable between a bell (with a fixed Q of 2.5 octave) and a shelving response (with a fixed rolloff of 12 dB per octave). • Low band frequency range: 40 to 600hz • Low band gain range: +/- 16.
Filter Mod This is a state-variable self-oscillating multimode filter with a response of 12 db per octave. It has a built-in envelope follower to modulate the filter’s cutoff frequency relative to the input. This stage is modelled on an analog full-wave rectified envelope follower. Additionally, the filter frequency can be modulated at audio rate by the input.
SC Enabling the SC button results in the FilterMod effect using the channel’s sidechain input as the source for the enveloper follower and audio-rate FM features. This means you can use other channels to modulate the filter cutoff. This function allows you to be very creative with the filter – here’s a few ideas to try out: • for quick and dirty LFOs, try tuning a kick down really low and using it as the filter FM source, perhaps after some additional processing.
Comp Chan The CompChan (channel compressor) is derived from a classic ‘feedback-based FET limiting amplifier’ design. It is also what is known as a ‘fixed-threshold’ design – the threshold at which compression starts is not adjustable. In practice, this means you may need to adjust the input and output levels when changing ratios. Input & Output This control varies the input level going into the compressor. Once the input level has reached the internal threshold, compression begins.
Noise Gate A noise gate is a type of dynamics processor that mutes or attenuates the input signal until its amplitude exceeds an adjustable threshold level, at which time the gate ‘opens’ to allow audio through at its actual level. They are often used during drum mixing in order to isolate drums within signals containing bleed or spill from other drums. Another common use is to reduce the decay of toms and kicks. Noise gates are often referred to simply as ‘gates’.
12:4 Distortion Drive BFD2’s Drive effect offers 4 distortion circuit models, useful for adding colour, grit or more extreme distortion to your pristine drum sounds. Mode Diode Diode clip circuits are found in countless guitar pedals and other distortion units. It gradually drives the input throughout the amplitude range. It shapes the input signal’s amplitude as shown in fig.1. OTA (Operational Transconductance Amplifier) This mode models the behaviour of an overdriven OTA chip.
Dirty & Clean The Dirty control sets the amount of post-distortion signal that is heard at the output. The Clean control sets the amount of the clean signal, which is comprised of the signals filtered out by the low-pass and highpass crossovers before the distortion stage. In other words, all the frequencies removed from the signal by the filters.
12:5 Other effects Gain The Gain effect is a simple tool for increasing or decreasing a channel’s gain. Gain This is the only control on this effect, and lets you increase the channel’s gain up to 18 dB, or decrease it up to -inf dB. Delay BFD2’s Delay effect can operate as a stereo or mono delay line, depending on whether it is used on a stereo or mono channel. Sync & Time The delay time can be set either in absolute time values in seconds or in tempo-based values.
Flanger The Flanger effect is a short modulated delay line with feedback to the input. It is used for a sense of movement and for psychedelic effects from the subtle to the extreme. The modulation source is a sine LFO with adjustable frequency. Freq The Freq (frequency) control affects the speed of modulation of the delay time. Depth The Depth control adjusts the amount of modulation of the delay time. Display The needle display in the Flanger effect represents the current delay time.
RingMod A ring modulator multiplies two signals together, giving you the sum and the difference between them and the output. The RingMod in BFD2 has an internal oscillator that provides one of the signals, the other being the drum sound passing through it. This effect is great for radical timbral changes for more experimental-sounding mixes. Mode Changes the waveshape of the internal oscillator which is multiplied with the audio input to the effect.
12:6 Mixing each part of the kit Kicks EQ The ‘low end thump’ of a kick lies in the 40-80 Hz range - many engineers refer to this as the ‘chest’ region - because you can feel it in your chest, rattling your ribcage! The main body of a kick exists in the 80-120 Hz range, with the the fundamental frequency of most kicks, depending on size, being at around 80 Hz. The body and resonance of the drum shell is found in the 160-500 Hz range.
Dynamics While compression can tame hats and balance the levels of different hihat articulations, remember that it’s always nice to retain a good amount of dynamics for the hihat, as this can contribute a lot to the feel of a groove. Therefore, try not to over-compress hihat channels. You can, of course, adjust the levels of individual hihat articulations in the kit-piece inspector, something which is sometimes vital as EQ-ing in particular can pronounce the energy of non-closed articulations.
12:7 Routing scenarios Creating sub-mixes for processing mic channels together You may want to process a number of mic channels together through the same set of FX. Let’s say you want to group the kick in and kick out channels, and apply some parallel compression to them. • Create an aux bus and set it to mono mode. • Set the kick in and kick out Output selector to the Aux channel you just created. • Adjust the levels of the kick in and kick out channels to achieve the desired balance between them.
12:8 External processing The following techniques involve knowledge of routing and other functions in your host, and familiarity with other software. Note that this section is intended as creative advice with the best intentions. Please don’t ask us how to achieve these techniques! There is a wealth of information available via search engines such as Google and Yahoo. Artificial reverb Don’t be afraid to use an artificial reverb, especially on the snares and toms.