
Installation Instructions
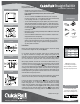

QuickRail Accessories
Bracket Kits
45° Bracket Kit
Curved Bracket Kit
Multi-Angle Bracket Kit
Stair Rail Bracket Kit
Straight Rail Bracket Kit
Posts
Colonial Porch Posts
Column Wraps
Complete Post Kits
Post Sleeves
UltraPost Kits
Post Accessories
Ball Post Top
New England Post Top
New England Post Base
Gothic Post Top
Rail Kits
Gate Kits
Stair Rail Kits
Straight Rail Kits
Locate the crush block and cut to the proper length
(Figure 6). The formula for determining the correct crush block
length is: Desired clearance from bottom rail to mounting surface + 3
1
/
4
" = length
of crush block.
Note: Spindle lengths are sized for a traditional 2" clearance from
bottom rail to mounting surface. Once the block is trimmed, insert it into the pre-cut
hole on the underside of the bottom rail.
Slide a bottom rail bracket cover onto each end of the bottom rail and attach the
bottom rail to the bottom rail mounting brackets, making sure the rail sits on the
resting flanges. Install two of the supplied 1" long screws into each mounting bracket
(1 on each side) in the middle slot of the bracket. The screws should be located as
close to the radius end of the slot as possible, which is approximately
1
/
2
" from the
end of the rail (Figure 7).
Note: If using a cordless drill, be careful not to strip the
screws. Slide the covers toward the post until they snap on to the mounting brackets.
An audible “click” should be heard, signifying that the covers are now secure.
To determine the location of the top rail mounting brackets, insert two spindles in the
bottom rail, one in each of the pre-cut holes that are closest to each end of the rail.
Slide a top rail mounting bracket on each end of the top rail so that the rail sets on
the resting flange. Place the rail on the spindles, inserting the two spindles into the
respective pre-cut holes in the top rail. Push down on the top rail to make sure it is
resting securely on top of the spindles. Before marking the locations of the mounting
brackets, make sure the spindles are plumb and the top rail is level. Using a pencil,
mark the location of the mounting brackets so they can be attached to the mounting
surface (Figure 8). Remove the top rail and top rail mounting brackets and secure
the brackets to the mounting surface using eight of the 1
1
/
2
” screws supplied and the
marks made previously.
Insert all of the spindles into the pre-cut holes in the bottom rail.
Slide a top rail bracket cover on each end of the top rail. Place the top rail on the
spindles, inserting the spindles one at a time while holding the top rail at an upward
angle (Figure 9). Once all of the spindles are inserted into the top rail, it should be
resting on the top rail mounting bracket resting flanges.
Install four of the supplied 1” long screws into each mounting bracket (2 on each
side) in the top and bottom slots of the brackets. The screws should be located as
close to the radius end of the slot as possible, which is approximately
1
/
2
" from the
end of the rail (Figure 10). Slide the covers towards the mounting plates until they
snap onto the mounting plates. An audible “click” should be heard, signifying that
the covers are now secure.
Figure 9
Figure 10
1
2
"
Top
Figure 7
1
2
"
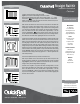
Straight Rail Kit
Installation Instructions
- Continued -
®
Need help? 1.800.446.3040 • www.fypon.com
Figure 8
®
Warranty Information
For complete warranty details
and exclusions, visit the Product
Support section at www.fypon.com.
Figure 6
Crush Block