Gaggenau Instruction Manual Steam Oven BS 220/221 BS 224/225
Table of Contents Safety Notes Before Use Intended Use Safety while Steaming Damage to the Appliance 4 4 4 4 4 Operating for the First Time 5 Avoiding Damage to the Appliance and the Cabinet Steam Oven and Cabinet Fronts Avoiding Damage to the Oven Interior 5 5 5 Features of your New Steam Oven Steam Oven Display and Controls Keys 6 6 7 7 Accessories 8 Heating Modes 9 Water Tank 10 First Settings after Installation Note Setting the Clock Choosing the Time Format Temperature Unit °C or °F Sett
$ Safety Notes Before Use The appliance is only guaranteed safe to use if installed by a specialist in accordance with the installation instructions. The installer is liable for any damage resulting from incorrect installation. The appliance may only be connected by a licensed specialist. The local electricity supplier’s regulations and construction regulations apply. Read the instruction manual carefully before operating the appliance.
Operating for the First Time Remove the packaging from the appliance and dispose of it according to local regulations. Be careful to remove all accessories from the packaging. Keep packaging elements and plastic bags away from children. Check the appliance for transport damage after unpacking it. Do not connect the appliance if it has been damaged. The appliance must be connected by an authorised specialist. No warranty claims can be lodged for any damage resulting from incorrect connection.
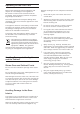
Features of your New Steam Oven Steam Oven This manual applies to different models. The pictures of this manual show the model BS 224/225. The models BS 220/221 feature display and controls on the bottom front. The operation is identical for all models. These models are especially suitable for installation above an oven. The water tank is on the opposite side to the door hinge. 12 30 Display and controls The models BS 224/225 feature display and controls on the top front.
Display and Controls Display Touch keys In the top part of the display is the status bar or a call up menu. The lower part shows the different settings. The keys on the left and right beside the display are touch sensitive. The function of the keys depends on the chosen setting. The icon beside the key shows the function of the key. 12 30 Function selector Temperature selector Use the left knob to select the cooking mode you will use to prepare your meal. You can turn the knob to the right or left.
Accessories As standard, your appliance comes with the following accessories: • Stainless steel cooking insert GN 2/3, 40 mm deep • Stainless steel cooking insert GN 2/3, perforated, 40 mm deep • Wire rack You can order the following special accessories: 8 • KB 220-000: Stainless steel cooking insert GN 2/3, 40 mm deep • KB 220-324: Stainless steel cooking insert GN 2/3, perforated, 40 mm deep • KB 220-114: Stainless steel cooking insert GN 1/3, 40 mm deep • KB 220-124: Stainless steel cooki
Heating Modes Display Heating mode Use Steaming temperature 30 - 100 °C Suitable for fish, vegetables and side dishes, extracting fruit juices and blanching. The dishes are completely surrounded by steam. 40 Dough proofing temperature 30 - 50 °C Raising yeast dough, the perfect temperature setting is 38 °C. The moisture distributes the heat evenly and avoids the surface of the dough drying out. 50 Defrosting temperature 40 - 60 °C Even and gentle defrosting of vegetables, meat, fish and fruit.
Water tank When you open the door of the oven, you will find the water tank on the side. Depending on the model, the tank is on the right or left side. Before use, fill the water tank to the MAX marking with fresh, cold water. If the water in your area is very hard, it is better to use filtered water or non-carbonated bottled water. Do not use distilled water or other liquids. Firmly close the lid of the tank. This is important for the correct functioning of the oven.
First Settings after Installation When your new steam oven has been connected, the first settings menu appears on the display. You can set the • • • • clock, time format, temperature unit, water hardness. Note The first settings menu appears only after the appliance has been connected or if the appliance is without electricity for several days. Refer to the chapter basic settings if you wish to change these parameters at any time. Setting the Clock The clock function appears on the screen.
Setting the Water Hardness 12 1 Use the test kit included to test the water hardness of your tap water. Fill the phial with mains water up to the 5 ml marker. 2 Add indicator solution drop by drop until the colour changes from purple to yellow. Carbonate hardness content: 1 drop = 1°KH = 1.25°e = 1.8°f Please note: count the number of drops that are necessary and gently shake the phial after each drop. 3 Use the d / e keys to enter the value between 1 and 18. Pre-set value is 12.
Calibration The boiling point depends on the air pressure. The higher the altitude, the lower the air pressure, and also the boiling point. During the first steaming after installation, the appliance calibrates the boiling point. During calibration, the appliance is adjusted to the pressure of the altitude where the appliance is installed. Calibrating the Steam Oven 1 Remove all accessories from the oven (cooking inserts, wire rack). The oven must be empty and cold.
Activating the Steam Oven Standby The steam oven remains on standby when no operating mode is selected or the child lock is activated. 12 30 The keys are not activated. The display is not lit. Note: You can choose between different standby screens. Refer to the chapter basic settings if you want to change the standby screen. Note: The display contrast depends on the vertical viewing angle.
Setting the Steam Oven The main operations of your steam oven are easily set using the knobs. Using the right knob you can set the temperature. To switch on the light in the oven, turn the temperature knob one position to the right. Temperature range: Steaming Dough proofing Defrosting Regenerating Low temperature steaming 30 30 40 60 70 - 100 °C 50 °C 60 °C 100 °C 90 °C The light in the oven remains off if the temperature is set below 70 °C. Using the left knob you can set the heating mode.
Note 100 --- If the L symbol appears on the left top side of the display and three dashes instead of the temperature, the water tank is empty. Fill the water tank to the MAX marking with fresh water. If three dashes appear on the display instead of the temperature, the knobs have not been set to the correct position. Check the position of the temperature and function selectors. Current Oven Temperature Display The current oven temperature is briefly shown when you press the a info key.
Cooking Table Important Notes • • The cooking times given are only a recommendation. The effective cooking time depends on the quality of the food, its temperature, the amount and the size of the food. Always preheat the oven. This will guarantee the best results. • If you use only one level, place the cooking insert on the second level from the bottom.
Dish Cooking insert Temperature Moisture in °C in % Cooking time in minutes Potatoes, peeled and quartered perforated 100 100 20-35 Kohlrabi, sliced perforated 100 100 15-25 Leeks, sliced perforated 100 100 5-10 Jacket potatoes (ca. 50 g each) perforated 100 100 25-30 Jacket potatoes (ca.
Dish Cooking insert Temperature Moisture in °C in % Cooking time in minutes Hake, whole, 800 g perforated 90-100 100 20-25 Monkfish fillet, 200 g each perforated 90-100 100 10-15 Bass, whole, 400 g each perforated 90-100 100 15-20 Fish – Low-temperature Steaming • Steaming fish between 70 and 90 °C prevents it from becoming soft und breaking apart. This is especially suitable for sensitive fish. Use the “low-temperature steaming” mode. • • The values are for fillets of fish.
Meat / Poultry – Low-temperature Cooking • Seared meat matures over a longer time at a low temperature in the oven. The food will remain juicy and preserve most of its nutrients. Use the “low-temperature steaming” mode. • • Take the meat from the fridge one hour before cooking. • To prevent the rind from becoming soft, wrap the meat in a roasting bag or heat-resistant plastic wrap after searing before putting it in the preheated oven to mature. Thus, the meat cooks in its own moisture.
Steaming Poultry Dish Cooking insert Temperature Moisture in °C in % Cooking time in minutes Stuffed chicken breast, 200 g each unperforated 100 100 10-15 Poussins, quails, pigeons, 300 g each perforated 100 100 25-30 Turkey breast, 300 g each 100 100 12-15 perforated Side Dishes / Rice The cooking time is a rough value. Observe the manufacturer’s recommendations.
Miscellaneous Dish Cooking insert Temperature Moisture in °C in % Cooking time in minutes To desinfect baby bottles or jam jars wire rack 100 100 20-25 Eggs, size M (5 eggs) perforated 100 100 8-15 90 100 25-30 90-95 100 8-10 Cooked-egg-garnish*, 500 g glass dish / wire rack Semolina dumplings unperforated *Cover cooked-egg-garnish with heat-resistant cling film or aluminium foil. Regenerating (Reheating) • • Reheat previously prepared dishes without loss of quality.
Defrosting • • • • • • Select the “Defrosting” heating mode. The defrosting time given is a rough value. The defrosting time depends on the size, weight and shape of the frozen food. Always freeze your food flat or in single pieces, this shortens the defrosting time. Take the food out of the packaging before defrosting. Only defrost the amount that you will need to prepare. Please observe: defrosted food might not keep and will deteriorate more quickly than fresh food.
Extracting Juice • Place the fruit or berries in the perforated cooking insert. Insert the perforated cooking insert with the fruit on the second level from below. Place the deep unperforated cooking insert one level lower to collect the juice. • • Leave the fruit in the oven until no more juice comes out. You can squeeze the food in a dish towel afterwards to gain the remaining juice.
Timer Using the timer menu you can set the following: M timer N stopwatch P cooking time duration (not during stand-by) O cooking time end (not during stand-by) Calling up the Timer Menu Touch the key beside the symbol timer menu. 12 30 q to call up the If the appliance is on standby, touch any key. Now the display is activated. The info a and timer q symbols are shown. Touch the key next to the timer symbol menu appears. q .
Stopwatch The stopwatch will count the elapsed time up to 90 minutes. The pause function pauses the stopwatch. The stopwatch runs independently of all other settings of the appliance. Starting the Stopwatch 00 00 1 Call up the timer menu. 2 Using 3 Start using the f or g select the stopwatch function N . m key. The timer menu is closed. The timer menu is closed immediately when you touch the b key. 100 100 Pausing the Stopwatch 1 Call up the timer menu. 2 Using 3 Touch the l key.
Cooking Time Duration If you set a cooking time duration for your meal, the appliance switches off automatically after the selected time. This enables you to leave the kitchen while the meal is being prepared. You can select a cooking time between 1 minute and 23 hours 59 minutes. Select the temperature and heating mode and place your meal in the oven. Switching off Automatically 01 20 1 Call up the timer menu. 2 Using f or g select the cooking time duration function P .
Cooking Time End You can program a cooking time end. Example: it is 13:30. The meal will take 40 minutes to cook and must be ready at 15:30. Set the cooking time duration and set the cooking time end to 15:30. The electronics will calculate the start time. The appliance will start automatically at 14:50 and switch off at 15:30. Please note that food which can easily go off should not stay in the oven too long. Note: Always set the desired temperature, heating mode and cooking time duration first.
Child Lock The steam oven has a child lock. It prevents the oven being turned on unintentionally. Supposition: You have to make the child lock available in the basic settings. See chapter basic settings. Activating the Child Lock Supposition: The temperature knob is in the OFF position. 12 30 1 Touch any key. The symbol the centre left key. 2 Touch the key o appears beside o for at least 6 seconds. The child lock is active, the controls are locked. The standby screen and the symbol o appear.
Safety Deactivation For your protection the appliance has a safety deactivation. The safety deactivation switches off the heat if the oven is left on for more than 12 hours without the controls being touched. --- 30 Three dashes appear on the display. Switch the temperature knob off. Then you can operate the appliance as usual.
Changing the Basic Settings Your appliance has several basic settings. You can customize these settings: Turn the temperature knob one position to the right to the light position. • • Call up the basic settings menu with the • Use the centre keys to change the selected setting. You can change several settings individually without leaving the menu. • Touch the b key to exit the menu. All settings are saved. Use the top settings. c key.
Basic Settings Clock 8 00 • Hours / minutes Time format 24 00 • 12 hour format (AM/PM) or 24 hour format Standby screen 8 00 • Clock / empty display Temperature unit • °F or °C Water hardness 12 • Set the water hardness between 1 and 18 Child lock • Child lock key not available / available Exhibition mode The setting w “exhibition mode not active” must be selected and must not be changed. The appliance does not heat up during exhibition mode x .
Care and Manual Cleaning Safety Notes Water Tank $ Warning! Do not clean the hob using high pressure cleaners or steam jets. Clean the water tank with hot soapy water. Leave it to dry with the lid opened. Keep the seal in the lid clean and dry after every use. $ Warning, risk of burns! Before cleaning, wait until the appliance has cooled down. Dry the slot in the oven after every use.
Cleaning Function Stubborn soiling can be loosened using the cleaning function and may then be removed more easily. The cleaning function takes approx. 32 minutes. Leave the oven to cool down completely before cleaning. Take all accessories out of the oven interior. First clean the evaporating dish to avoid residues burning in. How to Proceed 00 30 100 60 00 60 00 59 1 Fill the water tank to the MAX marking with cold water. Do not use distilled water. Fully insert the water tank until it engages.
If you want to stop the cleaning function: Switch off the temperature knob. If three dashes appear on the display: Operator error. Check if you have set the functions and temperature knobs to the correct positions.
Descaling Program To keep your appliance in good working order, you have to descale it regularly. Descale the oven when the descaling symbol n appears on the display. 100 100 The descaling program consists of three steps – descaling and rinsing twice. The descaling program lasts approx. 32 minutes. Always let the program run until it has ended.The oven light is off during the descaling program. Use a sponge to empty the evaporating dish between each of the three steps above.
Tip You can descale the evaporating dish between intervals. Completely fill the evaporating dish with descaling solution and the tank with water. Start the descaling program.
Trouble Shooting In case of a malfunction first check the household fuses. If the power supply is functioning correctly contact your dealer or Gaggenau after-sales service. Please specify the E number and FD number of the appliance when calling our after-sales service. You find these numbers on the rating plate of the appliance. Repairs may only be carried out by authorised technicians, in order to guarantee the electrical safety of the appliance.
Power Cut The appliance bridges a power cut of up to 5 minutes. The operation continues. --- After a longer power cut the appliance will switch off the operation. The x symbol appears on the display and three dashes instead of the temperature. Switch off the temperature knob and switch the appliance back on. The “first settings” menu reappears if the appliance is without electricity for several days. You have to reset the clock.
9000186423 EB 8812 en Gaggenau Hausgeräte GmbH Carl-Wery-Straße 34 D-81739 München www.gaggenau.