
Use & Care Manual

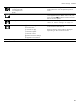
Table Of Contents
- BS 470/471 612 BS 474/475 612 BS 484/485 612
- Table of Contents
- Use and care manual
- IMPORTANT SAFETY INSTRUCTIONS 4
- ]Causes of damage 10
- 7Environmental protection 10
- *Familiarizing yourself with your appliance 11
- KBefore using the appliance for the first time 17
- + Water filter 18
- 9 Activating the appliance 19
- 1Operating the appliance 19
- OTimer functions 21
- FSabbath mode and Yom Tov mode 24
- A Panel Lock 26
- nAutomatic programs 26
- Personal recipes 28
- @Core temperature probe 30
- oHome Connect 33
- QBasic settings 37
- 2 Cleaning and maintenance 40
- 3Troubleshooting 46
- 4Customer service 48
- JTables and tips 48
- 9 Safety Definitions
- IMPORTANT SAFETY INSTRUCTIONS
- READ AND SAVE THESE INSTRUCTIONS
- 9 WARNING
- Proper Installation and Maintenance
- Have the installer show you the location of the circuit breaker or fuse. Mark it for easy reference.
- This appliance must be properly installed and grounded by a qualified technician. Connect only to properly grounded outlet. Refer to Installation Instructions for details.
- This appliance is intended for normal family household use only. It is not approved for outdoor use. See the Statement of Limited Product Warranty. If you have any questions, contact the manufacturer.
- Do not store or use corrosive chemicals, vapors, flammables or nonfood products in or near this appliance. It is specifically designed for use when heating or cooking food. The use of corrosive chemicals in heating or cleaning will damage the applian...
- Do not operate this appliance if it is not working properly, or if it has been damaged. Contact an authorized servicer.
- Do not obstruct oven vents.
- Do not repair or replace any part of the appliance unless specifically recommended in this manual. Refer all servicing to an authorized servicer.
- 9 WARNING
- 9 WARNING
- 9 WARNING
- 9 WARNING
- Fire Safety
- 9 WARNING
- 9 WARNING
- Always have a working smoke detector near the kitchen.
- In the event that personal clothing or hair catches fire, drop and roll immediately to extinguish flames.
- Have an appropriate fire extinguisher available, nearby, highly visible and easily accessible near the appliance.
- Smother flames from food fires other than grease fires with baking soda. Never use water on cooking fires.
- 9 WARNING
- 1. SMOTHER FLAMES with a close- fitting lid, cookie sheet, or metal tray, then turn off the burner. BE CAREFUL TO PREVENT BURNS. If the flames do not go out immediately, EVACUATE AND CALL THE FIRE DEPARTMENT.
- 2. NEVER PICK UP A FLAMING PAN – You may be burned.
- 3. DO NOT USE WATER, including wet dishcloths or towels – a violent steam explosion will result.
- 4. Use an extinguisher ONLY if:
- Burn Prevention
- DO NOT TOUCH HEATING ELEMENTS OR INTERIOR SURFACES OF OVEN - Heating elements may be hot even though they are dark in color. Interior surfaces of an oven become hot enough to cause burns. During and after use, do not touch, or let clothing, potholder...
- Exercise caution when opening the appliance. Standing to the side, open the door (or drawer) slowly and slightly to let hot air and/or steam escape. Keep your face clear of the opening and make sure there are no children or pets near the unit. After ...
- Do not heat or warm unopened food containers. Build-up of pressure may cause the container to burst and cause injury.
- Always place oven racks in desired location while oven is cool. Always use oven mitts, when the oven is warm. If a rack must be moved while oven is hot, do not let potholder contact the heating elements.
- 9 CAUTION
- 9 WARNING
- Scalding hazard!
- Secure all loose garments, etc. before beginning. Tie long hair so that it does not hang loose, and do not wear loose fitting clothing or hanging garments, such as ties, scarves, jewelry, or dangling sleeves.
- Use caution when cooking foods with high alcohol content (e.g. rum, brandy, bourbon) in the oven. Alcohol evaporates at high temperatures. There is a risk of burning as the alcohol vapors may catch fire in the oven. Use only small quantities of alcoh...
- Scalding hazard!
- 9 WARNING
- 9 WARNING
- 9 WARNING
- Child Safety
- When children become old enough to use the appliance, it is the responsibility of the parents or legal guardians to ensure that they are instructed in safe practices by qualified persons.
- Do not allow anyone to climb, stand, lean, sit, or hang on any part of an appliance, especially a door, warming drawer, or storage drawer. This can damage the appliance, and the unit may tip over, potentially causing severe injury.
- Do not allow children to use this appliance unless closely supervised by an adult. Children and pets should not be left alone or unattended in the area where the appliance is in use. They should never be allowed to play in its vicinity, whether or no...
- 9 CAUTION
- Cleaning Safety
- Cookware Safety
- Do not place food directly on oven bottom.
- Follow the manufacturer’s directions when using cooking or roasting bags.
- 9 WARNING
- Risk of electric shock!
- Ovenware must be heat and steam resistant. Silicone baking pans are not suitable for Combination mode.
- When using Steam mode with a perforated cooking pan, always slide the baking pan underneath it. The pan will catch any drippings.
- Care must be taken to prevent aluminum foil and meat probes from contacting the heater elements.
- The oven bottom and the evaporator dish must always remain clear. Always place ovenware on the rack or in the perforated cooking pan.
- Risk of electric shock!
- Proposition 65 Warning:
- ]Causes of damage
- 7Environmental protection
- *Familiarizing yourself with your appliance
- Familiarizing yourself with your appliance
- You will get to know your new appliance here. We explain the control panel and the individual controls to you. You are informed about the oven interior and accessories.
- Combi-steam oven
- Water tank for descaling program
- Displays and controls
- Symbols
- Colors and display
- Colors
- The various colors serve to guide you in the various adjustment situations.
- Presentation
- The presentation of symbols, values or the entire display changes depending on the situation.
- Zoom
- The display of the setting you are just changing is enlarged.
- Just before it elapses, a duration that is just elapsing is enlarged (e.g. the last 60 seconds in the case of timers).
- Minimized display screen
- After a short time, the display screen is minimized and only the most important things are displayed. This function is the default and can be modified in the basic settings.
- Automatic door opening
- Standby
- Activate appliance
- Additional information ( and )
- By touching the ( symbol, you can call up additional information. For example, information on the type of heating set or on the current temperature of the cooking compartment.
- Note:
- The ) symbol appears for important information and indicates that an action is required. Important information on safety and operating status is also occasionally displayed automatically. These messages disappear automatically after a few seconds, or...
- With Home Connect messages, the Home Connect status additionally appears in the ). You will find more information about this in the section entitled ~ "Home Connect" on page 33.
- Cooling fan
- Your appliance has a cooling fan. The cooling fan switches on during operation. The warm air escapes above the door.
- After removing cooked food, keep the door closed until the appliance cools down. The appliance door must not be left ajar, as adjoining kitchen furniture may be damaged. The cooling fan continues to run for a while and then switches off automatically.
- 9 CAUTION
- Drying of oven cavity
- Accessories
- Special accessories
- You can order the following accessories from your specialist dealer:
- Use the accessories only as indicated. The manufacturer assumes no liability for incorrect usage of the accessories.
- Do not heat the non-stick cooking containers up to more than 445° F (230 °C). Use the non-stick cooking container only in the combi-steam oven.
- KBefore using the appliance for the first time
- Before using the appliance for the first time
- In this chapter, you can find out what you must do before using your oven to prepare food for the first time. First read the section entitled ~ "IMPORTANT SAFETY INSTRUCTIONS" on page 4.
- The appliance must be completely installed and connected.
- After connecting the appliance to the power supply, the "Initial settings "menu will be displayed. Now you can now configure your new appliance for initial set-up.
- Notes
- Setting the language
- Setting the time format
- Setting the time
- Setting the date format
- Setting the date
- Setting the temperature unit
- Setting the water filter
- "Water filter” appears in the display. The default is "Available".
- It is recommended to install a suitable descaling system if the water hardness exceeds 7°dH (carbonate hardness 5°dH).
- 2. Confirm with ™.
- 3. If water filter "Available" has been selected: "Water filter capacity” is shown in the display.
- 4. Turn the rotary selector to select the capacity of the filter cartridge (between 100 - 9000 liters). Refer to the instructions included with the filter cartridge.
- 5. Confirm with ™.
- Setting water hardness
- Completing initial set-up
- Cleaning the door panel
- Cleaning accessories
- Heating up the appliance
- + Water filter
- Water filter
- Operation with or without water filter
- Change water filter
- Filter cartridges should be replaced regularly.
- The capacity of the filter cartridge depends on the frequency of use of the appliance and your regional water hardness. A message will appear in the display to remind you when the filter needs to be replaced. Regardless of the actual amount of water ...
- 2. The œ symbol is displayed. Confirm with ™.
- 3. Change the water filter. Refer to the instructions included with the filter cartridge. Confirm with ™.
- 4. "Select water filter capacity” is shown in the display. Confirm with ™.
- 5. Turn the rotary selector to select the capacity of the filter cartridge (between 100 - 9000 liters). Confirm with ™.
- 9 Activating the appliance
- 1Operating the appliance
- Operating the appliance
- Oven interior
- Inserting accessories
- Turning on
- Turning off
- Steam injection
- With misting, steam is specifically injected into the oven cavity. This enables you to bake, e.g. bread and bread rolls, with sufficient moisture.
- Misting only works with these heating modes:
- To start misting, touch the ð symbol. After a short while, steam is injected into the oven cavity.
- Steam is injected for approx. 5 minutes.
- To cancel misting: Press the ñ symbol.
- Steam removal
- During the steam removal process, cold water is introduced into the oven cavity. This cools the oven cavity down and the steam condenses on the oven cavity walls. When you open the oven door afterwards, only a little steam escapes.
- 9 WARNING
- Risk of Scalding!
- Steam removal only works with the following heating modes and if the temperature in the oven cavity is less than 265° F (130 °C):
- Proceed as follows: Touch the ¡ symbol. Steam removal lasts about 20 seconds. The heating remains switched off during steam removal.
- Stopping steam removal early: Open the oven door or touch the ¢ symbol.
- Notes
- Risk of Scalding!
- After every use
- 1. Remove food residues from the oven cavity as soon as the appliance has cooled down. Burnt-on soil will be much harder to remove later.
- 2. In order to dry the oven cavity, the cooling fan and the fan wheel on the back wall of the oven cavity continue to run for a while after the appliance is switched off. They then switch off automatically. This may take up to 95 minutes. The applian...
- 3. If required, you can dry the oven cavity quickly using the drying program. ~ "Drying program" on page 43
- 4. Once the oven cavity has cooled down, polish it with a soft cloth.
- 5. Wipe furnishings or handles dry if condensate has collected on them.
- Safety shut-off
- For your protection, the appliance has a safety shut-off feature. Every heating operation is switched off after 12 hours if the appliance is not operated during this time. A message appears in the display.
- Exception: programming with the long-term timer.
- Turn the program selection to 0, after which you can operate the appliance in the manner to which you are accustomed.
- OTimer functions
- Timer functions
- In the timer menu, set:
- Š Timer
- p Stopwatch
- 6 Cooking time (not in the idle state)
- 5 Cooking time end (not in the idle state)
- Launching the timer menu
- Timer
- The timer runs independently of the other appliance functions. You can enter a maximum of 90 minutes.
- Setting the timer
- 1. Call up the Timer menu.
- 2. Turn the rotary selector to set the desired time.
- 3. Start with I.
- The Timer menu closes and the timer starts to run. The symbol for the timer Š appears on the display and the time can be seen counting down.
- A signal sounds once the time has elapsed. The audible signal ceases if you touch the ™ symbol.
- You can exit the Timer menu at any time by touching the ' symbol. This way, the settings are lost.
- Suspend timer: Call up the Timer menu. Select the "Timer" function with C, select Š, and touch the H symbol. To let the timer run on, touch the I symbol.
- Switch off the timer early: Call up the Timer menu. Select the "Timer" function with C, select Š, and touch the Ž symbol.
- Stopwatch
- The stopwatch runs independently of the other appliance functions.
- The stopwatch counts up from 0 seconds to 90 minutes.
- It has a pause function. Therefore, you can stop the timer in between times.
- Starting the stopwatch
- Stopping and restarting the stopwatch
- 1. Launch the timer menu.
- 2. With C, select the "Stopwatch" function p.
- 3. Touch the H symbol.
- 4. Start with I.
- The time continues to run. Once 90 minutes have been reached, the display pulsates and a signal sounds. It goes off when you touch the ™ symbol. The p symbol disappears from the display. The operation has ended.
- Switching off the stopwatch: Launch the timer menu. With C, select the "Stopwatch" function p and touch the Ž symbol.
- Cooking time
- If you set a cooking time for your meal, the appliance switches off heating automatically after this time has elapsed.
- You can set a cooking time from 1 minute to 23:59 hours.
- Setting the cooking time
- You have set the heating function and temperature and you have placed your dish in the oven interior.
- 2. With C, select the "Cooking time" function 6.
- 3. Set the required cooking time with the rotary selector.
- 4. Start with I.
- One minute before expiration of the cooking time, the expiring cooking time is enlarged in the display.
- The appliance switches off after expiration of the cooking time. The 6 pulsates and a signal sounds. It goes off prematurely if you touch the ™ symbol, open the appliance door or set the program selection to 0.
- Changing the cooking time: Launch the timer menu. With C, select the "Cooking time" function 6. Set the cooking time with the rotary selector. Start with I.
- Clearing the cooking time: Launch the timer menu. With C, select the "Cooking time" function 6. Clear the cooking time with Ž. Return to normal operation with '.
- Canceling the entire operation: Set the program selection to 0.
- Note:
- End of cooking time
- You can defer the end of the cooking time until later.
- Example: it is 2 pm. The meal takes 40 minutes to cook. It should be ready by 3.30 pm.
- Enter the cooking time and shift the end of the cooking time to 3.30 pm. The electronic circuitry calculates the starting time. The appliance starts automatically at 2:50 pm and switches off at 3.30 pm.
- Note that easily perishable foodstuffs must not be left in the oven for too long.
- Shifting the end of the cooking time
- You have set the heating function, the temperature and the cooking time.
- 2. With C, select the "End of cooking time" function 5.
- 3. Set the required cooking time end with the rotary selector.
- 4. Start with I.
- Note:
- The appliance switches off after expiry of the cooking time. The 5 pulsates and a signal sounds. It goes off prematurely if you touch the ™ symbol, open the appliance door or set the program selection to 0.
- Changing the cooking time end: Launch the timer menu. With C, select "End of cooking time" 5. Set the required cooking time end with the rotary selector. Start with I.
- Canceling the entire operation: Set the program selection to 0.
- Note:
- FSabbath mode and Yom Tov mode
- Sabbath mode and Yom Tov mode
- Sabbath mode
- With this function, the appliance maintains a temperature between 120 and 450°F (50 and 230°C) with Convection + 0% humidity.
- You can keep dishes warm for up to 74 hours without having to switch on or off.
- Note that easily perishable foodstuffs must not be left in the oven for too long.
- Note:
- Follow these steps:
- 2. Select "Factory setting" with the rotary selector.
- 3. Confirm by touching the ™ symbol.
- 4. Rotate the selector to Sabbath mode :.
- 5. Confirm by touching the ™ symbol.
- 6. Rotate the selector to “activate”.
- 7. Corfirm by touching the ™ symbol.
- 8. Turn the oven off.
- 2. Touch the / symbol.
- 3. Changing the cooking time 6 : Touch the $ symbol. Set the preferred cooking time with the rotary selector. You can set up to 74 hours. Confirm by touching the ™ symbol. Then changing the temperature becomes an option.
- 4. Changing the temperature: Set the required temperature with the rotary selector.
- 5. Start with I .
- The appliance starts. / and the temperature appear in the display. The Sabbath screen will appear as shown.
- The oven and display lighting is off. The control panel is blocked and no tone can be heard when you touch it.
- The appliance no longer heats after expiry of the time. The display is blank. Set the program selector to 0.
- Switching off: To cancel the operation, set the program selector to 0.
- Yom Tov mode
- With this function, the appliance is programmed to perform in three stages.
- Stage 1 and 2 can be programmed for a maximum total duration of 74 hours. The duration of Step 3 is 1 hour and cannot be modified.
- Stage 1: maintains a warm temperature of 122° F (50°C) in the convection heating function. The interior oven lights remain off through this stage.
- Stage 2: the appliance raises to a desired temperature setting and maintains a temperature between 120 and 450° F (50 -230°C). For warming and cooking foods in the convection heating function. The desired time can be adjusted for this stage. The in...
- Stage 3: maintains a warm temperature of 122° F (50°C) in the convection heating function for 1 hour after stage 2 has ended. The interior oven lights will be on during this time.
- Note that easily perishable foodstuffs must not be left in the oven for too long.
- Setting the Yom Tov mode
- 2. Touch the / symbol.
- 2. Set the desired Stage 2 cooking time with the rotary selector.
- 3. Touch the C symbol to adjust the end of Stage 2 cooking time 5 .
- 4. Select the end time with the rotary selector.
- 5. Change the date if needed by touching the C symbol to V .
- 6. Rotate the selector to the desired date.
- 7. Confirm settings by touching the ™ symbol.
- 2. Start with I .
- The temperatures of Stage 1 and Stage 2 appear in the display. The remaining time to the beginning of Stage 2 is counted down in the display. The Yom Tov screen will appear as shown.
- The program will begin with the pre-set warm temperature without light, then advance to the programmed temperature with light until the end of the set date and time, and then maintain the pre-set warm temperature for 60 minutes.
- The appliance no longer heats after expiry of the time. The display is blank. Set the program selector to 0.
- Switching off: To cancel the operation, set the program selector to 0.
- A Panel Lock
- nAutomatic programs
- Automatic programs
- You can prepare a wide range of food using the automatic programs. The appliance will choose the optimal setting for you.
- To achieve good results, the cooking compartment must not be too hot for the type of food you have selected. If it is, a message will appear on the display. Allow the appliance to cool and then try again.
- Information on the settings
- Selecting a dish
- Applying settings for dishes
- You are guided through the entire setting process. Follow the instructions in the display.
- Use the rotary selector to scroll through the individual levels.
- 2. Touch the i symbol. Press ™ to confirm.
- 3. Use the rotary selector to select the category and press ™ to confirm.
- 4. Use the rotary selector to select the required dish and press ™ to confirm.
- 5. Press ™ to confirm the required settings. Follow the directions in the display.
- Adding extra cooking time
- After the cooking time has ended, you can leave some dishes to continue cooking if you are not satisfied with the cooking result.
- A query appears in the display asking if you want to continue cooking.
- 2. Select a single or double cooking time, depending on requirements.
- 3. Press I to start.
- 4. If the "Continue cooking" function has ended, turn the function selector to 0.
- Changing and canceling
- Calling up the last automatic programs used
- The last five dishes with the selected settings are saved. You have the option of saving these dishes with the selected settings as individual recipes. You can no longer change the settings of an individual recipe if you have saved it using the "Last...
- 2. Touch the i symbol.
- 3. Use the rotary selector to select "Last automatic programs" and press ™ to confirm.
- 4. Use the rotary selector to select the required dish and press ™ to confirm.
- 5. Enter a name for the dish and save. ~ "Entering a name" on page 29
- Personal recipes
- You can save up to 50 individual recipes. You can record a recipe. You can assign these recipes a name so that you can fall back on them quickly and conveniently if you need them.
- Recording a recipe
- You can set up to five phases in succession and you can record them.
- 2. Touch the i symbol.
- 3. Choose a free storage location with the rotary selector.
- 4. Touch the g symbol.
- 5. Set the desired temperature with the rotary selector.
- 6. The cooking time is recorded.
- 7. Recording another phase:
- 8. Once the appliance has achieved the desired cooking result, touch the & symbol to end the recipe.
- 9. Enter the name under "ABC". ~ "Entering a name" on page 29
- Programming a recipe
- You have the option of programming and saving up to five phases of preparation.
- 2. Touch the i symbol.
- 3. Choose a free storage location with the rotary selector.
- 4. Touch the % symbol. ~ "Entering a name" on page 29
- 5. Enter the name under "ABC".
- 6. Choose the first phase with the C symbol.
- 7. Choose the time setting with the C symbol.
- 8. Set the required cooking time with the rotary selector.
- 9. Choose the next phase with the C symbol.
- 10. Save with ™.
- Entering a name
- Starting a recipe
- Change recipe
- You can change the settings of a recorded or programmed recipe.
- 2. Touch the i symbol.
- 3. Use the rotary selector to select "Individual recipes" and press ™ to confirm.
- 4. Use the rotary selector to select the desired recipe.
- 5. Touch the % symbol.
- 6. Use the C symbol to select the desired phase.
- 7. Save with ™.
- Deleting a recipe
- @Core temperature probe
- Core temperature probe
- The core temperature probe makes it possible to cook with exact precision. It measures the temperature inside the food being cooked. When the required core temperature has been reached, the probe switches off automatically, ensuring that all food is ...
- The core temperature probe is damaged at temperatures above 480°F (250°C). Therefore, only ever use it in your appliance at a maximum temperature setting of 445°F (230°C).
- 9 WARNING
- 9 WARNING
- Risk of burns!
- Only use the core temperature probe supplied. You can purchase it as a spare part from Customer Service or from the online shop.
- When using the core temperature probe, never place the food on the top shelf position in the oven.
- After use, always remove the core temperature probe from the oven cavity. Never store it inside the oven cavity.
- After each use, clean the core temperature probe with a damp cloth. Do not clean in the dishwasher.
- Risk of burns!
- Inserting the core temperature probe into the food
- Insert the core temperature probe into the food before you place the food in the oven cavity.
- The core temperature probe has three measuring points. Insert the core temperature probe as far as possible. Th core temperature probe must not be inserted in the fat or be touching the ovenware or bones.
- Meat: Insert the core temperature probe at an angle from above as far as it will go into the meat. For more than one piece of meat, insert the core temperature probe into the middle of the thickest piece.
- Poultry: Insert the core temperature probe as far as it will go into the thickest point in the breast. Depending on its structure, insert the core temperature probe into the poultry crossways or lengthways. With poultry, make sure that the tip of the...
- Fish: Insert the core temperature probe behind the head as far as it will go towards the spine. Place the whole fish onto the wire rack and prop it up in the swimming position using half a potato.
- Turning the food: If you want to turn the food, do not remove the core temperature probe. Once you have turned the food, check that the core temperature probe is correctly positioned in the food.
- If you remove the core temperature probe during operation of the appliance, all settings are reset and you have to apply them again.
- Setting the core temperature
- 9 CAUTION
- 9 CAUTION
- 2. Turn the function selector to the desired heating type.
- 3. Use the rotary selector to set the oven cavity temperature.
- 4. Touch the + symbol. Use the rotary selector to change the set core temperature for the food and confirm with +.
- 5. The appliance heats with the set heating type.
- Estimated cooking time
- After preheating, if the appliance has a temperature setting above 212° F (100 °C), when the core temperature probe is inserted, the display shows an estimated cooking time approx. 5–20 minutes into the cooking time.
- The estimated cooking time is continually updated. The longer the cooking process lasts, the more precise the estimated cooking time becomes. Do not open the appliance door; this distorts the estimated cooking time.
- The estimated cooking time is displayed in normal operation and in the automatic program.
- The current core temperature is shown in the display when you touch the ( symbol.
- The estimated cooking time display can be deactivated in the basic settings so that the current core temperature is shown instead.~ "Basic settings" on page 37
- Notes
- Changing the set core temperature
- Deleting the set core temperature
- Core temperature guidelines
- Use chilled food only, not frozen food. The details given in the table are guidelines. Results depend on the quality and composition of the food.
- For hygiene reasons, critical foodstuffs such as fish and game should reach a core temperature of 143 - 158° F (62 – 70 °C); for poultry and minced meat this should be as high as 176 - 185° F (80 – 85 °C).
- Food
- Core temperature guideline
- Beef
- Sirloin, tenderloin, entrecôte
- very rare
- rare
- medium
- well-done
- 113 - 117°F (45 - 47 °C)
- 122 - 126°F (50 - 52 °C)
- 137 - 140°F (58 - 60 °C)
- 158 - 167°F (70 - 75 °C)
- Roast beef
- 176 - 185°F (80 - 85 °C)
- Pork
- Pork roast
- 162 - 176°F (72 - 80 °C)
- Pork loin
- medium
- well-done
- 149 - 158°F (65 - 70 °C)
- 167°F (75 °C)
- Meat loaf
- 185°F (85 °C)
- Fillet of pork
- 149 - 158°F (65 - 70 °C)
- Veal
- Veal roast, well-done
- 167 - 176°F (75 - 80 °C)
- Breast of veal, stuffed
- 167 - 176°F (75 - 80 °C)
- Saddle of veal
- medium
- well-done
- 137 - 140°F (58 - 60 °C)
- 149 - 158°F (65 - 70 °C)
- Fillet of veal
- rare
- medium
- well-done
- 122 - 126°F (50 - 52 °C)
- 137 - 140°F (58 - 60 °C)
- 158 - 167°F (70 - 75 °C)
- Game
- Saddle of venison
- 140 - 157°F (60 - 70 °C)
- Leg of venison
- 158 - 167°F (70 - 75 °C)
- Venison loin steaks
- 149 - 158°F (65 - 70 °C)
- Saddle of hare or rabbit
- 149 - 158°F (65 - 70 °C)
- Poultry
- Chicken
- 195°F (90 °C)
- Guinea fowl
- 175 - 185°F (80 - 85 °C)
- Goose, turkey, duck
- 185 - 195°F (85 - 90 °C)
- Duck breast
- medium
- well-done
- 131 - 140°F (55 - 60 °C)
- 158 - 176°F (70 - 80 °C)
- Ostrich steak
- 140 - 149°F (60 - 65 °C)
- Lamb
- Leg of lamb
- medium
- well-done
- 140 - 149°F (60 - 65 °C)
- 158 - 176°F (70 - 80 °C)
- Saddle of lamb
- medium
- well-done
- 131 - 140°F (55 - 60 °C)
- 149 - 167°F (65 - 75 °C)
- Mutton
- Leg of mutton
- medium
- well-done
- 158 - 167°F (70 - 75 °C)
- 176 - 185°F (80 - 85 °C)
- Saddle of mutton
- medium
- well-done
- 158 - 167°F (70 - 75 °C)
- 176 °F (80 °C)
- Fish
- Fillet
- 144 - 149°F (62 - 65 °C)
- Whole
- 149°F (65 °C)
- Terrine
- 144 - 149°F (62 - 65 °C)
- Other provisions
- Bread
- 205°F (96 °C)
- Paté
- 162 - 167°F (72 - 75 °C)
- Terrine
- 140 - 158°F (60 - 70 °C)
- Foie gras
- 113°F (45 °C)
- Reheating food
- 167°F (75°C)
- oHome Connect
- Home Connect
- This appliance can be networked and also controlled remotely using a mobile device. The Home Connect app offers extra functions that complement the networked appliance perfectly. If the appliance is not connected to your home network, it can be opera...
- The availability of the Home Connect function depends on the availability of Home Connect services in your country. Home Connect services are not available in every country. You can find more information on this at www.home-connect.com.
- Notes
- Setting Up
- To configure settings via Home Connect, you will need to have installed the Home Connect app on a mobile device.
- Your appliance will also need to be connected to your home network and to the Home Connect app. You can choose between the following connection types:
- Note:
- Installing the app
- Connecting the appliance to your home network (LAN)
- Connecting the appliance to your home network (Wi-Fi with WPS)
- Requirements:
- 2. Touch the % symbol.
- 3. Turn the rotary selector to "Wi-Fi".
- 4. Confirm by touching the ™ symbol.
- 5. Touch the ™ symbol to continue.
- 6. Turn the rotary selector to "Automatic (WPS)".
- 7. Touch the ™ symbol to start the connection process.
- 8. Press the WPS button on the router within the next 2 minutes.
- Connecting the appliance to your home network (Wi-Fi without WPS)
- 1. In the basic settings, select ¯ "Home Connect".
- 2. Touch the % symbol.
- 3. Turn the rotary selector to "Wi-Fi".
- 4. Confirm by touching the ™ symbol.
- 5. Touch the ™ symbol to continue.
- 6. Turn the rotary selector to "Manual".
- 7. Touch the ™ symbol to start the connection process.
- 8. Follow the instructions in the app.
- Connecting the appliance to the app
- Connect your appliance to the app when setting up Home Connect or connect your appliance to an additional Home Connect account. The Home Connect app can be installed on any number of mobile devices, which can then be connected to the appliance.
- Requirements:
- 2. Use the rotary selector to select "Connect to app".
- 3. Touch the % symbol and start the connection process with ™.
- 4. Follow the instructions in the app.
- Remote Start
- Remote start must be activated in order to start and operate your appliance via the Home Connect app. If remote start is deactivated, only the appliance operating modes can be displayed in the Home Connect app and appliance settings can be implemented.
- The remote start is automatically deactivated if the appliance door is opened.
- When you start the oven using a type of heating on the appliance itself, remote start is activated automatically. You can now make changes or start a new program from your mobile device.
- Activating remote start
- Remote Diagnostics
- Information on Data Protection
- When your appliance is connected to a WLAN network that is connected to the Internet for the first time, your appliance transmits the following categories of data to the Home Connect server (initial registration):
- This initial registration prepares the Home Connect functions for use and is only required when you want to use these Home Connect functions for the first time.
- Note:
- Declaration of Conformity
- Gaggenau Hausgeräte GmbH hereby declares that the appliance with Home Connect functionality meets the basic requirements and other relevant provisions of Directive 2014/53/EU.
- A detailed RED Declaration of Conformity can be found online at www.gaggenau.com among the additional documents on the product page for your appliance.
- 2.4 GHz band: max. 100 mW 5 GHz band: max. 100 mW
- Wi-Fi® Module
- FCC/IC Statements
- Model: COM2 FCC ID: 2AHES-COM2 IC: 21152-COM2
- The Home Connect module is a communication device designed to provide communication between appliances and smart devices.
- This module is integrated at the factory, under direct control of BSH Home Appliances Corporation, and is not user servicable or upgradable. At least 77/8 inch (20 cm) separation distance should be maintained from device to user.
- FCC COMPLIANCE STATEMENT
- INDUSTRY CANADA STATEMENT
- QBasic settings
- Basic settings
- In the general settings, you can adapt your appliance individually.
- 2. Select "General setting" with the rotary selector.
- 3. Touch the ™ symbol.
- 4. Set the required general setting with the rotary selector.
- 5. Touch the % symbol.
- 6. Set the general setting with the rotary selector.
- 7. Save with ™ or cancel with ' and quit the current general setting.
- 8. Turn the program selector to 0 to quit the general setting menu.
- 2 Cleaning and maintenance
- Cleaning and maintenance
- If taken care of and cleaned conscientiously, your appliance will stay beautiful and intact for a long time. Here we explain how to take care of and clean your appliance correctly.
- 9 WARNING
- 9 WARNING
- 9 WARNING
- Cleaning agents
- Pay attention to the information in the table to ensure that the various surfaces are not damaged by incorrect cleaning agents.
- Do not use any
- Thoroughly rinse out new sponge cloths before use.
- Area
- Cleaning agents
- NOTICE
- Microfiber cloth The honeycomb microfiber cloth is particularly suitable for cleaning sensitive surfaces such as glass, glass ceramic, stainless steel or aluminum (product no. 00460770, also available from our online online shop). It removes liquid a...
- Drain filter You can clean the drain filter in the oven cavity floor as necessary. When cooking fish or meat, we recommend cleaning the appliance after each use.
- 2. Remove any food remnants from the drain filter.
- 3. Rinse it out under running water. If it is very dirty, wash it in the dishwasher.
- 4. Insert the drain filter and turn it clockwise as far as it will go.
- Cleaning program
- The cleaning program removes stubborn dirt. A cleaning cartridge (a) is screwed into the top of the oven cavity. The oven cavity is cleaned, rinsed, and dried completely automatically. The drain filter (b) must remain inserted in the oven cavity floo...
- The complete cleaning program takes either 3 hours and 20 minutes or 3 hours and 45 minutes depending on the appliance model you have.
- With normal use, we recommend cleaning the appliance with the cleaning program four times a year. Depending on the use, more frequent cleaning can be necessary.
- If there are a lot of food remnants in the oven cavity, do not allow them to burn on. Start the cleaning program as soon as the appliance has cooled to 104° F (40 °C).
- You need special cleaning cartridges for the cleaning program. These are available from Customer Service or from the online shop (CL S10 040 set with 4 cleaning cartridges, order number 00311703).
- The cleaning cartridges can only be used once and are not refillable. Do not use any other cleaner.
- NOTICE
- Note:
- Starting the cleaning program
- 2. The ¢ symbol is displayed. Press ™ to confirm.
- 3. The switch-off time is displayed at which the cleaning program will end.If desired, move switch-off time with the rotary selector. Press ™ to confirm. The starting time and switch-off time are shifted, the cleaning time remains the same.
- 4. Remove all accessories from the oven cavity and remove the coarse dirt. Press ™ to confirm.
- 5. Remove the cover cap from the cleaning cartridge.
- 6. Screw the cleaning cartridge (a) as far as it will go into the socket in the top of the oven cavity. Close the appliance door. Press ™ to confirm. A cleaning time of 3:45 hours is displayed.
- 7. Start with I. The cleaning time counts down on the display. The light in the oven cavity remains switched off. The appliance door is locked.
- 8. Remove the cleaning cartridge.
- 9. Turn the drain filter on the oven cavity floor to the left and remove it. Remove food residues from the drain sieve.Rinse out under running water.
- 10. Insert the drain filter and turn right to the stop. Press ™ to confirm.
- Causes for unsatisfactory cleaning results
- Drying program
- With the drying program, you can dry the oven cavity quickly.
- The drying program takes 20 minutes.
- Starting the drying program
- 2. The j symbol is displayed. Confirm with ™.
- 3. The drying time of 20 minutes appears. Touch I to start. The drying time elapses on the display. The lamp in the oven cavity remains off.
- 4. A signal sounds after 20 minutes. A message appears in the display. Confirm with ™.
- Descaling program
- Regular descaling keeps the appliance in good condition. The descaling program descales and rinses the appliance fully automatically.
- Depending on the type of water and your use of the appliance, a message in the display reminds you to run the descaling program.
- To prevent damage to the appliance, the operating modes that use steam are disabled after this message has been repeated. You can still use the appliance to run operating modes that do not require steam. Only once the descaling program has been run c...
- The descaling program takes 1 hour 45 minutes from beginning to end.
- For the descaling program, you require special descaling tablets. These are available from Customer Service or from our online shop (17002490, set with four descaling tablets).
- NOTICE
- Note:
- Starting the descaling program
- 1. Set the function selector to S. Use the rotary selector to select the descaling program.
- 2. The ‘ is displayed. Press ™ to confirm.
- 3. The switch-off time at which the descaling program will end is displayed. If required, you can alter the switch-off time using the rotary selector. Press ™ to confirm.
- 4. Remove all accessories from the oven cavity. Press ™ to confirm.
- 5. Remove the descaling tablet from the plastic packaging.
- 6. Remove the tank from the appliance and take off the lid.
- 7. Place the descaling tablet in the compartment at the back of the tank. Fill the tank with water up to the "Max." mark (3.5 pints / 1.7 liters).
- 8. Position the lid on the tank and click it into place.
- 9. Slide the tank into the appliance.
- 10. Close the appliance door. Press ™ to confirm. A descaling time of 1 hour 45 minutes is displayed.
- 11. Press I to start. The descaling time will count down on the display. The light in the oven cavity remains switched off.
- Drying the oven cavity
- Removing the wire racks
- The wire racks can be removed for cleaning.
- Detaching the wire racks
- 2. Undo the knurled nuts (Fig. A).
- 3. Lift the wire racks slightly sideways away from the screw and pull them out towards the front (Fig. B).
- 2. Slide the back of wire racks onto the bolts, then reattach them at the front.
- 3. Tighten the knurled nuts.
- 3Troubleshooting
- Troubleshooting
- You can often easily eliminate problems that may occur on your own. Before calling Customer Service, take into account the following information.
- 9 WARNING
- 9 WARNING
- --------
- Power cut
- Demo mode
- The demo mode is activated if the ° symbol appears in the display. The appliance does not heat up.
- Briefly disconnect the appliance from the mains (switch off the domestic fuse or the circuit-breaker in the fuse box). Then deactivate the demo mode within 3 minutes in the factory setting.~ "Basic settings" on page 37
- 4Customer service
- Customer service
- If your appliance needs repairs, our customer service is there for you. We work hard to help solve problems quickly and without unnecessary service calls, getting your appliance back up and running correctly in the least amount of time possible.
- When you call, please indicate the product number (E-Nr.) and serial number (FD-Nr.) so that we can support you in a qualified manner. You will find the type plate with these numbers on the bottom of the appliance. To avoid having to search for a lon...
- E-Nr.
- FD-Nr.
- Please read the use and care instructions provided with your appliance. Failure to do so may result in an error in using the appliance. This could result in a service call that instead of fixing a mechanical issue is only needed for customer educatio...
- Please find the contact data of all countries in the enclosed customer service list.
- To book a service visit and product advice
- JTables and tips
- Tables and tips
- Notes
- Vegetables
- Fish
- Fish – low-temperature steaming
- Meat – cooking at higher temperatures
- Meat/poultry – low-temperature cooking
- Poultry
- Sous-vide cooking
- Sous-vide cooking is a method of cooking under a vacuum at low temperatures between 120 - 200°F (50 - 95 °C) and in 100% steam.
- With this type of heating preheating is not necessary. Sous-vide cooking is a gentle, low-fat method of preparing meat, fish, vegetables and desserts. A vacuum- packing machine is used to heat-seal the food in a special air-tight, heat-resistant cook...
- The protective envelope retains the nutrients and flavors. The low temperatures and the direct transfer of heat allow precisely controlled cooking in order to achieve the desired cooking results. It is almost impossible to overcook the food.
- Portions Use the portion sizes listed in the cooking table. For relatively large quantities and items, the cooking time must be adjusted accordingly.
- The portions given for fish, meat and poultry correspond to a single serving. A portion size sufficient for four people has been selected for vegetables and desserts.
- Rack levels You can cook on up to two levels. Place the cooking containers on levels 1 and 3 to achieve the best cooking results. When cooking on just one level, use level 2.
- Hygiene
- 9 WARNING
- Health risk!
- Vacuum-pack bags When using the sous-vide cooking method, only use heat- resistant vacuum-pack bags designed for this purpose.
- Do not cook the food in the bag you bought it in (e.g. portions of fish). These bags are not suitable for sous- vide cooking.
- Vacuum sealing Use a chamber vacuum-packing machine that can create a vacuum of at least 99% to vacuum-seal the food. This is the only way to achieve even heat transfer and therefore a perfect cooking result.
- Before cooking the food, check whether the vacuum in the bag is intact. Make sure that:
- If in doubt, place the food into a new bag and vacuum- seal it again.
- Food should be vacuum-sealed at most one day before it is cooked. This is the only way to prevent the escape of gases from the food (e.g. from vegetables) which inhibit the transfer of heat, or to prevent the texture of the food from changing, and th...
- Quality of the food The quality of the cooking result is 100% influenced by the quality of the ingredients you use. Use only fresh, top- quality food. This is the only way to guarantee a consistent cooking result that delivers impeccable flavor.
- Preparation Sous-vide cooking prevents flavors from escaping, intensifying the food's natural flavor. Please note that the usual quantities of seasoning and condiments, such as herbs, spices and garlic, will have a much greater effect on the flavor. ...
- If the ingredients are of high quality, it is often sufficient to enclose them in the bag with just a small piece of butter and a little salt and pepper. Generally, the fact that the food's natural flavors intensify during cooking is sufficient on it...
- Do not place the vacuum-sealed food items on top of one another or too close together in the cooking containers. In order to ensure that the heat is distributed evenly, the food items should not be touching. If you have more than one vacuum-pack bag,...
- Remove the vacuum-pack bags with care after cooking as hot water accumulates on the bags. Place the unperforated cooking container on the rack underneath the perforated cooking container containing the hot food.
- Dry the outside of the bag, place it into a clean, unperforated cooking container and cut it open with scissors.Place all of the food, along with its juices, into the cooking container.
- The food can be finished off as follows once the sous-vide cooking stage is complete:
- Meat: Flash fry at a very high temperature for a few seconds only on each side. This gives it a nice crust and the flavors you would expect from frying, without overcooking it.You can achieve a particularly good result using a teppan yaki or a grill....
- Vegetables: Flash fry in a frying pan or on a teppan yaki to give them the flavors you would expect from frying. When frying vegetables like this, it is easy to season them or mix them with other ingredients without them cooling down.
- Fish: Season and coat with hot butter. Since many types of fish fall apart easily after cooking using the sous-vide method, if you wish to flash fry it, this should be done before the sous-vide cooking stage.
- Fry the food for longer if has not been sufficiently well cooked during the sous-vide cooking stage.
- Serve the food on pre-heated plates and, if possible, with a hot sauce or butter as sous-vide cooking takes place at relatively low temperatures.
- Food
- Cooking container
- Temperature in °F (°C)
- Type of heating
- Cooking time in min.
- Observations
- Health risk!
- Broiling
- Side dishes
- Desserts
- Other
- Baked goods
- Dough proving (leaving to rise)
- Refreshing (warming up)
- Defrosting
- Preparing bulky food
- Acrylamide in foodstuffs
- Use and care manual

32
en-us Core temperature probe
Core temperature guidelines
Use chilled food only, not frozen food. The details given
in the table are guidelines. Results depend on the quality
and composition of the food.
For hygiene reasons, critical foodstuffs such as fish and
game should reach a core temperature of 143 - 158° F
(62 – 70 °C); for poultry and minced meat this should be
as high as 176 - 185° F (80 – 85 °C).
Food Core temperature
guideline
Beef
Sirloin, tenderloin, entrecôte
very rare
rare
medium
well-done
113 - 117°F
(45 - 47 °C)
122 - 126°F
(50 - 52 °C)
137 - 140°F
(58 - 60 °C)
158 - 167°F
(70 - 75 °C)
Roast beef 176 - 185°F
(80 - 85 °C)
Pork
Pork roast 162 - 176°F
(72 - 80 °C)
Pork loin
medium
well-done
149 - 158°F
(65 - 70 °C)
167°F (75 °C)
Meat loaf 185°F (85 °C)
Fillet of pork 149 - 158°F
(65 - 70 °C)
Veal
Veal roast, well-done 167 - 176°F
(75 - 80 °C)
Breast of veal, stuffed 167 - 176°F
(75 - 80 °C)
Saddle of veal
medium
well-done
137 - 140°F
(58 - 60 °C)
149 - 158°F
(65 - 70 °C)
Fillet of veal
rare
medium
well-done
122 - 126°F
(50 - 52 °C)
137 - 140°F
(58 - 60 °C)
158 - 167°F
(70 - 75 °C)
Game
Saddle of venison 140 - 157°F
(60 - 70 °C)
Leg of venison 158 - 167°F
(70 - 75 °C)
Venison loin steaks 149 - 158°F
(65 - 70 °C)
Saddle of hare or rabbit 149 - 158°F
(65 - 70 °C)
Poultry
Chicken 195°F (90 °C)
Guinea fowl 175 - 185°F
(80 - 85 °C)
Goose, turkey, duck 185 - 195°F
(85 - 90 °C)
Duck breast
medium
well-done
131 - 140°F
(55 - 60 °C)
158 - 176°F
(70 - 80 °C)
Ostrich steak 140 - 149°F
(60 - 65 °C)
Lamb
Leg of lamb
medium
well-done
140 - 149°F
(60 - 65 °C)
158 - 176°F
(70 - 80 °C)
Saddle of lamb
medium
well-done
131 - 140°F
(55 - 60 °C)
149 - 167°F
(65 - 75 °C)
Mutton
Leg of mutton
medium
well-done
158 - 167°F
(70 - 75 °C)
176 - 185°F
(80 - 85 °C)
Saddle of mutton
medium
well-done
158 - 167°F
(70 - 75 °C)
176 °F (80 °C)
Fish
Fillet 144 - 149°F
(62 - 65 °C)
Whole 149°F (65 °C)
Terrine 144 - 149°F
(62 - 65 °C)
Food Core temperature
guideline