Model# GSWWD09S1A09A User Manual Thank you for purchasing a Galanz product. Please read this manual carefully for correct usage and safety, and keep for future reference. For service, support and warranty information, call 1-800-562-0738.
CONTENTS CONTENTS Important Safety Instructions..............................................................................................................................................1 Precautions to Avoid Possible Exposure to Excessive Microwave Energy...................................................1 California Proposition 65 Warning.............................................................................................................................1 General Warning ......................
IMPORTANT SAFETY INSTRUCTIONS Do not attempt to operate this oven with the door open since open-door operation can result in harmful exposure to microwave energy. It is important not to tamper with the safety interlocks. Do not place any object between the oven front face and the door or allow soil or cleaner residue to accumulate on sealing surfaces. Do not operate the oven if it is damaged.
IMPORTANT SAFETY INSTRUCTIONS emergency services. IMPORTANT SAFETY INSTRUCTIONS Do not use the cavity for storage purposes. Do not leave paper products, cooking utensils or food in the cavity when not in use. Liquids, such as water, coffee, or tea are able to be overheated beyond the boiling point without appearing to be boiling due to surface tension of the liquid. Visible bubbling or boiling when the container is removed from the microwave oven is not always present.
IMPORTANT SAFETY INSTRUCTIONS GROUNDING INSTRUCTIONS This appliance must be grounded. In the event of an electrical short circuit, grounding reduces risk of electric shock by providing an escape wire for the electric current. This appliance is equipped with a cord having a grounding wire with a grounding plug. The plug must be plugged into an outlet that is properly installed and grounded.
IMPORTANT SAFETY INSTRUCTIONS IMPORTANT SAFETY INSTRUCTIONS Electrical Requirements The electrical requirements are a 120 volt 60 Hz, AC only, 20 amp. It is recommended that a separate circuit serving only the oven be provided. The oven is equipped with a 3-prong grounding plug. It must be plugged into a wall outlet properly installed and grounded. Power Cord —A short power supply cord is provided to reduce the risks resulting from becoming entangled in or tripping over a longer cord.
IMPORTANT SAFETY INSTRUCTIONS This section lists which utensils can be used in this microwave, which have limited use for short periods, and which should not be used in this microwave. RECOMMENDED Microwave browning dish — Use to brown the exterior of small items such as steaks, chops, or pancakes. Follow the directions provided with your browning dish. Microwaveable plastic wrap — Use to retain steam. Leave a small opening for some steam to escape and avoid placing it directly on the food.
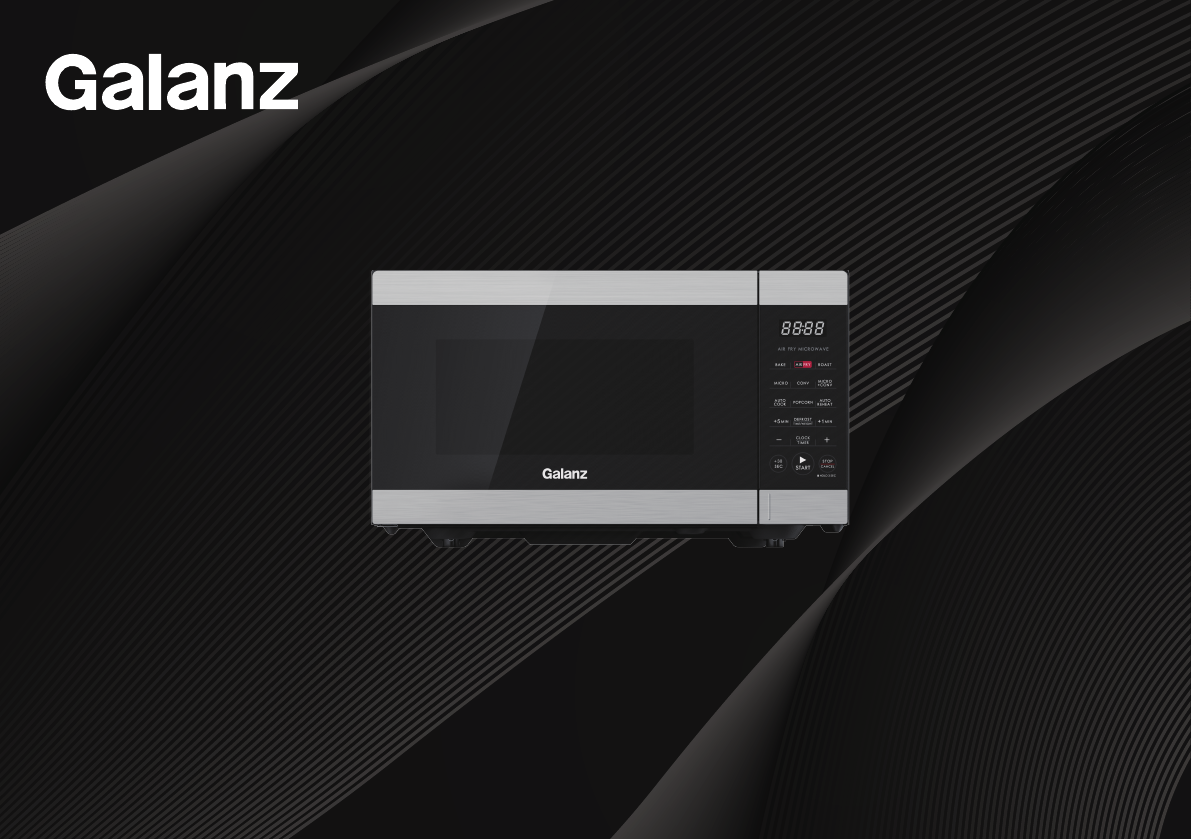
PRODUCT DIAGRAM 1. Control Panel PRODUCT DIAGRAM 2. Display Screen 3. Door Button 4. Oven Window 2 4 1 5. Top Heating Element 3 6. Upper Convection Fan 5 6 7 7. Glass Turntable 12 8. Roller Ring 9. Shaft 10. Baking and Roasting Pan 11. Air Fry Kit 12. Wave Guide (Please do not remove the mica plate covering the wave guide) 13.
CONTROL PANEL TIME / WEIGHT DEFORST Use to bake food (See Page 14). Use to air fry food (See Page 16). Press to set defrost program based on time (See Page 13). Press to set defrost program based on weight (See Page 12). ROAST +5MIN / +1MIN Use to roast food (See Page 18). Press to set the time of a cooking program. MICRO CLOCK / TIMER Use to microwave food with selected power level (See Page 11). Press and hold to set the clock time (See Page 9). Press to set the timer function (See Page 10).
FIRST TIME USE FIRST TIME USE If you are using your microwave for the first time, please be sure to: Clean the glass turntable, baking and roasting pan, air fry kit with hot water, a small amount of dishwashing liquid and a nonabrasive cleaning pad. Do not immerse the body of the unit in water. When you plug in the unit, the display will show "12:00". While you are in the process of any setting, the oven will return to standby mode after 30 seconds without any operation.
OPERATION INSTRUCTIONS Setting the Clock 4 Example: How to set a 12-hour clock at 11:58. 1 2 In standby mode, press and hold CLOCK/TIMER for 3 seconds to select 12-hour clock (press the pad again to select 24-hour clock). or 5 Press START or CLOCK/TIMER to confirm the minute and finish setting. or NOTE: While in the process of setting the clock, you can cancel the settings by pressing the STOP/CANCEL.
OPERATION INSTRUCTIONS OPERATION INSTRUCTIONS Timer Quick Start Microwave You can use the timer feature to count down a specific amount of time whether it’s for cooking or for anything else. Accessory Guide: Glass Turntable Example: How to set the timer for 3 minutes and 50 seconds. 1 Press CLOCK/TIMER once. Example: How to quick start microwave for 3 minutes and 50 seconds. 2 3 1 In stand-by mode, press + / - / +1MIN / +5MIN to enter the time. 2 Press START to confirm and start cooking.
OPERATION INSTRUCTIONS Microwave Cooking Press START once to confirm the power level. 4 Press + / - / +1MIN / +5MIN to enter cooking time 5 press START to confirm and start cooking. OPERATION INSTRUCTIONS 3 Accessory Guide: Glass Turntable This feature allows you to choose the power level and cooking time of microwave function. The longest cooking time is 95 minutes. Example: Cook at 30% power level for 3 minutes and 50 seconds.
OPERATION INSTRUCTIONS 4 Weight Defrost OPERATION INSTRUCTIONS Accessory Guide: Glass Turntable The defrosting time and power level are automatically set once the food category and the weight are selected. or 5 Press START to confirm and start defrosting. Example: How to defrost 8oz seafood. 1 In standby mode, press the TIME/WEIGHT DEFROST twice. X 2 2 Press +/- to select food code ‘dEF3’ (Seafood). or 3 12 Press +/- to select the food weight. Press START once to confirm the food type.
OPERATION INSTRUCTIONS Example: How to defrost food for 3 minutes and 50 seconds. 1 In standby mode, press the TIME/WEIGHT DEFROST once. 2 Press + / - / +1MIN / +5MIN to select the defrosting time. 3 Press START to confirm and start defrosting. Converting fractions of a pound to ounces: Fractions of a pound Ounces Less than .03 0 .03 to .09 1 .10 to .15 2 .16 to .21 3 .22 to .27 4 .28 to .34 5 .35 to .40 6 .41 to .46 7 .47 to .53 8 Fractions of a pound Ounces 9 .54 to .59 10 .60 to .65 11 .66 to .
OPERATION INSTRUCTIONS Bake OPERATION INSTRUCTIONS Accessory Guide: Glass Turntable When preheating finishes, the oven will show ‘Add Food 350F’ and sound periodically to remind user to put the food inside. 5 Open the oven door, the display will show the cooking time, and then place food into the oven. Close the oven door. 6 Press START once to confirm and start cooking.
OPERATION INSTRUCTIONS Custom Program: How to set Bake by choosing time and temperature (400°F for 25 minutes). 2 Press START once to confirm and start preheating. 6 When preheating finishes, the oven will show ‘Add Food 400F’ and sound periodically to remind user to put the food inside. 7 Open the oven door, the display will show the cooking time, and then place food into the oven. Close the oven door. 8 Press START once to confirm and start cooking.
OPERATION INSTRUCTIONS Air Fry OPERATION INSTRUCTIONS Accessory Guide: Glass Turntable Press START once to confirm food code. 4 Press +/- to select food weight. Air Fry Kit For Air Fry cooking, you can select the type of food you want to cook from the programs listed on the cooking label located on the interior panel of the appliance. or Auto Program: How to air fry 16oz chicken wings. 1 In standby mode, press the AIR FRY twice to use auto program.
OPERATION INSTRUCTIONS Air Fry Food Chart (Auto Program): Code Chicken Drumsticks AF-1 Chicken Nuggets AF-2 Chicken Wings AF-3 French Fries AF-4 Mozzarella Sticks AF-5 Onion Rings AF-6 Popcorn Chicken AF-7 Weight 8 oz 12 oz 16 oz 20 oz 24 oz 6 oz 8 oz 10 oz 12 oz 8 oz 12 oz 16 oz 20 oz 10 oz 6 oz 8 oz 10 oz 12 oz 14 oz 16 oz 8 oz 8 oz 10 oz 12 oz 16 oz Cooking Time 30:00 33:00 36:00 39:00 42:00 13:00 15:00 19:00 23:00 30:00 32:00 34:00 36:00 30:00 10:00 11:00 12:00 13:00 14:00 15:00 17:00 2
OPERATION INSTRUCTIONS 4 Roast OPERATION INSTRUCTIONS Accessory Guide: Glass Turntable Auto Program: How to Roast 12oz roasted potatoes. In standby mode, press the ROAST twice to use auto program. X 2 2 3 or 5 Press START once to confirm and start cooking. Roast Food Chart (Auto Program): Food Code Pork Loin Ar-1 Pork Tenderloin Ar-2 Roasted Potatoes Ar-3 Salmon Filet Ar-4 Press + / - to select food code ‘Ar-4’ (Roasted Potatoes).
OPERATION INSTRUCTIONS Custom Program: How to set Roast by choosing time and temperature (400°F for 25 minutes). Press START once to confirm and start cooking. In standby mode, press the ROAST once to use custom setting (Default is 350 °F). NOTE: It can be programmed for four different temperatures. They are: 350°F(default) → 375°F → 400°F → 325°F. 2 Press + / - to select temperature 400 °F. or 3 Press START once to confirm the temperature. 4 Press + / - to select cooking time.
OPERATION INSTRUCTIONS Convection Accessory Guide: Glass Turntable OPERATION INSTRUCTIONS 4 20 6 When preheating finishes, the oven will show ‘Add Food 400F’ and sound periodically to remind user to put the food inside. 7 Open the oven door, the display will show the cooking time, and then place food into the oven. Close the oven door. 8 Press START once to confirm and start cooking. Press + / - to select the preheating and cooking temperature.
OPERATION INSTRUCTIONS Microwave+Convection 4 Press + / - / +1MIN / +5MIN to select cooking time. 5 Press START to confirm and start cooking. Baking and Roasting Pan This oven has five pre-programmed temperatures settings that make it easy to cook with both convection heat and microwave automatically. They are: 350°F→375°F→400°F→300°F →325°F. The longest time is 95 minutes. Example: How to set the combination of microwave and convection at temperature 400°F for 30 minutes.
OPERATION INSTRUCTIONS 4 Auto Cook OPERATION INSTRUCTIONS Accessory Guide: Glass Turntable For auto cook function, you can select the type of food you want to cook from the programs listed on the cooking label located on the interior panel of the appliance. or 5 Press START to start cooking. Auto Program: How to Cook 8oz fresh vegetables. 1 In standby mode, press the AUTO COOK once. 2 Press + / - to select food code ‘AC-3’ (Fresh Vegetable).
OPERATION INSTRUCTIONS 4 Auto Reheat Glass Turntable For auto reheat function, you can select the type of food you want to cook from the programs listed on the cooking label located on the interior panel of the appliance. OPERATION INSTRUCTIONS Accessory Guide: : After selecting the food type, press + / - to select portion of food. or 4 Press START to start cooking. Auto Program: How to Reheat soup. 1 2 In standby mode, press the AUTO REHEAT once. Press +/- to select food code ‘AH-3’ (Soup).
OPERATION INSTRUCTIONS +30 Sec Function Popcorn OPERATION INSTRUCTIONS Example: How to cook popcorn for 3 minutes and 30 seconds. In standby mode, press +30 SEC, the microwave program will start at 100% power level and cook for 30 seconds. During cooking, you can add cooking time by touching +30 SEC pad repeatedly. The longest cooking time is 95 minutes. Example: During microwave cooking, add the cooking time by 2 minutes by utilizing the +30 SEC button. 1 In standby mode, press the POPCORN.
OPERATION INSTRUCTIONS Child lock Example1: How to set/cancel the child lock. 1 In standby mode, suppose the display is showing 11:58. 2 Press and hold STOP/CANCEL for 3 seconds, then ‘LOC’ appears. OPERATION INSTRUCTIONS The child proof lock prevents unsupervised operation by children. Press and hold for 3 seconds. 3 Press and hold STOP/CANCEL for 3 seconds, then ‘LOC’ disappears. Press and hold for 3 seconds.
TROUBLE SHOOTING Automatic Protection Mechanism TROUBLE SHOOTING LOW TEMPERATURE PROTECTION - The display may show Er03 which means the appliance has entered into low temperature protection mode which will protect the appliance from further damage. Audible alert will be heard until STOP/CANCEL is pressed or the appliance is unplugged.
CLEANING AND CARE Turn off the oven and unplug the power cord from the wall when cleaning. Keep the inside of the oven clean. When food splatters or spilled liquids adhere to oven walls, wipe with a damp cloth. Mild detergents may be used if the oven gets very dirty. Avoid using spray or other harsh cleaners. They may stain, streak or dull the door surface. The outside of the oven should be cleaned with a damp cloth.
PRODUCT WARRANTY PRODUCT WARRANTY Galanz product is warranted for one year following purchase for defects in material and workmanship. Please save your receipt as proof of purchase is required to make a warranty claim. During this period, we will provide the replacement cost of this product, a replacement or the equivalent, or repair per our discretion.
WARRANTY REGISTRATION PLEASE PRINT CLEARLY. Name Address City Phone Model Number State WARRANTY REGISTRATION OPERATION INSTRUCTIONS Please mail this warranty card to the address below within 30 days of purchase. Galanz Americas, 55 Challenger Road, Suite 503, Ridgefield Park, NJ 07660. ZIP Email Serial Number Purchase Location You must attach a copy of your purchase receipt to validate your registration.
©2019 Galanz Americas Limited Company