
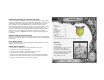
User Guide


THE MENU SCREEN
15
- Button Config
Set the buttons used during gameplay. Upon selecting <Button Config> from the Option Menu, the screen will change to the
Button Config Screen. Move the cursor to a button command and press the
≈ button. Upon doing this, a Select Window will
appear with a list of all the possible buttons to choose from. Select a button and press the
≈ button again. Continue this process
until all commands have been assigned a button. Once all settings are completed, press the SELECT button to display a
confirmation message. To confirm the new settings and save the information, move the cursor to <Yes> and press the
≈ button
once more.
NOTE: To return the button configurations to the default setting, press the
≈ button after pressing the START button.
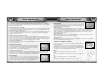
8. ITEM – Handling items in inventory
This command covers use and arrangement of items. From the Menu Screen, select <Item>. When the
≈ button is pressed, the cursor will move to the following five sub-commands: <Use>, <Discard>,
<Equipped>, <Sort>, and <Excavated>. Please see below for details regarding the operations of each
sub-command. There are also headings that concern the PocketStation personal game unit.
Use – Using items in inventory
This sub-command controls the use of items in inventory. Press the
≈ button after moving the cursor to <Use>. Select an item to
be used, and press the
≈ button twice (only items in a bright font can be selected). Upon doing so, a confirmation message will
appear with the cursor pointing to <Yes>. Pressing the
≈ button again at this point confirms the item to be used and also brings
up a Select Window with a list of characters. Select a character to use this item and press the
≈ button.
NOTE: To scroll through the item columns, press the directional button UP/DOWN or to the LEFT/RIGHT.
Discard – Discarding items in inventory
This sub-command controls discarding unnecessary items to make room for more important ones. Press the
≈ button after
moving the cursor to <Discard>. Select an item to be discarded and press the
≈ button twice. Upon doing so, a confirmation
message will appear. Move the cursor to <Yes> and press the
≈ button again to execute the command.
Equipped – Removing equipped items
This sub-command controls checking, as well as removing, items that are equipped. Press the
≈ button after moving the cursor
to <Equipped>. Select an item to be removed and press the
≈ button (only items in a bright font are equipped and can be
removed). Upon doing so, a confirmation message will appear. Move the cursor to <Yes> and press the
≈ button again to
execute the command.
Sort – Arranging items in inventory
This sub-command controls the arrangement of items by groups. Press the
≈ button after moving the cursor to <Sort>.
Upon doing so, a Select Window will appear with the following two options: <Auto> and <Manual>. Select an option and press
the
≈ button to execute the command. See the next page for details on the two options.
THE MENU SCREEN
14
Custom Arts – See the Duel Combo History.
The Custom Arts Window displays the previously used Weapon Arts and Spell Arts of a character’s Combo Attack or the previously
used Weapon Art that was created in “Duel.” Similar to the Equipped Arts and Combos Windows, it is possible for the player to
move the line in the Custom Arts Window to separate the two zones. Downloading data onto the PocketStation (see page 26) and
deleting information on the registry can also be done using the same method.
Arts List
Weapon Arts that the player acquires during battle and newly acquired Spell Arts are classified and displayed according to type.
Weapon Arts learned with Duel and those that are categorized in the Arts List Window are arranged in this list
(technique/acquired magical power list). All are accessed in the same manner. When the
≈ button is pressed while the Arts List
Window is displayed, it will enter the reference mode displaying each type of explanation.
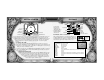
7. SYSTEM CONFIG – Changing the system settings
This command allows the player to change the system settings. From the Menu Screen, select
<System Config>. When the
≈ button is pressed, the Option Menu Window will be displayed listing
the following system settings: <Sound>, <Vibration ON/OFF>, <Screen Adjustment>, <Help Lock>,
and <Button Config>. Aside from the <Button Config> setting, changes to any of the other settings
can be done directly in the Option Menu. For <Button Config>, a separate screen will be displayed
when it is selected.
- Sound
Switch between <Stereo> and <Mono> sound output. Move the cursor to the desired sound output and press the
≈ button.
- Vibration ON/OFF
Set the Vibration Function <OFF> or <ON>. Move the cursor to either <OFF> or <ON> and press the
≈ button.
NOTE: This selection is possible only if a DUALSHOCK™ Analog Controller is connected. Otherwise, this setting will be displayed
in a gray font and cannot be accessed.
- Screen Adjustment
Adjust the screen position. To adjust the screen horizontally or vertically, set the cursor to <X> (or to <Y>, for vertical
adjustments) and press the
≈ button. Next, press the directional button UP/DOWN to increase or decrease the numerical value.
The higher the number, the more the screen moves to the right (or bottom, for vertical adjustments). Inversely, the lower the
number, the more the screen moves to the left (or top, for vertical adjustments).
- Help Lock
Set the operation lock <OFF> or <ON>. Move the cursor to either <OFF> or <ON> and press the
≈ button.