Operator‘s manual SILENO city, smart SILENO city gardena.com LT 64.
Contents 1 Introduction 1.1 Memo..................................................................... 3 1.2 Product description................................................ 3 1.3 Product overview....................................................5 1.4 Symbols on the product......................................... 5 2 Safety 2.1 Safety definitions....................................................7 2.2 General safety instructions.....................................7 2.
1 Introduction 1.1 Memo Serial number: PIN code: Product registration key: The Product registration key is a valuable document and must be stored in a safe place. This key is necessary for example to register the product on GARDENA's website or unlock the robotic lawnmower in the event of a lost PIN code. The product registration key is provided in a separate document in the product packaging. If the robotic lawnmower is stolen, it is important to notify GARDENA of this.
1.2.4 Movement pattern The movement pattern of the robotic lawnmower is random, which means that a movement pattern is never repeated. With this cutting system the lawn is mown evenly without any mowing lines from the robotic lawnmower. The blades must be in good condition to obtain the best mowing result. In order to keep the blades sharp for as long as possible it is important to keep the lawn free from branches, small stones and other objects. Replace the blades regularly for the best mowing result.
1.3 Product overview 3 7 2 6 8 1 4 9 16 10 17 5 13 15 19 12 22 11 23 21 14 20 18 24 28 30 27 25 26 29 31 The numbers in the figure represent: 1. 2. 3. 4. 5. 6. 7. 8. 9. 10. 11. 12. 13. 14. 15. 16. 17. 18.
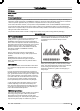
WARNING: Read the user instructions before operating the robotic lawnmower. WARNING: Operate the disabling device before working on or lifting the machine. It is only safe to carry out inspection or maintenance on the robotic lawnmower when the robotic lawnmower is disabled. The robotic lawnmower is disabled when the lamp on the ON/OFF button is not lit. WARNING: Keep a safe distance from the machine when operating. Keep your hands and feet away from the rotating blades. WARNING: Do not ride on the machine.
2 Safety 2.1 Safety definitions 2.2 General safety instructions Warnings, cautions and notes are used to point out specially important parts of the manual. The following system is used in the Operator’s Manual to make it easier to use: WARNING: Used if there is a risk of injury or death for the operator or bystanders if the instructions in the manual are not obeyed.
Warning! Automatic lawnmower! Keep away from the machine! Supervise children! • • Warning! Automatic lawnmower! Keep away from the machine! Supervise children! • • • • • • Use the operating mode Park or turn off the robotic lawnmower when persons, especially children or pets, are in the cutting area. It is recommended to program the lawnmower for use during hours when the area is free from activity, e.g. at night. See Advanced on page 23.
that the robotic lawnmower is disabled. See The indicator lamp on page 35. 3. Carry the robotic lawnmower by the handle under the robotic lawnmower with the blade disc away from the body. CAUTION: Never use a high-pressure washer to clean the robotic lawnmower. Never use solvents for cleaning. Inspect the robotic lawnmower each week and replace any damaged or worn parts. See Introduction maintenance on page 38. 2.3.
3 Installation 3.1 Presentation This chapter contains information that is important to be aware of when planning the installation. Before starting the installation make yourself familiar with what is included in the carton.
2. Fill in holes and hollows to stop rainwater forming pools of water. The product may be damaged if it is operated in pools of water. See Guarantee terms on page 53. 3.3.1 Best charging station location Take the following aspects into consideration when identifying the best location for the charging station: • • • • 3. Read carefully through all the steps before the installation. 4. Check that all parts for the installation are included. See Product overview on page 5.
It is also important that the charging station is not bent sideways. Otherwise the robotic lawnmower might have difficulties docking. wire in towards the charging station on page 17 and in Installation of the guide wire on page 18. 3.3.
The low voltage cable must never be stored in a coil or under the charging station's base plate as this can interfere with the signals from the charging station. WARNING: Do not under any circumstances mount the power supply at a height where there is a risk it can be submerged in water (minimum 30 cm from the ground). It is not permitted to place the power supply on the ground. 3. Connect the power supply’s power cable to a 100-240V wall socket.
1. Place the robotic lawnmower in the charging station while the boundary and guide wires are being laid. 2. Press the ON/OFF button to turn the robotic lawnmower on. If the battery is flat, it takes around 80 to 100 minutes to fully charge it. WARNING: Only charge the robotic lawnmower using a charging station which is intended for it. Incorrect use may result in electric shock, overheating or leakage of corrosive liquid from the battery.
cm / in. of the lawn along the ditch/kerbstone will not be mown. least 15 cm / 6 in. in height. This will prevent the robotic lawnmower from ending up outside the working area under any circumstance. min. 15 cm / 6" 30 cm 1-5 cm If the working area borders on a paving stone path or similar that is level with the lawn (+/- 1 cm / 0.4 in.), it is possible to allow the robotic lawnmower to run a little over the path. The boundary wire should then be laid 10 cm / in. from the edge of the path.
Note: In passages narrower than 2 m / 6.5 ft. (between boundary wires) GARDENA recommends that a guide wire is installed. 3.5.3.1 Secondary areas If the working area consists of two areas which the robotic lawnmower has difficulty travelling between, it is recommended to set up a secondary area. Instances of this are slopes greater than 25% slopes or a passage that is narrower than 60 cm / 24in. Lay the boundary wire then around the secondary area so that it forms an island outside of the main area.
>10% 10- cm / 3.9-" 100 cm / 40" 0-10% 0-10 cm / 0-3.9" 100 cm / 40" 3.5.4.1 Eyelet for connecting the guide wire To facilitate the connection of the guide wire to the boundary wire, it is recommended to create an eyelet with about 20 cm / 8 in. of extra boundary wire at the point where the guide wire will later be connected. It is a good idea to plan where the guide wire will be placed before laying out the boundary wire. See Laying and connecting the guide wire on page 19.
3.5.4.3 Splicing the boundary wire CAUTION: Twinned cables, or a screw terminal block that is insulated with insulation tape are not satisfactory splices. Soil moisture will cause the wire to oxidise and after a time result in a broken circuit. Use an original coupler if the boundary wire is not long enough and needs to be spliced. It is waterproof and gives a reliable electrical connection. 3. Cut off any surplus boundary wire. Cut 1-2 cm above each connector. Insert both wire ends in the coupler.
The robotic lawnmower runs at varying distances from the guide wire to reduce the risk of tracks forming. The area beside the wire which the robotic lawnmower then uses is called the Corridor. G The robotic lawnmower always runs to the left of the guide wire as seen facing the charging station. Thus the corridor is to the left of the guide wire. When installing, it is therefore important to create as much free space as possible to the left of the guide wire, as seen facing the charging station.
7. Connect the guide wire to the boundary wire using a coupler: a) Insert the boundary wire and guide wire in the coupler. Check that the wires are fully inserted into the coupler so that the ends are visible through the transparent area on the other side of the coupler. b) Use a polygrip to completely compress the button on the coupler. It does not matter which holes are used to connect each wire.
lawnmower is disabled when the lamp on the ON/OFF button is not lit. 3.10.2 Display Starting point M in 1. 35 m /4 .5 f t. When the STOP button is pressed and the hatch is opened, the display shows the following information: 2. When the guide calibration is completed, the robotic lawnmower follows the guide wire and then starts mowing. 3.10 Control panel All commands and settings for the robotic lawnmower are done on the control panel. The control panel consists of a display and a keypad.
• • smart system (only for smart SILENO city) Settings 3.12 Schedule SCHEDULE Scheduling wizard Advanced 3.11.1 Main menu Schedule The schedule function is an ideal tool to control which periods the robotic lawnmower should not mow, for example when children are playing in the garden. The scheduling wizard is a quick tool to find suitable schedule settings for the robotic lawnmower. See Scheduling The lawn should not be cut too often to obtain the best mowing result.
If you want to change the schedule settings for individual work days use the Schedule - Advanced menu. 3.12.2 Advanced Advanced The table below provides suggestions for different schedule settings depending on the size of the lawn. The work hours per day should be seen as indicative. It may need to be adjusted to suit the garden and for example grass quality and growth during the season.
In this menu you can: • • To disable mowing a whole day, uncheck both periods. To return to the Schedule overview, press the Menu button. 3.12.5 Copy Use this function to copy the current day settings to other days. Mark Copy by using the arrow keys and press OK. Then use the up and down arrow keys to move the cursor between days. The times will be copied to the days that are marked with OK. enable your smart robotic lawnmower to include with or exclude from the GARDENA smart system app.
• Country menu first enter the PIN code by using the up/down arrow keys and press OK. 3.13.5 Exclude device To remove the wireless connection between the robotic mower and smart system, select the Exclude device option in the robotic lawnmower menu. If you confirm to exclude the device, there will be no communication between the robotic lawnmower and other smart system devices. Note: The robotic lawnmower must be manually deleted from the list of products in the GARDENA smart system app.
2. Select New loop signal in the menu. 3. Press OK and await confirmation that the loop signal has been generated. This normally takes about 10 seconds. Change PIN code 1. Enter the current PIN code by using the up/down arrow keys and press OK. 2. Enter the new PIN code and press OK. 3. Confirm by entering the same code again and press OK. When the PIN code is changed, the message PIN code changed appears in the display. Make a note of the new PIN code on the designated line in Memo.
How to measure the distance to a remote area 20% 30% 3.14.2.4 To set the lawn coverage To set the lawn coverage follow below steps: 1. Use the left/right arrow keys to choose Area 1, 2 or 3. 2. Confirm by pressing the OK button. 3. Use the up/down arrow keys to change how far the robotic lawnmower should follow the guide wire. 4. Press the right arrow key and set how often this should be done. 5. Confirm by pressing the OK button. 6. Press the Menu button to go back to the overview menu of Lawn coverage.
Use the up/down arrow keys to specify the number of centimetres that the robotic lawnmower should pass the boundary wire and press OK. General Time & date Language Country Reset all user settings About 3.14.3.3 ECO mode This function automatically turns off the signal in the boundary loop, the guide wires and the charging station when the robotic lawnmower is not mowing, i.e. when the lawnmower is charging or is not allowed to mow due to schedule settings. 3.14.4.
3.14.4.2 Language To select language: 1. Use the up/down arrow keys to place the cursor at the required language. 2. Go back to Time & Date menu by pressing the Menu button. 3.14.4.3 Country To select country: 1. Use the up/down arrow keys to place the cursor at the required country. 2. Go back to Time & Date menu by pressing the Menu button. 3.14.4.4 Reset all user settings This function allows you to reset the robotic lawnmower to the factory default settings.
3.15 Menu structure overview Schedule Scheduling wizard Advanced Overview/Monday Period 1 All Mo days Period 2 Tu We Th Copy Fr Sa Reset Su Current day Poor Bad All week smart system* Exclude device Status Connected Yes/No Signal strength Good * smart SILENO city 30 - Installation 367 - 004 - 16.02.
3.16 Menu structure overview Settings Security Lawn coverage General Installation Area 1-3 Security level New loop signal Low How? Starting point Advanced How often? 367 - 004 - 16.02.
3.17 Yard layout examples The robotic mower’s behaviour is controlled to a certain extent by what settings are made. Adapting the robotic lawnmower's settings according to the shape of the lawn makes it easier for the robotic lawnmower to frequently reach all parts and therefore achieve a perfect mowing result. Different layouts require different settings. The following pages outline a number of layout examples with installation proposals and settings.
3.17.3 L-shaped garden with a couple of islands and the charging station installed in the narrow area Area 500 m2 Schedule SILENO city (for 500 m2) 08:00 - 19:00, Monday to Sunday Lawn coverage Area 1: How? Guide How far? X m How often? 60% Remarks The Lawn coverage (How often?) for Guide must be specified as a value corresponding to the largest part of the working area as most of the working area can easily be reached by the robotic lawnmower following the guide wire out from the charging station.
3.17.5 Unsymmetrical working area with a narrow passage and a number of islands Area 500 m2 Schedule SILENO city (for 500 m2) 08:00 - 19:00, Monday to Sunday Lawn coverage Factory setting Remarks The guide wire must be placed along the narrow passage to ensure that the robotic lawnmower can with ease locate the charging station from the right hand side of the working area. As the right hand area is only a small part of the working area, the Lawn coverage factory settings can be used.
4 Operation 4.1 The ON/OFF button WARNING: Read the safety instructions carefully before you start your robotic lawnmower. WARNING: Keep your hands and feet away from the rotating blades. Never put your hands or feet close to or under the machine when the motor is running. WARNING: Never use the robotic lawnmower when persons, especially children, or pets, are in the cutting area. 5. Select the desired operating mode and confirm with the OK button. See Operating modes on page 35. 6. Close the hatch.
4.3.3 Operating mode - Park Operating mode Park means that the robotic lawnmower remains in the charging station until a different operating mode is selected. 4.3.4 Operating mode - Park / Schedule Operating mode Park / Schedule means that the robotic lawnmower remains in the charging station until the next schedule or standby permits operation. See Schedule and Standby on page 36. 4.3.
4.7 Charge a flat battery 24 h When the GARDENA robotic lawnmower is new or has been stored for a long period, the battery will be flat and needs to be charged before starting. WARNING: Only charge the robotic lawnmower using a charging station which is intended for it. Incorrect use may result in electric shock, overheating or leakage of corrosive liquid from the battery.
5 Maintenance 5.1 Introduction - maintenance For better operating reliability and longer service life: check and clean the robotic lawnmower regularly and replace worn parts if necessary. All maintenance and servicing must be done according to GARDENA's instructions. See Guarantee terms on page 53. When the robotic lawnmower is first used, the blade disc and blades should be inspected once a week. If the amount of wear during this period has been low, the inspection interval can be increased.
result in a screw wearing during mowing and shearing. The blades can then be propelled from under the body and cause serious injury. Replace worn or damaged parts for safety reasons. Even if the blades are intact, they should be replaced on a regular basis for the best mowing result and low energy usage. There are 3 blades on the robotic lawnmower, which are screwed into the blade disc. All 3 blades and screws must be replaced at the same time to obtain a balanced cutting system.
batteries. Do not use non-rechargeable batteries. The appliance must be disconnected from the supply mains when removing the battery. 1. Press the ON/OFF button for 3 seconds to turn off the robotic lawnmower. 2. Check that the indicator lamp on the ON/OFF button is not lit. 3. Set the cutting height to MIN (2). 4. Turn the robotic lawnmower upside down. Place the robotic lawnmower on a soft and clean surface to avoid scratching the body and the display cover. 5. Clean around the battery cover. 6.
6 Troubleshooting 6.1 Introduction - troubleshooting In this chapter, faults and symptoms are described and can guide you if the robotic lawnmower does not operate as expected. More suggestions for steps to take in the event of malfunction or symptoms can be found on www.gardena.com. 6.2 Fault messages Below a number of fault messages are listed which may be shown in the display of the robotic lawnmower. Contact GARDENA customer service if the same message appears often.
Message Cause Outside working area The boundary wire connections to the charging station are crossed. Action Check that the boundary wire is connected correctly. The boundary wire is too close to the edge of Check that the boundary wire has been laid the working area. according to the instructions. See Installation on page 27. The working area slopes too much by the boundary loop. The boundary wire is laid in the wrong direction around an island.
Message Cause Action Stuck in charging sta- There is an object in the way of the robotic tion lawnmower preventing it from leaving the charging station. Remove the object. Upside down Turn the robotic lawnmower the right way up. The robotic lawnmower is leaning too much or has turned over. Needs manual charg- The robotic lawnmower is set to the Seconing dary area operating mode. Place the robotic lawnmower in the charging station. This behaviour is normal and no action is required.
6.3 Information messages Below a number of information messages are listed which may be shown in the display of the robotic lawnmower. Contact GARDENA customer service if the same message appears often. Message Low battery Cause Action The robotic lawnmower cannot find the charg- Check that the charging station and the guide ing station. wire are installed in accordance with the instructions. See Installation of the guide wire on page 18. The guide wire is broken or not connected.
6.4 Indicator lamp in the charging station For a fully functional installation, the indicator lamp in the charging station must emit a solid or flashing green light. If something else appears, follow the troubleshooting guide below. There is more help on www.gardena.com. If you still need help, please contact GARDENA customer service. Light Cause Action Solid green light Good signals No action required Green flashing light The signals are good and ECO mode is activated. No action required.
6.5 Symptoms If your robotic lawnmower does not work as expected, follow the symptoms guide below. There is a FAQ (Frequently Asked Questions) on www.gardena.com which provides more detailed answers to a number of standard questions. Contact GARDENA customer service if you still cannot find the reason for the fault. Symptoms Cause The robotic lawnmow- The boundary wire is not laid in a long er has difficulty dock- straight line that is far enough out from the ing. charging station.
Symptoms Cause Action Uneven mowing results. The robotic lawnmower works too few hours per day. Increase the mowing time. See Advanced on page 23. The shape of the working area requires the use of Area 1-3 for the robotic lawnmower to find its way to all remote areas. Use Area 1-3 to steer the robotic lawnmower to a remote area. See Lawn coverage on page 26. The How often? setting is incorrect in relation Check that the correct How often? value is to the layout of the working area. selected.
GUIDE R L Guide To rectify the fault you will need boundary wire, connector(s) and coupler(s): a) If the suspected boundary wire is short then it is easiest to exchange all of the boundary wire between L and the point where the guide wire is connected to the boundary wire (thick black line). b) If the suspected boundary wire is long (thick black line) then do as follows: Put L and GUIDE back to their original positions. Then disconnect R. Connect a new loop wire to R.
4. If indicator lamp still flashes blue in step 3 above: Put L and GUIDE back in their original positions. Then switch R and GUIDE. If indicator lamp now is lit with a solid green light then disconnect L and connect a new boundary wire to L. Connect the other end of this new wire at the middle of the suspected wire section. Follow the same approach as in 3a) and 3b) above. 5. When the break is found, the damaged section must be replaced with a new wire. Always use original couplers. 367 - 004 - 16.02.
7 Transportation, storage and disposal 7.1 Transportation The contained lithium-ion-batteries are subject to the Dangerous Goods Legislation requirements. For commercial transports e.g. by third parties or forwarding agents, special requirement on packaging and labeling must be observed. Consult an expert for hazardous material for preparation of the item being shipped. Please also observe possibly more detailed national regulations.
8 Technical data 8.1 Technical data Data SILENO city smart SILENO city Length, cm 55 55 Width, cm 38 38 Height, cm 23 23 Weight, kg 7.3 7.3 Electrical system SILENO city smart SILENO city Battery, Lithium-Ion 18 V/2.1 Ah Art.No 584 85 28-01, 584 85 28-02 Power supply, V/28 V DC 100-240 100-240 Low voltage cable length, m 5 5 Mean energy consumption at maximum use 3.9 kWh/month in a 500 m2 3.9 kWh/month in a 500 m2 working area working area Charge current, A DC 1.3 1.
Mowing SILENO city smart SILENO city Maximum length boundary wire, m 300 300 Maximum length guide wire, m 150 150 – 700 – 700 IP-classification SILENO city smart SILENO city Robotic lawnmower IPX5 IPX5 Charging station IPX5 IPX5 Power supply IPX4 IPX4 Internal SRD (short range device) SILENO city smart SILENO city Operating frequency band, MHz - 863-870 Maximum transmitted power, dBm - 14 Free field radio range, approx.
9 Warranty 9.1 Guarantee terms GARDENA guarantees this product’s functionality for a period of two years (from date of purchase). The guarantee covers serious faults relating to materials or manufacturing faults. Within the guarantee period, we will replace the product or repair it at no charge if the following terms are met: • • The robotic lawnmower and the charging station may only be used in compliance with the instructions in this Operator’s Manual.
10 EC Declaration of Conformity 10.1 EC Declaration of Conformity Husqvarna AB, SE-561 82 Huskvarna, Sweden, tel: +46-36-146500, declares that the Robotic lawnmovers GARDENA SILENO city and GARDENA smart SILENO city with serial numbers dating 2017 week 48 and onwards (the year and week is clearly stated on the rating plate, followed by the serial number), comply with the requirements of the COUNCIL’S DIRECTIVE: • Directive “relating to machinery” 2006/42/EC.
367 - 004 - 16.02.
ORIGINAL INSTRUCTIONS We reserve the right to make changes without prior notice. Copyright © 2017 GARDENA Manufacturing GmbH. All rights reserved. 115 89 45-26 2018-02-21 LT 64.