zūmo 395 ® Owner’s Manual January 2016 190-02000-00_0A
All rights reserved. Under the copyright laws, this manual may not be copied, in whole or in part, without the written consent of Garmin. Garmin reserves the right to change or improve its products and to make changes in the content of this manual without obligation to notify any person or organization of such changes or improvements. Go to www.garmin.com for current updates and supplemental information concerning the use of this product.
Table of Contents Resetting the Fuel Tank Mileage ........................................... 8 Enabling Dynamic Fuel Stops ................................................ 9 Installation...................................................................... 1 Finding and Saving Locations...................................... 9 Mounting Your Device in a Motorcycle ....................................... 1 Powered Motorcycle Mount ...................................................
Viewing Track Information ................................................... 13 TracBack® ................................................................................ 14 Following Your Recent Track ............................................... 14 Saving Your Recent Track as a Trip .................................... 14 Tire Pressure ............................................................................ 14 Setting Up the Tire Pressure Sensors .................................
Installation Mounting Your Device in a Motorcycle Powered Motorcycle Mount WARNING Garmin strongly recommends having an experienced installer with the proper knowledge of electrical systems install the device. Incorrectly wiring the power cable can result in damage to the vehicle or the battery and can cause bodily injury. See the Important Safety and Product Information guide in the product box for product warnings and other important information. ® NOTE: Both 1/4 in. standard and M6 bolts are included.
Attaching the Base Plate to the Motorcycle Mount NOTICE Direct, sustained contact with the base plate, or any part of the motorcycle, may damage the mount over time. To prevent this kind of damage, you must place the mounting spacers between the mount and base plate, and make sure that no part of the device or mount touches the motorcycle. 1 Thread the M4 x 20 mm panhead screws À through the washers Á, cradle, spacers Â, and base plate Ã.
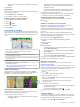
Device Overview 6 Click Add a Device. The Garmin Express software detects your device. À Á Â Ã 7 Click Add Device. 8 Follow the on-screen instructions to add your device to the Garmin Express software. When setup is complete, the Garmin Express software searches for map and software updates for your device. 9 Select an option: • To install all available updates, click Install All. • To install a single update, click View Details and select an update.
3 If necessary, go outdoors to an open area, away from tall buildings and trees. When turns green, the device has acquired satellite signals and is ready for navigation. Status Bar Icons The status bar is located at the top of the main menu. The status bar icons display information about features on the device. You can select some icons to change settings or view additional information. GPS signal status. Hold to view GPS accuracy and acquired satellite information (Viewing GPS Signal Status, page 19).
Information about red light and speed camera locations is available in some areas for some product models. Go to garmin.com/speedcameras to check availability and compatibility, or to purchase a subscription or one-time update. You can purchase a new region or extend an existing subscription at any time. You can go to mygarmin.com to update the camera database on your device. You should update your device frequently to receive the most up-to-date camera information.
• Select a point, such as a street, intersection, or address location. 5 Select Go!. Going Home The first time you start a route home, the device prompts you to enter your home location. 1 Select Where To? > Go Home. 2 If necessary, enter your home location. Editing Your Home Location Information 1 Select Where To? > Saved > Home. 2 Select . 3 Select > Edit. 4 Enter your changes. 5 Select Done.
TIP: If the Change Route tool is not in the map tools menu, you can add it (Enabling Map Tools, page 11). 2 Select an option: • To detour your route for a specific distance, select Detour by Distance. • To detour around a specific road on the route, select Detour by Road. • To find a new route, select Detour. Stopping the Route From the map, select > Stop. Trip Planner You can use the trip planner to create and save a trip, which you can navigate later.
Avoiding Delays, Tolls, and Areas Avoiding Toll Roads Your device can avoid routing you through areas that require tolls, such as toll roads, toll bridges, or congestion areas. The device may still include a toll area in your route if no other reasonable routes are available. 1 Select Settings > Navigation. 2 Select an option: NOTE: The menu changes based on your area and the map data on your device. • Select Toll Roads. • Select Tolls and Fees > Toll Roads.
Enabling Dynamic Fuel Stops Before you can enable dynamic fuel stops, the device must be in motorcycle mode, placed in the motorcycle mount, and fuel tracking must be enabled. You can set the device to suggest fuel stops based on your estimated fuel range. Select Apps > Fuel Settings > Dynamic Fuel Stops. Finding and Saving Locations The maps loaded in your device contain locations, such as restaurants, hotels, auto services, and detailed street information.
2 Select Viewing Current Location Information > Explore this Venue. Foursquare Foursquare is a location-based social network. Your device includes pre-loaded Foursquare points of interest, which are indicated by the Foursquare logo in your location search results. Searching Foursquare Points of Interest You can search for Foursquare points of interest loaded on your device. Select Where To? > Categories > Foursquare.
6 Select an option: • Select Name. • Select Phone Number. • Select Categories to assign categories to the saved location. • Select Change Map Symbol to change the symbol used to mark the saved location on a map. 7 Edit the information. 8 Select Done. Assigning Categories to a Saved Location You can add custom categories to organize your saved locations. NOTE: Categories appear in the saved locations menu after you have saved at least 12 locations. 1 Select Where To? > Saved. 2 Select a location. 3 Select .
5 Select Done. Trip Information Viewing Trip Data from the Map Before you can view trip data on the map, you must add the tool to the map tools menu (Enabling Map Tools, page 11). From the map, select > Trip Data. Customizing the Trip Data Fields Before you can customize the data that appears in the trip data map tool, you must add the trip data tool to the map tools menu (Enabling Map Tools, page 11). 1 From the map, select > Trip Data. 2 Select a trip data field. 3 Select an option.
• To disable audio from streaming media, clear the Media Audio check box. Hands-Free Calling NOTE: Bluetooth wireless technology and hands-free calling are not available on all models, or for all languages and regions. NOTE: While most phones are supported and can be used, it cannot be guaranteed that a particular phone can be used. All features may not be available for your phone. Using Bluetooth wireless technology, your device can connect to your mobile phone to become a hands-free device.
TracBack ® Following Your Recent Track 7 Within 30 seconds, on the sensor, insert the battery  into the battery holder à with the positive side facing up. The TracBack feature records a track of your recent movement. You can retrace your recent track back to where you started. 1 Select Apps > TracBack. Your recent track appears on the map. 2 Select Go!.
Low tire pressure Low sensor battery Sensor not connected Tire Pressure Sensor Sleep Mode Renaming Service Categories 1 Select Apps > Service History. 2 Select the category to be renamed. 3 Select > Rename Category. 4 Enter a name, and select Done. When you park your vehicle and turn off your zūmo device, the tire pressure sensor enters a power-saving sleep mode after several minutes. The sensor does not transmit information to the zūmo device while in sleep mode.
TIP: To purchase additional map products, go to http://buy.garmin.com. 1 Select Settings > Map & Vehicle > myMaps. 2 Select a map. Navigation Settings Select Settings > Navigation. Route Preview: Shows a preview of the major roads in your route when you start navigation. Calculation Mode: Sets the route calculation method. Off-Route Recalculation: Sets recalculation preferences when navigating away from an active route.
Position Reporting: Shares your position information with Garmin to improve content. Travel History: Allows the device to record information for the myTrends, Where I’ve Been, and Trip Log features. Clear Travel History: Clears your travel history for the myTrends, Where I’ve Been, and Trip Log features. Restoring Settings You can restore a category of settings or all settings to the factory default values. 1 Select Settings. 2 If necessary, select a settings category. 3 Select > Restore.
2 Remove the end piece, the silver tip Á, and the fuse Â. 3 Insert a new fast-blow fuse that has the same current, such as 1 A or 2 A. 4 Place the silver tip in the end piece. 5 Push in the end piece and rotate it clockwise to lock it back into the vehicle power cable Ã. Troubleshooting The suction cup will not stay on my windshield 1 Clean the suction cup and windshield with rubbing alcohol. 2 Dry with a clean, dry cloth. 3 Mount the suction cup (Installation, page 1).
Transferring Data From Your Computer 1 Connect the device to your computer (Connecting the Device 2 3 4 5 6 to Your Computer, page 18). Depending on your computer operating system, the device appears as either a portable device, a removable drive, or a removable volume. On your computer, open the file browser. Select a file. Select Edit > Copy. Browse to a folder on the device. NOTE: For a removable drive or volume, you should not place files in the Garmin folder. Select Edit > Paste.
Index Symbols 2-D map view 12 3-D map view 12 A accessories 19 active lane guidance 6 addresses, finding 10 answering calls 13 audio, proximity points 16 avoidances area 8 deleting 8 disabling 8 road 8 road features 8 tolls 8 B categories 9 cities 10 coordinates 10 intersections 10 Foursquare 10 fuel stations 10 tracking 8, 9 fuse, changing 17 suction cup 17 myTrends, routes 7 G O Garmin Express registering the device 3 updating software 3 geocaching 10 going home 6 GPS 3, 19 P H hands-free phone c
shaping a route 6 shortcuts adding 10 deleting 10 simulated locations 16 sleep mode 3, 15 Smartphone Link 12 software updating 3 version 16 specifications 17 speed cameras 4 suction cup 17 T theft, avoiding 17 time settings 16 tire pressure alerts 14 profiles 14 sensors 14 sleep mode 15 tolls, avoiding 8 tools, maps 11 TracBack 14 tracks 13 transportation modes 4 travel history 16 trip information 12 resetting 12 viewing 12 trip log, viewing 12 trip planner 7 editing a trip 7 shaping points 7 troubleshooti
www.garmin.