EDGE® 130 Owner’s Manual
© 2018 Garmin Ltd. or its subsidiaries All rights reserved. Under the copyright laws, this manual may not be copied, in whole or in part, without the written consent of Garmin. Garmin reserves the right to change or improve its products and to make changes in the content of this manual without obligation to notify any person or organization of such changes or improvements. Go to www.garmin.com for current updates and supplemental information concerning the use of this product.
Table of Contents Introduction.....................................................................1 Keys ............................................................................................ 1 Status Icons ........................................................................... 1 Pairing Your Smartphone ........................................................... 1 Installing the Standard Mount ..................................................... 1 Releasing the Edge .............................
Introduction WARNING See the Important Safety and Product Information guide in the product box for product warnings and other important information. Always consult your physician before you begin or modify any exercise program. Keys 3 Select an option to add your device to your Garmin Connect account: • If this is the first device you have paired with the Garmin Connect Mobile app, follow the on-screen instructions.
• While in an active widget, select for that widget. to view additional options Using the Backlight • To turn on the backlight, select any key. • To adjust the timeout, hold , select System > Backlight Timeout, and select an option. Training Going for a Ride If your device was packaged with an ANT+ sensor, they are already paired and can be activated during initial setup. to turn on the device. 1 Hold 2 Go outside, and wait while the device locates satellites. appears solid when the device is ready.
NOTE: When you download a course from your Garmin Connect account, all segments in the course are downloaded automatically. Racing a segment: You can race a segment, trying to match or exceed your personal record or other cyclists who have ridden the segment. Strava™ Segments You can download Strava segments to your Edge 130 device. Follow Strava segments to compare your performance with your past rides, friends, and pros who have ridden the same segment.
NOTE: As soon as you select , your Virtual Partner starts the course and does not wait for you to warm up. • Scroll to the map to view the course map. If you stray from the course, the device displays a message. Viewing Course Details 1 Hold . 2 Select Navigation > Courses. 3 Select a course. 4 Select an option: • • • • Select Ride to ride the course. Select Summary to view details about the course. Select Map to view the course on the map. Select Elevation to view an elevation plot of the course.
Deleting a Personal Record 1 Hold . 2 Select My Stats > Personal Records. 3 Select a personal record. 4 Select Options > Clear Record > Yes. Navigation Navigation features and settings also apply to navigating courses (Courses, page 3) and segments (Segments, page 2). • Locations (Locations, page 5) • Map settings (Viewing User Locations on the Map, page 5) Locations You can record and store locations in the device. Marking Your Location Before you can mark a location, you must locate satellites.
rate, calories burned, cadence, an overhead map view, pace and speed charts, and customizable reports. NOTE: Some data requires an optional accessory such as a heart rate monitor. Connect Mobile app. Your Bluetooth paired smartphone must be equipped with a data plan and be in an area of network coverage where data is available. Your emergency contacts must be able to receive text messages (standard text messaging rates may apply).
1 Snap the heart rate monitor module À onto the strap. The Garmin logos on the module and the strap should be right-side up. 2 Wet the electrodes Á and the contact patches  on the back of the strap to create a strong connection between your chest and the transmitter. The sensor may be tilted when installed on an asymmetrical hub. This does not affect operation. 3 Rotate the wheel to check for clearance. The sensor should not contact other parts of your bike.
If you know your maximum heart rate, you can use the table (Heart Rate Zone Calculations, page 13) to determine the best heart rate zone for your fitness objectives. If you do not know your maximum heart rate, use one of the calculators available on the Internet. Some gyms and health centers can provide a test that measures maximum heart rate. The default maximum heart rate is 220 minus your age.
4 Select Options > Calibrate. 5 Keep your power meter active by pedaling until the message appears. 6 Follow the on-screen instructions. Pedal-Based Power Vector measures pedal-based power. Vector measures the force you apply a few hundred times every second. Vector also measures your cadence or rotational pedaling speed. By measuring the force, the direction of force, the rotation of the crank arm, and time, Vector can determine power (watts).
Reset: Allows you to reset the system settings or delete all user data (Restoring All Default Settings, page 12). About: Displays the software version and unit ID, and allows you to check for software updates (Viewing E-label Regulatory and Compliance Information, page 11). Changing the Device Language 1 Hold . 2 Select System > Language. Changing the Units of Measure You can customize units of measure for distance and speed. 1 Hold . 2 Select System > Units. Turning the Device Tones On and Off 1 Hold .
Operating temperature From -5° to 50°C (from 23° to 122°F) range User Replaceable Batteries Radio frequency/ protocol WARNING See the Important Safety and Product Information guide in the product box for product warnings and other important information. 2.4 GHz ANT+ wireless communications protocol *The device withstands pressure equivalent to a depth of 30 m. For more information, go to www.garmin.com/waterrating.
Troubleshooting Resetting the Device If the device stops responding, you may need to reset it. This does not erase any of your data or settings. for 15 seconds. 1 Hold The device turns off. for one second to turn on the device. 2 Hold Restoring All Default Settings You can restore all of the device settings to the factory default values. 1 Hold to open the main menu. 2 Select System > Reset. 3 Select an option: • To reset only your device and ride settings, select Reset Settings.
minutes, then start the timer and run for 20 minutes, your elapsed time is 35 minutes. Elevation: The altitude of your current location above or below sea level. ETA at Dest.: The estimated time of day when you will reach the final destination (adjusted to the local time of the destination). You must be navigating for this data to appear. ETA at Next: The estimated time of day when you will reach the next waypoint on the route (adjusted to the local time of the waypoint).
Wheel Size L (mm) 12 × 1.75 935 14 × 1.5 1020 14 × 1.75 1055 16 × 1.5 1185 16 × 1.75 1195 18 × 1.5 1340 18 × 1.75 1350 20 × 1.75 1515 20 × 1-3/8 1615 22 × 1-3/8 1770 22 × 1-1/2 1785 24 × 1 1753 24 × 3/4 Tubular 1785 24 × 1-1/8 1795 24 × 1-1/4 1905 24 × 1.75 1890 24 × 2.00 1925 24 × 2.125 1965 26 × 7/8 1920 26 × 1(59) 1913 26 × 1(65) 1952 26 × 1.25 1953 26 × 1-1/8 1970 26 × 1-3/8 2068 26 × 1-1/2 2100 26 × 1.40 2005 26 × 1.50 2010 26 × 1.
Index indoor training 4 installing 1, 6, 7 A K accessories 6, 8, 12 activities, starting 2 alerts 10 ANT+ sensors 4, 6, 9 pairing 8 power meters 8 applications 5 smartphone 1 assistance 6 Auto Lap 4 Auto Pause 4 Auto Scroll 4 keys 1 B back to start 5 backlight 2 bands 12 battery charging 1 maximizing 9, 12 replacing 11 type 2 bike sensors 8 Bluetooth sensors 4, 6 Bluetooth technology 1, 5, 10 C cadence 7 calibrating, power meter 8 calorie, alerts 10 cleaning the device 11 clearing data 12 computer, c
support.garmin.
Quick Start Manual 2 Manuel de demarrage rapide 11 Manuale di avvio rapido 22 Schnellstartanleitung 33 Guia de inicio rapido 44 Manual de inicio rapido 54
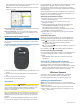
EDGE® 130 Quick Start Manual Introduction &WARNING See the Important Safety and Product Information guide in the product box for product warnings and other important information. -- -~-- Always consult your physician before you begin or modify any exercise program. - -~ Keys !G) 1 J 1 @ A _ == ... 2 Select to wake the device. Hold to turn the device on and off. -~ Select to scroll through the data screens, options, and settings. From the home screen, hold to view the device menu.
@IV iI ~~ ® Select to scroll through the data screens, options, and settings. From the home screen, select to view the widgets. I Select to start and stop the timer. I Select to choose an option or to I acknowledge a message. C ID IO Select to mark a new lap. Select to return to the previous screen.
toward the sky. You can install the bike mount on the stem or the handlebars. 1 Select a secure location to mount the device where it does not interfere with the safe operation of your bike. 2 Place the rubber disk CD on the back of the bike mount. The rubber tabs align with the back of the bike mount so it stays in place. 3 Place the bike mount on the bike stem. 4 5 6 4 Attach the bike mount securely using the two bands @. Align the tabs on the back of the device with the bike mount notches @.
... .......- Going for a Ride 1 2 3 4 Hold - to turn on the device. Go outside, and wait while the device locates satellites. 11111 appears solid when the device is ready. From the home screen, select I..... Select I..,. to start the activity timer. Distance Timer Speed 25.00 56:27 29.0 Avg.Speed 26.2 Totl. Ascent Grade 182 4 NOTE: History is recorded only while the activity timer is running.
5 6 7 Select 1.._. to stop the activity timer. Select Save Ride. Select the ride type. TIP: Accurate ride type data is important for creating bike friendly courses on your Garmin Connect account. Viewing Widgets Your device comes preloaded with several widgets. You should pair your device with a smartphone to get the most of out your Edge device. • From the home screen, select A or v . • The device scrolls through the widget loop. While in an active widget, select 1.._.
install the Garmin Connect Mobile app on your smartphone. Go to www.garmin.com/intosports Iapps for more information. NOTE: Your device must be connected to your Bluetooth enabled smartphone to take advantage of some features. Live Track: Allows friends and family to follow your races and training activities in real time. You can invite followers using email or social media, allowing them to view your live data on a Garmin Connect tracking page.
Assistance &CAUTION Assistance is a supplemental feature and should not be relied on as a primary method to obtain emergency assistance. The Garmin Connect Mobile app does not contact emergency services on your behalf. When your Edge device with GPS enabled is connected to the Garmin Connect Mobile app, you can send an automated text message with your name and GPS location to your emergency contacts. For more information, see your owner's manual.
2 3 4 5 Plug the small end of the USB cable into the USB port on the device. Plug the large end of the USB cable into an AC adapter or a computer USB port. Plug the AC adapter into a standard wall outlet. When you connect the device to a power source, the device turns on. Charge the device completely. Restarting the Device If the device stops responding, you may need to restart it. NOTE: Restarting the device may erase your data or settings. 1 Hold /- for 15 seconds. The device turns off.
Restoring All Default Settings You can restore all of the device settings to the factory default values. 1 Hold :=to open the main menu. 2 Select System > Reset. 3 Select an option: • To reset only your device and ride settings, select Reset Settings. NOTE: This does not delete your activity history, such as rides, workouts, and courses. • To reset your device and ride settings, and delete all user history and data, select Delete All. NOTE: This deletes all user-entered information and activity history.
Specifications Operating temperature range: From -20° to 60°C (from -4° to 140°F) Charging temperature range: From 0° to 45°C (from 32° to 113°F) Wireless frequencies/protocols: 2.4 GHz @ 1 dBm nominal EDGE® 130 Manuel de demarrage rapide Introduction Consultez le guide Informations importantes sur le produit et Ia securite inclus dans l'emballage du produit pour prendre connaissance des avertissements et autres informations sur le produit. """'·""""""'-"·"·"'""'"'·""·"'-"·'""·~--"'-'v.•.-.•.·.---.Y.
© 2018 Garmin Ltd. or its subsidiaries Garmin'' , the Garmin logo, ANT+'", and Edge®are trademarks of Garmin Ltd. or its subsidiaries, registered in the USA and other countries. Connect IQ'"", Garmin Connectm, and Garmin Expressmare trademarks of Garmin Ltd. or its subsidiaries. These trademarks may not be used without the express permission of Garmin. The Bluetooth") word mark and logos are owned by the Bluetooth SIG, Inc. and any use of such marks by Garmin is under license.
(GJH 5HPRWH ,QVWUXFWLRQV ,QVWUXFWLRQV GH OD WpOpFRPPDQGH (GJH (GJH ,VWUX]LRQL GHO WHOHFRPDQGR (GJH )HUQEHGLHQXQJ ± $QZHLVXQJHQ
(GJH 5HPRWH ,QVWUXFWLRQV $OLJQ WZR RI WKH QRWFKHV ➀ ZLWK WKH VLGHV RI WKH PRXQW DQG SUHVV WKH UHPRWH LQWR WKH PRXQW XQWLO LW FOLFNV 'HYLFH 2YHUYLHZ ➀ ➁ /DS NH\ 6HOHFW WR PDUN D QHZ ODS $FWLRQ NH\ 6HOHFW WR VWDUW DQG VWRS WKH WLPHU +ROG WR WXUQ RQ WKH EDFNOLJKW 127( 7KLV LV WKH GHIDXOW IXQFWLRQDOLW\ RI WKH DFWLRQ NH\ 7KH DFWLRQ NH\ IXQFWLRQV DUH SURJUDPPDEOH ➂ 3DJH NH\ 6HOHFW WR VFUROO IRUZDUG WKURXJK WKH GDWD SDJHV +ROG WR VFUROO WKURXJK WKH GDWD SDJHV LQ UHYHUVH ➃ 6WDWXV /(' 6
9HULI\ WKH JDVNHW ➁ LV IXOO\ VHDWHG LQ WKH JURRYH 5HSODFH WKH EDFNSODWH DOLJQLQJ WKH SRVW ➂ ZLWK WKH JDS LQ WKH FLUFXLW ERDUG ➃ 5HSODFH DQG WLJKWHQ WKH WKUHH VFUHZV 127( 'R QRW RYHUWLJKWHQ 6SHFLILFDWLRQV %DWWHU\ W\SH 8VHU UHSODFHDEOH &5 YROWV %DWWHU\ OLIH 8S WR \HDUV KRXU SHU GD\ 2SHUDWLQJ WHPSHUDWXUH UDQJH )URP WR & IURP WR ) 5DGLR IUHTXHQF\ SURWRFRO *+] $17 ZLUHOHVV FRPPXQLFDWLRQV SURWRFRO :DWHU UDWLQJ $70 7KH GHYLFH ZLWKVWDQGV SUHVVXUH HTXLYD
*DUPLQ /WG RU LWV VXEVLGLDULHV ZZZ JDUPLQ FRP VXSSRUW
Speed Sensor and Cadence Sensor Instructions ...................................................... 2 Instructions relatives au capteur de vitesse et au capteur de cadence .................................... 7 lstruzioni dei sensori di velocita e cadenza ... 13 Geschwindigkeits- und TrittfrequenzsensorAnweisungen ................................................. 19 lnstrucciones del sensor de velocidad y del sensor de cadencia .......................................
Speed Sensor and Cadence Sensor Instructions See the Important Safety and Product Information guide in the product box for product warnings and other important information. Installing the Speed Sensor NOTE: If you do not have this sensor, you can skip this task. TIP: Garminerecommends you secure your bike on a stand while installing the sensor. 1 Place and hold the speed sensor on top of the wheel hub. 2 Pull the strap G) around the wheel hub, and attach it to the hook ~ on the sensor.
NOTE: The LED flashes green for five seconds to indicate activity after two revolutions. Installing the Cadence Sensor NOTE: If you do not have this sensor, you can skip this task. TIP: Garmin recommends you secure your bike on a stand while installing the sensor. 1 Select the band size that fits your crank arm CD securely. 2 3 The band you select should be the smallest one that stretches across the crank arm.
5 NOTE: The LED flashes green for five seconds to indicate activity after two revolutions. Take a 15 minute test ride and inspect the sensor and bands to ensure there is no evidence of damage. Pairing the Sensors with Your Device Pairing is the process of connecting an ANT+f) wireless sensor, like your speed sensor or cadence sensor, with a Garmin ANT+ compatible device. NOTE: The pairing instructions differ for each Garmin compatible device. See your owner's manual.
apply. See www.dtsc.ca.gov/hazardouswaste /perchlorate. & CAUTION Contact your local waste disposal department to properly recycle the batteries. Replacing the Speed Sensor or Cadence Sensor Battery The LED flashes red to indicate a low battery level after two revolutions. 1 Locate the circular battery cover CD on the back of the sensor. 2 Twist the cover counter-clockwise until the 3 marker points to unlocked and the cover is loose enough to remove. Remove the cover and the battery (2).
4 Wait 30 seconds. 5 Insert the new battery into the cover, observing polarity. 6 NOTE: Do not damage or lose the 0-ring gasket. Twist the cover clockwise until the marker points to locked. NOTE: The LED flashes red and green for a few seconds after battery replacement. When the LED flashes green and then stops flashing, the device is active and ready to send data. Limited Warranty The Garmin standard limited warranty applies to this accessory. For more information, go to www.garmin.com/support/warranty.
*The device withstands pressure equivalent to a depth of 10 m. For more information, go to www.garmin.com/waterrating. Instructions relatives au capteur de vitesse et au capteur de cadence A Consultez le guide Informations importantes sur /e produit et Ia securite inclus dans l'emballage du produit pour prendre connaissance des avertissements et autres informations importantes sur le produit. Installation du capteur de vitesse REMARQUE: si vous ne possedez pas ce capteur, vous pouvez ignorer cette tache.
Garmin', the Garmin logo, and ANT+ are trademarks of Garmin Ltd. or its subsidiaries, registered in the USA and other countries. These trademarks may not be used without the express permission of Garmin. This product is ANT+ certified. Visit www.thisisant.com /directory for a list of compatible products and apps. TRA REGISTERED No: ER0128990/14 DEALER No: DA0061884/11 :a CE TA-2013/2434 TA-2013/2431 APPROVED APPROVED © 2014-2015 Garmin Ltd. or its subsidiaries www.garmin.
Important Safety and Product Information 2 Informations importantes sur le produit et Ia securite 8 guida lnformazioni importanti sulla sicurezza e sui prodotto 15 Wichtige Sicherheits- und Produktinformationen 21 Informacion importante sobre el producto y tu seguridad 28 lnforma~oes importantes sobre seguran~a e sobre o produto 34 Belangrijke veiligheids- en productinformatie 40 Vigtige produkt- og sikkerhedinformationer 46 Tarkeita turvallisuus- ja tuotetietoja 51 Viktig sikkerhets- og
IMPORTANT SAFETY AND PRODUCT INFORMATION Failure to heed the following warnings could result in an ~.99i.~~D.~~.~~g~_l_ll~J~~-~~~~!!iD~-l~-~-~-~-~--~~--~-~~!~~~.!~J.~~L................... Battery Warnings A lithium-ion battery can be used in this device. Coin cell batteries can be used in the accessory. If these guidelines are not followed, batteries may experience a shortened life span or may present a risk of damage to the device, fire, chemical burn, electrolyte leak, and/or injury.
• Always use your best judgement, and operate the bicycle in a safe manner. • Make sure your bicycle and hardware are properly ·~····-!!)~~}~~!~!n.~~. 9.~~--~~~!-~_1Lp~-~~-~E~-~~~!-~~!!Y..~~~.!~JJ~~:------~----~ ott-Road Navigation Warnings If your Garmin device is able to suggest off-road routes for various outdoor activities, such as biking, hiking, and all-terrain vehicles, follow these guidelines to ensure safe off-road navigation.
• Contact your local waste disposal department to dispose of the device/batteries in accordance with applicable local laws and regulations. GPS Notice The navigation device may experience degraded performance if you use it in proximity to any device that uses a terrestrial broadband network operating close to the frequencies used by any Global Navigation Satellite System (GNSS), such as the Global Positioning Service (GPS). Use of such devices may impair reception of GNSS signals.
interference will not occur in a particular installation. If this equipment does cause harmful interference to radio or television reception, which can be determined by turning the equipment off and on, the user is encouraged to try to correct the interference by one of the following measures: • Reorient or relocate the receiving antenna. • Increase the separation between the equipment and the receiver. • Connect the equipment into an outlet that is on a different circuit from the GPS device.
Limited Warranty THIS LIMITED WARRANTY GIVES YOU SPECIFIC LEGAL RIGHTS, AND YOU MAY HAVE OTHER LEGAL RIGHTS, WHICH VARY FROM STATE TO STATE (OR BY COUNTRY OR PROVINCE). GARMIN DOES NOT EXCLUDE, LIMIT OR SUSPEND OTHER LEGAL RIGHTS YOU MAY HAVE UNDER THE LAWS OF YOUR STATE (OR COUNTRY OR PROVINCE). FOR A FULL UNDERSTANDING OF YOUR RIGHTS YOU SHOULD CONSULT THE LAWS OF YOUR STATE, COUNTRY OR PROVINCE.
MERCHANTABILITY OR FITNESS FOR A PARTICULAR PURPOSE, STATUTORY REMEDY OR OTHERWISE. THIS LIMITED WARRANTY GIVES YOU SPECIFIC LEGAL RIGHTS, AND YOU MAY HAVE OTHER LEGAL RIGHTS, WHICH VARY FROM STATE TO STATE AND FROM COUNTRY TO COUNTRY. IF IMPLIED WARRANTIES CANNOT BE DISCLAIMED UNDER THE LAWS OF YOUR STATE OR COUNTRY, THEN SUCH WARRANTIES ARE LIMITED IN DURATION TO THE DURATION OF THIS LIMITED WARRANTY.
facility in another country that can service your product, in which case you will be responsible for complying with all applicable import and export laws and regulations and for paying all custom duties, VAT., shipping fees and other associated taxes and charges.