VENU ™ Owner’s Manual
© 2019 Garmin Ltd. or its subsidiaries All rights reserved. Under the copyright laws, this manual may not be copied, in whole or in part, without the written consent of Garmin. Garmin reserves the right to change or improve its products and to make changes in the content of this manual without obligation to notify any person or organization of such changes or improvements. Go to www.garmin.com for current updates and supplemental information concerning the use of this product.
Table of Contents Introduction.....................................................................1 Device Overview ......................................................................... 1 Touchscreen Tips .................................................................. 1 Locking and Unlocking the Touchscreen .......................... 1 Using the Controls Menu ....................................................... 1 Icons ..............................................................................
Clearing a Personal Record ................................................. 14 Clearing All Personal Records ............................................. 14 Navigation ..................................................................... 15 Saving Your Location ............................................................... 15 Deleting a Location .............................................................. 15 Navigating to a Saved Location ................................................
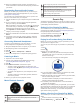
Introduction WARNING See the Important Safety and Product Information guide in the product box for product warnings and other important information. Always consult your physician before you begin or modify any exercise program. Device Overview The touchscreen locks and does not respond to touches until you unlock it. 3 Hold any button to unlock the touchscreen. Using the Controls Menu The controls menu contains customizable shortcuts, such as locking the touchscreen and turning the device off.
3 Select an option to add your device to your Garmin Connect account: • If this is the first device you have paired with the Garmin Connect app, follow the on-screen instructions. • If you have already paired another device with the Garmin Connect app, from the or menu, select Garmin Devices > Add Device, and follow the on-screen instructions. Connected Features Connected features are available for your Venu device when you connect the device to a compatible smartphone using Bluetooth technology.
• To manually turn on or off do not disturb mode, hold , and select . • To automatically turn on do not disturb mode during your sleep hours, open the device settings in the Garmin Connect app, and select Sounds & Alerts > Do Not Disturb During Sleep. Finding Your Phone You can use this feature to help locate a lost smartphone that is paired using Bluetooth wireless technology and currently within range. 1 Hold . 2 Select .
4 Select an installed third-party provider, and follow the on- screen instructions to disconnect the third-party provider from your device. Downloading Personal Audio Content Before you can send your personal music to your device, you must install the Garmin Express application on your computer (www.garmin.com/express). You can load your personal audio files, such as .mp3 and .aac files, to a Venu device from your computer. 1 Connect the device to your computer using the included USB cable.
3 Follow the on-screen instructions. After the card is added, you can select the card on your watch when you make a payment. Managing Your Garmin Pay Cards You can temporarily suspend or delete a card. NOTE: In some countries, participating financial institutions may restrict the Garmin Pay features. 1 From the Garmin Connect app, select or . 2 Select Garmin Pay. 3 Select a card. 4 Select an option: • To temporarily suspend or unsuspend the card, select Suspend Card.
4 Select a heart rate threshold value. 5 Select the toggle to turn on the alert. Each time you exceed or drop below the custom value, a message appears and the device vibrates. Broadcasting Heart Rate to Garmin Devices • • • • NOTE: The optical sensor is located on the back of the device. See Tips for Erratic Heart Rate Data, page 6 for more information about wrist-based heart rate. See Tips for Erratic Pulse Oximeter Data, page 7 for more information about the pulse oximeter sensor.
Heart Rate Zone Calculations Zone % of Maximum Heart Rate Perceived Exertion Benefits 1 50–60% Relaxed, easy pace, rhythmic breathing Beginning-level aerobic training, reduces stress 2 60–70% Comfortable pace, slightly deeper breathing, conversation possible Basic cardiovascular training, good recovery pace 3 70–80% Moderate pace, more difficult to hold conversation Improved aerobic capacity, optimal cardiovascular training 4 80–90% Fast pace and a bit Improved anaerobic uncomfortable, brea
Auto Goal Your device creates a daily step goal automatically, based on your previous activity levels. As you move during the day, the device shows your progress toward your daily goal . in your timeline. The Move IQ events show activity type and duration, but they do not appear in your activities list or newsfeed. The Move IQ feature can automatically start a timed activity for walking and running using time thresholds you set in the Garmin Connect app. These activities are added to your activities list.
Menstrual cycle tracking: Displays your current cycle. You can view and log your daily symptoms. Music controls: Provides music player controls for your smartphone or on-device music. My day: Displays a dynamic summary of your activity today. The metrics include timed activities, intensity minutes, floors climbed, steps, calories burned, and more. Notifications: Alerts you to incoming calls, texts, social network updates, and more, based on your smartphone notification settings.
Tips for Improved Body Battery Data • Your Body Battery level updates when you sync your device with your Garmin Connect account. • For more accurate results, wear the device while sleeping. • Rest and good sleep charge your Body Battery. • Strenuous activity, high stress, and poor sleep can cause your Body Battery to drain. • Food intake, as well as stimulants like caffeine, has no impact on your Body Battery. Menstrual Cycle Tracking Your menstrual cycle is an important part of your health.
3 Select an option: • To add a favorite activity, select the activity, and select Add Favorite. • To remove a favorite activity, select the activity, and select Remove Favorite. Indoor Activities The Venu device can be used for training indoors, such as running on an indoor track or using a stationary bike. GPS is turned off for indoor activities. When running or walking with GPS turned off, speed, distance, and cadence are calculated using the accelerometer in the device.
2 3 4 5 Select Pool Swim. Select your pool size, or enter a custom size. Press to start the activity timer. Start your activity. The device automatically records swim intervals and lengths. 6 Press when you rest. The display inverts color, and the rest screen appears. 7 Press to restart the interval timer. 8 After you complete your activity, press to stop the activity timer, and hold again to save the activity. Setting the Pool Size 1 Press . 2 Select Pool Swim. 3 Swipe up. 4 Select Settings > Pool Size.
• The distances to the front and back of the nearest hazard appear on the screen. • The hazard type is listed at the top of the screen. • The green is represented as a half circle at the top of the screen. The line below the green represents the center of the fairway. • Hazards are shown below the green in approximate locations relative to the fairway. 2 Swipe to view other hazards for the current hole.
settings. The device uses this information to calculate accurate training data. 1 Hold . 2 Select > User Profile. 3 Select an option. Fitness Goals Knowing your heart rate zones can help you measure and improve your fitness by understanding and applying these principles. • Your heart rate is a good measure of exercise intensity. • Training in certain heart rate zones can help you improve cardiovascular capacity and strength.
2 Select History > Records. NOTE: This does not delete any saved activities. Select a sport. 3 4 Select Clear All Records > . The records are deleted for that sport only. Navigation Stopping Navigation • To stop navigation and continue your activity, hold , and select Stop Navigation. • To stop navigation and save your activity, press , and swipe up. Compass You can use the GPS navigation features on your device to save locations, navigate to locations, and find your way home.
1 Hold . 2 Select History. 3 Select an option: • To view an activity from this week, select This Week. • To view an older activity, select Previous Weeks. 4 Select an activity. 5 Select Time in Zone. Garmin Connect Your Garmin Connect account allows you to track your performance and connect with your friends. It gives you the tools to track, analyze, share, and encourage each other. You can record the events of your active lifestyle, including runs, walks, rides, swims, hikes, golf games, and more.
The device sets the new watch face as your active watch face. Customizing the Controls Menu You can add, remove, and change the order of the shortcut menu options in the controls menu (Using the Controls Menu, page 1). 1 Hold . The controls menu appears. 2 Hold . The controls menu switches to edit mode. 3 Select the shortcut you want to customize.
Alert Name Alert Type Description Custom Event, recurring You can select an existing message or create a custom message and select an alert type. Recurring You can set a distance interval. Distance Heart Rate Range You can set minimum and maximum heart rate values or select zone changes. Pace Range You can set minimum and maximum pace values. Run/Walk Recurring You can set timed walking breaks at regular intervals. Speed Range You can set minimum and maximum speed values.
Pair Phone: Connects your device with a compatible smartphone equipped with Bluetooth technology. Sync: Allows you to transfer the data between your device and the Garmin Connect app. Stop LiveTrack: Allows you to stop a LiveTrack session while one is in progress. System Settings Hold , and select > System. Auto Lock: Automatically locks the touchscreen to prevent inadvertent screen touches. You can press to unlock the touchscreen. Language: Sets the language of the device interface.
• From the devices widget in the Garmin Connect application, select your device. After customizing settings, sync your data to apply the changes to your device (Using the Garmin Connect App, page 16, Using Garmin Connect on Your Computer, page 16). Wireless Sensors Your device can be used with wireless ANT+ or Bluetooth sensors. For more information about compatibility and purchasing optional sensors, go to buy.garmin.com.
Charging the Device WARNING This device contains a lithium-ion battery. See the Important Safety and Product Information guide in the product box for product warnings and other important information. NOTICE To prevent corrosion, thoroughly clean and dry the contacts and the surrounding area before charging or connecting to a computer. Refer to the cleaning instructions in the appendix. 1 Plug the small end of the USB cable into the charging port on your device. 2 Select > System > About.
2 Wipe it dry. After cleaning, allow the device to dry completely. TIP: For more information, go to www.garmin.com/fitandcare. Changing the Bands • Pair your headphones with your device (Connecting Bluetooth Headphones, page 4). My music cuts out or my headphones do not stay connected The device is compatible with 20 mm wide, standard, quickrelease bands. 1 Slide the quick-release pin on the spring bar to remove the band.
Restarting the Device If the device stops responding, you may need to restart it. NOTE: Restarting the device may erase your data or settings. 1 Hold for 15 seconds. The device turns off. 2 Hold for one second to turn on the device. Restoring All Default Settings You can reset all of the device settings to the factory default values. You should sync your device with the Garmin Connect app to upload your activity data before you reset the device. 1 Hold . 2 Select > System > Reset.
Distance: The distance traveled for the current track or activity. Elapsed Time: The total time recorded. For example, if you start the timer and run for 10 minutes, then stop the timer for 5 minutes, then start the timer and run for 20 minutes, your elapsed time is 35 minutes. Elevation: The altitude of your current location above or below sea level. Floors Climbed: The total number of floors climbed up for the day. Floors Descended: The total number of floors climbed down for the day.
Males Percentile 20–29 30–39 40–49 50–59 60–69 70–79 Fair 40 41.7 40.5 38.5 35.6 32.3 29.4 Poor 0–40 <41.7 <40.5 <38.5 <35.6 <32.3 <29.4 Females Percentile 20–29 30–39 40–49 50–59 60–69 70–79 Superior 95 49.6 47.4 45.3 41.1 37.8 36.7 Excellent 80 43.9 42.4 39.7 36.7 33 30.9 Good 60 39.5 37.8 36.3 33 30 28.1 Fair 40 36.1 34.4 33 30.1 27.5 25.9 Poor 0–40 <36.1 <34.4 <33 <30.1 <27.5 <25.
Index A accessories 20, 23 activities 10, 11, 17 adding 10 custom 10 favorites 10 saving 10 starting 10 activity tracking 7, 8 alarms 17, 19 alerts 17, 18 heart rate 6 ANT+ sensors 20 applications 2, 3, 5, 13 smartphone 1, 10 assistance 5 Auto Lap 18 Auto Pause 18 auto scroll 18 B backlight 20 bands 22 battery charging 21 life 21 maximizing 2, 22 bike sensors 20 Bluetooth sensors 20 Bluetooth technology 2, 5, 18, 22 headphones 4, 22 Bluetooth Technology 3 Body Battery 9, 10 C cadence alerts 18 sensors 20
Z zones heart rate 6 time 19 Index 27
support.garmin.