GPSMAP 86 ® Owner’s Manual
© 2019 Garmin Ltd. or its subsidiaries All rights reserved. Under the copyright laws, this manual may not be copied, in whole or in part, without the written consent of Garmin. Garmin reserves the right to change or improve its products and to make changes in the content of this manual without obligation to notify any person or organization of such changes or improvements. Go to www.garmin.com for current updates and supplemental information concerning the use of this product.
Table of Contents Introduction.....................................................................1 GPSMAP 86s/sc Device Overview ............................................. 1 GPSMAP 86i/sci Device Overview ............................................. 1 Buttons ........................................................................................1 Turning On the Device ........................................................... 1 Locking the Keys .......................................................
Registering Your Device at Geocaching.com ...................... 11 Connecting to Geocaching.com ...................................... 11 Downloading Geocaches Using a Computer ....................... 11 Geocache Searches ............................................................ 12 Searching for a Geocache .............................................. 12 Searching for a Geocache on the Map ........................... 12 Filtering the Geocache List ..................................................
Introduction Buttons WARNING See the Important Safety and Product Information guide in the product box for product warnings and other important information. GPSMAP 86s/sc Device Overview FIND Select to open the search menu. MARK Select to save your current location as a waypoint. QUIT Select to cancel or return to the previous menu or page. Select to scroll through the main pages. ENTER Select to choose options and acknowledge messages.
To get the most out of your GPSMAP 86i/sci device, you should activate it. Activating the device allows you to use inReach features, including messaging, SOS, tracking, and inReach Weather. Messages Your GPSMAP 86i/sci device sends and receives text messages using the Iridium satellite network. You can send messages to an SMS phone number, an email address, or another device that uses inReach technology. Each message you send includes your location details where allowed.
Viewing Message Details 1 Select Messages. 2 Select a conversation. 3 Select a message. 4 Select the information tab. Navigating to a Message Location When you receive a message from another device with inReach technology, the message may include location information. For these messages, you can navigate to the location from which the message was sent. 1 Select Messages. 2 Select a conversation with location information. 3 Select the map tab. 4 Select Go.
Testing the Device You should test the device outdoors before using it on a trip to ensure your satellite subscription is active. From the main menu, select inReach Utilities > Communications Test > Test. Wait while the device sends a test message. When you receive a confirmation message, your device is ready to use. Syncing inReach Data You can sync data from your Garmin Explore account to your device using the Garmin Explore app.
2 Follow to your destination. Course Pointer The course pointer is most useful when you are navigating on water or where there are no major obstacles in your path. It can also help you avoid hazards near the course, such as shoals or submerged rocks. To enable the course pointer, from the compass, select MENU > Heading Setup > Go To Line (Pointer) > Course (CDI). Display: Sets the type of directional heading shown on the compass. North Reference: Sets the north reference used on the compass.
Barometer Mode: Variable Elevation allows the barometer to measure changes in elevation while you are moving. Fixed Elevation assumes the device is stationary at a fixed elevation, so the barometric pressure should only change due to weather. Pressure Trending: Sets how the device records pressure data. Save Always records all pressure data, which can be helpful when you are watching for pressure fronts.
Navigation 3 Select Add Network. 4 Select a wireless network from the list and enter the password, if necessary. The device stores the network information and connects automatically when you return to this location. Navigating to a Destination Connect IQ Features You can add Connect IQ features to your device from Garmin and other providers using the Connect IQ Mobile app. You can customize your device with data fields, widgets, and apps.
3 Select MENU > Delete. Waypoint Averaging You can refine a waypoint location for more accuracy. When averaging, the device takes several readings at the same location and uses the average value to provide more accuracy. 1 Select Waypoint Manager. 2 Select a waypoint. 3 Select MENU > Average Location. 4 Move to the waypoint location. 5 Select Start. 6 Follow the on-screen instructions. 7 When the confidence status bar reaches 100%, select Save.
1 Select Route Planner. 2 Select a route. 3 Select Reverse Route. 2 Select to switch to the map tab. 3 Select TracBack. The map displays your route with a magenta line, start point, and end point. 4 Navigate using the map or the compass. Deleting a Route 1 Select Route Planner. 2 Select a route. 3 Select Delete Route. Stopping the Current Activity 1 From the main pages, select ENTER > Stop. 2 Select an option: Recordings Your device records your path as an activity.
2 If necessary, select Forecast Type, and select a Basic or Premium weather forecast. 3 If necessary, select Location, and select a location. By default, the device requests weather for your current location. 4 If necessary, select Marine to request a marine weather forecast. NOTE: For best results, you should only request a marine forecast for a location away from shore and over a large body of water. Marine forecasts are not available for land locations or inland lakes. 5 Select Get Forecast.
inReach Utilities: Allows you to view details about your inReach subscription, check mail, and perform a communications test (inReach Features, page 2). inReach Weather: Allows you to request basic, premium, or marine weather forecasts using your inReach subscription (Requesting an inReach Weather Forecast, page 9). Recording Controls: Allows you to view details about the current activity and control the current activity recording (Viewing the Current Activity, page 9).
2 3 4 5 Go to www.geocaching.com. If necessary, create an account. Sign in. Follow the instructions at geocaching.com to find and download geocaches to your device. Geocache Searches You can search the geocaches loaded on your device. If you are connected to www.geocaching.com, you can search live geocache data and download geocaches. NOTE: You can download detailed information for more than three geocaches per day with a premium membership. Go to www.geocaching.com for more information.
1 Select Profile Change. 2 Select a profile. Enabling chirp Searching 1 Select Setup > Geocaching. 2 Select chirp™ Searching > On. Finding a Geocache with a chirp 1 With chirp searching enabled, navigate to a geocache. When you are within approximately 10 m (33 ft.) of the geocache that contains a chirp, details about the chirp appear. 2 Select Show Details. 3 If necessary, select Go to navigate to the next stage of the geocache.
Customizing the Device Customizing the Data Fields You can customize the data fields displayed on each main page. 1 Open the page for which you will change the data fields. 2 Select MENU. 3 Select Change Data Fields. 4 Select the new data field. 5 Follow the on-screen instructions. Setup Menu Select MENU twice, and select Setup. NOTE: Some settings may not be available for all device models. System: Allows you to customize system settings (System Settings, page 14).
Appearance: Changes the appearance of the display background and selection highlight (Changing the Color Mode, page 15). Screen Capture: Allows you to save the image on the device screen. Review Text Size: Changes the size of the text on the screen. Changing the Color Mode 1 Select Setup > Display > Appearance. 2 Select an option: • To allow the device to display day or night colors automatically based on the time of day, select Mode > Auto. • To use a light background, select Mode > Day.
features in different colors so the marine POIs are more readable and so the map reflects the drawing scheme of paper charts. Fishing (requires marine maps) displays a detailed view of bottom contours and depth soundings and simplifies map presentation for optimal use while fishing. Appearance: Sets the appearance of marine navigation aids on the map.
2 Select an option: • To reset data specific to a trip, such as distance and averages, select Reset Trip Data. • To delete all saved waypoints, select Delete All Waypoints. • To clear the data recorded since you started your current activity, select Clear Current Activity. NOTE: The device continues to record new data for the current activity. • To reset only the settings for your current activity profile to the factory default values, select Reset Profile Settings.
2 Plug the small end of the USB cable into the USB port on the Device Care NOTICE Avoid chemical cleaners, solvents, and insect repellents that can damage plastic components and finishes. Do not store the device where prolonged exposure to extreme temperatures can occur, because it can cause permanent damage. The device is water resistant to IEC Standard 60529 IPX7. It can withstand accidental immersion in 1 meter of water for 30 minutes. Prolonged submersion can cause damage to the device.
Compass-safe distance 17.5 cm (7 in.) Wireless frequency/protocol 2.4 GHz @ 14.9 dBm nominal Viewing E-label Regulatory and Compliance Information The label for this device is provided electronically. The e-label may provide regulatory information, such as identification numbers provided by the FCC or regional compliance markings, as well as applicable product and licensing information. 1 Select Setup. 2 Select About.
Last Lap Descent: The vertical distance of descent for the last completed lap. Last Lap Distance: The distance traveled for the last completed lap. Last Lap HR: The average heart rate for the last completed lap. Last Lap Speed: The average speed for the last completed lap. Last Lap Time: The stopwatch time for the last completed lap. Location (lat/lon): The current position in latitude and longitude, regardless of the selected position format setting.
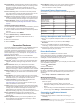
Fitness Goals Knowing your heart rate zones can help you measure and improve your fitness by understanding and applying these principles. • Your heart rate is a good measure of exercise intensity. • Training in certain heart rate zones can help you improve cardiovascular capacity and strength. If you know your maximum heart rate, you can use the table (Heart Rate Zone Calculations, page 21) to determine the best heart rate zone for your fitness objectives.
Index A accessories 15, 17, 20 activities 9 alarms clock 10 marine 16 proximity 8, 13 tones 15 altimeter 5 calibrating 6 ANT+ sensors 15 pairing 20 applications 6, 7 area calculation 10, 13 Auto Lap 15 autopilot 7 B backlight 1, 14, 17 battery 18 charging 1, 2 life 17 maximizing 14, 17 storage 17 BirdsEye imagery 10 Bluetooth sensors 15 Bluetooth technology 6, 15 boat data 7 brightness 1 buttons 1 C calculator 10 calendar 10 calibrating, altimeter 6 carabiner clip 17 charging 2 chirp 12, 13, 15 cleaning t
support.garmin.