ZŪMO XT ® Owner’s Manual
© 2020 Garmin Ltd. or its subsidiaries All rights reserved. Under the copyright laws, this manual may not be copied, in whole or in part, without the written consent of Garmin. Garmin reserves the right to change or improve its products and to make changes in the content of this manual without obligation to notify any person or organization of such changes or improvements. Go to www.garmin.com for current updates and supplemental information concerning the use of this product.
Table of Contents Resetting the Fuel Tank Mileage ........................................... 8 Enabling Dynamic Fuel Stops ................................................ 8 Getting Started............................................................... 1 Finding and Saving Locations...................................... 8 Device Overview ......................................................................... 1 Turning the Device On or Off ......................................................
Viewing the List of Notifications ........................................... 14 Hands-Free Calling ................................................................... 14 Setting Up Bluetooth Features for Your Apple® Device ........... 14 Disabling Bluetooth Features (iPhone®) ............................. 14 Setting Up Bluetooth Features for Your Smartphone with Android™ .................................................................................. 14 Disabling Bluetooth Features (Android) ............
Getting Started WARNING See the Important Safety and Product Information guide in the product box for product warnings and other important information. 1 Connect to a Wi‑Fi network (Connecting to a Wi‑Fi Network, ® 2 3 4 5 6 7 page 19)(optional). Pair your Bluetooth phone and headset (Pairing Your Phone and Headset, page 13) (optional). Update the maps and software on your device (Product Updates, page 20). Acquire GPS signals (Acquiring GPS Signals, page 1). Mount the device and connect it to power.
Automobile mode Motorcycle mode Off-road mode Choosing a Transportation Mode Select the transportation mode icon on the status bar. Using the Large Button Keyboard You can enable additional keyboard languages or layouts in the language and keyboard settings . • Select or to view more characters. • Select to switch to other keyboard languages and layouts. Installation Mounting Your Device in a Motorcycle 2 Tighten the nuts to secure the base. NOTE: The recommended torque is 50 lbf-in (5.65 N-m).
NOTE: An additional replacement screw is included in the box. Attaching the Base Plate to the Motorcycle Mount NOTICE Direct, sustained contact with the base plate, or any part of the motorcycle, may damage the mount over time. To prevent this kind of damage, you must place the mounting spacers between the mount and base plate, and make sure that no part of the device or mount touches the motorcycle. 1 Thread the M4 x 20 mm panhead screws washers , cradle, spacers through the , and base plate .
Speeding alert: The device plays a tone and displays a red border on the speed limit icon when you exceed the posted speed limit for the current road. Railroad crossing: The device plays a tone and displays the distance to an upcoming railroad crossing. Animal crossing: The device plays a tone and displays the distance to an upcoming animal crossing area. Curve: The device plays a tone and displays the distance to a curve in the road.
You can use your device to send inReach messages to your contacts. 1 Select Apps > inReach > . 2 Select New Message. 3 Select Select Contacts to add one or more contacts. 4 Enter a message. 5 Select Send. SOS During an emergency, you can contact the GEOS International Emergency Rescue Coordination Center (IERCC) to request help. Pressing the SOS button sends a message to the rescue coordination center, and they notify the appropriate emergency responders of your situation.
Starting a Route by Using the Map You can start a route by selecting a location from the map. 1 Select View Map. 2 Drag and zoom the map to display the area to search. 3 If necessary, select to filter the displayed points of interest by category. Location markers (colored dots) appear on the map. 4 Select an option: • Select a location marker. • Select a point, such as a street, intersection, or address location. 5 Select Go!.
You can add locations to the middle or end of your route. For example, you can add a fuel station as the next destination in your route. TIP: To create complex routes with multiple destinations or scheduled stops, you can use the trip planner to plan, schedule, and save a trip (Planning a Trip, page 16). 1 From the map, select > Where To?. 2 Search for a location. 3 Select a location. 4 Select Go!. 5 Select an option: • To add the location as the next destination in your route, select Add as Next Stop.
5 Select the lower-right corner of the area to avoid, and select Next. The selected area is shaded on the map. 6 Select Done. Disabling a Custom Avoidance You can disable a custom avoidance without deleting it. 1 Select Settings > Navigation > Custom Avoidances. 2 Select an avoidance. 3 Select > Disable. Deleting Custom Avoidances 1 Select Settings > Navigation > Custom Avoidances > . 2 Select an option: • To delete all custom avoidances, select Select All > Delete.
Points of Interest A point of interest is a place that you may find useful or interesting. Points of interest are organized by category and can include popular travel destinations such as gas stations, restaurants, hotels, and entertainment venues. Finding a Location by Category 1 2 3 4 Select Where To?. Select a category, or select Categories. If necessary, select a subcategory. Select a location.
parking spots, type of parking area, price, or accepted payment methods. NOTE: Detailed parking data is not available in all areas or for all parking locations. Finding Parking Near Your Current Location 1 Select Where To? > Categories > Parking. 2 Select Filter Parking, and select one or more categories to filter parking by availability, type, price, or payment methods (optional). NOTE: Detailed parking data is not available in all areas or for all parking locations. 3 Select a parking location.
Finding TripAdvisor Points of Interest 1 Select Where To? > TripAdvisor. 2 Select a category. 2 From the search results, select a location. 3 Select > Save. 4 Enter a name, and select Done. A list of nearbyTripAdvisor points of interest for the category appears. 3 Select Sort Results to sort the search results by distance or popularity (optional). Saving Your Current Location 1 From the map, select the vehicle icon. 2 Select Save. 3 Enter a name, and select Done. 4 Select OK.
Map Tools Map tools provide quick access to information and device functions while you view the map. When you activate a map tool, it appears in a panel at the edge of the map. Stop: Stops navigation of the active route. Edit Route: Allows you to take a detour or skip locations in your route (Changing Your Active Route, page 6). Mute: Mutes the device audio. Cities Ahead: Shows upcoming cities and services along your active route or along a highway.
The nearest upcoming traffic incident appears in a panel on the right side of the map. 2 Select the traffic incident to view additional details. Viewing Traffic on the Map The traffic map shows color-coded traffic flow and delays on nearby roads. 1 From the main menu, select Apps > Traffic. 2 If necessary, select > Legend to view the legend for the traffic map. Searching for Traffic Incidents 1 From the main menu, select Apps > Traffic. 2 Select > Incidents. 3 Select an item in the list.
The popup closes, but the notification remains active on your phone. • To view a notification, select View. • To listen to the notification, select View > Play. The device reads the notification using text-to-speech technology. This feature is not available for all languages. • To perform additional actions, such as dismissing the notification from your phone, select View, and select an option.
Receiving Traffic Data Using Your Smartphone Your device can receive subscription-free traffic data while connected to a smartphone running the Garmin Drive app. 1 Connect your device to the Garmin Drive app (Pairing Your Phone and Headset, page 13). 2 On your zūmo device, select Settings > Traffic, and verify the Traffic check box is selected. Receiving Traffic Data Using a Traffic Receiver NOTICE Heated (metallized) windshields could degrade the performance of the traffic receiver.
• To select where to save the downloaded imagery, select Save To. 4 Select Download. 5 Enter a name for the downloaded imagery and select Done. Trip Planner You can use the trip planner to create and save a trip, which you can navigate later. This can be useful for planning a delivery route, a vacation, or a road trip. You can edit a saved trip to further customize it, including reordering locations, optimizing the order of stops, adding suggested attractions, and adding shaping points.
1 2 3 4 5 6 Select Apps > Service History. Select a service category. Select Add Record. Enter the odometer reading, and select Next. Enter a comment (optional). Select Done. Adding Service Categories 1 Select Apps > Service History. 2 Select > Add Category. 3 Enter a category name, and select Done. Viewing the Weather Forecast Before you can use this feature, your device must be receiving weather data.
Driving Map View: Sets the perspective on the map. Map Detail: Sets the level of detail on the map. More detail may cause the map to draw slower. Map Theme: Changes the color of the map data. Map Layers: Sets the data that appears on the map page (Customizing the Map Layers, page 13). Auto Zoom: Automatically selects the zoom level for optimal use of your map. When disabled, you must zoom in or out manually.
Traffic Alerts: Sets the traffic delay severity for which the device displays a traffic alert. Specifications Water resistance IEC 60529 IPX71 Units and Time Settings Operating temperature range From -15° to 55°C (from 5° to 131°F) Charging temperature range From 0° to 45°C (from 32° to 113°F) To open the Units and Time settings page, from the main menu, select Settings > Units & Time. Current Time: Sets the device time. Time Format: Allows you to select a 12-hour, 24-hour, or UTC display time.
1 Select Settings > Wireless Networks. 2 If necessary, select Wi-Fi to enable Wi‑Fi technology. 3 Select Search for Networks. The device displays a list of nearby Wi‑Fi networks. 4 Select a network. 5 If necessary, enter the password for the network, and select Done. The device connects to the network, and the network is added to the list of saved networks. The device reconnects to this network automatically when it is within range.
Troubleshooting 1 Clean the outer casing of the device (not the touchscreen) using a cloth dampened with a mild detergent solution. 2 Wipe the device dry. Cleaning the Touchscreen 1 Use a soft, clean, lint-free cloth. 2 If necessary, lightly dampen the cloth with water. 3 If using a dampened cloth, turn off the device and disconnect the device from power. 4 Gently wipe the screen with the cloth. Avoiding Theft • • • • Remove the device and mount from sight when not in use.
3 Connect the USB cable to your device and to a USB port on your computer. TIP: The USB cable must connect to a USB port on your computer, not to a USB hub. The device turns on automatically and goes into MTP mode or USB mass storage mode. A picture of the device connected to a computer appears on the device screen. NOTE: If you have several network drives mapped on your computer, Windows may have trouble assigning drive letters to your Garmin drives.
Exporting Data from BaseCamp with an Apple Computer 1 Select an option: • To export all BaseCamp data stored on your computer, select My Collection, and select File > Export 'My Collection'. • To export one or more items or a list, select one or more items or a list, and select File > Export Selected User Data. Enter a name. 2 3 Select a location for the exported file. 4 Select the file format. 5 Select Export. Importing Data to Garmin Explore Go to explore.garmin.com and log in to your account.
Index 2-D map view 13 3-D map view 13 intersections 10 Foursquare 10 fuel stations 11 tracking 8 fuse, changing 21 A G Symbols active lane guidance 6 addresses, finding 10 alerts audio 18 proximity points 18 audio, proximity points 18 avoidances area 7 deleting 8 disabling 8 road 7 road features 7 tolls 7 B battery charging 19 maximizing 21 problems 21 Bluetooth 18 Bluetooth technology 13, 14, 21 disconnecting a device 14 pairing a headset 13 pairing a phone 13 Bluetooth Technology disabling calls 14
SOS 5 canceling 5 sending 5 specifications 19 speed cameras 4 suction cup 21 T theft, avoiding 21 time settings 19 tolls, avoiding 7 tools, maps 12 TracBack 16 tracks 16 traffic 12, 14, 15, 18 adding subscriptions 15 alternate route 7 cameras 17 incidents 13, 15 map 13, 15 receiver 15 searching for delays 13, 15 traffic cameras, viewing 17 transportation modes 1, 2 travel history 19 trip information 12 resetting 12 viewing 12 trip planner 16 editing a trip 16 shaping points 16 TripAdvisor 10, 11 troublesho
support.garmin.
Quick Start Manual 2 Manuel de demarrage rapide 6 Guia de inicio rapido 12
I zumo®XT Map updates provide the newest available changes to roads and locations in the Quick Start Manual maps used by your device. Keeping maps Getting Started up to date helps your device find recently -:----------. added locations and calculate more WARNING accurate routes. Map updates are large See the Important Safety and Product and may take several hours to complete.
Internet service provider for more information about data limits or charges. 2 Wait while the device locates satellites. You can update the maps and software by 3 If necessary, go to an open area, away from tall buildings and trees. connecting your device to a Wi-Fi network that provides access to the Internet. This ■1111 in the status bar indicates the satellite allows you to keep your device up to date signal strength. When at least half the without connecting it to a computer.
I Weather information: Sends real-time weather forecasts, road conditions, and weather radar to your device. Smart Notifications: Displays phone notifications and messages on your device. This feature is not available for all languages. Hands-Free calling: Allows you to place and receive phone calls through the device using your connected Bluetooth headset. Send locations to device: Allows you to send locations from your smartphone to your navigation device.
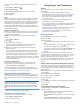
- ® Next action in the route. Arrows on the map indicate the location of upcoming actions. ® Vehicle speed. ,__ (J) Name of the road on which you are traveling. ® ® 2 Select a category, or select Categories. If necessary, select a subcategory. 3 4 Map tools. Provides tools to show you more information about your route and surroundings. By default, the device searches near your current location.
Media Player The media player can play music or audio from these sources. • Music files stored on your zomo device. • Bluetooth audio from a paired phone. Changing the Media Source You can change the source from which media is played on your device. 1 Select Music. 2 Select the current media source G). 3 Select an available media source from the hst. Getting the Owner's Manual The owner's manual mcludes instructions for using device features and accessing regulatory information. Go to garmin.
© 2020 Garmin ltd. or its subsidiaries Garmin , the Garmin logo, and TracBack are trademarks of Garmin Ltd. or its subsidiaries, registered in the USA and other countries zomo, Garmin Adventurous Routing"', Garmin Drive"', and Garmin Express • are trademarks of Garmin Ltd. or its subsidiaries. These trademarks may not be used without the express permission of Garmin. The BLUETOOTH word mark and logos are owned by the Bluetooth SIG, Inc. and any use of such marks by Garmin is under license.
Installation Instructions 2 Instructions d'installation 3 lnstrucciones de instalaci6n 5 Garmin', the Garmin logo, and zomo are trademarks of Garmin Ltd. or its subsidiaries, registered in the USA and other countries. These trademarks may not be used without the express permission of Garmin. El numero de registro COFETEUIFETEL puede ser revisado en el manual a traves de la siguiente pagina de internet.
zumo®XT Installation Instructions Mounting Your Device in a Motorcycle Powered Motorcycle Mount Garmin• strongly recommends having an experienced installer with the proper knowledge of electrical systems install the device. Incorrectly wiring the power cable can result in damage to the vehicle or the battery and can cause bodily injury. See the Important Safety and Product Information guide in the product box for product warnings and other important information.
Installing Your Device in the Motorcycle Mount 1 Fit the bottom of your device into the cradle. 2 Push the top of the device forward until it snaps into place. The latch (D on the mount stays up after you insert the device. Removing Your Device from the Motorcycle Mount 1 Press the release button on the top of the mount. 2 Lift out the device. Mounting Your Device in an Automobile NOTICE Before mounting the device, check the local laws pertaining to windshield mounting.
Important Safety and Product Information 2 Informations importantes sur le produit et la sécurité 4 guida Informazioni importanti sulla sicurezza e sul prodotto 7 Wichtige Sicherheits- und Produktinformationen 9 Información importante sobre el producto y tu seguridad 12 Informações importantes de segurança e do produto 15 Belangrijke veiligheids- en productinformatie 17 Vigtige produkt- og sikkerhedinformatione r 20 Tärkeitä turvallisuus- ja tuotetietoja 22 Viktig sikkerhets- og produktinformasjon 24 Guide
EN ,PSRUWDQW 6DIHW\ DQG 3URGXFW ,QIRUPDWLRQ :$51,1* )DLOXUH WR KHHG WKH IROORZLQJ ZDUQLQJV FRXOG UHVXOW LQ DQ DFFLGHQW RU FROOLVLRQ UHVXOWLQJ LQ GHDWK RU VHULRXV LQMXU\ 'LVWUDFWLRQ :DUQLQJ 7KLV GHYLFH LV LQWHQGHG WR HQKDQFH WKH VLWXDWLRQDO DZDUHQHVV ZKHQ XVHG SURSHUO\ ,I XVHG LPSURSHUO\ \RX FRXOG EHFRPH GLVWUDFWHG E\ WKH GLVSOD\ ZKLFK FRXOG OHDG WR DQ DFFLGHQW FDXVLQJ VHULRXV SHUVRQDO LQMXU\ RU GHDWK 2QO\ DFFHVV WKH LQIRUPDWLRQ GLVSOD\HG RQ WKH GHYLFH ZLWK D JODQFH $OZD\V PDLQWDLQ DZDUHQHVV RI \RXU
KDUPIXO LQWHUIHUHQFH WR UDGLR FRPPXQLFDWLRQV LI QRW LQVWDOOHG DQG XVHG LQ DFFRUGDQFH ZLWK WKH LQVWUXFWLRQV +RZHYHU WKHUH LV QR JXDUDQWHH WKDW LQWHUIHUHQFH ZLOO QRW RFFXU LQ D SDUWLFXODU LQVWDOODWLRQ ,I WKLV HTXLSPHQW GRHV FDXVH KDUPIXO LQWHUIHUHQFH WR UDGLR RU WHOHYLVLRQ UHFHSWLRQ ZKLFK FDQ EH GHWHUPLQHG E\ WXUQLQJ WKH HTXLSPHQW RII DQG RQ WKH XVHU LV HQFRXUDJHG WR WU\ WR FRUUHFW WKH LQWHUIHUHQFH E\ RQH RI WKH IROORZLQJ PHDVXUHV 5HRULHQW RU UHORFDWH WKH UHFHLYLQJ DQWHQQD ,QFUHDVH WKH VHSDUDWLRQ E
Important Safety and Product Information 2 Informations importantes sur le produit et la sécurité 4 Información importante sobre el producto y tu seguridad 7 Printed in Taiwan January 2020 190-00720-AR_0A
EN ,PSRUWDQW 6DIHW\ DQG 3URGXFW ,QIRUPDWLRQ :$51,1* )DLOXUH WR KHHG WKH IROORZLQJ ZDUQLQJV FRXOG UHVXOW LQ DQ DFFLGHQW RU FROOLVLRQ UHVXOWLQJ LQ GHDWK RU VHULRXV LQMXU\ 'LVWUDFWLRQ :DUQLQJ 7KLV GHYLFH LV LQWHQGHG WR HQKDQFH WKH VLWXDWLRQDO DZDUHQHVV ZKHQ XVHG SURSHUO\ ,I XVHG LPSURSHUO\ \RX FRXOG EHFRPH GLVWUDFWHG E\ WKH GLVSOD\ ZKLFK FRXOG OHDG WR DQ DFFLGHQW FDXVLQJ VHULRXV SHUVRQDO LQMXU\ RU GHDWK 2QO\ DFFHVV WKH LQIRUPDWLRQ GLVSOD\HG RQ WKH GHYLFH ZLWK D JODQFH $OZD\V PDLQWDLQ DZDUHQHVV RI \RXU
KDUPIXO LQWHUIHUHQFH WR UDGLR FRPPXQLFDWLRQV LI QRW LQVWDOOHG DQG XVHG LQ DFFRUGDQFH ZLWK WKH LQVWUXFWLRQV +RZHYHU WKHUH LV QR JXDUDQWHH WKDW LQWHUIHUHQFH ZLOO QRW RFFXU LQ D SDUWLFXODU LQVWDOODWLRQ ,I WKLV HTXLSPHQW GRHV FDXVH KDUPIXO LQWHUIHUHQFH WR UDGLR RU WHOHYLVLRQ UHFHSWLRQ ZKLFK FDQ EH GHWHUPLQHG E\ WXUQLQJ WKH HTXLSPHQW RII DQG RQ WKH XVHU LV HQFRXUDJHG WR WU\ WR FRUUHFW WKH LQWHUIHUHQFH E\ RQH RI WKH IROORZLQJ PHDVXUHV 5HRULHQW RU UHORFDWH WKH UHFHLYLQJ DQWHQQD ,QFUHDVH WKH VHSDUDWLRQ E