
User manual

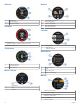

Table Of Contents
- Table of Contents
- Getting Started
- Flying
- Activities
- Training
- Widgets
- Clock
- Navigation
- History
- Connect IQ Features
- Connected Features
- Customizing Your Device
- ANT+ Sensors
- Device Information
- Device Maintenance
- Appendix
- Index

VIRB Remote
The VIRB remote function allows you to control your VIRB
action camera using your device. Go to www.garmin.com/VIRB
to purchase a VIRB action camera.
Controlling a VIRB Action Camera
Before you can use the VIRB remote function, you must enable
the remote setting on your VIRB camera. See the VIRB Series
Owner's Manual for more information. You must also set the
VIRB widget to be shown in the widget loop (Customizing the
Widget Loop, page 16).
1
Turn on your VIRB camera.
2
On your D2 Bravo device, select UP or DOWN from the
watch face to view the VIRB widget.
3
Wait while the device connects to your VIRB camera.
4
Select an option:
• To record video, select START.
The video counter appears on the D2 Bravo screen.
• To stop recording video, select STOP.
• To take a photo, select DOWN.
Clock
Setting an Alarm
You can set up to ten separate alarms. You can set each alarm
to sound once or to repeat regularly.
1
Hold UP.
2
Select Clock > Alarm Clock > Add Alarm.
3
Select Status > On.
4
Select Time, and enter the alarm time.
5
Select Notification, and select a type of notification
(optional).
6
Select Frequency, and select when the alarm should repeat.
7
Select Backlight > On to turn on the backlight with the alarm.
Starting the Countdown Timer
1
Hold UP.
TIP: You can select to view the countdown timer.
2
Select Clock > Timer.
3
Enter the time.
4
If necessary, select Restart > On to automatically restart the
timer after it expires.
5
If necessary, select Notification, and select a type of
notification.
6
Select Start Timer.
Using the Stopwatch
1
Hold UP.
TIP: You can select to view the countdown timer.
2
Select Clock > Stopwatch.
3
From the clock, select START.
Setting Sunrise and Sunset Alerts
You can set the sunrise and sunset alerts to sound a specific
number of minutes or hours before the actual sunrise or sunset
occurs.
1
Hold UP.
2
Select Clock > Alerts.
3
Select an option:
• Select Til Sunset > Status > On.
• Select Til Sunrise > Status > On.
4
Select Time, and enter the time.
Navigation
Saving Your Location
You can save your current location to navigate back to it later.
1
Hold UP.
2
Select Save Location.
3
Follow the on-screen instructions.
Editing Your Saved Locations
You can delete a saved location or edit its name, elevation, and
position information.
1
Hold UP.
2
Select Navigation > Saved Locations.
3
Select a saved location.
4
Select an option to edit the location.
Navigating to a Destination
You can use your device to navigate to a destination or follow a
course. When you start navigating, you can choose the activity
to be used while traveling to your destination, such as hiking,
running, or biking. If you are already recording an activity when
you start navigation, the device continues to record the current
activity while navigating.
1
Hold UP.
2
Select Navigation.
3
Select a category.
4
Respond to the on-screen prompts to choose a destination.
5
Select Go To.
6
Select an activity.
Navigation information appears.
7
Select START to begin navigation.
8
Select UP or DOWN to view additional data pages (optional).
Navigating with Sight 'N Go
You can point the device at an object in the distance, such as a
water tower, lock in the direction, and then navigate to the
object.
1
Hold UP.
2
Select Navigation > Sight 'N Go.
3
Point the top of the watch at an object and select START.
4
Select an activity.
Navigation information appears.
5
Select START to begin navigation.
6
Select UP or DOWN to view additional data pages (optional).
Compass
The device has a 3-axis compass with automatic calibration.
The compass features and appearance change depending on
your activity, whether GPS is enabled, and whether you are
navigating to a destination. You can change the compass
settings manually (Compass Settings, page 16). To open the
compass settings quickly, you can select START from the
compass widget.
Map
represents your location on the map during flying activities.
represents your location on the map during non-flying activities.
Clock 11