
Operation Manual


Stopping Navigation
1
During an activity, hold MENU.
2
Select Stop Navigation.
Map
Your device comes preloaded with maps and can display
several types of Garmin map data, including topographical
contours and nearby points of interest. To purchase additional
map data and view compatibility information, go to garmin.com
/maps.
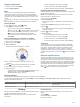
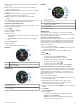
represents your location on the map. When you are navigating
to a destination, your route is marked with a line on the map.
Viewing the Map
1
From the watch face, select > Map.
2
Hold MENU, and select an option:
• To pan or zoom the map, select Pan/Zoom.
TIP: You can select to toggle between panning up and
down, panning left and right, or zooming. You can hold
to select the point indicated by the crosshairs.
• To see nearby points of interest and waypoints, select
Around Me.
Saving or Navigating to a Location on the Map
You can select any location on the map. You can save the
location or start navigating to it.
1
From the map, hold MENU.
2
Select Pan/Zoom.
Controls and crosshairs appear on the map.
3
Pan and zoom the map to center the location in the
crosshairs.
4
Hold to select the point indicated by the crosshairs.
5
If necessary, select a nearby point of interest.
6
Select an option:
• To download the weather radar image associated with the
selected location, select Show NEXRAD (Viewing
NEXRAD Weather Radar, page 2).
• To start navigating to the location, select Go.
• To save the location, select Save Location.
• To view information about the location, select Review.
Navigating with the Around Me Feature
You can use the around me feature to navigate to nearby points
of interest and waypoints.
NOTE: The map data installed on your device must include
points of interest to navigate to them.
1
From the map, hold MENU.
2
Select Around Me.
Icons indicating points of interest and waypoints appear on
the map.
3
Select UP or DOWN to highlight a section of the map.
4
Select .
A list of points of interest and waypoints in the highlighted
map section appear.
5
Select to select a location.
6
Select an option:
• To start navigating to the location, select Go.
• To view the location on the map, select Map.
• To save the location, select Save Location.
• To view information about the location, select Review.
Compass
The device has a 3-axis compass with automatic calibration.
The compass features and appearance change depending on
your activity, whether GPS is enabled, and whether you are
navigating to a destination. You can change the compass
settings manually (Compass Settings, page 32). To open the
compass settings quickly, you can select from the compass
widget.
Altimeter and Barometer
The device contains an internal altimeter and barometer. The
device collects elevation and pressure data continuously, even
in low-power mode. The altimeter displays your approximate
elevation based on pressure changes. The barometer displays
environmental pressure data based on the fixed elevation where
the altimeter was most recently calibrated (Altimeter Settings,
page 33). To open the altimeter or barometer settings quickly,
select from the altimeter or barometer widgets.
Altimeter Readings
The altimeter functions differently depending on the fixed or variable settings.
You can adjust the altimeter settings by holding MENU, selecting Settings > Activities & Apps > FLY, selecting the activity
settings, and selecting Altimeter.
Sensor Fixed Variable
Altimeter with GPS On Elevation is equal to GPS elevation. Elevation reflects changes in ambient pressure
and GPS position.
Altimeter with GPS Off Elevation remains constant. Elevation reflects changes in ambient pressure.
History
History includes time, distance, calories, average pace or speed,
lap data, and optional sensor information.
NOTE: When the device memory is full, your oldest data is
overwritten.
Using History
History contains previous activities you have saved on your
device.
1
Hold MENU.
2
Select History > Activities.
3
Select an activity.
26 History