
User manual

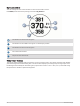

Table Of Contents
- Table of Contents
- Introduction
- Clocks
- Activities and Apps
- Starting an Activity
- Stopping an Activity
- Running
- Swimming
- Multisport
- Indoor Activities
- Climbing Sports
- Starting an Expedition
- Going Hunting
- Marine Activities
- Skiing and Winter Sports
- Golfing
- Jumpmaster
- Customizing Activities and Apps
- Training
- Training for a Race Event
- Workouts
- PacePro Training
- Power Guide
- Segments
- Using Virtual Partner®
- Setting a Training Target
- Racing a Previous Activity
- History
- Appearance
- Watch Face Settings
- Glances
- Viewing the Glance Loop
- Customizing the Glance Loop
- Body Battery
- Performance Measurements
- Training Status
- Adding a Stock
- Controls
- Morning Report
- Sensors and Accessories
- Map
- Music
- Connectivity
- User Profile
- Safety and Tracking Features
- Health and Wellness Settings
- Navigation
- Power Manager Settings
- System Settings
- Device Information
- Troubleshooting
- Product Updates
- Getting More Information
- My device is in the wrong language
- Is my phone compatible with my watch?
- My phone will not connect to the watch
- Can I use my Bluetooth sensor with my watch?
- My headphones will not connect to the watch
- My music cuts out or my headphones won't stay connected
- Restarting Your Watch
- Resetting All Default Settings
- Tips for Maximizing the Battery Life
- Acquiring Satellite Signals
- The temperature reading is not accurate
- Activity Tracking
- Appendix

Viewing the Tip Sequence
The first time you use the Tempo Training activity, the watch displays a tip sequence to explain how your swing
is analyzed.
1 During your activity, press START.
2 Select Tips.
3 Press START to view the next tip.
Jumpmaster
WARNING
The jumpmaster feature is for use by experienced skydivers only. The jumpmaster feature should not be used
as a primary skydiving altimeter. Failure to input the appropriate jump related information can lead to serious
personal injury or death.
The jumpmaster feature follows military guidelines for calculating the high altitude release point (HARP). The
watch detects automatically when you have jumped to begin navigating toward the desired impact point (DIP)
using the barometer and electronic compass.
Planning a Jump
1 Select a jump type (Jump Types, page28).
2 Enter the jump information (Entering Jump Information, page29).
The device calculates the HARP.
3 Select Go To HARP to start navigation to the HARP.
Jump Types
The jumpmaster feature allows you to set the jump type to one of three types: HAHO, HALO, or Static. The jump
type selected determines what additional setup information is required. For all jump types, drop altitudes and
opening altitudes are measured in feet above ground level (AGL).
HAHO: High Altitude High Opening. The jumpmaster jumps from a very high altitude and opens the parachute
at a high altitude. You must set a DIP and a drop altitude of at least 1,000 feet. The drop altitude is assumed
to be the same as the opening altitude. Common values for a drop altitude range from 12,000 to 24,000 feet
AGL.
HALO: High Altitude Low Opening. The jumpmaster jumps from a very high altitude and opens the parachute at
a low altitude. The required information is the same as the HAHO jump type, plus an opening altitude. The
opening altitude must not be greater than the drop altitude. Common values for an opening altitude range
from 2,000 to 6,000 feet AGL.
Static: The wind speed and direction are assumed to be constant for the duration of the jump. The drop altitude
must be at least 1,000 feet.
28 Activities and Apps