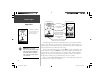
Geko 201 ™ ® Personal Navigator owner’s manual and reference guide 201 Cover.
© Copyright 2003 Garmin Ltd. or its subsidiaries All Rights Reserved Garmin International, Inc. 1200 East 151st Street, Olathe, Kansas 66062 U.S.A. Tel. 913/397.8200 Fax 913/397.8282 Garmin (Europe) Ltd. Unit 5, The Quadrangle, Abbey Park Industrial Estate, Romsey, SO51 9DL, U.K. Tel. 44/1794.519944 Fax 44/1794.519222 Garmin Corporation No. 68, Jangshu 2nd Road, Shijr, Taipei County, Taiwan Tel. 886/2.2642.9199 Fax 886/2.2642.
Let the Fun Begin Introduction fun (noun): 1. A source of enjoyment, amusement, or pleasure. 2. Enjoyment; amusement: have fun at the party. On Your Mark. . . 3. Playful, often noisy, activity. We don’t know about the noise, but fun and simplicity is what the Geko 201 is all about. To get the most out of your new Geko 201, take the time to read through this Owner’s Manual to understand the operating features of the unit.
Introduction Table of Contents Introduction Registration ............................................................. i Table of Contents ................................................... ii Warnings and Cautions ......................................... iii FCC Compliance Statement .................................. iv Software License Agreement .................................. iv Installing the Batteries ............................................ v Buttons...........................................
WARNING: If you choose to use the Geko 201 in a vehicle, it is the sole responsibility of the owner/operator of the Geko 201 to secure the GPS unit so that it will not cause damage or personal injury in the event of an accident. Do not mount the Geko 201 over airbag panels or in a place where the driver or passengers are likely to have an impact with it in an accident or collision.
Introduction FCC Compliance Statement The Geko 201 complies with Part 15 of the FCC interference limits for Class B digital devices FOR HOME OR OFFICE USE. These limits are designed to provide reasonable protection against harmful interference in a residential installation, and are more stringent than “outdoor” requirements.
Introduction Installing the Batteries The Geko 201 operates on two AAA batteries (not included), installed in the back of the unit. To install the batteries, remove the battery cover by inserting a coin in the bottom slot. Twist the coin to lift the cover up and pull away. Insert the batteries, observing proper polarity. Attach the battery cover by inserting the tab end into the back slot at an angle, laying it flat, and then pushing it forward until the clip catches.
Introduction Geko 201 Buttons UP Button The UP/DOWN Buttons: • Press to highlight options on pages and menus • Press to adjust display contrast on the Satellite Page • Press to Zoom out (UP) and in (DOWN) on the Map Page • Press to cycle through the data fields on the Navigation Page The OK Button: • Press to confirm data entry or menu selection • Press and hold to Mark your current position and access the Mark Waypoint Page The POWER Button: • Press and hold to turn the unit on and off • Press and release
Main Pages Main Pages All of the information needed to operate the Geko 201 is found on five main ‘pages’ (or display screens). These pages are the Satellite, Map, Navigation, Trip Computer, and Menu. Main Pages Basics Press the PAGE Button to switch between pages. Satellite Map Navigation Trip Computer Menu 1 190-00297-01_0A.
Satellite Pages Advanced Skyview Normal Skyview Page Basics Status Message Location Accuracy (estimated) A “READY TO NAVIGATE” message must display before you can begin using your Geko 201 to navigate. Satellites Satellite Signal Strength Bars (a ‘D’ stands for differential corrections and denotes a WAAS Satellite) The ‘3D’ displays when receiving signals from four or more satellites.
Backlighting If lighting conditions make it hard for you to see the screen, you can turn on the backlight. Press and release the POWER Button from any screen to turn on the backlight. The backlight is timed to stay on for 30 seconds to save battery power. Satellite Pages Options To adjust the backlight’s timeout setting: Light Timeout Options 1. Press the UP or DOWN Button while on the Menu Page to highlight ‘SETUP’ and press the OK Button to display the Setup Page. 2.
Map Page Heading Indicator Page Basics When on the Map Page, the UP and DOWN Buttons are used to adjust the map scale from 50 feet to 800 miles. Waypoint Symbol Waypoint Name ‘Trail’ (track log) Path to Destination Map Scale ‘You’ (your location) The Map Page shows where you are (the animated figure) and provides a picture of where you are going. As you travel (the animated figure ‘walks’) and leaves a ‘trail’ (track log). Waypoint names and symbols are also shown on the map.
The Options on the Map Page allow you to customize the page in several ways although not all options are visible all the time. The following options are always available: • Clear Track Log: Allows you to clear the track log and immediately start a new one. • Measure Distance: Allows you to choose two way (the default for one is your current position) and then select a second waypoint. The distance, estimated time needed to reach that point, and your current estimated speed is calculated automatically.
Map Page Options Using the Track Log The Geko 201 draws an electronic breadcrumb trail or ‘track log’ on the Map Page as you travel. The track log starts recording as soon as the Geko 201 gets a location fix. To make use of the track log, select the ‘PAN TRACK LOG’ option to show a pointer which moves along the track log when you press the UP or DOWN Button. Press the OK Button to see the four choices ‘TRACBACK’, ‘GOTO’, ‘MARK’ and ‘ZOOM’. ‘CLEAR’ the track log before starting a new trip.
Moving Direction Line Navigation Page Waypoint (Destination) Name Straight Line Distance to the Destination Destination Symbol Compass Ring Data field Direction Arrow (follow this) Page Basics On the Navigation Page, the UP and DOWN Buttons are used to cycle through different trip data. The Navigation Page guides you to a destination. When you’re moving with no particular destination in mind, the Navigation Page displays a subset of information.
Navigation Page Options The Navigation Page allows you to display 10 types of different data, such as ‘Elevation’, ‘Speed’, etc. Data Field Options By pressing the UP or DOWN Button, you can cycle through the Data fields at the bottom of the Navigation Page: • Elevation—the measurement of height above mean sea level. • Heading—the direction you are traveling. • Location—shows your current location coordinates, UTM, latitude and longitude, etc. • Speed—tells you how fast you are going.
Trip Computer Page Page Basics Four data fields of your choosing display on the Trip Computer Page. The default fields are shown but by selecting the ‘CHANGE FIELDS’ option you can make your selections from the list of 31 items. To change the fields: 1. From the Trip Computer Page, press the OK Button to display the Page Options menu. 2. Press the UP or DOWN Button to highlight ‘CHANGE FIELDS’ and press the OK Button. 3.
Trip Computer Page Options • Elevation—the measurement of height above mean sea level. The following fields display figures only when navigating: • Heading—the direction you are traveling. • Bearing—the compass direction from your location to your destination. • Lat/Lon—the current GPS position. • Course—the direction from your starting location to a destination. • Location—shows your current latitude and longitude. • Final Dest—(Final Destination) the last waypoint on your route.
Menu Page Page Basics and Options The Menu Page gives you access to the Geko 201’s essential features. With the Menu Page you can create (Mark) and select waypoints, select, save or change Tracks and Routes, choose from the four Games, and access the system Setup features. MARK Page The MARK Page marks your current location as a waypoint. You can then change the waypoint symbol, name, elevation and location (latitude and longitude).
Menu Page Options (Continued from previous page) 3. Scroll through the position coordinate places using the UP or DOWN Button (UP Button to move right to left, DOWN Button to move left to right). When you reach the position place you want to change, press the OK Button. Use the UP or DOWN Button to scroll through the choices and highlight one. Press the OK Button and the position place changes. Repeat to finish making changes. 4.
Menu Page The WAYPOINTS Page organizes all of your waypoints (alphabetically) for easy selection by name or by proximity (nearest), or, if you choose, allows you to delete all waypoints. To select a waypoint: Waypoints 1. From the MENU Page press the UP or DOWN Button to highlight ‘WAYPOINTS’, then press the OK Button. 2. Select ‘LIST ALL’ and press the OK Button to see an alphabetical listing of all Waypoints. 3.
Menu Page Review Waypoint Page Waypoints The Review Waypoint Page allows you to change the waypoint symbol, name, elevation and location (just as on the Mark Waypoint Page). You can also delete the waypoint, display the waypoint on the Map Page, start a Goto and Project the waypoint. To delete a waypoint: 1. From the REVIEW WAYPOINT Page, press the UP or DOWN Button to highlight ‘DELETE’. You can start a Goto from the REVIEW WAYPOINT Page. 2. Press the OK Button.
The Geko 201’s Project waypoint feature can create a waypoint at a specified distance and bearing using either your current position or an existing waypoint as reference. Menu Page To Project a waypoint: 1. To project from where you are, Mark your current position as explained on Page 11 and then select this “nearest” waypoint from the Waypoints list. Press the OK Button to display the REVIEW WAYPOINT Page.
Menu Page Tracks As discussed on Page 6, the Geko 201 draws an electronic breadcrumb trail or ‘track log’ on the Map Page as you travel. The track log starts recording as soon as the Geko 201 gets a location fix. If you want to keep a record of a certain track log before deleting it, go ahead and save it. You can save a total of 10 tracks in the Geko 201. Saved tracks can be used for navigation later. After a track log is saved, the saved track will have a beginning (BEGIN) and ending (END) point.
To save a track for navigation later: Menu Page 1. From the ‘MENU’ Page, press the UP or DOWN Button to highlight ‘TRACKS’ and then press the OK Button to display the ‘TRACK LOG’ Page. 2. Press the UP or DOWN Button to highlight ‘SAVE’ and press the OK Button to display the track log. Tracks 3. Press the UP or DOWN Button to pick a ‘begin’ point and press the OK Button to save that point. 4.
Menu Page (Continued from Page 17) 5. Press the UP or DOWN Button, to highlight the correct character and press the OK Button to accept that character. Tracks 6. Continue until the name is entered correctly, then highlight ‘OK’ at the bottom of the screen and press the OK Button to save the new name. To delete a saved track: Track on Map Page 1.
The Geko 201 allows you to navigate using one of three methods: Goto, TracBack and Route. The Goto method of navigation was briefly discussed on page 6 and TracBack is discussed on page 18. A route is at least two waypoints that describe the path you are going to travel. The route feature is very convenient because it allows the Geko 201 to guide you from the first waypoint in the route, to each successive waypoint until you reach your final destination.
Menu Page There are two ways to create a route: • Use existing waypoints that reside in the Geko 201. Follow the instructions below to insert a waypoint into a route. Routes “FOLLOW” choice list • Plan a ‘ROUTE’ in Garmin MapSource™ on your PC, and upload the ‘ROUTE’ to the Geko 201. See your Garmin Dealer for more information about MapSource (MapSource is an optional accessory, and is not included with the Geko 201).
To activate a route: Menu Page 1. From the ‘MENU’ Page, press the UP or DOWN Button to highlight ‘ROUTES’ and press the OK Button to display the ‘ROUTES’ Page. 2. Press the UP or DOWN Button to highlight ‘FOLLOW’ and press the OK Button to display the choices from the first (beginning) waypoint and the last (end) waypoint. Routes 3. Press the UP or DOWN Button to highlight the desired waypoint and then press the OK Button to display the ‘NAVIGATION’ Page for guidance to the destination waypoint.
Menu Page The Geko 201 offers four games with you, the user, as the key participant. The Games Page shows the listing, which includes: Geko Smak, Memory Race, Nibbons and Virtua Maze. Highlight the appropriate game and then press the OK Button to play. Brief instructions display when you start each game. Games WARNING: Do not attempt to play these games while driving a motor vehicle or in an area of heavy traffic. Geko Smak Geko Smak features you as the triangular-shaped player.
Menu Page To adjust the Grid or Square Size in custom mode: 1. Highlight the ‘Grid Size’ or ‘Square Size’ field and press the OK Button. Games 2. Choose the desired size and press the OK Button. 3. Highlight ‘Start’ and press the OK Button to begin the game. Nibbons In this game, you must walk around the board collecting the numbers as they appear. Through time, your “tail” will grow. You may travel anywhere on the screen but you can not walk into your tail, or you will lose a life.
Menu Page Setup The Setup Page allows you to customize the Geko 201. On the Setup Page you can change coordinate systems, map datums, and distance units. You can also change the time format, north reference, operating mode, display contrast, and back light timeout setting. Time Page The Time Page allows you to select a 12 hour or 24 hour time format, enter the proper time zone, and choose Daylight Savings Time.
3. Press the UP or DOWN Button to scroll through the selections and press the OK Button when you have found the correct Time Zone. Setup Page 4. Press the PAGE Button to return to the page of your choice. Daylight Savings Time Time Daylight savings time can be set to ‘Automatic’ (using the built-in almanac to automatically change the clock settings when daylight savings goes into or out of effect). You can choose ‘Yes’ to manually add daylight savings or ‘No’ to remain on standard time.
Setup Page Light Timeout The ‘LIGHT TIMEOUT’ option allows you to set the display backlight timeout (STAYS ON, 15 or 30 seconds, and 1 or 2 minutes). Display To change the light timeout: 1. From the SETUP Page press the UP or DOWN Button to highlight ‘DISPLAY’. Press the OK Button to display the DISPLAY Page. 2. Press the UP or DOWN Button and highlight the ‘LIGHT TIMEOUT’ field and press the OK Button. 3. Press the UP or DOWN Button and highlight your selection and press the OK Button. 4.
Using the Geko 201 with a paper map increases the navigation capabilities of each. To use a map in conjunction with the Geko 201, you must select the position format, map datum, map units, and north reference to match the map. The Geko 201 supports both the UTM/UPS and latitude/longitude grids, which define position location for the entire globe.
Setup Page To change the Map Datum: 1. From the MENU Page press the UP or DOWN Button to highlight ‘UNITS’. Press the OK Button to display the UNITS Page. Units 2. Press the UP or DOWN Button to highlight the ‘MAP DATUM’ field and press the OK Button. 3. Press the UP or DOWN Button to highlight the desired datum and press the OK Button. 4. Press the PAGE Button to return to the MENU Page. You can select statute, nautical, or metric units of measurement from the UNITS Page.
tion changes as you move around the earth. Magnetic North is the direction in which a compass needle points. The Geko 201 bearings will correspond to the compass if the Geko 201 is set to magnetic north. Due to errors introduced when map makers flatten the earth’s sphere onto paper, not all of the grid lines drawn on the map point exactly to the north pole, so the north indicated by the grid lines is called ‘Grid North’.
Setup Page The Interface Page allows you to connect and use devices such as computers and differential GPS (DGPS) beacon receivers to the Geko 201. Input/Output Settings Interface The ‘Interface’ Settings Page allows you to use your Geko 201 with external NMEA devices, DGPS beacon receivers, a personal computer, etc. You can choose from seven different input/output serial data formats, or none at all.
To select an I/O Format: Setup Page 1. From the ‘SETUP’ Page, press the UP or DOWN Button to highlight the ‘INTERFACE’ field and press the OK Button to display the INTERFACE Page. 2. Press the OK Button on the ‘I/O FORMAT’ field to display the format options. 3. Press the UP or DOWN Button to highlight the desired format, the press the OK Button. Interface 4. Press the PAGE Button to return to the SETUP Page. 31 190-00297-01_0A.
Setup Page The System Page allows you to choose from four modes of operation (Normal, WAAS, Battery Save, Demo), change the language display, choose a battery type, include owner information, and view the software version on your unit. System GPS Mode The GPS receiver is always ‘ON’ when it’s in ‘NORMAL’ mode. The normal mode is more responsive to sudden turns or change of speed/acceleration.
Language Setup Page The Geko 201 offers 16 different languages in which to view the information. To change the language: 1. From the MENU Page press the UP or DOWN Button to highlight the ‘SYSTEM’ field. Press the OK Button to display the SYSTEM Page. System 2. Press the UP or DOWN Button to highlight ‘LANGUAGE’ field and press the OK Button. 3. Press the UP or DOWN Button to highlight your selection and press the OK Button. 4. Press the PAGE Button to return to the SYSTEM Page.
Appendix A Specifications Physical Case: Size: Weight: Temperature Range: Fully-gasketed, high-impact plastic alloy, waterproof to IPX7 standards (waterproof to 1 meter for 30 minutes) 1.9”W x 3.9”H x .96”D (48.3 x 99.1 x 24.4 mm) Approx. 3.1 ounces (96g) w/batteries 5° to 158°F (-15° to 70°C)3 (operating) Performance Receiver: Acquisition time: Differential-ready, 12 parallel channel Approx. 15 seconds (warm start) Approx. 45 seconds (cold start) Approx.
Standard Accessories Appendix B Owner’s Manual and Reference Guide Quick Start Guide Optional Accessories Accessories Belt Clip Attaches to the back of the unit for convenient carrying. Bicycle Mounting Kit Allows the Geko 201 to be mounted on bicycle handle bars. Carrying Case Protects the Geko 201 when not in use. Bicycle Mounting Kit Lanyard Attaches to the back of the unit for convenient carrying. Marine Mounting Kit Allows the Geko 201 to be mounted on any flat surface.
Appendix C Interface formats are selected from the SETUP Page. The input/output lines on your Geko 201 are RS-232 compatible, allowing an interface to a wide range of external devices, including PC’s, differential beacon receivers, marine autopilots and/or a second GPS receiver. Wiring Diagram The NMEA 0183 version 3.0 interface format is supported by the Geko 201 and enables the unit to drive up to three NMEA devices. NMEA 0183 Version 3.
A Accessories 35 Advanced Skyview 2 Arrival Time 8, 10 Auto Zoom On/Off 5 Average Moving 10 Speed 8 B Backlight 3, 26 Batteries 32, 34, v Battery Save Mode 32 Battery usage icon v Beacon Receiver Setup 30 Bearing 8, 10 Buttons DOWN vi OK vi PAGE vi POWER vi UP vi C Cautions iii Change Data Fields 8 Daylight Savings 25 Time format 24 Time Zone 24 190-00297-01_0A.
Index Light Timeout 26 Location 8, 10 M G Games Geko Smak 22 Memory Race 22 Nibbons 23 Virtua Maze 23 Games Page 22–23 GARMIN 30 GARMIN DGPS 30 Geko Smak 22 Global Positioning System ii GOTO 6, 14 Goto Line 5 GPS Mode 32 H Heading 8, 10 I Input Settings 30 Installing Batteries v Interface Page 30, 31 L LAT/LON 10 38 190-00297-01_0A.
Routes Page 19 RTCM/NMEA 30 RTCM/TEXT 30 RTCM IN 30 S Satellite Page 2 Select a Waypoint 13 Settings Input 30 Output 30 Setup Page 24 Skyview, Advanced 2 Software License Agreement iv Specifications 34 Speed 8, 10 Maximum 10 Overall 10 Vertical 10 Stopped Time 10 Stop Navigation 5 Sunrise 10 Sunset 10 System Page 32, 33 Battery Type 32 GPS Mode 32 Languages 33 Owner Info 33 190-00297-01_0A.
Warranty Limited Warranty This Garmin product is warranted to be free from defects in materials or workmanship for one year from the date of purchase. Within this period, Garmin will at its sole option, repair or replace any components that fail in normal use. Such repairs or replacement will be made at no charge to the customer for parts or labor, provided that the customer shall be responsible for any transportation cost.
call Garmin Customer Service at one of the numbers shown below, for shipping instructions and an RMA tracking number. The unit should be securely packed with the tracking number clearly written on the outside of the package. The unit should then be sent, freight charges prepaid, to any Garmin warranty service station. A copy of the original sales receipt is required as the proof of purchase for warranty repairs.
Notes 42 190-00297-01_0A.
201 Cover.
For the latest free software updates throughout the life of your Garmin products, visit the Garmin web site at www.garmin.com. © Copyright 2003 Garmin Ltd. or its subsidiaries Garmin International, Inc. 1200 East 151st Street, Olathe, Kansas 66062, U.S.A. Garmin (Europe) Ltd. Unit 5, The Quadrangle, Abbey Park Industrial Estate, Romsey, SO51 9DL, U.K. Garmin Corporation No. 68, Jangshu 2nd Road, Shijr, Taipei County, Taiwan www.garmin.com Part Number 190-00297-01 Rev. A 201 Cover.