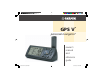
® GPS V personal navigator ® owner’s manual and reference guide GPS V OM Covers.
© Copyright 2001-2003 Garmin Ltd. or its subsidiaries All Rights Reserved Garmin International, Inc. 1200 East 151st Street, Olathe, Kansas 66062 U.S.A. Tel. 913/397.8200 Fax 913/397.8282 Garmin (Europe) Ltd. Unit 5, The Quadrangle, Abbey Park Industrial Estate, Romsey, SO51 9DL, U.K. Tel. 44/1794.519944 Fax 44/1794.519222 Garmin Corporation No. 68, Jangshu 2nd Road, Shijr, Taipei County, Taiwan Tel. 886/2.2642.9199 Fax 886/2.2642.
Introduction Welcome Thank you for choosing the Garmin GPS V®. The GPS V offers true turn-by-turn navigation through the use of its auto-routing feature. At the touch of a button, you now have access to the shortest and fastest routes, turn directions, and estimated time of arrival at your intended destination. Along the way, GPS V on-screen prompts alert you to necessary turns, distance to upcoming turns, route deviation, and distance to the final destination. The GPS V is compact and portable.
Introduction Warnings and Cautions Warning: This product, its packaging, and its components contain chemicals known to the State of California to cause cancer, birth defects, or reproductive harm. This Notice is being provided in accordance with California’s Proposition 65. If you have any questions or would like additional information, please refer to our web site at www.garmin.com/prop65. Do Not Mount Where Driver’s Field of Vision is Blocked Do Not Mount in Front of Airbag Panels ii GPS V OM.
Introduction Map Data One of the goals of Garmin is to provide customers with the most complete and accurate cartography that is available to us at a reasonable cost. We use a combination of governmental and private data sources, which we identify as required in product literature and copyright messages displayed to the consumer. Virtually all data sources contain inaccurate or incomplete data to some degree.
Introduction Software License Agreement Software License Agreement BY USING THE GPS V, YOU AGREE TO BE BOUND BY THE TERMS AND CONDITIONS OF THE FOLLOWING SOFTWARE LICENSE AGREEMENT. PLEASE READ THIS AGREEMENT CAREFULLY. Garmin Corporation (“Garmin”) grants you a limited license to use the software embedded in this device (the “Software”) in binary executable form in the normal operation of the product. Title, ownership rights and intellectual property rights in and to the Software remain in Garmin.
Introduction FCC Compliance The GPS V complies with Part 15 of the FCC interference limits for Class B digital devices FOR HOME OR OFFICE USE. These limits are designed to provide reasonable protection against harmful interference in a residential installation, and are more stringent than “outdoor” requirements.
Introduction Limited Warranty Help us better support you by completing our on-line registration today! Registration ensures you will be notified of product updates, new products and provides lost or stolen unit tracking. Have the serial number of your GPS V handy and connect to our web site (www.garmin.com). Look for the Product Registration link on the home page. Garmin International, Inc. 1200 E. 151st Street Olathe, KS 66062, U.S.A. Phone: 913/397.8200 or 800/800.1020 Fax: 913/397.
Introduction Introduction . . . . . . . . . . . . . . . . . . . . . . . . . . . . . . . . . . . . i Welcome . . . . . . . . . . . . . . . . . . . . . . . . . . . . . . . . . . . . i About This Manual . . . . . . . . . . . . . . . . . . . . . . . . . . . . . i Safety Warnings and Cautions . . . . . . . . . . . . . . . . . . . ii Map Data . . . . . . . . . . . . . . . . . . . . . . . . . . . . . . . . . . . iii Software License Agreement . . . . . . . . . . . . . . . . . . . . . iv FCC Compliance . . . . . .
Introduction Appendices . . . . . . . . . . . . . . . . . . . . . . . . . . . . . . . . . . . 70 Table of Contents Marking Your Location as a Waypoint . . . . . . . . . . . . . 48 Main Menu . . . . . . . . . . . . . . . . . . . . . . . . . . . . . . . . . . 50 Tracks . . . . . . . . . . . . . . . . . . . . . . . . . . . . . . . . . . . 51 Setup . . . . . . . . . . . . . . . . . . . . . . . . . . . . . . . . . . . 54 System Setup . . . . . . . . . . . . . . . . . . . . . . . . . . 54 Time Setup . . . . . .
Reference GPS V Description Unit Description Antenna Rotate upright for best satellite reception FIN D FIN D Rocker Keypad Keypad with Backlighting See page 2 for Key descriptions Landscape Orientation Power/Backlight Key LCD Display 4-gray level LCD with Backlighting Left Side / Bottom Insert AA Batteries Power/Data Connector (back side) Portrait Orientation 1 GPS V OM.
Reference Keypad Usage POWER (Red Lamp Symbol) – Turns the unit on and off. A momentary press while the power is on displays the backlight/contrast adjustment window. Press and hold to turn the GPS V off. PAGE – Switches between the main pages and returns the display from an option window back to a main page. Press and hold to switch between landscape (horizontal) and portrait (vertical) screen orientations. QUIT – Returns the display to the previous page.
Reference Features/Data Entry The following features and procedures are referred to throughout this manual. CURSOR – A highlighted area on the screen which can be moved up/down/left/ right with the ROCKER KEYPAD to select individual fields on the display. Moving the cursor to a given location allows you to begin data entry or scroll through a list. FIELD – The location on a page where a group of characters or an option is entered and displayed.
Reference Battery Installation NOTE: When replacing batteries, use only new or fully recharged batteries. DO NOT mix Alkaline, NiCad, NiMH and Lithium batteries. Remove the batteries from the GPS V if you do not plan to use it for several months. Stored batteries will eventually discharge and leak, causing damage to your unit. Follow the battery manufacturer’s instructions for proper care and disposal of used batteries. During typical use, battery life will be up to 25 hours.
Reference Turning the GPS V On (and Off) Before turning the GPS V on, find a suitable location for its use. If you are operating the GPS V indoors, with the “Use Indoors” option, location is not critical. However, during actual navigation use the GPS V should be outside—or on the dashboard of your car—where the detachable antenna has a clear view of the sky. Rotate the antenna so it is pointing upward, perpendicular to the ground. Turning On/Off To turn the GPS V on, press and hold the red POWER key.
Reference Adjusting Screen Contrast and Backlighting Screen Contrast and Backlighting If lighting conditions make it difficult to see the display screen, you can adjust the contrast or turn on the backlight. To adjust screen contrast and/or backlighting: 1. Press the red power key momentarily. A pop-up window appears for screen settings. 2. Use the Left/Right portion of the ROCKER KEYPAD to adjust screen contrast. 3. Use the Up/Down portion of the ROCKER KEYPAD to adjust backlighting. 4.
Reference Unit Pages at a Glance All of the information needed to operate the GPS V is found on “pages” (i.e., display screens). If no destination is selected, there are three main pages: Satellite Status, Map, and Trip Information. Press the PAGE key to sequence through the pages in forward order, or use the QUIT key to sequence through the pages in reverse order. The Reference Section describes in detail what each page does and how it is configured.
Reference Satellite Status Page Satellite Status Page Receiver Status (Ready for Navigation) Sky View Subject Finder: Signal Strength .................................. page 8 Lock-on Times................................. page 74 Receiver Status.................................. page 9 Track Up Orientation ...................... page 10 New Location ..................................
Reference Receiver Status Receiver Status is indicated at the top of the Satellite Status Page, directly above the sky view. The status will be shown as one of the following conditions: Satellite Status Page Searching for Satellites—the GPS V is looking for any available satellites in view. Locating Satellites—the GPS V is initializing and collecting new almanac data. This process can take up to five minutes, depending on the satellites currently in view.
Reference Satellite Status Page Options Satellite Status Page Satellite Status Page Options: Use Indoors (or Use Outdoors) Track Up (or North Up) New Elevation New Location Many features of the GPS V are menu driven. Each of the main pages has an options menu, allowing you to custom tailor the corresponding page to your preferences and/or select special features which specifically relate to that page. To display the Satellite Status Page Options, press MENU (with the Satellite Status Page displayed).
Reference New Elevation—allows you to designate your approximate altitude in order to better refine a 2D position. By default, 2D positioning will attempt to use the last known altitude. If the altitude is off by several hundred feet (or more), manually entering your approximate altitude will enable the receiver to more accurately determine a position fix. Satellite Status Page To enter an elevation: 1.
Reference The Map Page Map Page Subject Finder: Changing Map Scale..................pages 12-13 Overzoom........................................ page 13 Panning the Map............................. page 13 Pointing to Map Features ................ page 13 Configuring Map Features............... page 17 North Up Map ................................ page 18 Use the IN and OUT zoom keys to change the map scale. The map scale appears in the lower left corner of the map.
Reference Zooming, Panning and Pointing There are three main actions you can perform on the Map Page: zooming, panning and pointing. The map display has map scales from 20 feet to 800 miles. The current map scale is indicated on the bottom left corner of the map display. Map Page To change the map scale: 1. Press the IN zoom key to see a smaller area with more detail. 2. Press the OUT zoom key to see a larger area with less detail.
Reference Map Page map except route lines and track log data. When a waypoint name is highlighted, you can review information about the waypoint, list waypoint options, or execute a ‘Route to It’ directly from the Map Page. To select an on-screen location with the panning pointer: 1. Use the ROCKER KEYPAD to start the panning function. A panning pointer will appear on the screen. 2. Continue using the ROCKER KEYPAD to place the pointer on the desired item. 3.
Reference Once you are finished with panning, you can quickly remove the panning arrow and re-center the map on your present position by pressing the QUIT key. Map Page Map Page Navigation Information The following navigation information is displayed on the Map Page: When not navigating (no destination selected) • Moving direction - Cardinal letters indicate the direction you are traveling. • Speed - Your rate of travel which can be displayed in miles per hour or kilometers per hour.
Reference Map Page Options Map Page Map Page Options: Stop/Resume Navigation Recalculate Hide Guidance Text (or Show Guidance Text) Setup Map (with tabs for-—Map, Display, Line, Waypoint, City, Road, Point, Area and Topo) Change Fields Measure Distance MapSource Info Many features of the GPS V are menu driven. Like each of the main pages, the Map Page has an options menu, allowing you to customize the page to your preferences and/or select special features which specifically relate to the Map Page.
Reference Setup Map—allows you to configure the map display to your preferences, including map detail, map orientation, automatic zooming, and color mode. The map setup options are organized under a series of “file tabs”, making individual selections easier to locate and change.
Reference Map Page ‘Lock On Road’ causes the triangular present location symbol to “snap to” the nearest road. This compensates for any minor errors in your location reading. The ‘Direct Goto Line’ can represent bearing to your destination (and remain tied to your present position) or a course line (which remains fixed at the location where the Goto was first initiated). Settings Descriptions: Map Detail—Adjusts the amount of map information, such as roads, that is displayed.
Reference Change Fields—allows you to choose the data displayed on user-selectable data fields adjacent to the map display (to the right of the map when horizontally oriented) or to remove the data fields and display a full-screen map. Map Page To change a data field or change the number of on-screen data fields: 1. With the Map Page Options displayed, use the ROCKER KEYPAD to highlight ‘Change Fields’ and press ENTER. 2.
Reference Map Page Measure Distance—allows you to measure the bearing and distance between any two points you choose on the Map Page. Also displays the latitude and longitude of the pointer. To measure the distance between two points: Use the ‘Measure Distance’ option to measure distance and bearing between any two map locations. A pointer and “rubber-band” will appear, along with display of bearing and distance between points at the top of the page. 1.
Reference Trip Information Page Current Heading Current Speed Trip Information Page Trip Odometer and Trip Computer Readouts Subject Finder: Resetting Trip Information............... page 23 Clearing the Track Log .................... page 23 Average Speed Current Location Time and Date The third main page is the Trip Information Page. If you are making a long trip, you will find the Trip Information Page very useful.
Reference Trip Information Page You can change the information types on the Trip Information Page, using the ‘Change Fields’ option. The following items appear on the Trip Information Page: Current Heading—Your current direction of travel is indicated on a compass-like display at the top of the page. Speed—Your current vehicle speed can be indicated in miles per hour, knots or kilometers per hour.
Reference Trip Information Page Options Many features of the GPS V are menu driven. Like each of the main pages, the Trip Information Page has an options menu, allowing you to customize the page to your preferences and/or select special features which specifically relate to the Trip Information Page. To display the Trip Information Page Options, press MENU (with the Trip Information Page displayed). The following Trip Information Page options are available: Reset...
Reference Trip Information Page Change Fields—allows you to choose the data displayed on six user-selectable data fields on the Trip Information Page (across the middle of page). To change a data field(s): 1. With the Trip Information Page Options displayed, use the ROCKER KEYPAD to highlight ‘Change Fields’ and press ENTER. 2. Use the ROCKER KEYPAD to highlight the data field you wish to change (look for the small highlight box on one of the data field titles) and press ENTER. 3.
Reference To average position samples and save the result as a waypoint: 1. With the Map Page Options displayed, use the ROCKER KEYPAD to highlight ‘Average Location’ and press ENTER. An Average Location window appears. Observe the ‘Accuracy’ and ‘Measurement Count’ figures. Trip Information Page 2. When the ‘Accuracy’ and/or ‘Measurement Count’ figures reach the desired value(s), highlight ‘Save’ and press ENTER. (To cancel the averaging function, highlight ‘Discard’ and press ENTER.) 3.
Reference Using the Find Menu Using Find Find Menu: Points of Interest (Food&Drink, Lodging, Entertainment, Shopping, Services, Transportation and Emergency&Government) Addresses Intersections Waypoints* Cities Exits Recently Found Places *See pages 14 and 48-49 for more information on creating and using waypoints. You can search for Waypoints, Cities or interstate highway Exits that are included in the GPS V basemap using the Find Menu.
Reference 5. Use the ROCKER KEYPAD and ENTER to spell the name of the desired waypoint, city or point of interest on the top line of the page (pressing ENTER after each letter/number is selected). Using Find 6. As you enter each letter/number, the list below is continuously updated to display any matches in the data. You may find that only the first few letters/numbers are needed to display the desired item.
Reference Finding nearby waypoints, cities or points of interest: Using Find 1. Press FIND to display the Find Menu. 2. Use the ROCKER KEYPAD to select ‘Points of Interest’, ‘Waypoints’ or ‘Cities’. 3. A pop-up window allows you to find ‘Nearest’ or ‘By Name’. Use the ROCKER KEYPAD to select ‘Nearest’ and press ENTER. 4. For Points of Interest Only: additional pop-up windows allow you to select the points of interest category(s). Use the ROCKER KEYPAD and ENTER to select the desired category(s).
Reference When viewing waypoints the information window displays the waypoint name, a map symbol, the location in latitude/longitude and elevation. City information includes city name, the size by population and the distance/direction from your current location. Points of interest information includes name, address and phone number. Using Find Finding Highway Exits You can use the Find Menu ‘Exits’ option to locate a nearby exit on an interstate highway. Exits are listed only by ‘Nearest’.
Reference To find an exit for another nearby interstate: Using Find 1. Follow steps 1 through 4 on the preceding page, under ‘To find an Exit’. 2. With a list of nearest exits displayed, press MENU. 3. With ‘Select Exit Road’ highlighted, press ENTER. 4. Use the ROCKER KEYPAD and ENTER to select a different interstate highway, by name. Note that, when selecting a numbered highway (e.g., I-20 or Hwy 15), do not enter the “I” or “Hwy” prefix—just the number. 5.
Reference Finding an Address or an Intersection You must download MapSource City Select data to your GPS V to search for addresses or intersections, otherwise these options are not selectable. Using Find To locate an address: 1. Press the FIND key to display the Find Menu. 2. Use the ROCKER KEYPAD to select the ‘Addresses’ option and then press ENTER to display the Find Address Page. 3. With the number field highlighted, use the ROCKER KEYPAD and ENTER to enter the street number portion of the address.
Reference Recently Found Places Using Find You can use the ‘Recently Found Places’ option to locate Points of Interest, Addresses and Intersections, Cities, and other locations you have recently retrieved. The Recently Found Places Page uses a series or ‘file tabs’ at the top that identifies each category of recently found places. Each category lists up to fifteen items (i.e., the last fifteen businesses found are listed under the POI tab, the last fifteen cities found are under the cities tab, etc.).
Reference Using Goto or Routes The GPS V gives you several options to select a destination: FIND—Use the FIND key as described on pages 26-32. Once you have selected the desired location, use the on-screen ‘Goto’ button that appears on the information page for the desired location to navigate to that location. This is the easiest method for selecting a destination and is ideal for shorter routes.
Reference For Automatic Routes: Goto and Routes You can create automatic or manual routes. Automatic routes use the routing features in MapSource City Select data and the GPS V’s built-in basemap to automatically select the required turns to reach your final destination. Manual routes are created by adding each location along the route manually, beginning with your departure point. 34 GPS V OM.indd 34 5. Use the ROCKER KEYPAD to select the desired destination category (e.g.
Reference When using FIND or automatic routes, you can save the automatically-created Goto or route from the Current Route Page. This allows you to retrieve the route again for later use. When viewing saved routes, note that a hiker symbol is used to denote manual and off-road routes. A car symbol denotes an automatically-created Goto or route. Goto and Routes To save a Goto or automatic route: 1. While navigating the route, press PAGE until the Current Route Page is displayed (see page 40). 2.
Reference Goto and Routes Route List Options: Follow Roads Rename Copy Delete Delete All With the list of saved routes displayed, press MENU to display an options menu. Functions are available for deleting, copying and renaming saved routes. Follow Roads—selecting this option will calculate an autoroute for a manual route, so that the route follows roads instead of a direct line. This feature can also be performed by selecting the ‘Navigate’ button on a manual Route Review page.
4. Press MENU to display an options menu. 5. To delete all routes, use the ROCKER KEYPAD to select ‘Delete All’ and press ENTER. 6. To delete the highlighted route (step 3), use the ROCKER KEYPAD to select ‘Delete’ and press ENTER. From the list of saved routes, highlight any saved manual route (denoted by hiker symbol) on the list and press ENTER to display an information page for the selected route.
Reference Goto and Routes 5. Press MENU to display an options menu. 6. Use the ROCKER KEYPAD to select ‘Reverse Route’ or ‘Copy Route’ and press ENTER. When copying a route, a new route is added to the route list with the same name as the original, but with a one-digit number added to the end. The Route Information Page includes two user-selectabe data fields.
Reference Any saved manual routes can also be edited from the Route Information Page. You can insert, remove, move or change waypoints in the route. To edit a route: 1. Press the MENU key twice to view the Main Menu. 2. Use the ROCKER KEYPAD to highlight ‘Routes’ and press ENTER. A list of all routes stored in memory is displayed. Goto and Routes Route Editing Options: Review Change Insert Move Remove 3.
Reference Current Route Page Turn Instructions Current Route Page Subject Finder: Stop Navigation............................... page 41 Recalculate Route ............................ page 42 Use Detour...................................... page 42 Turn Direction Arrow Distance and Time To Go (or Arrival Time) Scroll Bar Direction Pointer The Current Route Page only appears in the main page sequence when a destination is selected using an automatic route.
Reference To view the Next Turn Page from the Current Route Page: 1. With the Current Route Page displayed, press ENTER to display the Next Turn Page for the next turn. 2. Press ENTER or QUIT to exit the Next Turn Page. To view the Next Turn Page for any turn on the Current Route Page: 1. With the Current Route Page displayed, use the ROCKER KEYPAD to highlight the desired turn and press ENTER.
Reference Current Route Page Recalculate—Recalculates the Goto or route starting from your current location. This allows you to update the route if you’ve traveled off the current route or reselected between faster time or shorter distance calculations. To recalculate the currently selected route: 1. With the Current Route Page Options displayed, use the ROCKER KEYPAD to highlight ‘Recalculate’ and press ENTER.
Reference Show Arrival Times (or Show Times to Go)—Switches the Current Route Page between display of arrival times at each turn and the final destination, or showing time to go (in hours/minutes or minutes/seconds, as appropriate). Current Route Page To change the time displayed on the Current Route Page: 1. With the Current Route Page displayed, press MENU. 2. Use the ROCKER KEYPAD to select ‘Show Arrival Times’ (or ‘Show Times to Go’) and press ENTER.
Reference Next Turn Page Next Turn Page Subject Finder: Current Route Page ......................... page 40 Off Road Routing Preference.......pages 7, 34 The Next Turn Page is only available while navigating a Goto or route. However, when selecting a destination, the ‘Off Road’ route preference will display the Direction Finder Page—not the Current Route or Next Turn Pages. Use the IN and OUT zoom keys to change the map scale on the Next Turn Page. Press QUIT or ENTER to exit the Next Turn Page.
Reference Direction Finder Page Pointer (Bearing to Destination) Distance To and Name of Next Waypoint Graphic Compass Current Speed Direction Finder Page Subject Finder: Big Numbers Display....................... page 47 Bearing Pointer vs. Course Pointer....page 47 Time to Final Destination Whenever a destination has been selected using the ‘Off Road’ routing preference or when navigating a manual route, the Direction Finder Page appears in the main page sequence—in place of the Current Route Page.
Reference Direction Finder Page Options Direction Finder Page Direction Finder Page Options: Stop Navigation (or Resume Navigation) Change Fields Big Numbers (or Small Numbers) Course Pointer (or Bearing Pointer) Restore Defaults Many features of the GPS V are menu driven. Like each of the main pages, the Direction Finder Page has an options menu, allowing you to customize the page to your preferences and/or select special features which specifically relate to the Direction Finder Page.
Reference Big Numbers (or Small Numbers)—allows you to select a different Direction Finder Page layout, with a smaller graphic compass and two user-selectable, large-character data fields. If ‘Big Numbers’ is selected, ‘Small Numbers’ will appear as an option instead. Direction Finder Page To change the Direction Finder Page layout: 1. With the Direction Finder Page Options displayed, use the ROCKER KEYPAD to highlight ‘Big Numbers’ (or ‘Small Numbers’) and press ENTER.
Reference Marking Your Location as a Waypoint Waypoints The GPS V allows you to capture your current location and save it as a “waypoint”. Use this feature to mark locations you may wish to return to in the future (e.g., parked car location, trailhead or fishing spot). The GPS V can hold up to 500 Waypoints. To mark your location as a Waypoint: To mark your current location as a waypoint, press and hold the ENTER key.
Reference At the bottom of the Mark Waypoint Page there are three on-screen buttons: Delete—deletes the waypoint. Goto—Tells the unit that you want to navigate to that waypoint. Map—Shows the waypoint on the Map Page. When marking your current location, the GPS V also allows you to average position samples over time to produce a more accurate position. Waypoints To average position samples and save the result as a waypoint: 1. With the Mark Waypoint Page displayed, press MENU. 2.
Reference Main Menu Main Menu Main Menu Selections: Mark (see pages 48-49) Find (see pages 26-32) Routes (see pages 33-39) Tracks Setup Accessories The Main Menu provides you with a directory of GPS V’s features and unit settings. From the Main Menu you can mark new waypoints, find points of interest or cities, creates routes, save track logs, change unit settings, display a calendar, play games, and much more. Several of the Main Menu features are covered elsewhere in this manual.
Reference Main Menu: Routes The Route functions of the GPS V are described on pages 33-39 of this manual. Main Menu: Tracks Main Menu: Tracks The GPS V draws an electronic breadcrumb trail on the Map Page as you travel along. This breadcrumb trail is referred to as a “track log”. A track log contains information about points along its path, including time and position. The GPS V can use this information to allow you to retrace your path, in either direction.
Reference To set up the track log recording function: Main Menu: Tracks 1. Follow the steps on page 50 to select ‘Tracks’ and display the Saved Tracks Page. 2. Press the MENU key to display an options window. 3. Use the ROCKER KEYPAD to highlight ‘Setup Track Log’ and press ENTER. 4. Use the ROCKER KEYPAD to highlight ‘Wrap When Full’ and press ENTER to check/uncheck this feature. When unchecked, the track log is recorded until available memory is full, then stops.
Reference To save the track log currently being recorded: 1. Follow the steps on page 50 to select ‘Tracks’ and display the Saved Tracks Page. Main Menu: Tracks 2. Use the ROCKER KEYPAD to highlight ‘Save’ and press ENTER. To display additional information for a saved track: 1. Follow the steps on page 50 to select ‘Tracks’ and display the Saved Tracks Page. 2. Use the ROCKER KEYPAD to highlight a track log in the ‘Saved Tracks’ list and press ENTER.
Reference Main Menu: Setup Main Menu: Setup Setup Pages (file tabs): System Time Guidance Routing Units Timers Location Alarms Interface The Setup Pages are selected via a series of “file tabs” across the top of the screen. Each setup page is labeled and identified according to its file tab. The Setup Pages allow you to customize your GPS V to your personal preferences. Each selectable Setup Page is denoted by a “file tab” at the top that identifies the function of that page. To select a Setup Page: 1.
Reference portion of the GPS V and is best suited for indoor use (e.g., learning to use the GPS V or creating manual routes). The GPS V cannot be used for navigation guidance when operating in Demo Mode. The Battery setting is used to designate the type of batteries currently being use to power your GPS V: Alkaline or Lithium. This setting ensures accurate readings from the battery level indicator. The Backlight setting determines how long the backlighting will remain on after the last keypress.
Reference To restore System Setup Page features to the original factory settings: Main Menu: Setup 1. Follow the steps on page 54 to select the System Setup Page. 2. Press MENU to display an options menu. 3. Use the ROCKER KEYPAD to highlight ‘Restore Defaults’ and press ENTER. When downloading City Select data to your GPS V, you may be asked to supply a “unit ID”. This information is provided under a ‘Software Version’ selection.
Reference Main Menu: Setup: Guidance The Guidance Setup Page controls how the GPS V responds when you depart from a route, how the Next Turn Page is displayed, and whether or not the GPS V shuts off automatically upon arrival at your destination. The Off-Route Recalcuation setting determines whether the GPS V prompts you when you depart from the route, automatically recalculates the route without prompting, or ignores the departure from the route and continues with current route navigation.
Reference Main Menu: Setup Shorter Distance—This setting uses distance as the primary criteria for route calculation. The calculated route will be shorter distance, but may take more time. Off Road—This setting creates a direct-line route from your current location to your destination. This may be useful outside the detailed map coverage areas.
Reference 2. Use the ROCKER KEYPAD to highlight the feature you wish to change and press ENTER. A pop-up window will appear with selections for that feature. Main Menu: Setup 3. Use the ROCKER KEYPAD to highlight the desired setting and press ENTER. The ‘Avoid’ selections at the bottom of the Routing Setup Page let you avoid certain items that may be undesirable in your route. However, the GPS V may still use these items if the alternatives will take you too far out of your way.
Reference To restore Units Setup Page features to the original factory settings: Main Menu: Setup 1. Follow the steps on page 54 to select the Units Setup Page. 2. Press MENU to display an options menu. 3. Use the ROCKER KEYPAD to highlight ‘Restore Defaults’ and press ENTER. Main Menu: Setup: Timers The Timers Setup Page lets you select a count up or count down user timer. For a count down timer, you may also specify the count down duration.
Reference position readings on your GPS V conform to position readings on a printed map/chart. Check the legend on your paper map/chart to determine which map datum was used to create it. Main Menu: Setup Note that, format and map datum settings are best used by individuals with a working knowledge of these subjects. Selecting the wrong format or wrong map datum can result in substantial position errors. To select a location format or map datum: 1.
Reference Main Menu: Setup 2. Use the ROCKER KEYPAD to highlight ‘Anchor Drag’ and press ENTER. A pop-up window will appear. 3. Use the ROCKER KEYPAD to highlight ‘On’ or ‘Off’ and press ENTER. 4. To define the alarm distance, use the ROCKER KEYPAD to highlight the anchor drag distance field and press ENTER. Use the ROCKER KEYPAD and ENTER to enter the maximum allowable drift distance. To enable/disable the proximity alarm: 1. Follow the steps on page 54 to select the Alarms Setup Page.
Reference Spanish language screen displays. Main Menu: Setup: Interface The Interface Setup Page lets you control the input/output format used when connecting your GPS V to a computer, external NMEA devices, a DGPS beacon receiver, etc. The following settings are available: GARMIN—The proprietary format used to exchange waypoint, route, track log and MapSource data with a PC. GARMIN DGPS—The proprietary format used with a Garmin differential beacon receiver (e.g., GBR 23).
Reference ENTER. Use the ROCKER KEYPAD to highlight the desired setting and press ENTER. Main Menu: Accessories Accessories: Sun & Moon Hunt & Fish Calendar Gas Mileage Games Calculator 5. For GARMIN DGPS or RTCM In/NMEA Out, use the ROCKER KEYPAD to highlight ‘Beacon’ and press ENTER. Use the ROCKER KEYPAD to select ‘Scan’ or ‘Manual’ and press ENTER. If ‘Scan’ is selected, the GPS V will automatically direct the beacon receiver to scan for available beacon transmitters.
The Sun and Moon Accessories Page graphically depicts the position of the sun and moon relative to Earth. Sun and moon positions can be displayed for any date and for any location on Earth. The Sun and Moon Accessories Page also displays sunrise, sunset, moonrise and moonset times for the selected time, date and location. On-screen buttons at the bottom of the page allow you to animate the movement of the sun and moon and stop at a given time/date.
Reference Main Menu: Accessories 5b. Press MENU to display an options menu. Use the ROCKER KEYPAD to highlight ‘Use Current Time’ and press ENTER. To toggle between sky view and moon phase displays: 1. Follow the steps on page 64 to select the Sun and Moon Accessory Page. 2. Press MENU to display an options menu. 3. Use the ROCKER KEYPAD to highlight ‘Change to Sky View’ or ‘Change to Moon Phase’ and press ENTER.
Reference Press ENTER when the pointer is on the desired location. Or... Main Menu: Accessories 4b. If ‘Use Find Menu’ is selected, follow the step-by-step instructions on pages 26-32 in this manual. Note that, the times displayed are the recognized best and good times for hunting and fishing. But, be certain that they are not in conflict with state and local game laws which may vary from location to location. It is your responsibility to know and abide by these laws.
Reference Main Menu: Accessories 4. Use the ROCKER KEYPAD and ENTER to enter the new note. Select ‘OK’ and press ENTER when finished entering the note. To delete calendar notes: 1. Follow the steps on page 64 to select the Calendar Accessory Page. 2. Use the ROCKER KEYPAD to highlight the date containing the note you with to delete and press MENU. (NOTE: This step is not necessary when deleting old notes.) 3. Use the ROCKER KEYPAD to highlight ‘Delete This Day’s Notes’ or ‘Delete Notes Older Than...
Reference The Games Accessory Page lets you play two games, Breakout and Memory Race. Breakout uses the ROCKER KEYPAD to control a paddle at the bottom of the screen. The object of the game is to deflect the bouncing ball(s) until all bricks at the top of the screen have been removed. Use the QUIT key to exit the game. Memory Race has you as the key playing piece, as you walk or travel about until your position appears in a square. Press ENTER to open the chest and reveal the symbol.
Appendix A Wiring/Interfacing The GPS V can be connected to a vehicle’s electrical system and a PC, beacon receiver, marine autopilot, or other compatible device using the optional PC Interface Cable with Cigarette Lighter Adapter (P/N 010-10165-00). (-) Ground Data In The GPS V can be connected to a PC, beacon receiver, marine autopilot or other compatible device using the supplied PC Interface Cable with RS-232 Serial Port Connector (P/N 010-10141-00).
Appendix B Cleaning The GPS V is constructed of high quality materials and does not require user maintenance other than cleaning. Clean the unit using a cloth dampened with a mild detergent solution and then wipe dry. Avoid chemical cleaners and solvents that may damage plastic components. Storage Storing alkaline batteries in the unit for extended periods is not recommended.
Appendix C Messages The GPS V uses an on-screen message system to alert you to unit operating characteristics. Press the ENTER key to acknowledge the message and return to the page you were viewing. Anchor Drag - You have drifted beyond the specified anchor drag alarm distance. Arriving at Destination - You have arrived at the destination location. Can’t Unlock Maps - At least one map on the data card is locked. Data Transfer Complete - Transfer of data to the unit from PC software has been completed.
Appendix C Proximity Radius Overlaps - The alarm radius specified overlaps the area specified by another proximity waypoint. Messages Route Memory Full - Route memory is full and no more routes can be saved or added (from another GPS unit or a PC). Track Truncated - A complete uploaded track will not fit in memory. The oldest track log points were deleted to make space for the most recent data. Route Truncated - The route has been truncated because it was too long.
Appendix D DGPS Accuracy Specifications PHYSICAL 2 Position: 3-5 meters (10-16 feet), 95% typical Velocity: 0.05 meter/sec steady state Dynamics: Performs to specifications to 6 g’s Interfaces: NMEA 0183 version 2.3, RTCM SC-104 (for DGPS corrections) and RS-232 for PC interface Case: Rugged; fully gasketed Size: 2.3”H x 5.0”W x 1.6”D (5.9 x 12.7 x 4.1 cm) Data Storage Life: Indefinite; no memory battery required Weight: Approx.
Appendix E MapSource City Select CD-ROM Overview CD-ROMs containing all U.S. and Canadian detailed coverage areas (DCAs) are included with your GPS V. The MapSource City Select CD is designed specifically for the GPS V and contains detailed street maps for major cities. This mapping software allows for automatic routing and also contains turn restrictions and other routing information.
Appendix F Index Best Route ...........................................58 Big Numbers .......................................47 C A Accessories Pages .......................... 64-69 Alarm Clock ........................................60 Alarms Setup Page......................... 61-62 Altitude ...............................................11 Anchor Drag Alarm .............................61 Antenna ................................................1 Areas ..................................................
Appendix F File Tabs..............................................17 FIND Key.................................. 2, 26-32 FIND Menu............................. 26-32, 50 Finding Addresses ...............................31 Finding By Name .......................... 26-27 Finding Cities................................ 26-28 Finding Highway Exits .................. 29-30 Finding Intersections...........................31 Finding Nearest...................................28 Finding Points of Interest ..........
Appendix F Index Off Route Recalculation.......................57 On-Screen Button..................................3 Orientation..........................2, 10, 18, 55 OUT Zoom Key................... 2, 12-13, 44 P Package Contents ...................................i Packing List............................................i PAGE Key..........................................2, 7 Panning Map ................................. 13-14 Pointing on Map............................ 13-14 Power On/Off...............
Appendix F Time Format .......................................56 Time Setup Page..................................56 Time To Go ...................................15, 43 Time Zone...........................................56 Timers Setup Page ...............................60 TracBack..............................................53 Tracks............................................ 51-53 Track Up .............................................10 Tracks............................................
GPS V OM Covers.
For the latest free software updates (excluding map data) throughout the life of your Garmin products, visit the Garmin web site at www.garmin.com. © Copyright 2001-2003 GARMIN Ltd. or its subsidiaries GARMIN International, Inc. 1200 East 151st Street, Olathe, Kansas 66062, U.S.A. GARMIN (Europe) Ltd. Unit 5, The Quadrangle, Abbey Park Industrial Estate, Romsey, SO51 9DL, U.K. GARMIN Corporation No. 68, Jangshu 2nd Road, Shijr, Taipei County, Taiwan www.garmin.com Part Number 190-00204-10 Rev.