GPSMAP 500/700 Series and echoMAP™ 50/70 Series ® Owner’s Manual March 2015 Printed in Taiwan 190-01556-10_0D
All rights reserved. Under the copyright laws, this manual may not be copied, in whole or in part, without the written consent of Garmin. Garmin reserves the right to change or improve its products and to make changes in the content of this manual without obligation to notify any person or organization of such changes or improvements. Go to www.garmin.com for current updates and supplemental information concerning the use of this product.
Table of Contents Introduction.....................................................................1 echoMAP 70 Series and GPSMAP 700 Series .......................... 1 Using the Touchscreen .......................................................... 1 echoMAP 50 Series and GPSMAP 500 Series .......................... 1 Device Keys ........................................................................... 1 Downloading the Manuals ..........................................................
Creating a Waypoint on the Sonar Screen Using the Touchscreen ............................................................................. 16 Creating a Waypoint on the Sonar Screen Using the Device Keys .......................................................................................... 16 Measuring Distance on the Sonar Screen ................................ 16 Pausing the Sonar Display ....................................................... 16 Viewing Sonar History ...............................
Opening the Media Player ........................................................ 28 Icons .................................................................................... 28 Selecting the Media Source ...................................................... 28 Connecting a Bluetooth Wireless Device to the Media Player ................................................................................... 28 Playing Music ............................................................................
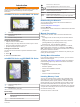
Introduction WARNING See the Important Safety and Product Information guide in the product box for product warnings and other important information. echoMAP 70 Series and GPSMAP 700 Series Zooms in to a chart or view. Scrolls, highlights options, and moves the cursor. SELECT Acknowledges messages and selects options. BACK Returns to the previous screen. MARK Saves the present location as a waypoint. HOME Returns to the Home screen. MENU Opens a menu of options for the page, when applicable.
Customizing the Chartplotter Customizing the Home Screen 4 Close the door. Software Update You can add items to and rearrange items on the Home screen. 1 From the Home screen, select Customize Home. 2 Select an option: • To rearrange an item, select Rearrange, select the item to move, and select the new location. • To add an item to the Home screen, select Add, and select the new item. • To remove an item you have added to the Home screen, select Remove, and select the item.
You will need this password to access the wireless network from a wireless device. The password is case-sensitive. Connecting a Wireless Device to the Chartplotter Before you can connect a wireless device to the chartplotter wireless network, you must configure the chartplotter wireless network (Setting Up the Wi‑Fi Wireless Network). You can connect multiple wireless devices to the chartplotter to share data. 1 From the wireless device, turn on the Wi‑Fi technology and search for wireless networks.
2 Select Stop Panning or Back to stop panning and return the 6 Follow the magenta line, steering to avoid land, shallow Selecting an Item on the Map Using the Device Keys 1 From a chart or 3D chart view, select , , , or to move Viewing Location and Object Information on a Chart screen to your present location. Marine services You can view information about a location or an object on the Navigation chart or the Fishing chart.
Fishing Charts: Shows the chart with enhanced bottom contours and without navigational data. This chart works well for offshore deep-sea fishing. High Resolution Satellite Imagery: Provides high-resolution satellite images for a realistic view of the land and water on the Navigation chart (Showing Satellite Imagery on the Navigation Chart). Aerial Photos: Shows marinas and other navigationally significant aerial photos to help you visualize your surroundings (Viewing Aerial Photos of Landmarks).
Symbol Description Target is lost. A green X indicates that the AIS transmission from the vessel is lost, and the chartplotter displays a message banner asking whether the vessel should continue to be tracked. If you discontinue vessel tracking, the lost target symbol disappears from the chart or the 3D chart view. Dangerous target in range. The target flashes while an alarm sounds and a message banner appears.
AIS Distress Signal Device Targeting Symbols Symbol Description AIS distress signal device transmission. Select to see more information about the transmission and begin navigation. Transmission lost. Transmission test. Appears when a vessel initiates a test of their distress signal device, and does not represent a true emergency. Transmission test lost.
Compass Tape: Shows the compass tape data bar when the vessel is navigating to a destination. Editing the Data Fields You can change the data shown in the overlay numbers displayed on the charts and other screens. 1 From a screen that supports overlay numbers, select Menu. 2 If necessary, select Chart Setup. 3 Select Overlay Numbers > Edit Layout. 4 Select a layout. 5 Select a data field. 6 Select the type of data shown in the field.
Basic Navigation Questions Fish Eye 3D Settings NOTE: This feature is available with premium charts, in some areas. From the Fish Eye 3D chart view, select Menu. View: Sets the perspective of the 3D chart view. Tracks: Shows tracks. Sonar Cone: Shows a cone that indicates the area covered by the transducer. Fish Symbols: Shows suspended targets.
Creating a Waypoint at a Different Location 1 Select Nav Info > Waypoints > New Waypoint. 2 Select an option: • To create the waypoint by entering position coordinates, select Enter Coordinates, and enter the coordinates. • To create the waypoint using a chart, select Use Chart, select the location, and select Select. Marking and Starting Navigation to an MOB Location When you mark a waypoint, you can designate it as a man overboard (MOB) location.
9 Follow the magenta line, steering to avoid land, shallow water, and other obstacles. Creating and Saving a Route This procedure saves the route and all the waypoints in it. The starting point can be your present location or another location. 1 Select Nav Info > Routes & Auto Guidance Paths > New Route > Route Using Chart. 2 Select the starting location of the route. 3 Select Add Turn. 4 Select the location of the next turn on the chart. 5 Select Add Turn.
Creating and Saving an Auto Guidance Path 1 Select Nav Info > Routes & Auto Guidance Paths > New Route > Auto Guidance. 2 Select a starting point, and select Next. 3 Select a destination, and select Next. 4 Select an option: • To view a hazard and adjust the path near a hazard, select Hazard Review. • To adjust the path, select Adjust Path, and follow the onscreen instructions. • To delete the path, select Cancel Auto Guidance. • To save the path, select Done.
Showing Tracks From a chart or a 3D chart view, select Menu > Waypoints & Tracks > Tracks > On. A trailing line on the chart indicates your track. Setting the Color of the Active Track 1 Select Nav Info > Tracks > Active Track Options > Track Color. 2 Select a track color. Saving the Active Track The track currently being recorded is called the active track. 1 Select Nav Info > Tracks > Save Active Track. 2 Select an option: • Select the time the active track began. • Select Entire Log. 3 Select Save.
Combinations The Combination screen shows a combination of different screens at the same time. The number of options available on the Combination screen depends on the optional devices you have connected to your chartplotter and whether you are using premium maps. Selecting a Combination 1 Select Combinations. 2 Select a combination.
Â Ã Ä Å Æ The transducer on your vessel Trees Old tires LiveVü Down Sonar View This sonar view shows a two-dimensional view of what is below the boat and can be used to see a bait ball and fish. Logs Distance from the side of the boat SideVü/DownVü Scanning Technology Instead of a more common conical beam, the SideVü/DownVü transducer uses a flat beam to scan the water and ground to the sides of your boat.
RealVü 3D Down Sonar View This sonar view shows a three-dimensional view of what is below the transducer and can be used when you are stationary and want to see what is around your boat. RealVü 3D Historical Sonar View This sonar view provides a three-dimensional view of what is behind your boat as you are moving and shows the entire water column in 3D, from the bottom to the top of the water. This view is used for finding fish.
Adjusting the Level of Detail You can control the level of detail and noise shown on the sonar screen either by adjusting the gain for traditional transducers, or by adjusting the brightness for DownVü and SideVü/DownVü transducers. If you want to see the highest intensity signal returns on the screen, you can lower the gain or brightness to remove lower intensity returns and noise. If you want to see all return information, you can increase the gain or brightness to see more information on the screen.
Some sonar black boxes and transducers also provide the ability to customize preset frequencies for each transducer element, which enables you to change the frequency quickly using the presets as the water and your goals change. Viewing two frequencies concurrently using the split-frequency view allows you to see deeper with the lower frequency return and, at the same time, see more detail from the higher frequency return.
On-screen Control: Sets the behavior of the buttons on the sonar screen control. This is available for touchscreen devices. Range Lines: Shows the vertical lines indicating the distance to the right and left of the boat. This setting is available for SideVü sonar view. Color Scheme: Sets the color scheme of the sonar view. This setting might be available in the Appearance menu. The high contrast color schemes provide darker color assignments to the low intensity returns.
Wider beam widths generate larger arches for fish target returns, making them ideal for locating fish. Wider beam widths also perform better in deep water, because the lower frequency has better deep water penetration. Wider beam widths can also generate more surface noise and reduce bottom signal continuity during rough sea conditions. Use AHRS: Allows the internal attitude heading and reference system (AHRS) sensors to detect the installation angle of the Panoptix transducer.
5 Select Menu > Transmit Radar. Adjusting the Radar Range The range of the radar signal indicates the length of the pulsed signal transmitted and received by the radar. As the range increases, the radar transmits longer pulses in order to reach distant targets. Closer targets, especially rain and waves, also reflect the longer pulses, which can add noise to the Radar screen.
• To show the tracks of AIS vessels, select Trails, and select the length of the track that appears. VRM and EBL The variable range marker (VRM) and the electronic bearing line (EBL) measure the distance and bearing from your boat to a target object. On the Radar screen, the VRM appears as a circle that is centered on the present location of your boat, and the EBL appears as a line that begins at the present location of your boat and intersects the VRM.
NOTE: Depending upon the radar in use, the gain setting configured for use in one radar mode may or may not be applied to other radar modes or to the Radar overlay. NOTE: Not all options and settings are available on all radar and chartplotter models. 1 From a radar screen or the radar overlay, select Menu > Gain. 2 Select an applicable option for the connected radar: • To set the gain automatically once, based on average conditions, the range of the radar signal, and the selected radar mode, select Auto.
NOTE: Depending upon the radar in use, the settings configured for use in one radar mode may or may not be applied to other radar modes or to the radar overlay. NOTE: Not all options and settings are available on all radar and chartplotter models. Turning on Echo Trails From a radar screen or the radar overlay, select Menu > Radar Setup > Echo Trails > Display. Adjusting the Length of the Echo Trails 1 From a radar screen or the radar overlay, select Menu > Radar Setup > Echo Trails > Time.
From the engine gauges screen, select Menu > Gauge Setup > Status Alarms > On. When an engine alarms is triggered, a gauge status alarm message appears and the gauge may become red depending on the type of alarm. You can set an alarm to sound when the total amount of remaining onboard fuel reaches the level you specify. 1 Select Settings > Alarms > Fuel > Fuel Alarm > On. 2 Enter the remaining amount of fuel that triggers the alarm.
2 Select an option: • To set the top of the wind gauge to a North heading, select North Up. • To rotate the gauge so the direction in which you are moving is at the top, select Head Up. Configuring the Heading Source of the Environment Gauge You can specify the source of the heading displayed on the environment gauge. Magnetic heading is the heading data received from a heading sensor, and GPS heading is calculated by your chartplotter GPS (course over ground).
information was sent with the distress call, that information is also available and recorded with the call. designates a distress call in the DSC list and marks the position of the vessel on the Navigation chart at the time of the DSC distress call. Navigating to a Vessel in Distress designates a distress call in the DSC list and marks the position of a vessel on the Navigation chart at the time of the DSC distress call. 1 Select Nav Info > Other Vessels > DSC List. 2 Select a position-report call.
6 On your Garmin VHF radio, select Call. Making an Individual Routine Call to an AIS Target 1 From a chart or 3D chart view, select an AIS target. 2 Select AIS Vessel > Call with Radio. 3 If necessary, select Channel, and select a new channel. 4 Select Send. The chartplotter sends information about the call to the radio. On your Garmin VHF radio, select Call. 5 Media Player NOTE: The media player feature is not compatible with all chartplotter models.
Muting the Media Volume 1 From the media screen, select 2 If necessary, select Select. . Scanning VHF Channels Before you can scan VHF channels, you must set the source to VHF. You can monitor VHF channels saved as presets for activity and automatically switch to an active channel. From the VHF media screen, select Menu > Scan. Adjusting the VHF Squelch NOTE: Your media player must support VHF radio to use this feature. 1 From the VHF source page, select Menu > Squelch.
2 Select an option: • To show the video using a stretched aspect ratio, select Aspect > Stretch. The video cannot be stretched beyond the dimensions provided by the connected video device, and it may not fill the entire screen. • To show the video using a standard aspect ratio, select Aspect > Standard. • To adjust the brightness, select Brightness, and select Up, Down, or Auto. • To adjust the color saturation, select Saturation, and select Up, Down, or Auto.
2 Select an option: Wind Barb • To view the weather forecast for the next 48 hours, in 12hour increments, select Next Forecast or multiple times. • To view the weather forecast for the previous 48 hours, in 12-hour increments, select Previous Forecast or multiple times. Viewing a Marine Forecast or an Offshore Forecast 1 Select Weather > Forecast. 2 Pan the chart to an offshore location. The Marine Forecast or Offshore Forecast options appear when forecast information is available.
1 From the weather fishing chart, select Menu > Sea Temperature. 2 Select an option: • To allow the chartplotter to adjust the temperature range automatically, select Auto Configure. The chartplotter automatically finds the lower and upper limits for the current screen, and updates the temperaturecolor scale. • To enter the lower and upper limits for the temperature range, select Lower Limit or Upper Limit, and enter the lower or upper limit.
System Information: Provides information about the device and the software version. Simulator: Turns on the simulator and allows you to set the speed and simulated location. Display Settings Not all options are available on all models. Select Settings > System > Display. Backlight: Sets the backlight level. Color Mode: Sets the device to display day or night colors. Screenshot Capture: Allows the device to save images of the screen.
Setting the Water Temperature Offset Before you can set the water temperature offset, you must have a NMEA 0183 water-temperature sensor or a temperaturecapable transducer to measure water temperature. The temperature offset compensates for the temperature reading from a temperature sensor. 1 Measure the water temperature using the temperature sensor or temperature-capable transducer that is connected to the chartplotter.
System Units: Sets the unit format for the device. Variance: Sets the magnetic declination, the angle between magnetic north and true north, for your present location. Heading: Sets the direction references used in calculating heading information. True sets geographic north as the north reference. Grid sets grid north as the north reference (000º). Magnetic sets the magnetic north as the north reference. Position Format: Sets the position format in which a given location reading appears.
whether the line safely avoids known obstacles and the turns enable efficient travel. Auto Guidance maintains a wide clearance from obstacles in open water, even if you set the Shoreline Distance setting to Near or Nearest. As a result, the chartplotter may not reposition the Auto Guidance line, unless the destination selected requires navigation through a narrow waterway.
Cleaning the Screen NOTICE Cleaners containing ammonia will harm the anti-reflective coating. The device is coated with a special anti-reflective coating which is very sensitive to skin oils, waxes, and abrasive cleaners. 1 Apply an eyeglass lens cleaner specified as safe for antireflective coatings to the cloth. 2 Gently wipe the screen with a soft, clean, lint-free cloth. Calibrating the Touchscreen You can calibrate the screen if the screen is not properly responding to the touches.
Type Receive Sentence Description Type PGN GPRMB RMB: Recommended minimum navigation information Receive 127245 Rudder GPRMC RMC: Recommended minimum specific GNSS data GPRTE RTE: Routes GPVTG VTG: Course over ground and ground speed GPWPL WPL: Waypoint location 127505 Fluid level GPXTE XTE: Cross track error 129038 AIS class A position report PGRME E: Estimated error 129039 AIS class B position report PGRMM M: Map datum 129040 AIS class B extended position report PGRMZ Z: Altit
Index A aerial photos 5 AIS 5, 7, 8 alarm 6 distress signal device 6, 7 radar 21 SART 7 targeting 5–7 threats 6, 21 turning on 36 vessels 6 alarms 34 anchor drag 34 arrival 34 collision 6 deep water 19 engine 24 gauges 25 navigation 34 off course 34 shallow water 19 sonar 19 water temperature 19 weather 34 anchor drag alarm 34 animated currents, tides 5 antenna, GPS 2 arrival alarm 34 Auto Guidance 9, 11, 12, 35 line 12, 35 paths 12 shoreline distance 12, 35 B backlight 2 Bluetooth devices 28 buoy reports
echo trails 23, 24 field of view 24 front-of-boat offset 24 gain 22, 23 optimizing display 23 overlay screen 22 range 21 range rings 24 sentry mode 21 timed transmit 21 tracks, Fish Eye 3D 7 transmitting 20 waypoints 7, 21, 24 zoom scale 21 radar overlay 22 radio, SiriusXM 29 range rings 8 registering the device 36 resetting, settings 29 Route To 9 routes copying 36 creating 10, 11 deleting 11 editing 11 navigating 11 navigating parallel to 11 synchronizing 13 viewing list of 11 waypoints 36 S safe depth 3
www.garmin.