FLUX 2 Smart Assem bly EN NO NL SE DE Fl FR I IT PL CZ ES GR PT CN DK JP Tacx
1.
2. Lay the trainer down on its side ~ Leg de trainer op zijn kant -: Legen Sie den Trainer auf die Seite I ~ r Couchez le trainer au sol, sur le cote Ir Appoggiare il trainer su un lato I - - Apoye el rodillo de entrenamiento sabre el Lado 'l Deite o simulador de lado lH L~g tr~neren ned pa siden I O Legg treneren ned pa siden I c. f- Lagg trainern pa sidan I r Aseta vastus kyljelleen , - Pol6z trenazer na boku I C ZPolozte trenazer dolu na stranu C ) Tono8e:rnore: TO nponovmnplo oTo nAat I ( ' :j.
3. Place the cassette on the body by aligning the markers I Plaats de cassette. let hierbij op markering voor het uitlijnen Qt- Legen Sie die Kassette auf den Karper. Richten Sie die Markierungen aneinander aus alignant Les marques i marcatori marcadores r. - 1 ,..
4.
5. Slide the front leg in the trainer and fix it with the 2 bolts ~ Schuit de voorpoot in de trainer en zet deze met de 2 bouten vast n Lassen Sie den Vorderfuf3 in den Trainer gleiten. Befestigen Sie ihn mit den beiden Schrauben fixez-le avec les 2 vis Faites glisser le pied avant dans le trainer, et Far scorrere la gamba anteriore del trainer e fissarla con i 2 bulloni in dotazione Deslice la pata delantera del rodillo de entrenamiento y fijela con los 2 pernos .
6. Place the trainer on a firm, level surface ~ Plaats de trainer op een stevige en vlakke ondergrond [ Stellen Sie fest , welchen Anschluss Sie fur die Kassette brauchen ,. Determinez le connecteur necessaire en fonction de la cassette Decidere quale sia il connettore corretto in base alla cassetta i: Determine el conector necesario segun el cartucho , .
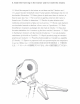
7. Select the needed quick release. Place the T2835 for 142x12 or 148x12 mm axles according to the instructions supplied with the axles. Use the fill ring in case of axle length 135 mm " Selecteer de benodigde snelspanner. Plaats de T2835 bij een as van 142x12 mm of 148x12 mm volgens de instructies. Gebruik de vulring bij een aslengte van 135 mm De. Wahlen Sie den erforderlichen Schnellspanner aus.
C1 Vyberte potrebny rychloupinak. Umistete T2835 pro osy 142x12 nebo 148x12 mm pod le pokynu dodavanych k osam. Pouzijte vyplnovad krouzek s osami 135 mm GP EnLAE~TE ro an □ lrouµEvo ouornµa raxdac; EAEu8e:pwonc;. Tono8£Hior£ TO T2835 yto rnuc; o~ovEc; 142x12 n 148x12 mm auµcpwva µ£ nc; o5nyit:c; nou nape:xovraL µ£ rouc; 6~ovEc;. [rnv nEpinrwon 6~ova µnKouc; 135 mm, xpnotµonolnarE rov 5oKrUALo n)d1pwonc; L ~~t!~a'g~tff~illo ~!ffl~$~ffc~tl'gi.~B~.
8. Place the bike in the trainer ~ L Plaats de fiets in de trainer I D Stellen Sie das Fahrrad auf den Trainer FR Placez le velo sur le trainer , Mettere la bici nel trainer I l ~ Coloque la bicicleta en el rodillo de entrenamiento Pl Coloque a bicicleta no simulador I D L.
CAUTION: disk surface can be hot. Do not touch when operating. LET OP: de schijf kan heet zijn. Niet aanraken tijdens gebruik 1 VORSICHT: Scheibe kann heif3 sein. Im Betrieb Beri.ihrungen vermeiden • ATTENTION : la surface du disque peut etre brOlante. Ne la touchez pas durant l'operation ATTENZIONE: la superficie del disco pub essere calda. Non toccare durante il funzionamento PRECAUCl6N: la superficie del disco puede estar caliente.
English • Tests have revealed that the unit will not overheat. even when subject to extreme use. However, when subject to prolonged and intensive use, the enclosure around the brake may become very hot. Always allow the brake to cool down after use before touching it. • Ensure not to drop the brake during assembly as this can lead to an imbalance which may cause vibration. • Never open the brake unit as this may cause damage.
Specifications Wireless Protocol: Frequency range RF Output Power Temperature Range Transmit Range Power supply Bluetooth 4.0 & ANT+ 2400-2483,5 MHz 5 dBm !typical) Operational -20 °C to + 55 °C 10 m Only use supplied power cord FCC and IC Declarations Your device contains a low power transmitter. When device is transmitting it sends out Radio Frequency IRF) signals.
T2980.
Quick Start Smart trainers Tacx
The possibilities For an interactive ride on a Tacx Smartt ra iner you may use the Tacx apps, but you can also opt for Zwift, TrainerRoad. Kinomap and Bkool software. As the trainer communicates over ANT+ and Bluetooth it's possible lo read out your performance data on a 2nd device on top of controlling it with the previously mentioned software.
Control of trainers resistance a
Compatibility Tc:icx Tra1n1nq app ,, , iOS • Bluetooth 4.0 integrated smartphones: iPhone4s and newer, Android 4.3 and newer Ti::lCX Training app r r I bl•t iOS • ANT+ or Bluetooth 4.0 integrated tablets: iPad 3 and newer (BT only), Android 4.3 and newer [ANT+ or BTI T:,r"( Tramin~ cipo f rJ k! I Windows and Ma c desktops with ANT+ antenna No ANT+ or Bluetooth 4.0 integrated? Android tablet with micro 1Pad use Wahoo AN T+ Desk tops.
, •
3rd party apps and software 3rd Party apps Various training options Apps with ANT+ FE-C or Bluetooth open, like: Zwift,TrainerRoad, Kinomap, FulGaz, Sufferfest, Cycleops [PC only]. BKool.
3rd Party software ANT+ antenna needed, Tacx Antenna available online and rn stores Zwift, TrainerRoad, Sufferfest. Cycleops [PC only). BKool. T www ta x.
Bike computers Bike computers Workouts according to ridden GPS tracks. i' Devices wi th ANT+ FE-C. like: Garmin Edge 520 & 1000.
Tacx Utility app Test the connections and download lhe latest firmware updates. • iPhone 4s and newer • Android 4.3 and newer ·- II Please follow the steps below before you start the Ut1l1ty app for Android: 1. Turn off all apps running in the background 2. Turn off Blueloolh and then turn 1t back on 3. Start the Utility app llllii... GET JTON ,....
Frequently asked questions All trainers with a physical transmission le.g a belt or roller) need to be calibrated. The trainer determines the resistance in the transmission: the tyre on the roll or the tension in the bell This 1s used as a reference point to accuretely measure and apply the needed resistance. • Real1st1c road simulation • Correct measurement of cadence and power • No slipping Cali bra le the trainer via the app or software you use.
Connect you r device in the app or software. Go to [DEVICES]. search for the trainer and connect il. A smartphone can only communicate with the trainer via Bluetooth. I Some tablets are equipped with an ANT+ receiver. If so, you can choose to connec t your tablet via ANT+ 6r Bluetooth. If not. you can only connect via Bluetooth. a A desktop can only communicate with the trainer via ANT+. To connect a desktop you'll need an ANT+ antenna.
Other anguage? The Quick Start guide is onl1ne available in NL DE FR SE Fl PL IT CZ 16 languages. go to ES PT GR CN DK JP Need help? Maybe you can find an answer on our website: Or contact our support team via Facebook, Twitter or e-mail. ~ @tacxsupport I) www.facebook.com/tacxvr ►X◄ support@tacx.
Read performance data on 2nd device You may control the trainer with your phone, tablet or desktop and connect a 2nd device to read your power, speed and cadence.
rnr n ... t1b1 1t • ANT+ : all devices • Bluetooth : Bluetooth 4.0 or higher Whether lo connect this second device via ANT+ or Bluetoolh depends on how your 1st device 1s connected. Over ANT+ you can connect as many devices as you'd like to read out your performance data. Over Bluetooth you can only connect one device.
Option 1 Option 2 When your 1st device is connected via When your 1st device 1s connected via Bluetooth you can connect the other ANT+ you can connecl lhe other dev1celsl device ls] via ANT+ via either Bluetooth and/or ANT+ o· 1st device g g a o· a 1 •1 device ,,
T0854O 2018-04 Designed and produced in the Netherlands Tacx
English Tacx Warranty Conditions Thank you for buying this Tacx product. Tacx aims to provide the highest possible quality at all times. Nevertheless, should you have any complaints please notify us immediately. The following warranty conditions apply without prejudice to the stipulations in Tacx·s General Terms and Conditions.
3 • • " cloud,tacx,com g
~ 0::: 0 Q_ Q_ ~ (._f) 0::: w 2 0 ~ (._f) ~ u E u 0 X u ru L -0 0... 0... ::) u>< t2 l/') +-' L 0 ----.. 0... ---- ..s::::. 0.... 0....