8511856.
8511856.
8511856.book Page i Tuesday, November 21, 2006 5:14 PM Contents Chapter 1: Getting Help. . . . . . . . . . . . . . . . . . . . . . . . . . . . . . . . . . . . . . . . . . . 1 Thank you for purchasing our computer! . . . . . . . . . . . . . . . . . . . . . . . . . . . . . . . . Using the Gateway Web site . . . . . . . . . . . . . . . . . . . . . . . . . . . . . . . . . . . . . . . . . . Using Help and Support . . . . . . . . . . . . . . . . . . . . . . . . . . . . . . . . . . . . . . . . . . . . . .
8511856.book Page ii Tuesday, November 21, 2006 5:14 PM Contents Using a memory card . . . . . . . . . . . . . . . . . . . . . . . . . . . . . . . . . . . . . . . . . Using the diskette drive . . . . . . . . . . . . . . . . . . . . . . . . . . . . . . . . . . . . . . . . . . . . . Using an optical drive . . . . . . . . . . . . . . . . . . . . . . . . . . . . . . . . . . . . . . . . . . . . . . . Identifying drive types . . . . . . . . . . . . . . . . . . . . . . . . . . . . . . . . . . . . . . . .
8511856.book Page iii Tuesday, November 21, 2006 5:14 PM www.gateway.com Sharing resources . . . . . . . . . . . . . . . . . . . . . . . . . . . . . . . . . . . . . . . . . . . . . . . . . . Sharing drives and printers . . . . . . . . . . . . . . . . . . . . . . . . . . . . . . . . . . . . Using the network . . . . . . . . . . . . . . . . . . . . . . . . . . . . . . . . . . . . . . . . . . . . . . . . . Viewing shared drives and folders . . . . . . . . . . . . . . . . . . . . . . . . . . . . . . .
8511856.
8511856.
511856.book Page 2 Tuesday, November 21, 2006 5:14 PM CHAPTER 1: Getting Help Thank you for purchasing our computer! You have made an excellent decision choosing Gateway. We are sure that you will be pleased with the outstanding quality, reliability, and performance of your new computer. Each and every Gateway computer uses the latest technology and passes through the most stringent quality control tests to ensure that you are provided with the best product possible.
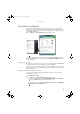
8511856.book Page 3 Tuesday, November 21, 2006 5:14 PM www.gateway.com Using Help and Support Your computer includes Help and Support, an easily accessible collection of help information, troubleshooters, and automated support. Use Help and Support to answer questions about Windows and to help you quickly discover and use the many features of your Gateway computer. To start Help and Support: • Click Start, then click Help and Support. Help and Support opens.
8511856.book Page 4 Tuesday, November 21, 2006 5:14 PM CHAPTER 1: Getting Help Using online help Many programs provide information so you can research a topic or learn how to perform a task while you are using the program. You can access most online help information by selecting a topic from a Help menu or by clicking the Help button on the menu bar and selecting Online Support from the list. Available information depends on the program.
8511856.
8511856.book Page 6 Tuesday, November 21, 2006 5:14 PM CHAPTER 2: Using Windows Vista Using the Windows desktop After your computer starts, the first screen you see is the Windows desktop. The desktop is like the top of a real desk. Think of the desktop as your personalized work space where you open programs and perform other tasks. Help For more information about the Windows desktop, click Start, then click Help and Support. Type Windows desktop in the Search Help box, then press Enter.
8511856.book Page 7 Tuesday, November 21, 2006 5:14 PM www.gateway.com Using the Start menu Help For more information about the Windows Start menu, click Start, then click Help and Support. Type Windows Start menu in the Search Help box, then press ENTER. You can start programs, open files, customize your system, get help, search for files and folders, and more using the Start menu. To use the Start menu: Shortcut Start Ö All Programs Ö 1 Click (Start) on the lower left of the Windows desktop.
8511856.book Page 8 Tuesday, November 21, 2006 5:14 PM CHAPTER 2: Using Windows Vista Adding icons to the desktop Help For more information about the desktop icons, click Start, then click Help and Support. Type desktop icons in the Search Help box, then press ENTER. You may want to add an icon (shortcut) to the desktop for a program that you use frequently.
8511856.book Page 9 Tuesday, November 21, 2006 5:14 PM www.gateway.com Window item Description Clicking the minimize button reduces the active window to a button on the taskbar. Clicking the program button in the taskbar opens the window again. Clicking the maximize button expands the active window to fit the entire computer display. Clicking the maximize button again restores the window to its former size. Clicking the close button closes the active window or program.
8511856.book Page 10 Tuesday, November 21, 2006 5:14 PM CHAPTER 2: Using Windows Vista Creating folders Folders are much like the folders in a file cabinet. They can contain files and other folders. Files are much like paper documents—letters, spreadsheets, and pictures—that you keep on your computer. In fact, all information on a computer is stored in files. Folders Files To create a folder: Shortcut File ÖNew ÖFolder Ötype name 1 Click (Start), then click Computer on the Start menu.
8511856.book Page 11 Tuesday, November 21, 2006 5:14 PM www.gateway.com 6 Click Paste. A copy of the file or folder appears in the new location. Help For more information about copying files and folders or moving files or folders, click Start, then click Help and Support. Type copying files and folders or moving files and folders in the Search Help box, then press ENTER. To move a file or folder to another folder: 1 Locate the file or folder you want to move.
8511856.book Page 12 Tuesday, November 21, 2006 5:14 PM CHAPTER 2: Using Windows Vista To empty the Recycle Bin: Caution Emptying the Recycle Bin permanently erases any files or folders in the bin. These files cannot be restored. 1 Double-click the Recycle Bin icon on the desktop. The Recycle Bin window opens. 2 Click Empty the Recycle Bin. Windows asks you if you are sure that you want to empty the bin. 3 Click Yes. Windows permanently deletes all files in the Recycle Bin.
8511856.book Page 13 Tuesday, November 21, 2006 5:14 PM www.gateway.com Using advanced search options Search can find files meeting more criteria than file name. You can narrow your search by selecting the search options that you want. You can search by the: • Name or part of a name • Creation date • Modification date • File type • Tag • Author • Text contained in the file • Time period in which it was created or modified You can also combine search criteria to refine searches.
8511856.book Page 14 Tuesday, November 21, 2006 5:14 PM CHAPTER 2: Using Windows Vista Creating a new document To create a new document: (Start), All Programs, Accessories, then click WordPad. Microsoft WordPad starts and a blank document opens. 1 Click 2 Begin composing your document. Use the menus and toolbar buttons at the top of the window to format the document. Saving a document After you create a document, you need to save it if you want to use it later.
8511856.book Page 15 Tuesday, November 21, 2006 5:14 PM www.gateway.com 3 Click Folders to open the Folders list, then click the folder you want to open. 4 Double-click the document file name. The document opens. Help For more information about opening documents, click Start, then click Help and Support. Type opening files in the Search Help box, then press ENTER. Printing a document To print a document, you must have a printer connected to your computer or have access to a network printer.
8511856.book Page 16 Tuesday, November 21, 2006 5:14 PM CHAPTER 2: Using Windows Vista Shortcuts Help For more information about Windows keyboard shortcuts, click Start, then click Help and Support. Type Windows keyboard shortcuts in the Search Help box, then press ENTER. The following table shows a few shortcuts that you can use in Windows and almost all programs that run in Windows. For more information about shortcuts, see your Windows or program documentation. 16 To... Do this...
8511856.
8511856.book Page 18 Tuesday, November 21, 2006 5:14 PM CHAPTER 3: Using the Internet and Faxes Learning about the Internet The Internet is a worldwide network of computers linked together to provide information to people everywhere. The two most popular services on the Internet are e-mail and the World Wide Web. You can access this network by connecting your computer to a telephone, DSL (Digital Subscriber Line), or cable television line and signing up with an Internet service provider (ISP).
8511856.book Page 19 Tuesday, November 21, 2006 5:14 PM www.gateway.com Setting up an Internet account Before you can view the information on the World Wide Web, you need to set up an Internet account with an Internet service provider (ISP). To set up an ISP service or to transfer an existing account to this computer, contact the ISP directly. Dial-up Internet connections are those using a telephone system to connect to the Internet.
8511856.book Page 20 Tuesday, November 21, 2006 5:14 PM CHAPTER 3: Using the Internet and Faxes To learn more about using the Web browser features, click Help in the menu bar. Link Web page Linked Web page Connecting to a Web site After you set up an account with an Internet service provider (ISP), you can access the many information sources on the World Wide Web. To connect to a Web site: 1 Connect to your Internet account.
8511856.book Page 21 Tuesday, November 21, 2006 5:14 PM www.gateway.com Downloading files Caution To protect your computer against viruses, make sure that you scan the files you download. For more information, see “Protecting your computer from viruses” on page 63. Downloading is the process of transferring files from a computer on the Internet to your computer. To download files or programs from a Web site: 1 Connect to your Internet account.
8511856.book Page 22 Tuesday, November 21, 2006 5:14 PM CHAPTER 3: Using the Internet and Faxes Sending e-mail To send e-mail using Windows Mail: Connect to your Internet service provider. 1 2 3 4 5 6 Click (Start), then click E-mail. Your default e-mail program opens. Click Create Mail. Type the e-mail address of the recipient you want to send e-mail to in the To box. Type the subject of your e-mail in the Subject box. Type the e-mail message.
8511856.book Page 23 Tuesday, November 21, 2006 5:14 PM www.gateway.com Using faxes Using Windows Fax and Scan Windows Fax and Scan comes pre-installed with Windows Vista Business, Enterprise, or Ultimate Editions. If your computer has a built-in fax modem, Windows automatically detects it during the setup process. You can connect your computer to one local fax modem, although you can connect to multiple fax servers or devices on a network.
8511856.book Page 24 Tuesday, November 21, 2006 5:14 PM CHAPTER 3: Using the Internet and Faxes 5 Type the name of the fax modem in the dialog box, then click Next. The Choose how to receive faxes screen opens. 6 Click how you want to receive faxes, then click Unblock when the The Security Alert window opens. The New Fax window opens. 7 Create your fax, then open the Cover Page menu by clicking the arrow and selecting a cover page from the list. The Sender Information dialog box opens.
8511856.book Page 25 Tuesday, November 21, 2006 5:14 PM www.gateway.com 9 To enter optional dialing rule information, click Dialing Rule and select a rule from the menu. If you have not set up a dialing rule, select New Rule from the menu. The Location Information dialog box opens. 10 Type your location information, then click OK. The Dialing Rules dialog box opens. 11 Highlight your location, then click Edit. The Edit Location dialog box opens. 12 Complete the location information, then click OK.
8511856.book Page 26 Tuesday, November 21, 2006 5:14 PM CHAPTER 3: Using the Internet and Faxes 13 Click OK. The New Fax dialog box opens. 14 Enter, scan, or attach the fax information you want to send, then click Send. Setting up your cover page template You can create your own cover page template that you can use in place of the cover page templates that Microsoft Fax provides for you. To create a cover page template, you use the Fax Cover Page Editor.
8511856.book Page 27 Tuesday, November 21, 2006 5:14 PM www.gateway.com 4 Click Print. The Send Fax Wizard opens. 5 Complete the wizard by following the instructions in “Sending a Fax” on page 23, or “Faxing a scanned document or from programs” on page 26. Canceling a fax You can cancel a fax that you have set up to send at a time in the future. To cancel a fax that has not been sent: (Start), All Programs, then click Windows Fax and Scan. Windows Fax and Scan opens.
8511856.
8511856.
8511856.book Page 30 Tuesday, November 21, 2006 5:14 PM CHAPTER 4: Using Drives and Media Files Using the memory card reader You can use the optional memory card reader to transfer pictures from a digital camera to your computer. You can also use the memory card reader to transfer data between your computer and a device that uses memory cards, such as a PDA, MP3 player, or cellular telephone. (Your computer’s memory card reader may look different.
8511856.book Page 31 Tuesday, November 21, 2006 5:14 PM www.gateway.com Using the diskette drive The optional diskette drive (not available on all systems) uses 3.5-inch diskettes (sometimes called floppy disks). Diskettes are useful for storing files or transferring files to another computer. (Your computer’s diskette drive may look different.) Drive activity light Diskette slot Eject button To use a diskette: 1 Insert the diskette into the diskette drive with the label facing up.
8511856.book Page 32 Tuesday, November 21, 2006 5:14 PM CHAPTER 4: Using Drives and Media Files If your optical drive has this logo... Your drive type is... Use your drive for... DVD+RW Installing programs, playing audio CDs, playing DVDs, accessing data, and recording video and data to CDs and DVD+R or DVD+RW discs. DVD R/RW Installing programs, playing audio CDs, playing DVDs, accessing data, and recording video and data to CDs and DVD+R, DVD+RW, DVD-R, and DVD-RW discs.
8511856.book Page 33 Tuesday, November 21, 2006 5:14 PM www.gateway.com Playing a CD Important Some music CDs have copy protection software. You may not be able to play these CDs on your computer. A standard Compact Disc (CD) can hold an entire album of digital songs and can be played on a CD player or your computer’s CD drive.
8511856.book Page 34 Tuesday, November 21, 2006 5:14 PM CHAPTER 4: Using Drives and Media Files Playing music and movies Playing audio and video files Windows Media Player can play several types of audio and video files, including WAV, MIDI, MP3, AU, AVI, and MPEG formats. For more information about using Windows Media Player, click Help.
8511856.book Page 35 Tuesday, November 21, 2006 5:14 PM www.gateway.com 3 Click one of the following to control playback: Repeat Shuffle • • • • • • • Rewind Stop Fast forward Pause/Play Volume Mute Shuffle randomizes the playback order of the files in the playlist. Repeat starts playing the list over again after it reaches the end. Stop stops playback and rewinds the current file to the beginning.
8511856.book Page 36 Tuesday, November 21, 2006 5:14 PM CHAPTER 4: Using Drives and Media Files 3 If a dialog box opens and asks you what you want the computer to do with the disc, click Play. Windows Media Player opens and begins playing the disc. If Windows Media Player does not open automatically, click (Start), All Programs, then click Windows Media Player. Windows Media Player opens. Playlist Video screen Playback controls 4 If the disc is not already playing, click 36 (play).
8511856.book Page 37 Tuesday, November 21, 2006 5:14 PM www.gateway.com 5 Click one of the following to control playback: Repeat Shuffle • • • • • • • Rewind Stop Fast forward Pause/Play Volume Mute Shuffle randomizes the playback order of the files in the playlist. Repeat starts playing the list over again after it reaches the end. Stop stops playback and rewinds the current file to the beginning.
8511856.book Page 38 Tuesday, November 21, 2006 5:14 PM CHAPTER 4: Using Drives and Media Files 4 When you finish recording, click Stop Recording. The Save As dialog box opens. 5 Type a name for the recording, specify the file type and location where you want to save the recording, then click Save. The recording is saved. Creating WMA and MP3 music files Important Some music CDs have copy protection software. You cannot copy tracks from copy-protected CDs.
8511856.book Page 39 Tuesday, November 21, 2006 5:14 PM www.gateway.com Building a music library Use Windows Media Player to build a music library. You can organize your music tracks (individual MP3 or WMA audio files) by categories, find a track quickly by sorting, and add information to a music file.
8511856.book Page 40 Tuesday, November 21, 2006 5:14 PM CHAPTER 4: Using Drives and Media Files Creating music CDs and video DVDs Creating a music CD Important We recommend that you do not use your computer for other tasks while creating CDs or DVDs. If you record copyrighted material on a CD or DVD, you need permission from the copyright owner. Otherwise, you may be violating copyright law and be subject to payment of damages and other remedies.
8511856.book Page 41 Tuesday, November 21, 2006 5:14 PM www.gateway.com Creating a video DVD Creating a video DVD using Windows DVD Maker If your computer has Windows Vista Home Premium or Windows Vista Ultimate Edition, you can create video DVDs using Windows DVD Maker. To create a video DVD using Windows DVD Maker: Important We recommend that you do not use your computer for other tasks while creating CDs or DVDs.
8511856.book Page 42 Tuesday, November 21, 2006 5:14 PM CHAPTER 4: Using Drives and Media Files 4 Click Add items. The Add Items to DVD dialog box opens. 5 Find and select the videos you want to add to the video DVD, then click Add. The videos are added to the video list, and a graphic in the lower left corner of the window shows you how much disc capacity will be used. 6 Click Next. The Ready to burn disc dialog box opens.
8511856.book Page 43 Tuesday, November 21, 2006 5:14 PM www.gateway.com 7 Click any of the following options to customize your video disc: • Preview shows how your DVD’s opening menu will look using the current settings. • Menu text changes the disc title, font, and button names. • Customize menu changes the menu fonts, background and foreground videos, audio track, and button styles. • Slide show creates a slide show from photo files. 8 Click Burn. Your DVD is recorded.
8511856.book Page 44 Tuesday, November 21, 2006 5:14 PM CHAPTER 4: Using Drives and Media Files Using Windows Media Center If your computer has Windows Vista Home Premium or Windows Vista Ultimate Edition, you can use Windows Media Center to watch TV, videos, and movies, listen to music, and view photos. Media Center is a simplified, streamlined interface that is ideally suited for playing and managing media files.
8511856.book Page 45 Tuesday, November 21, 2006 5:14 PM www.gateway.com 3 Use the remote control navigation buttons to select a Media Center menu option, then press OK. • TV + Movies lets you play TV programs you have recorded, play a DVD or Blu-ray movie, or set up your TV tuner card (if installed). • Online Media lets you play online games.
8511856.book Page 46 Tuesday, November 21, 2006 5:14 PM CHAPTER 4: Using Drives and Media Files Using the Media Center remote control You can use the optional remote control to play all of your media files from across the room. (The remote control included with your computer may look different from that shown below.
8511856.
8511856.book Page 48 Tuesday, November 21, 2006 5:14 PM CHAPTER 5: Networking Your Computer Introduction to networking Making sure your broadband connection works Important If you do not have a broadband connection already installed, make the necessary arrangements with your ISP. Be sure to find out how soon after the installation the line will be activated. Broadband Internet settings differ from ISP to ISP.
8511856.book Page 49 Tuesday, November 21, 2006 5:14 PM www.gateway.com Important To add the ability to access a wireless Ethernet network to your wired Ethernet network, connect an access point to the router or use a router that has a built-in access point. Attached to the router are all of your computers or Ethernet-ready devices. Also connected to the router is a cable or DSL modem that provides access to the Internet.
8511856.book Page 50 Tuesday, November 21, 2006 5:14 PM CHAPTER 5: Networking Your Computer 3 Click Device Manager from the task list on the left. The Device Manager window opens. 4 Click the plus (+) in front of Network adapters. The Ethernet device installed in your computer is listed. If one is not listed, you must install one.
8511856.book Page 51 Tuesday, November 21, 2006 5:14 PM www.gateway.com In addition to a router, you need a straight-through cable for each computer you want to connect to the network. Cable/DSL modem Router WAN port To set up a network using a router: 1 Plug one end of the power adapter into the AC connector on the router and the other end into a grounded, 110V electrical outlet. 2 Turn on your computers.
8511856.book Page 52 Tuesday, November 21, 2006 5:14 PM CHAPTER 5: Networking Your Computer Speed is not the only issue if you decide to use equipment with different standards. Compatibility can also be an issue. Take the following into consideration when you purchase wireless equipment: Access point Wireless cards supported 802.11a 802.11a only 802.11b 802.11b only 802.11g 802.11b and 802.11g 802.11n 802.11b, 802.11g, and 802.
8511856.book Page 53 Tuesday, November 21, 2006 5:14 PM www.gateway.com Determining if a wireless Ethernet device is already installed on your computer To determine if an Ethernet card is already installed on your computer: 1 Click (Start), then click Control Panel. The Control Panel window opens. 2 Click System and Maintenance, then click System. 3 Click Device Manager from the task list on the left. The Device Manager window opens. 4 Click the plus (+) in front of Network adapters.
8511856.book Page 54 Tuesday, November 21, 2006 5:14 PM CHAPTER 5: Networking Your Computer 6 Type a name for your workgroup in the Workgroup box. Use a workgroup name of up to 15 characters with no blank spaces. The workgroup name must be the same for all computers in your network workgroup, and the name must be different than any computer name on your network. 7 Click OK. When you are prompted to restart your computer, click Restart Now.
8511856.book Page 55 Tuesday, November 21, 2006 5:14 PM www.gateway.com To connect to your wireless Ethernet network: 1 Click (Start), then click Network. The Network window opens. 2 Click Network and Sharing Center. The Network and Sharing Center window opens. 3 Click Connect to a network on the left of the window. The Connect to a network dialog box opens.
8511856.book Page 56 Tuesday, November 21, 2006 5:14 PM CHAPTER 5: Networking Your Computer 4 Click a network, then click Connect. If you can see the network name, but you cannot connect to it, your network is using security. Right-click on the network, then click Properties. Modify the security settings to match the settings you set on your access point. Wireless security For information on wireless security, refer to the documentation that came with your access point.
8511856.book Page 57 Tuesday, November 21, 2006 5:14 PM www.gateway.com Sharing resources With a network, you can share your Internet connection, drives, and printers. Sharing drives and printers With a network, you can share drives (for example hard drives and DVD drives) and printers among the computers connected to the network. Important To share a printer among the network computers, each computer must have the shared printer’s drivers installed.
8511856.book Page 58 Tuesday, November 21, 2006 5:14 PM CHAPTER 5: Networking Your Computer Un-sharing drives and folders To un-share drives or folders: 1 Click (Start), then click Computer. 2 Right-click the drive or folder that you want to un-share, then click Share. 3 Click Advanced Sharing, then click Share this folder (or drive) to uncheck the box. 4 Click Apply, then click OK. Sharing printers To share printers: 1 Click (Start), then click Control Panel. The Control Panel window opens.
8511856.book Page 59 Tuesday, November 21, 2006 5:14 PM www.gateway.com Creating a shortcut to a network drive After a shortcut is created on a computer for a drive or folder on another computer, the contents of the drive or folder can be accessed as if the drive were attached directly to the computer. For example, a shortcut is created on computer 2 to the Documents folder on computer 1. To access the Documents folder on computer 1 from computer 2, double-click shortcut icon.
8511856.
8511856.
8511856.book Page 62 Tuesday, November 21, 2006 5:14 PM CHAPTER 6: Protecting Your Computer Hardware security Although you may be able to replace your computer with a call to your insurance agent, you cannot replace the information stored on your computer. Take steps to prevent theft of your computer. Kensington lock slot The first step in computer security is preventing your computer from being stolen.
8511856.book Page 63 Tuesday, November 21, 2006 5:14 PM www.gateway.com Protecting your computer from viruses A virus is a program that attaches itself to a file on a computer, then spreads from one computer to another. Viruses can damage data or cause your computer to malfunction. Some viruses go undetected for a period of time because they are activated on a certain date.
8511856.book Page 64 Tuesday, November 21, 2006 5:14 PM CHAPTER 6: Protecting Your Computer 2 Click Scan. McAfee scans your computer for viruses and automatically removes any that it finds. When McAfee is finished scanning, the program displays a summary of the items detected and removed from your computer. Updating your virus definitions McAfee is set up to automatically retrieve the latest virus definitions from the Internet and install them on your computer.
8511856.book Page 65 Tuesday, November 21, 2006 5:14 PM www.gateway.com 2 Click Computer & Files. A list of services appears to the right of Computer & Files category. 3 Click Configure in the services area. The Computer & Files Configuration screen opens. 4 Click the grey Virus protection is enabled bar to expand that area, then click Advanced. 5 Click the type of scan you want to configure, then set the options for that scan type. 6 Click OK.
8511856.book Page 66 Tuesday, November 21, 2006 5:14 PM CHAPTER 6: Protecting Your Computer Using McAfee Parental Controls You can use McAfee Parental Controls to restrict your children from accessing specific Web sites or spending too much time on the Internet. To use McAfee Parental Controls: (Start), All Programs, McAfee, then click McAfee SecurityCenter. McAfee SecurityCenter opens. 1 Click 2 Click Parental Controls, then click Configure in the services area.
8511856.book Page 67 Tuesday, November 21, 2006 5:14 PM www.gateway.com 4 Click the control you want to configure, then follow the instructions for modifying that control. 5 Click OK. Using Windows Security Center Windows Security Center helps protect your computer through: • A firewall • Automatic Windows updates • Third party virus protection software • Security options in Internet Explorer Modifying security settings To modify security settings: 1 Click (Start), Control Panel, then click Security.
8511856.book Page 68 Tuesday, November 21, 2006 5:14 PM CHAPTER 6: Protecting Your Computer Security updates To keep your computer secure, you need to keep Windows and your computer’s system software up to date. Windows Update If a hacker finds a way to bypass the security features built into Windows, Microsoft creates a high-priority Windows update to fix the problem. You should update Windows regularly to keep your computer secure.
8511856.book Page 69 Tuesday, November 21, 2006 5:14 PM www.gateway.com 4 Click Change Settings. The Change Settings dialog box opens. 5 Make your changes to the schedule settings, then click OK. BigFix Your computer may include BigFix. BigFix monitors your computer for problems and conflicts. It automatically gathers information about the latest bugs, security alerts, and updates from BigFix sites on the Internet. Whenever BigFix detects a problem, it alerts you by flashing the blue taskbar icon.
8511856.
8511856.
8511856.book Page 72 Tuesday, November 21, 2006 5:14 PM CHAPTER 7: Customizing Windows Changing screen settings Tip If you are using a monitor, you can adjust the screen settings for brightness, contrast, and horizontal and vertical image position using the controls on the front or side of your monitor. For more information about these adjustments, see your monitor’s user guide. Adjusting the color depth and screen area are two of the most basic display settings you may need to change.
8511856.book Page 73 Tuesday, November 21, 2006 5:14 PM www.gateway.com Changing the appearance of windows and backgrounds You can change the appearance of Windows desktop items, such as the colors of windows and dialog boxes and the color and design of the desktop background. To change Window colors and effects: 1 Click (Start), Control Panel, then under Appearance and Personalization, click Customize colors. The Window Color and Appearance dialog box opens.
8511856.book Page 74 Tuesday, November 21, 2006 5:14 PM CHAPTER 7: Customizing Windows 2 Click the Picture Location list, then click the location where you want to look for background images. If the location you want is not in the list, click Browse and locate the drive and folder. 3 Click the picture or color you want to use for the background, then click OK.
8511856.book Page 75 Tuesday, November 21, 2006 5:14 PM www.gateway.com Changing gadgets Gadgets are constantly running mini-programs that are visible on your Windows desktop. They can be moved, removed, resized, and configured according to your preference. Although you can position them anywhere on your desktop, gadgets are usually visible on the right edge of your screen in the Sidebar.
8511856.book Page 76 Tuesday, November 21, 2006 5:14 PM CHAPTER 7: Customizing Windows Using a gadget’s control panel Some gadgets have built-in control panels that you can use to control their behavior. To use a gadget’s control panel: 1 In the Sidebar, hold the mouse pointer over the gadget. The gadget’s built-in control panel appears on the gadget. (Slideshow gadget shown) 2 Click the control you want to operate.
8511856.book Page 77 Tuesday, November 21, 2006 5:14 PM www.gateway.com Setting up multiple monitors Important The dialog boxes shown in this section are for demonstrative purposes only and may not represent the screens on your computer. If your computer’s video card supports additional monitors (it must have two video connections), you can connect an additional monitor or projector to your computer.
8511856.book Page 78 Tuesday, November 21, 2006 5:14 PM CHAPTER 7: Customizing Windows 9 To use the second monitor or projector as an extension of your desktop (increasing the size of your Windows desktop), click to select the check box for Extend my Windows desktop onto this monitor. You can click and drag the “2” monitor icon to position it the same way the physical monitor is arranged on your desk. 10 Click OK.
11856.book Page 79 Tuesday, November 21, 2006 5:14 PM www.gateway.com Changing mouse settings Help For more information about mouse settings, click Start, then click Help and Support. Type mouse settings in the Search Help box, then press ENTER. You can adjust the double-click speed, pointer speed, left-hand or right-hand configuration, and other mouse settings.
8511856.book Page 80 Tuesday, November 21, 2006 5:14 PM CHAPTER 7: Customizing Windows Adding and modifying user accounts You can create and customize a user account for each person who uses your computer. You can also change between user accounts without turning off your computer. User account tips • If you want to create an account for someone, but you do not want that user to have full • access to your computer, be sure to make that account limited.
8511856.book Page 81 Tuesday, November 21, 2006 5:14 PM www.gateway.com To switch between user accounts: 1 Save any open documents that are being worked on in your current account. 2 Click (Start), click the arrow next to the lock icon, then click Switch User or Log Off. • Switch User opens the account selection screen but does not log off the current user, • and any programs that were running for the previous user continue to run.
8511856.book Page 82 Tuesday, November 21, 2006 5:14 PM CHAPTER 7: Customizing Windows 2 Click a power plan (default plans shown): • Balanced uses several energy-saving features while maintaining reasonable • • performance and convenience. Power saver maximizes energy savings but reduces performance and convenience. High performance maximizes performance but reduces energy savings. 3 To change a power plan, click Change plan settings, change the settings you want, then click Save changes.
8511856.book Page 83 Tuesday, November 21, 2006 5:14 PM www.gateway.com Changing accessibility settings Your computer can be a powerful tool, but it may be less useful to you if items on the screen are difficult to see, or if the mouse is difficult to control. Windows has several tools that help you use it more easily. Using the Ease of Access Center Use the Ease of Access Center to change several system display settings.
8511856.book Page 84 Tuesday, November 21, 2006 5:14 PM CHAPTER 7: Customizing Windows Using voice recognition You can attach a microphone to your computer and configure Windows to create typed text from your voice. To set up voice recognition: 1 Click (Start), Control Panel, Ease of Access, then click Speech Recognition Options. The Speech Recognition Options window opens.
8511856.
8511856.
8511856.book Page 87 Tuesday, November 21, 2006 5:14 PM www.gateway.
8511856.
8511856.
8511856.